Integrate Social Login Into Your Spring Boot App
Learn how you can integrate Google and Facebook logins on your Spring Boot app.
Join the DZone community and get the full member experience.
Join For FreeYou’ve probably seen social login options with just about every username and password field on the Internet. And it's not hard to see why allowing users to sign-in with credentials they’ve already created is a popular option.
But how do you make sure your login API is ready to handle every time a social provider updates their specification? Not to mention implementing all the different specs from different providers. That’s where Okta comes in.
Why Okta for Social Login in Spring Boot?
If you deploy Okta to handle your social login, when Linkedin decides to update their login API spec for the third time in a week to combat Russian hackers, you won’t even know about it. It’ll already be handled.
In this tutorial, we’re going to demonstrate how to use Okta social login with a Spring app written in Java. In particular, we’re going to use Google and Facebook. We’re also going to demonstrate how to use a custom, self-hosted login page.
We’re going to assume that you already have a free developer.okta.com account and have created an OAuth 2.0/OpenID Connect application that we can use to configure social login. If you do not already have an account, head on over to the Okta website and sign up!
The default application settings are fine to get us started. We’ll just need to make a few changes.
Get Started: Download and Configure Your Spring Boot Example App
Okta already has an example Spring Boot app configured for you. Go ahead and download it from the repo.
git clone https://github.com/oktadeveloper/okta-spring-social-example.git
cd okta-spring-social-example
The first thing you’ll want to do is to copy the src/main/resources/application.template.yml to src/main/resources/application.yml and fill in the necessary information.
You’ll need the following:
- Okta application client ID
- Okta application client secret
- Your Okta org URL, e.g.
https://okta.okta.com - Your Okta issuer URL. From the Okta dashboard, select API in the top menu and then click Authorization Servers, and you’ll see the Issuer URI for the default authorization server
You’ll want to check your Okta OIDC application’s configuration. It should match the following photo. This is also where you’ll get your client ID and client secret. Note that under “Allowed grant types,” the “Implicit (Hybrid)” checkbox is checked (it’s not checked by default).

You should be able to run ./mvnw from the terminal to run the app (you only need to type ./mvnw because the pom.xmlspecifies a default goal of spring-boot:run, so typing ./mvnw is the same as typing ./mvnw spring-boot:run).
To test the app, log out of your developer.okta.com account and go to http://localhost:8080 (or open an incognito window).
If all goes well, you’ll be redirected to the example app welcome screen that says: “Social Login, Custom Login, and Spring Boot Example.”
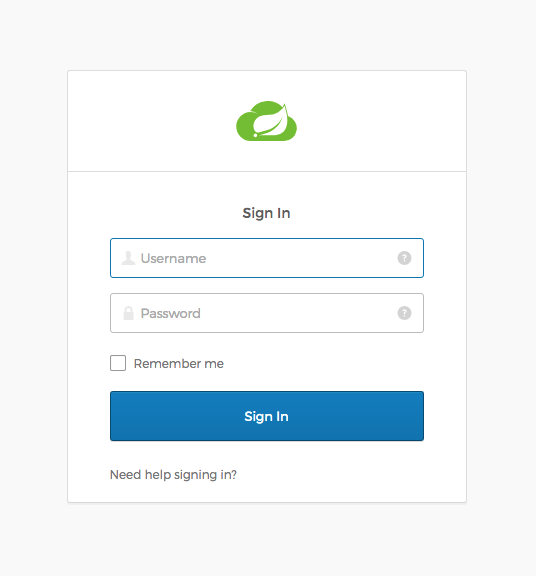
Click the Login button and you will be taken to a custom, locally-hosted login page.
Once you log in, you’ll see a welcome message with your email address and a bit that says:
You have successfully authenticated against your Okta org
Now, we’re ready to configure Google and Facebook for social login!
Configure Google and Facebook for Social Login in Your Spring Boot App
Okta has some great documentation on configuring social login, including some tips for specific social providers.
Here are the steps you need to follow to configure Facebook for Okta social login:
- Go to https://developers.facebook.com and register for a developer account, if you haven’t already done so.
- Head over to the Facebook app dashboard: https://developers.facebook.com/apps.
- Create a Facebook app. Instructions for creating a Facebook application can be found here: https://developers.facebook.com/docs/apps/register.
- Once you’ve created your Facebook app, go to the app dashboard, click the Settings link on the left-hand side, and select the Basic submenu.
- Save the App ID and App Secret values. You’ll need them later.
- You’ll also need to add a Facebook Login product. From the left menu, click the + sign next to products and add a Facebook Login product.
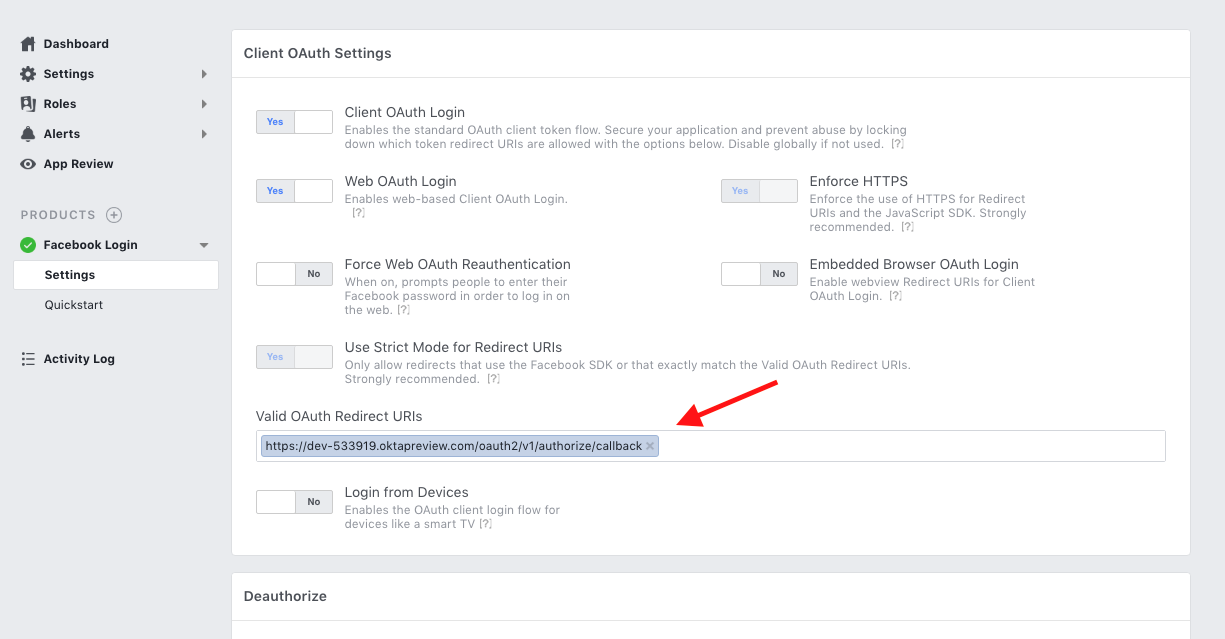
- Configure the Valid OAuth Redirect URIs to include your redirect URI with your Okta org URL:
https://okta.okta.com/oauth2/v1/authorize/callback - Save changes
Here are the steps you need to follow to configure Google for Okta social login:
- Go to https://console.developers.google.com/ and register for a developer account.
- Create a Google API Console project.
- Once your Google App is open, click on the Credentials menu and then Create Credentials followed by OAuth client ID.
- Select Web Application type for the OAuth client type.
- Give the client a name.
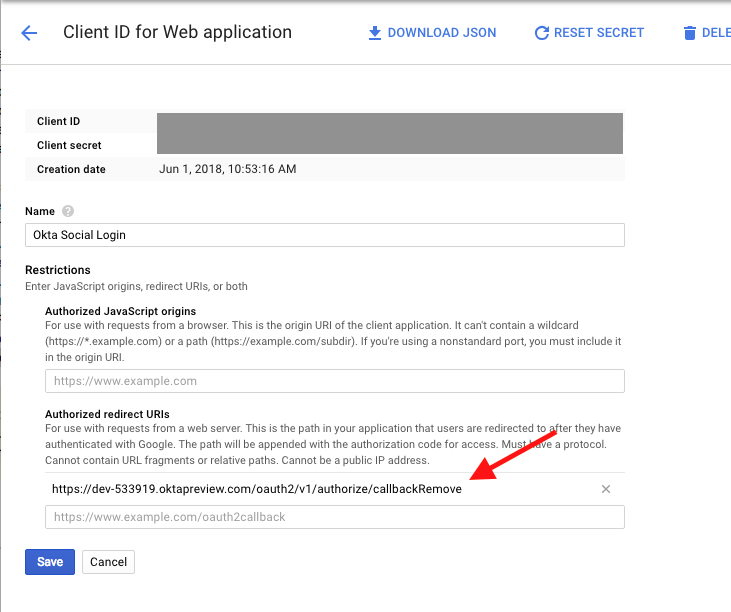
- Fill in your redirect URL in the Authorized redirect URIs. It’s the same one you used for Facebook and ends with
/oauth2/v1/authorize/callback. - Click Create.
- Copy the client ID and client secret, as you’ll need them later.
Configure Okta to Use Facebook and Google for Social Login
Log into your developer.okta.com dashboard. Under the Users top menu, select the Social Identity and Providers item.
From the Add Identity Providers dropdown, select Facebook.

Give it a name, something clever like “Log in with Facebook,” and enter your client ID and client secret values (you did save those, right?). Everything else can stay the same.
Click Add Identity Provider
Repeat this process for Google, using the client ID and client secret from your Google OAuth 2.0 client IDs.
Your Okta Identity Providers page should now look like the following. Note the two “IdP IDs” — you’ll need these in a moment.

Customize the Self-Hosted Sign-In Page for Your Spring Boot App
The final step is to update the Okta Sign-in Widget on your customized sign-in page. This part is ridiculously easy. You’ll need the IdP IDs from above.
Open the src/main/resources/templates/login.html file and take a look at the JavaScript block at the bottom of the page. You configure the identity providers in the Okta Sign-In Widget’s config using the idps property.
See the commented section of code below.
config.baseUrl = /*[[${oktaBaseUrl}]]*/ '{oktaBaseUrl}';
config.clientId = /*[[${oktaClientId}]]*/ '{oktaClientId}';
config.redirectUri = /*[[${redirectUri}]]*/ '{redirectUri}';
config.logo = 'https://spring.io/img/homepage/icon-spring-cloud.svg';
config.authParams = {
  issuer: /*[[${issuerUri}]]*/ '{issuerUri}',
  responseType: 'code',
  state: /*[[${state}]]*/ '{state}' || false,
  scopes: /*[[${scopes}]]*/ '[scopes]',
  display: 'page'
};

/*********************************************************/
/* ADD ME TO CONFIGURE SOCIAL LOGIN!!!                   */
config.idps = [
   {type: 'FACEBOOK', id: '<< Your Facebook IdP ID >>'},
   {type: 'GOOGLE', id: '<< Your Google IdP ID >>' }
];
/*********************************************************/

new OktaSignIn(config).renderEl(
  { el: '#sign-in-widget' },
  function (res) {
    console.log(res)
  },
  function (err) {
    console.log(err)
  }
);
That’s it! Pretty cool, huh?
The Okta Sign-In Widget has a lot of great configuration options, and you can check out the docs for them on the GitHub page.
Try Out Your New Spring Boot App With Social Login
Sign out of the developer.okta.com dashboard and restart your Spring Boot app using ./mvnw.
Once the app has started, navigate to http://localhost:8080 and click the Login button.
You should see the new social login buttons and should be able to log in using Google and Facebook.
NOTE: If your social accounts use an email address different than what you’re using for your Okta preview account, you may need to add a user to the Okta application.

Learn More About Spring Boot and Secure User Management
To learn more about Spring Boot, secure user management, and other topics related to modern development, I encourage you to follow our developer blog. Here are some selected posts that you may find particularly valuable:
- Deploy Your Secure Spring Boot + Angular PWA as a Single Artifact
- Build a Basic CRUD App with Angular 5.0 and Spring Boot 2.0
- Add CI/CD to Your Spring Boot App with Jenkins X and Kubernetes
- Secure Your Spring Boot App with MFA
- What Happens if Your JWT is Stolen?
And, as always, we’d love your feedback on this post or anything we’re working on! Hit us up in the comments below or on Twitter @oktadev.
Add Social Login to Your Spring Boot 2.0 App was originally published to the Okta developer blog on July 24, 2018.
Opinions expressed by DZone contributors are their own.
Comments