Basic Building Blocks of Angular 2 Architecture
Here's a quick intro into the basic building blocks of Angular 2, along with a look-back at the changes from Angular 1.
Join the DZone community and get the full member experience.
Join For FreeAfter a beta version and so many RCs, finally, Angular 2 was released this past September. So, I thought before diving into ng2, it’s a good time to understand the architecture of Angular 2.
Angular 2 is quite different from its predecessor. It is component-based, and the use of controllers and scope has been deprecated. Syntax and structure have also changed.
Angular 2 vs. Angular 1
- It is faster than its predecessor. As said in ng-conf it is 2 to 5 times better than Angular 1.
- It took a mobile-first approach.
- Changed structure and syntax. It is simpler in structure. The component structure makes it easy to use.
- Changed dependency injection.
- More Language choices, i.e you can use Typescript, Dart, or JavaScript for your implementation.
- Difficult to set up. In Angular, you just have to add the reference of the library but in Angular 2 you have to set different node modules to make it work.
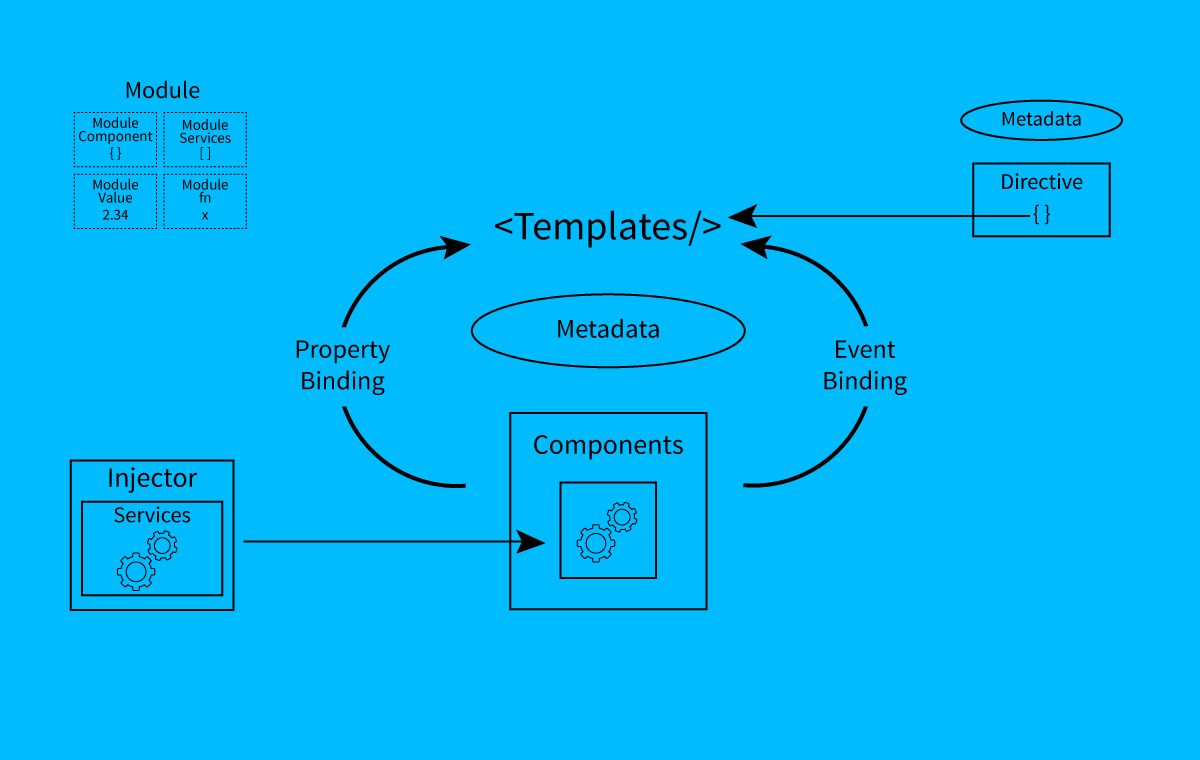
There are basically 8 building blocks of Angular 2. These are:
- Modules
- Components
- Templates
- Metadata
- Data binding
- Directives
- Services
- Dependency Injection
Let's go over each one of them one by one.

Modules
Modules are blocks of code that do a certain type of task. A module exports some value in the main code, such as class. The first and the most common module that you will study is the one that exports Component Class.
app/app.component.ts (excerpt)
export class AppComponent { }
Here app.component is a module.
Libraries
Libraries' names start with the @angular prefix. Modules can be a library of other modules. Angular 2 itself has many modules that are libraries of others.
@angular/core is the most important library that contains most of the modules that we need.
Components
A component is basically a class that is used to show an element on the screen. The components have some properties and by using them we can manipulate how the element should look and behave on the screen. We can create a component, destroy, and update as the user moves in the application. Life Cycle hooks are the modules that we use for this purpose. Like ngOnInit()
app/app.component.ts (excerpt)
export class blogComponent { }
Here blogComponent is a component.
Templates
The view of the component is defined through templates. Templates are basically the HTML we use to show on our page.
app/hero-list.component.html
<h2>Hero List</h2> <p><i>Pick a hero from the list</i></p> <ul> <li *ngFor="let food of foods" (click)="selectedFood(food)"> {{food.name}} </li> </ul><food-detail *ngIf="selectedFood" [food]="selectedHero"></food-detail>
This is a simple HTML file, but you may wonder: What are these elements?
<Is there an answer to this question?>
*ngFor,{{food.name}}, (click), [food], and <food-detail>?
Metadata
Metadata tells Angular how a class should be processed on the screen. For example:
@Component({ selector: 'food-list', templateUrl: 'app/food-list.component.html', directives: [FoodDetailComponent], providers: [FoodService]})
To tell Angular that we are using a component with certain metadata, we attach a decorator to it (“@”).
Here @Component will be identified as a component class.
Selector tells Angular to render the HTML that templateURL has at this tag <food-list></food-list>
Directives are other components that this Component will require to render and providers are the services required.
The template, metadata, and component together describe a view.
Data Binding
The main feature of any JavaScript framework is data binding. As Angular 1, Angular 2 also support data binding.
There are 4 ways of binding a data according to the direction to the DOM, from the DOM, or in both directions:
<input [(ngModel)]="food.name"><li>{{food.name}}</li><food-detail [food]="selectedFood"></food-detail><li (click)="selectFood(food)"></li>- The {{hero.name}} interpolation display food.name value in li tag.
- The [hero] property binding passes the selected food value from parent to child component.
- The (click) event binding calls the selectedFood function when a user clicks on it.
- Two-way data binding is an important fourth way that combines property and event binding by the ngModel directive.
Directive
Directive helps us to add behavior to the DOM elements. We can attach multiple directives to the DOM elements. In TypeScript we define decoratives by @decorative decorator.
There are 3 types of decorative:
- Directive-with-a-template
- Structural
- Attribute
A component is a directive-with-a-template:
Structural directives add, delete and replace DOM elements. For example:
<li *ngFor = "let food of foods”></li><food-detail *ngIf="selectedFood"></food-detail>
Attribute directives change the appearance of DOM elements. For example:
<input [(ngModel)]="hero.name">Services
A service is a class containing any function, feature with a defined, and specific purpose. For example:
export class FoodService { getfoodies(): Food[] { return FOODIES; }}Dependency Injections
Dependency injection allows one to inject a dependency as a service throughout the web application. To inject a dependency we do not create a service but we have a constructor to request the service. The framework then provides it. For example:
constructor(private service: HeroService) { }What Next?
Angular 2 can be written in TypeScript, Dart, or plain JavaScript. But my recommended way is to use TypeScript as of now because their documentation is well-written. To understand each of the layers separately or dive deeper into this, you can see the official documentation available in all of the three aforementioned languages.
Published at DZone with permission of Rachit Bhardwaj. See the original article here.
Opinions expressed by DZone contributors are their own.
