Sponsored Content
Spring MVC Example for User Registration and Login
Spring MVC Example for User Registration and Login
This article is a step-by-step guide for setting up a User Registration and Login using a few web dev languages and databases.
This article was provided by and does not represent the editorial content of DZone.
Join the DZone community and get the full member experience.
Join For FreeThis article is a step by step guide for User Registration and Login using the below tools and technologies.
1. Spring Framework (Core, MVC & JDBC)
2. Java 1.8
3. Maven 3.3.9
4. Eclipse IDE (Mars2)
5. MySQL 5.1
Step 1: Create a Maven Project
Using Eclipse IDE, create a Maven Project by selecting Web Archetype.
Step 2: Update Pom.xml
Update your maven dependencies.
<project xmlns="http://maven.apache.org/POM/4.0.0" xmlns:xsi="http://www.w3.org/2001/XMLSchema-instance" xsi:schemaLocation="http://maven.apache.org/POM/4.0.0 http://maven.apache.org/maven-v4_0_0.xsd">
    <modelVersion>4.0.0</modelVersion>
    <groupId>jbr</groupId>
    <artifactId>SpringMvcUser</artifactId>
    <packaging>war</packaging>
    <version>0.1</version>
    <name>SpringMvcUser Maven Webapp</name>
    <url>http://maven.apache.org</url>
    <properties>
        <project.build.sourceEncoding>UTF-8</project.build.sourceEncoding>
        <spring.version>4.3.2.RELEASE</spring.version>
        <junit.version>4.12</junit.version>
        <servlet.version>3.1.0</servlet.version>
        <servlet.version>3.0.1</servlet.version>
        <mysql.connector.version>5.1.9</mysql.connector.version>
    </properties>
    <dependencies>
        <!-- Junit -->
        <dependency>
            <groupId>junit</groupId>
            <artifactId>junit</artifactId>
            <version>${junit.version}</version>
            <scope>test</scope>
        </dependency>
        <!--Servlet-Api -->
        <dependency>
            <groupId>javax.servlet</groupId>
            <artifactId>javax.servlet-api</artifactId>
            <version>${servlet.version}</version>
        </dependency>
        <!-- Spring Framework -->
        <dependency>
            <groupId>org.springframework</groupId>
            <artifactId>spring-core</artifactId>
            <version>${spring.version}</version>
        </dependency>
        <dependency>
            <groupId>org.springframework</groupId>
            <artifactId>spring-beans</artifactId>
            <version>${spring.version}</version>
        </dependency>
        <dependency>
            <groupId>org.springframework</groupId>
            <artifactId>spring-context</artifactId>
            <version>${spring.version}</version>
        </dependency>
        <dependency>
            <groupId>org.springframework</groupId>
            <artifactId>spring-jdbc</artifactId>
            <version>${spring.version}</version>
        </dependency>
        <dependency>
            <groupId>org.springframework</groupId>
            <artifactId>spring-test</artifactId>
            <version>${spring.version}</version>
            <scope>test</scope>
        </dependency>
        <dependency>
            <groupId>org.springframework</groupId>
            <artifactId>spring-webmvc</artifactId>
            <version>${spring.version}</version>
        </dependency>
        <!-- Servlet API -->
        <dependency>
            <groupId>javax.servlet</groupId>
            <artifactId>javax.servlet-api</artifactId>
            <version>${servlet.version}</version>
        </dependency>
        <!-- MySQL database driver -->
        <dependency>
            <groupId>mysql</groupId>
            <artifactId>mysql-connector-java</artifactId>
            <version>${mysql.connector.version}</version>
        </dependency>
    </dependencies>
    <build>
        <finalName>SpringMvcUser</finalName>
    </build>
</project>
Step 3: Update web.xml
Update the web.xml under src/main/webapp/WEB-INF as shown below:
<?xml version="1.0" encoding="UTF-8"?>
<web-app xmlns:xsi="http://www.w3.org/2001/XMLSchema-instance" xmlns="http://java.sun.com/xml/ns/javaee" xsi:schemaLocation="http://java.sun.com/xml/ns/javaee http://java.sun.com/xml/ns/javaee/web-app_3_0.xsd" version="3.0">
    <display-name>Archetype Created Web Application</display-name>
    <welcome-file-list>
        <welcome-file>home.jsp</welcome-file>
    </welcome-file-list>
    <servlet>
        <servlet-name>spring-mvc</servlet-name>
        <servlet-class>org.springframework.web.servlet.DispatcherServlet</servlet-class>
        <load-on-startup>1</load-on-startup>
    </servlet>
    <servlet-mapping>
        <servlet-name>spring-mvc</servlet-name>
        <url-pattern>/</url-pattern>
    </servlet-mapping>
</web-app>-
DispatcherServletis the root Servlet for any Servlet defined in your application. It will redirect the request made to the application to the appropriate controller based on the URL. -
spring-mvcis the name of the root servlet and Spring container will look for the configuration with this name. So next step is to create a spring configuration with spring-mvc-servlet.xml.
Step 4: Create spring-mvc-servlet.xml
Create spring-mvc-servlet.xml under the src/main/webapp/WEB-INF folder and define the beans.
<?xml version="1.0" encoding="UTF-8"?>
<beans xmlns="http://www.springframework.org/schema/beans" xmlns:context="http://www.springframework.org/schema/context" xmlns:xsi="http://www.w3.org/2001/XMLSchema-instance" xsi:schemaLocation=" http://www.springframework.org/schema/beans  http://www.springframework.org/schema/beans/spring-beans-3.0.xsd http://www.springframework.org/schema/context  http://www.springframework.org/schema/context/spring-context-3.0.xsd">
    <import resource="classpath:jbr/config/user-beans.xml" />
    <context:component-scan base-package="jbr.springmvc" />
    <context:annotation-config />
    <bean class="org.springframework.web.servlet.view.InternalResourceViewResolver">
        <property name="prefix" value="/jsp/" />
        <property name="suffix" value=".jsp" />
    </bean>
</beans>
Step 5: Create Controllers
Create Separate Controllers for User Registration and Login as below.
Create a package jbr.springmvc.controller
RegistrationController.java
package jbr.springmvc.controller;

import javax.servlet.http.HttpServletRequest;
import javax.servlet.http.HttpServletResponse;

import org.springframework.beans.factory.annotation.Autowired;
import org.springframework.stereotype.Controller;
import org.springframework.web.bind.annotation.ModelAttribute;
import org.springframework.web.bind.annotation.RequestMapping;
import org.springframework.web.bind.annotation.RequestMethod;
import org.springframework.web.servlet.ModelAndView;

import jbr.springmvc.model.User;
import jbr.springmvc.service.UserService;

@Controller
public class RegistrationController {
  @Autowired
  public UserService userService;

  @RequestMapping(value = "/register", method = RequestMethod.GET)
  public ModelAndView showRegister(HttpServletRequest request, HttpServletResponse response) {
    ModelAndView mav = new ModelAndView("register");
    mav.addObject("user", new User());

    return mav;
  }

  @RequestMapping(value = "/registerProcess", method = RequestMethod.POST)
  public ModelAndView addUser(HttpServletRequest request, HttpServletResponse response,
  @ModelAttribute("user") User user) {

  userService.register(user);

  return new ModelAndView("welcome", "firstname", user.getFirstname());
  }
}
LoginController.java
package jbr.springmvc.controller;

import javax.servlet.http.HttpServletRequest;
import javax.servlet.http.HttpServletResponse;

import org.springframework.beans.factory.annotation.Autowired;
import org.springframework.stereotype.Controller;
import org.springframework.web.bind.annotation.ModelAttribute;
import org.springframework.web.bind.annotation.RequestMapping;
import org.springframework.web.bind.annotation.RequestMethod;
import org.springframework.web.servlet.ModelAndView;

import jbr.springmvc.model.Login;
import jbr.springmvc.model.User;
import jbr.springmvc.service.UserService;

@Controller
public class LoginController {

  @Autowired
  UserService userService;

  @RequestMapping(value = "/login", method = RequestMethod.GET)
  public ModelAndView showLogin(HttpServletRequest request, HttpServletResponse response) {
    ModelAndView mav = new ModelAndView("login");
    mav.addObject("login", new Login());

    return mav;
  }

  @RequestMapping(value = "/loginProcess", method = RequestMethod.POST)
  public ModelAndView loginProcess(HttpServletRequest request, HttpServletResponse response,
  @ModelAttribute("login") Login login) {
    ModelAndView mav = null;

    User user = userService.validateUser(login);

    if (null != user) {
    mav = new ModelAndView("welcome");
    mav.addObject("firstname", user.getFirstname());
    } else {
    mav = new ModelAndView("login");
    mav.addObject("message", "Username or Password is wrong!!");
    }

    return mav;
  }

}
Step 5: Create POJO Classes
Create a package: jbr.springmvc.model
Login.java
package jbr.springmvc.model;

public class Login {

  private String username;
  private String password;

  public String getUsername() {
  return username;
  }

  public void setUsername(String username) {
  this.username = username;
  }

  public String getPassword() {
  return password;
  }

  public void setPassword(String password) {
  this.password = password;
  }

}
User.java
package jbr.springmvc.model;

public class User {

  private String username;
  private String password;
  private String firstname;
  private String lastname;
  private String email;
  private String address;
  private int phone;

  public String getUsername() {
  return username;
  }

  public void setUsername(String username) {
  this.username = username;
  }

  public String getPassword() {
  return password;
  }

  public void setPassword(String password) {
  this.password = password;
  }

  public String getFirstname() {
  return firstname;
  }

  public void setFirstname(String firstname) {
  this.firstname = firstname;
  }

  public String getLastname() {
  return lastname;
  }

  public void setLastname(String lastname) {
  this.lastname = lastname;
  }

  public String getEmail() {
  return email;
  }

  public void setEmail(String email) {
  this.email = email;
  }

  public String getAddress() {
  return address;
  }

  public void setAddress(String address) {
  this.address = address;
  }

  public int getPhone() {
  return phone;
  }

  public void setPhone(int phone) {
  this.phone = phone;
  }
}
Note: If you wanted to add any new logic, you can add another layer called service and access the DAO layer.
Step 6: Create DAO Classes
Create an interface/classes for accessing the MySQL Database.
Create a package: jbr.springmvc.dao
UserDao.java
package jbr.springmvc.dao;

import jbr.springmvc.model.Login;
import jbr.springmvc.model.User;

public interface UserDao {

  void register(User user);

  User validateUser(Login login);
}
UserDaoImpl.java
package jbr.springmvc.dao;

import java.sql.ResultSet;
import java.sql.SQLException;
import java.util.List;

import javax.sql.DataSource;

import org.springframework.beans.factory.annotation.Autowired;
import org.springframework.jdbc.core.JdbcTemplate;
import org.springframework.jdbc.core.RowMapper;

import jbr.springmvc.model.Login;
import jbr.springmvc.model.User;

public class UserDaoImpl implements UserDao {

  @Autowired
  DataSource datasource;

  @Autowired
  JdbcTemplate jdbcTemplate;

  public void register(User user) {

    String sql = "insert into users values(?,?,?,?,?,?,?)";

    jdbcTemplate.update(sql, new Object[] { user.getUsername(), user.getPassword(), user.getFirstname(),
    user.getLastname(), user.getEmail(), user.getAddress(), user.getPhone() });
    }

    public User validateUser(Login login) {

    String sql = "select * from users where username='" + login.getUsername() + "' and password='" + login.getPassword()
    + "'";

    List<User> users = jdbcTemplate.query(sql, new UserMapper());

    return users.size() > 0 ? users.get(0) : null;
    }

  }

  class UserMapper implements RowMapper<User> {

  public User mapRow(ResultSet rs, int arg1) throws SQLException {
    User user = new User();

    user.setUsername(rs.getString("username"));
    user.setPassword(rs.getString("password"));
    user.setFirstname(rs.getString("firstname"));
    user.setLastname(rs.getString("lastname"));
    user.setEmail(rs.getString("email"));
    user.setAddress(rs.getString("address"));
    user.setPhone(rs.getInt("phone"));

    return user;
  }
}
Step 7: Create Spring Beans Configuration
Under resources , create a new xml bean configuration user-beans.xml to define the beans we created.
<?xml version="1.0" encoding="UTF-8"?>
<beans xmlns="http://www.springframework.org/schema/beans" xmlns:context="http://www.springframework.org/schema/context" xmlns:xsi="http://www.w3.org/2001/XMLSchema-instance" xsi:schemaLocation=" http://www.springframework.org/schema/beans  http://www.springframework.org/schema/beans/spring-beans-3.0.xsd http://www.springframework.org/schema/context  http://www.springframework.org/schema/context/spring-context-3.0.xsd">
    <context:component-scan base-package="jbr.springmvc" />
    <context:annotation-config />
    <bean id="userService" class="jbr.springmvc.service.UserServiceImpl" />
    <bean id="userDao" class="jbr.springmvc.dao.UserDaoImpl" />
    <bean id="jdbcTemplate" class="org.springframework.jdbc.core.JdbcTemplate">
        <property name="dataSource" ref="datasource" />
    </bean>
    <bean id="datasource" class="org.springframework.jdbc.datasource.DriverManagerDataSource">
        <property name="driverClassName" value="com.mysql.jdbc.Driver" />
        <property name="url" value="jdbc:mysql://localhost:3306/myusers" />
        <property name="username" value="root" />
        <property name="password" value="root" />
    </bean>
</beans>
Step 8: Create Tables in MySQL
CREATE DATABASE
  IF NOT EXISTS myusers;USE
    DROP TABLE
    DROP TABLE IF EXISTS `myusers`.`users`;CREATE TABLE `myusers`.`users`
                 (
                              `username`  VARCHAR(45) NOT NULL,
                              `password`  VARCHAR(45) NULL,
                              `firstname` VARCHAR(45) NOT NULL,
                              `lastname`  VARCHAR(45) NULL,
                              `email`     VARCHAR(45) NULL,
                              `address`   VARCHAR(45) NULL,
                              `phone`     INT NULL,
                              PRIMARY KEY (`username`)
                 )
Step 9: Create Views
Under the /src/main/webapp folder, create a home.jsp which we defined as 'welcome-file' in web.xml.
home.jsp
<%@ page language="java" contentType="text/html; charset=ISO-8859-1" pageEncoding="ISO-8859-1" %>
    <!DOCTYPE html PUBLIC "-//W3C//DTD HTML 4.01 Transitional//EN" "http://www.w3.org/TR/html4/loose.dtd">
    <html>

    <head>
        <meta http-equiv="Content-Type" content="text/html; charset=ISO-8859-1">
        <title>Welcome</title>
    </head>

    <body>
        <table align="center">
            <tr>
                <td><a href="login">Login</a>
                </td>
                <td><a href="register">Register</a>
                </td>
            </tr>
        </table>
    </body>

    </html>
Under /src/main/webapp/jsp create:
register.jsp
<%@ taglib prefix="form" uri="http://www.springframework.org/tags/form" %>

    <%@ page language="java" contentType="text/html; charset=ISO-8859-1" pageEncoding="ISO-8859-1" %>
        <html>

        <head>
            <meta http-equiv="Content-Type" content="text/html; charset=ISO-8859-1">
            <title>Registration</title>
        </head>

        <body>
            <form:form id="regForm" modelAttribute="user" action="registerProcess" method="post">

                <table align="center">
                    <tr>
                        <td>
                            <form:label path="username">Username</form:label>
                        </td>
                        <td>
                            <form:input path="username" name="username" id="username" />
                        </td>
                    </tr>
                    <tr>
                        <td>
                            <form:label path="password">Password</form:label>
                        </td>
                        <td>
                            <form:password path="password" name="password" id="password" />
                        </td>
                    </tr>
                    <tr>
                        <td>
                            <form:label path="firstname">FirstName</form:label>
                        </td>
                        <td>
                            <form:input path="firstname" name="firstname" id="firstname" />
                        </td>
                    </tr>
                    <tr>
                        <td>
                            <form:label path="lastname">LastName</form:label>
                        </td>
                        <td>
                            <form:input path="lastname" name="lastname" id="lastname" />
                        </td>
                    </tr>
                    <tr>
                        <td>
                            <form:label path="email">Email</form:label>
                        </td>
                        <td>
                            <form:input path="email" name="email" id="email" />
                        </td>
                    </tr>
                    <tr>
                        <td>
                            <form:label path="address">Address</form:label>
                        </td>
                        <td>
                            <form:input path="address" name="address" id="address" />
                        </td>
                    </tr>
                    <tr>
                        <td>
                            <form:label path="phone">Phone</form:label>
                        </td>
                        <td>
                            <form:input path="phone" name="phone" id="phone" />
                        </td>
                    </tr>

                    <tr>
                        <td></td>
                        <td>
                            <form:button id="register" name="register">Register</form:button>
                        </td>
                    </tr>
                    <tr></tr>
                    <tr>
                        <td></td>
                        <td><a href="home.jsp">Home</a>
                        </td>
                    </tr>
                </table>
            </form:form>

        </body>

        </html>
login.jsp
<%@ taglib prefix="form" uri="http://www.springframework.org/tags/form" %>
    <%@ page language="java" contentType="text/html; charset=ISO-8859-1" pageEncoding="ISO-8859-1" %>
        <!DOCTYPE html PUBLIC "-//W3C//DTD HTML 4.01 Transitional//EN" "http://www.w3.org/TR/html4/loose.dtd">
        <html>

        <head>
            <meta http-equiv="Content-Type" content="text/html; charset=ISO-8859-1">
            <title>Login</title>
        </head>

        <body>

            <form:form id="loginForm" modelAttribute="login" action="loginProcess" method="post">
                <table align="center">
                    <tr>
                        <td>
                            <form:label path="username">Username: </form:label>
                        </td>
                        <td>
                            <form:input path="username" name="username" id="username" />
                        </td>
                    </tr>
                    <tr>
                        <td>
                            <form:label path="password">Password:</form:label>
                        </td>
                        <td>
                            <form:password path="password" name="password" id="password" />
                        </td>
                    </tr>
                    <tr>
                        <td></td>
                        <td align="left">
                            <form:button id="login" name="login">Login</form:button>
                        </td>
                    </tr>

                    <tr></tr>
                    <tr>
                        <td></td>
                        <td><a href="home.jsp">Home</a>
                        </td>
                    </tr>
                </table>
            </form:form>
            <table align="center">
                <tr>
                    <td style="font-style: italic; color: red;">${message}</td>
                </tr>
            </table>

        </body>

        </html>
welcome.jsp
<%@ page language="java" contentType="text/html; charset=ISO-8859-1" pageEncoding="ISO-8859-1" %>
    <!DOCTYPE html PUBLIC "-//W3C//DTD HTML 4.01 Transitional//EN" "http://www.w3.org/TR/html4/loose.dtd">
    <html>

    <head>
        <meta http-equiv="Content-Type" content="text/html; charset=ISO-8859-1">
        <title>Welcome</title>
    </head>

    <body>
        <table>
            <tr>
                <td>Welcome ${firstname}</td>
            </tr>
            <tr>
            </tr>
            <tr>
            </tr>
            <tr>
                <td><a href="home.jsp">Home</a>
                </td>
            </tr>
        </table>
    </body>

    </html>
Step 10: Run the Application
-
Right-click the application and Maven->clean.
-
Right-click the application and Maven->install.
-
Right-click the application and Run As->Run on Server->Run using Tomcat.
You will see the below outputs.
Home Page:

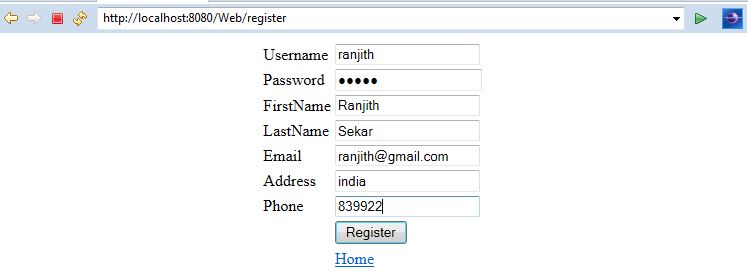
User Registration:
User Registration Success:

Login:

Login Success:
Summary
This tutorial helps to create a Maven Project for a Spring MVC and develop a small application for User Registration and Login.
Download the code from my git repo:
Opinions expressed by DZone contributors are their own.
{{ parent.title || parent.header.title}}
{{ parent.tldr }}
{{ parent.linkDescription }}
{{ parent.urlSource.name }}