

API Load Testing With Gatling
In this article, we'll learn how to perform a load test on a REST API endpoint using Gatling and JMeter. Read on for more information!

Join the DZone community and get the full member experience.
Join For FreeLoad testing is an important practice for APIs and applications that have lots of users. For load testing their APIs, developers can choose between many popular open source load testing tools. One of these is Gatling. This blog post will explain how to execute a load test with Gatling for a REST API endpoint that uses the GET method.
Usually, this blog covers load testing with Apache JMeter™. Both Gatling and JMeter are very powerful load testing tools. But one of the advantages Gatling offers Java developers is the Scala development language for test creation, which is nicer to use in my opinion. Read a more comprehensive comparison of open source performance testing tools here.
If you want to practice yourself, you can find the complete source with all the configs and codes this blog post cover, here. This article will show code fragments. The environment we will be using is Java and Spring Boot API (an open source API framework), together with the Gradle build tool, as usual in my articles. Don't forget to install Gatling. Let's get started.
1. First, like in any library, we need to add the dependencies to our build.gradle file.
testCompile group: 'io.gatling.highcharts', name: 'gatling-charts-highcharts', version: '2.2.5'2. As mentioned before, Gatling uses Scala for test configuration. Therefore, we have to add plugin support to build.gradle. Run the following command:
apply plugin: 'scala'3. Next, we need to add a task for Gradle, so that we can execute our load tests from the command line. To do that, add the following code to the build.gradle file:
task loadTest(type: JavaExec) {
   dependsOn testClasses
   description = "Load Test With Gatling"
   group = "Load Test"
   classpath = sourceSets.test.runtimeClasspath
   jvmArgs = [
        "-Dgatling.core.directory.binaries=${sourceSets.test.output.classesDir.toString()}"
   ]
   main = "io.gatling.app.Gatling"
   args = [
           "--simulation", "BlazeMeterGatlingTest",
           "--results-folder", "${buildDir}/gatling-results",
           "--binaries-folder", sourceSets.test.output.classesDir.toString(),
           "--bodies-folder", sourceSets.test.resources.srcDirs.toList().first().toString() + "/gatling/bodies",
   ]
}
This is the default way for creating custom tasks for Gradle. It is a JavaExec type task, with test class dependencies. This means it has nothing to do with main classes. The most important part here is the configuration, where we let Gatling know which simulation (basically that's a test) to execute, where to store reports, and where to get body files (body files are for requests that require having a body).
4. That's all the basic configuration we have to do for executing a Gatling test. Now let's create the actual test (simulation). For that, create a BlazeMeterGatlingTest file in src/test/scala folder with the following content:
import io.gatling.core.Predef._
import io.gatling.core.structure.ScenarioBuilder
import io.gatling.http.Predef._
import io.gatling.http.protocol.HttpProtocolBuilder

class BlazeMeterGatlingTest extends Simulation {
   private val baseUrl = "http://localhost:16666"
   private val basicAuthHeader = "Basic YmxhemU6UTF3MmUzcjQ="
   private val authPass = "Q1w2e3r4"
   private val uri = "http://localhost:16666/api/1.0/arrival/all"
   private val contentType = "application/json"
   private val endpoint = "/api/1.0/arrival/all"
   private val authUser= "blaze"
   private val requestCount = 1000


 val httpProtocol: HttpProtocolBuilder = http
   .baseURL(baseUrl)
   .inferHtmlResources()
   .acceptHeader("*/*")
   .authorizationHeader(basicAuthHeader)
   .contentTypeHeader(contentType)
   .userAgentHeader("curl/7.54.0")

 val headers_0 = Map("Expect" -> "100-continue")

 val scn: ScenarioBuilder = scenario("RecordedSimulation")
   .exec(http("request_0")
     .get(endpoint)
     .headers(headers_0)
     .basicAuth(authUser, authPass)
     .check(status.is(200)))

 setUp(scn.inject(atOnceUsers(requestCount))).protocols(httpProtocol)
}
This our basic load test, which will do following:
It will call http://localhost:16666/api/1.0/arrival/all 1000 times and make sure that we have status 200, meaning that it is fine. You can change this to your own API config and the number of requests, i.e the load.
5. Compared to JMeter, Gatling has an advantage in reporting. After each execution, you can see the path to the latest generated report in the command line. In my case, it is the following part of the command line output:
Reports generated in 0s.
Please open the following file: /Users/avagyang/Projects/blazedemo/build/gatling-results/blazemetergatlingtest-1503222349931/index.html

BUILD SUCCESSFUL
And when I point my browser to that path I can see the report shown in the pictures below. In the reports we have lots of useful information, the most useful part is on the first page directly where we can see request count (1000), passed requests count (OK), and failed request count (KO).
This is the minimum that we need, but for our API improvements, we can take a deeper look into the details. For example, in case of errors we will have this:
 General Report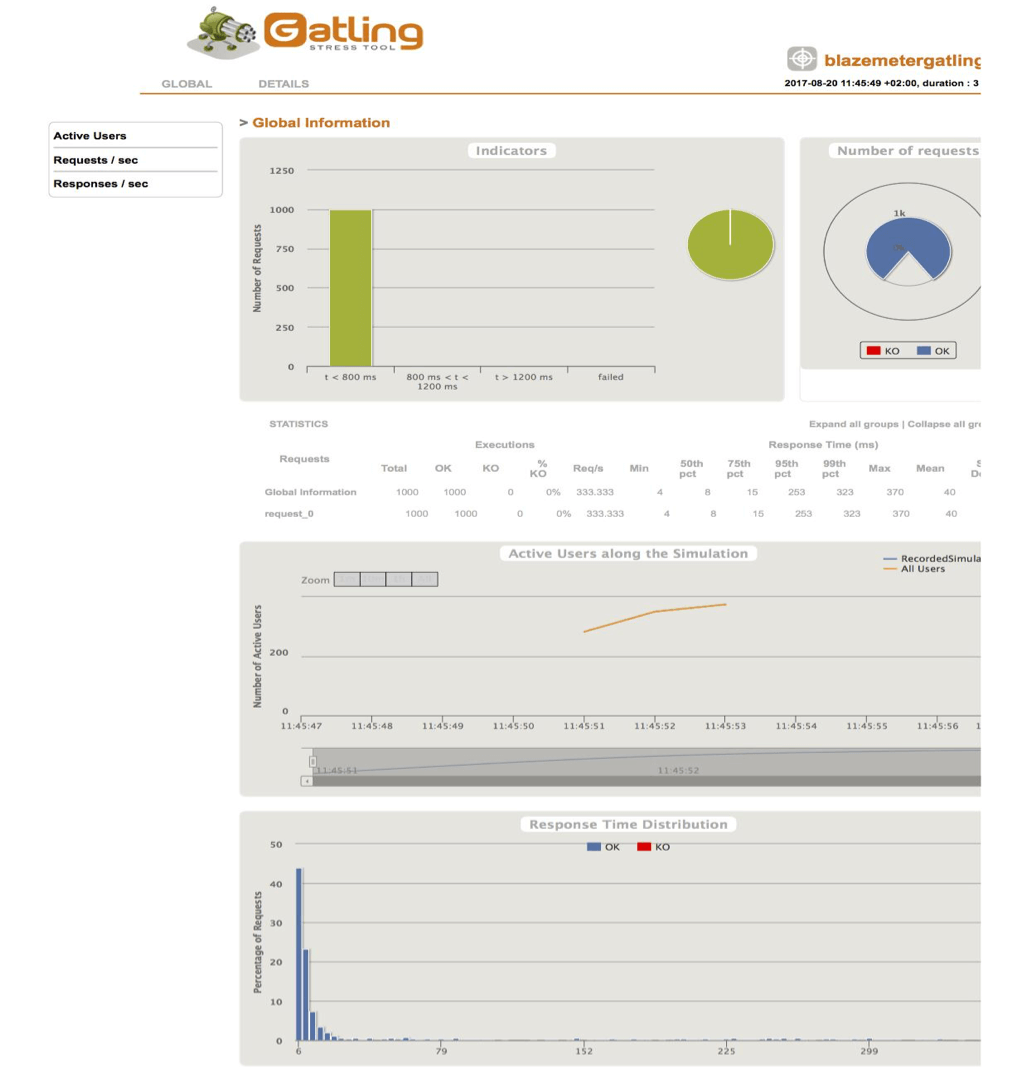
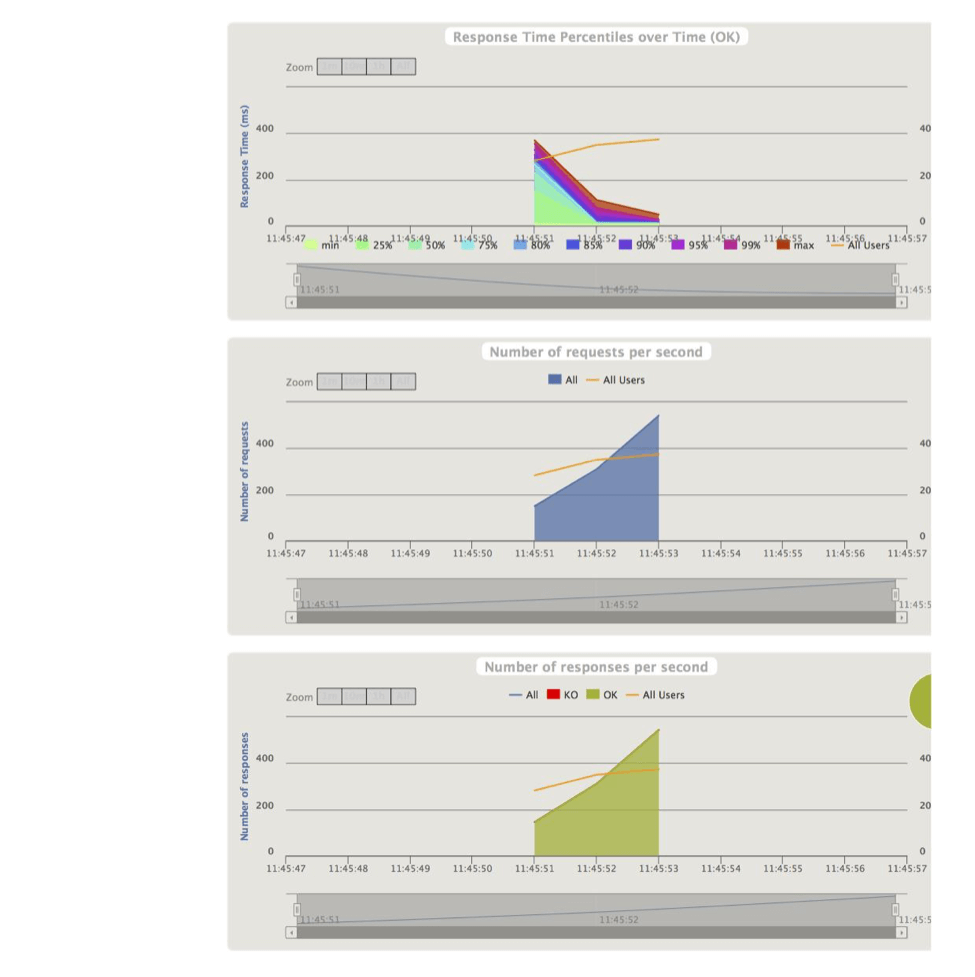 Request_0 Report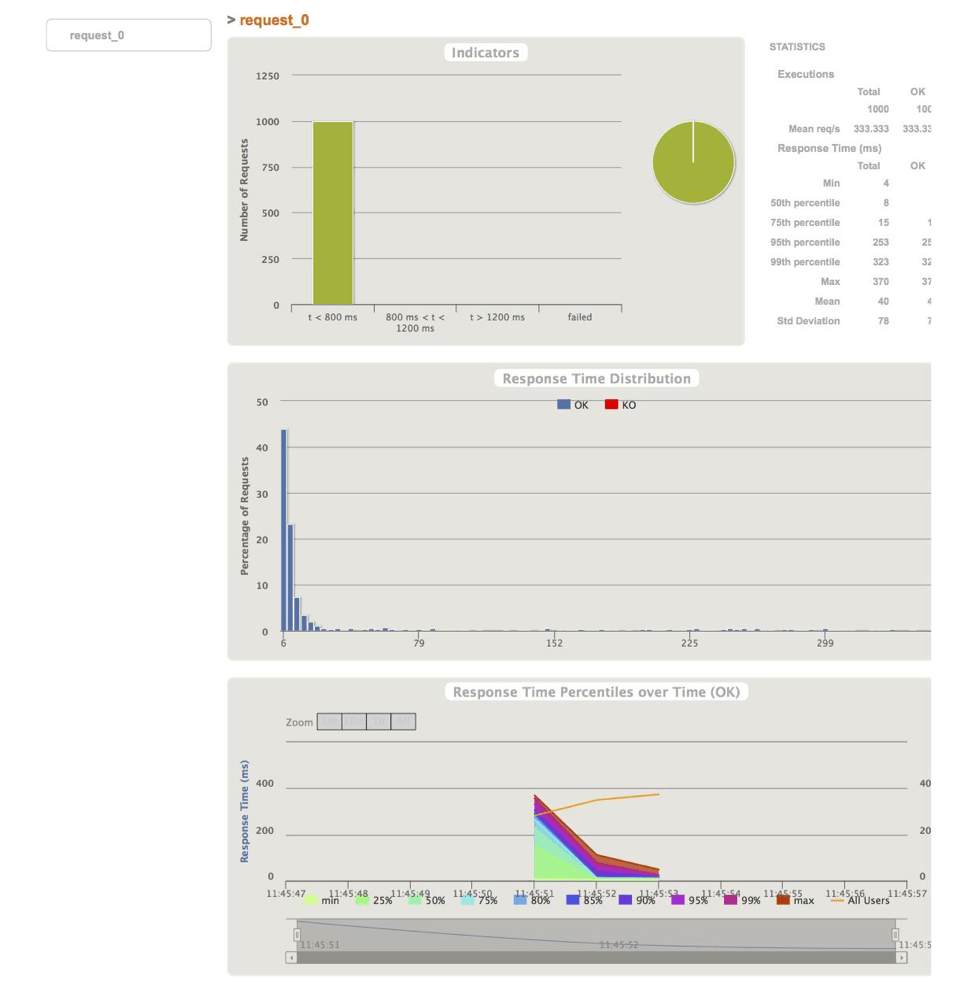
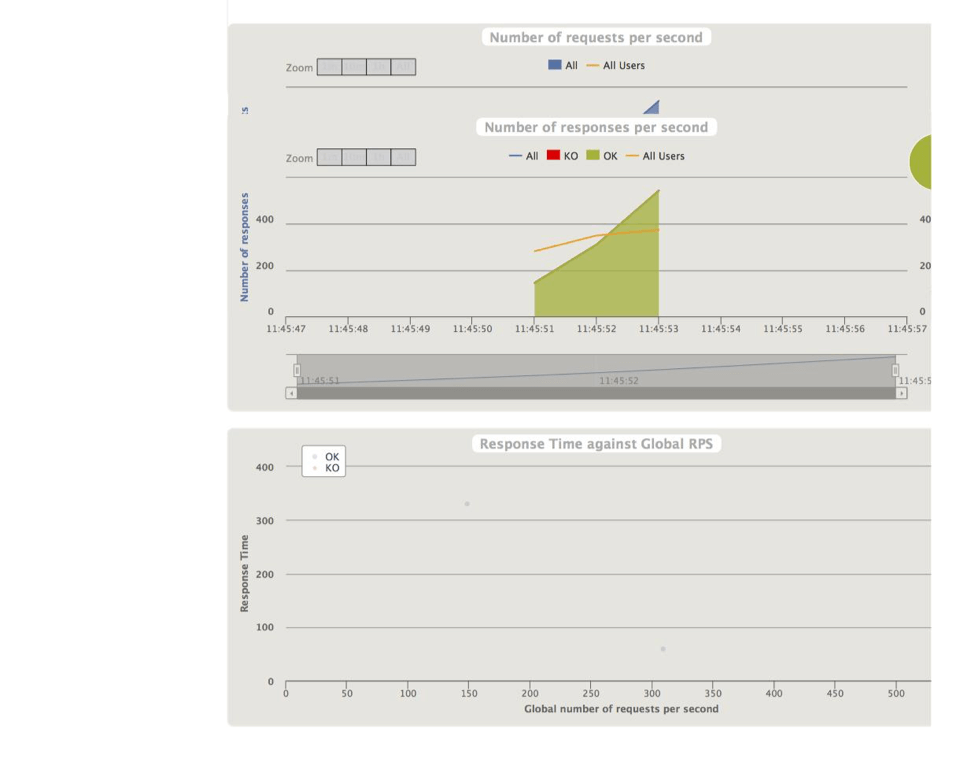
That's it! You now know how to run a load test for your API endpoint with Gatling.
Published at DZone with permission of . See the original article here.
Opinions expressed by DZone contributors are their own.
Comments