Configuring a DataSource in an Enterprise Application Using Payara Server
In this post, we’ll explore how to configure aDataSource implementation using the Payara application server environment.
Join the DZone community and get the full member experience.
Join For FreeConnecting to a data source is a very common task in enterprise applications, and the main interface for it is the DataSource interface from Java’s JDBC API. In this post, we’ll explore how to configure aDataSource implementation using the Payara application server environment. I will be using Eclipse as IDE (the Enterprise edition), AdoptOpenJDK (build for OpenJDK 8) for running the server, and MariaDB for the database. The Payara Server also works with Oracle’s JDK and Azul Zulu. The goal is to see how to acquire connections to a database in the context of a Java EE environment via the DataSource interface, which is the preferred means to do it according to the JDBC specification.
Requirements
First, we need to download and install the Payara Server. You can download it from this link. Payara has several product options for download, including a microservices-oriented version and Docker images. You can just download the normal Server Full installation which takes roughly 140 MB. The latest version of the server (v5.192) supports running on JDK 11, although it seems to be in preview mode.
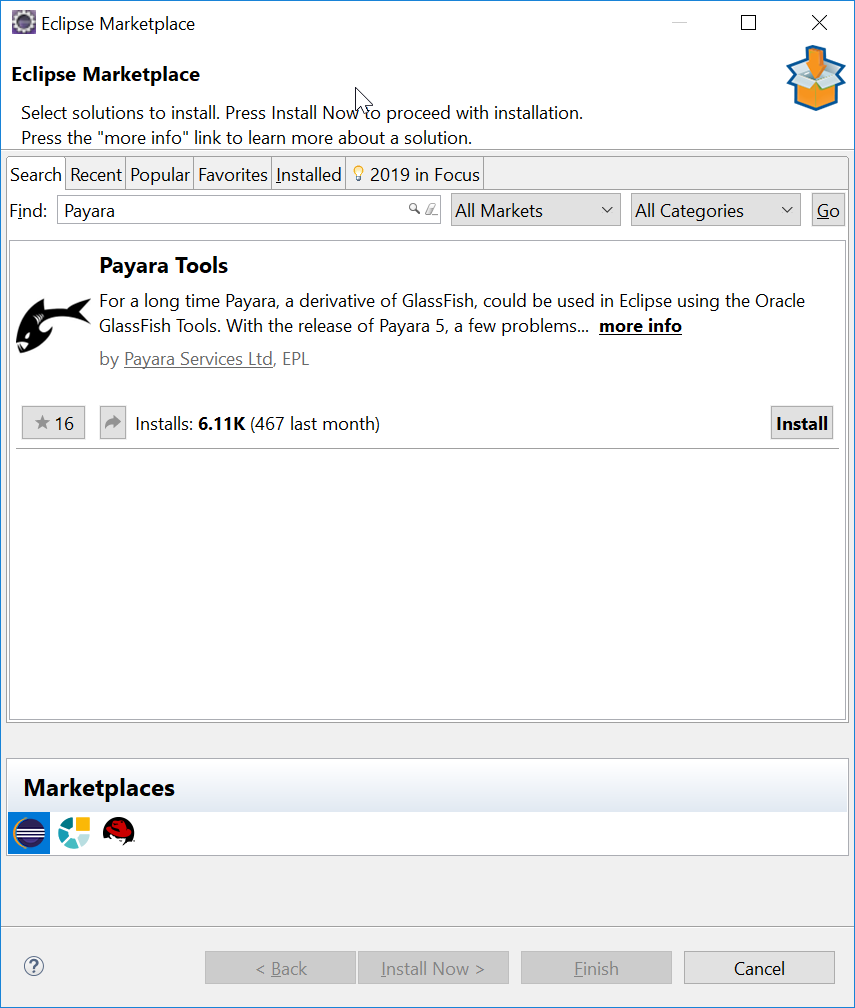
To facilitate developing in Eclipse, we need to install a plugin that can recognize Payara as the application server. This can be done by selecting Help -> Eclipse Marketplace, then searching for Payara in the search box. The plugin to install is called “Payara Tools.”
For the purpose of this simple demo app, the database of choice will be MariaDB, an open source database that is very close to MySQL. Even though MariaDB is not listed among the vendors when configuring the database in Payara console, as we will see later it should be possible to just pass in the DataSource implementation and it will work fine.
Links to these prerequisites are provided at the end of this post.
Setting up the Project
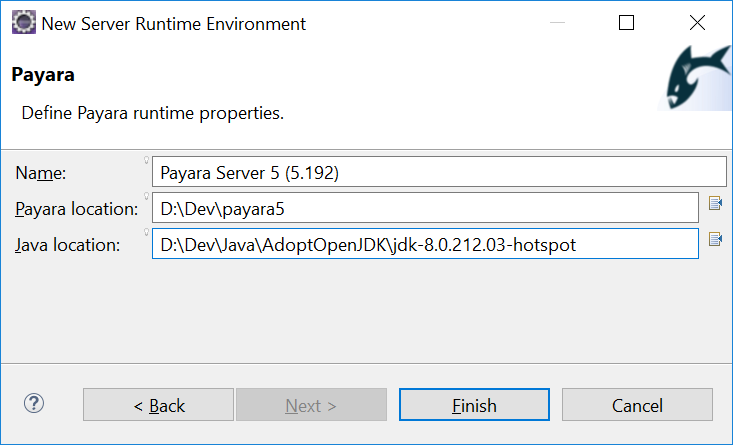
The sample application will be a simple Web app with a simple HTTP servlet that will just connect to the database and print information about the database using JDBC. To create the project, the simplest way is from Eclipse selecting New -> Dynamic Web Project. Give a name for the project, and click on the New Runtime button, which will open a dialog to define a target server that references the installed Payara server. There you would specify the local installation of the server and which JDK it will use. These steps are shown in the two images below.
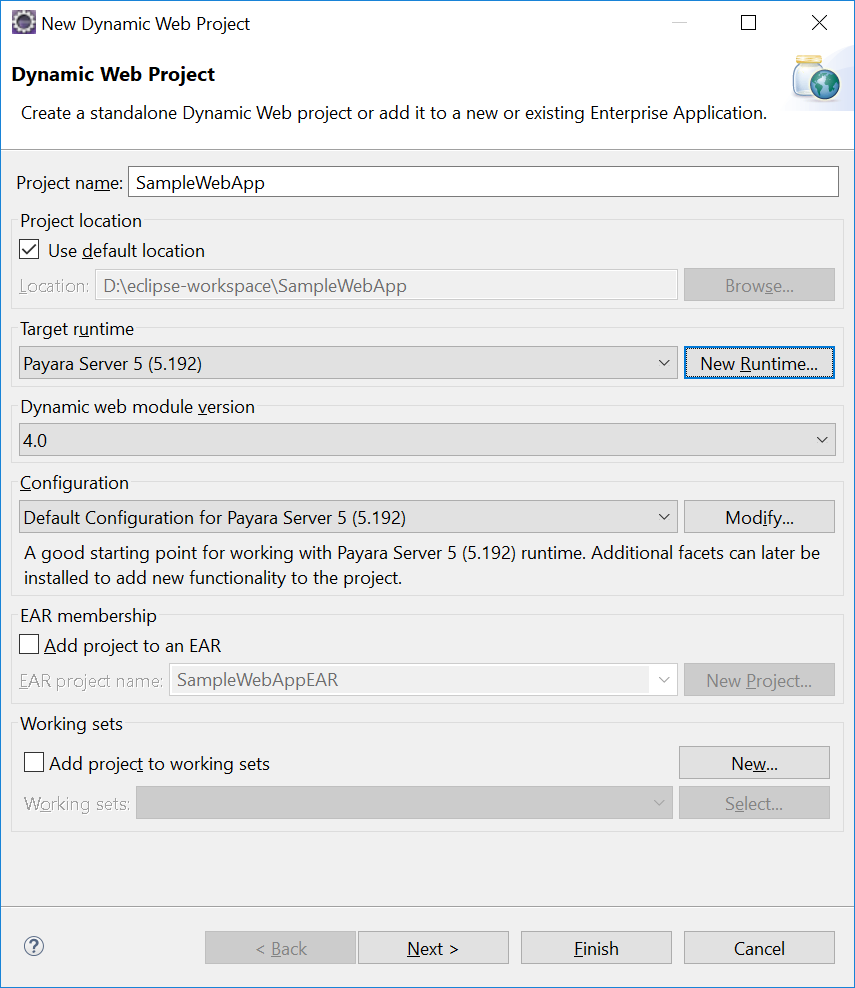
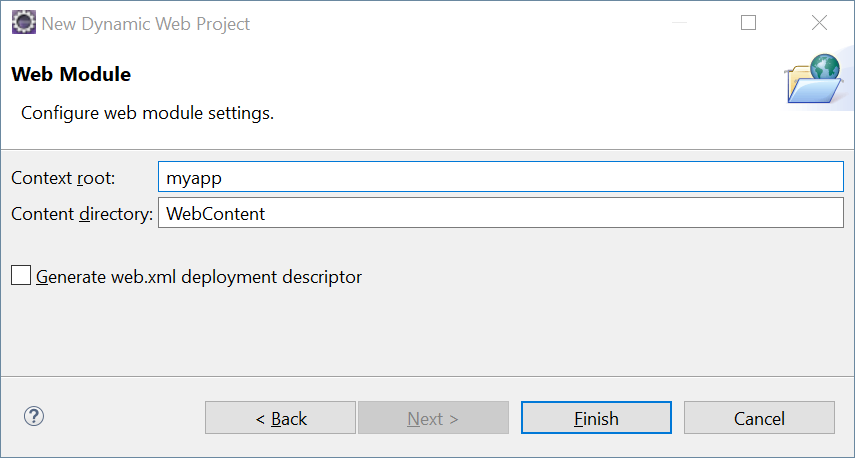
 You can either click Finish to create the project or go through the remaining pages if you want to change the context root, as shown below, which will affect the URL used to access the app from the browser (it defaults to the name of the project). Note that we will not be using any
 web.xml descriptor here.
Next, we create a servlet under the source directory by selecting New -> Servlet, e.g. in a class com.example.SampleServlet. Eclipse will generate the basic methods to handle the HTTP GET and POST requests (namely, doGet() and doPost). A starting point would be something like the following:
@WebServlet(name = "SampleServlet", urlPatterns = "/dbinfo")
public class SampleServlet extends HttpServlet {
...
@Override
protected void doGet(HttpServletRequest request, HttpServletResponse response) throws ServletException, IOException {
response.getWriter().append("Served at: ").append(request.getContextPath());
}
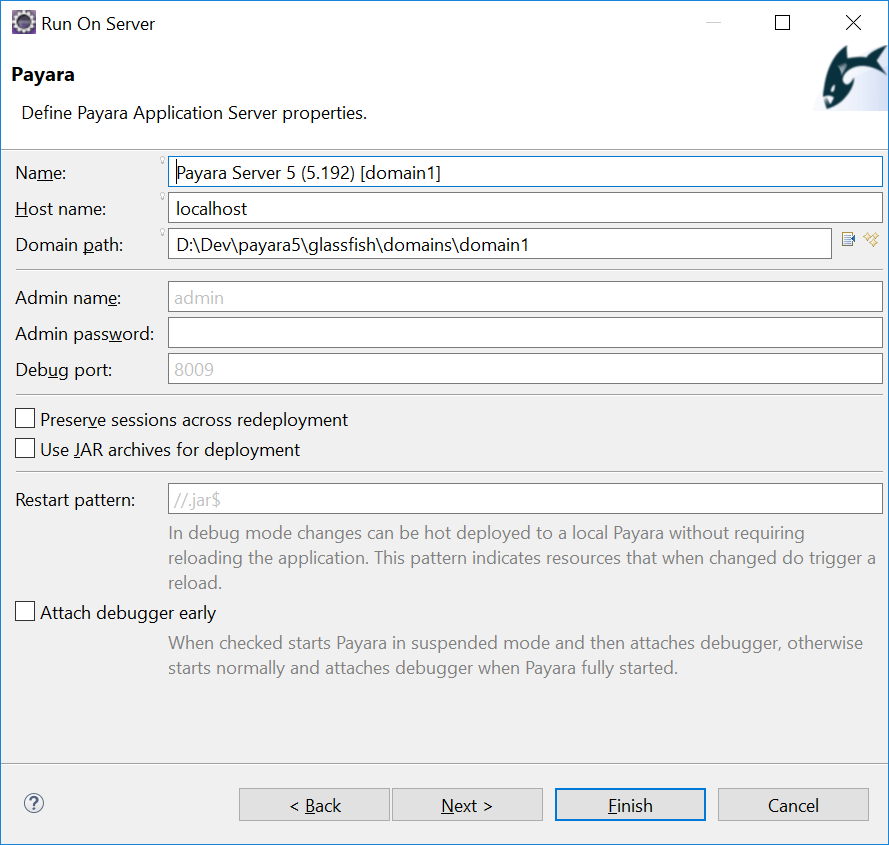
}We can run the app directly from Eclipse by right-clicking on the project and selecting Run As -> Run on Server. A dialog will open to select the target server, which will be populated with the one previously defined.

Select Next and make sure that all properties are filled correctly with no error shown in the dialog. Note the populated domain path corresponding to domain1 (the default domain in Payara) for our Web app.
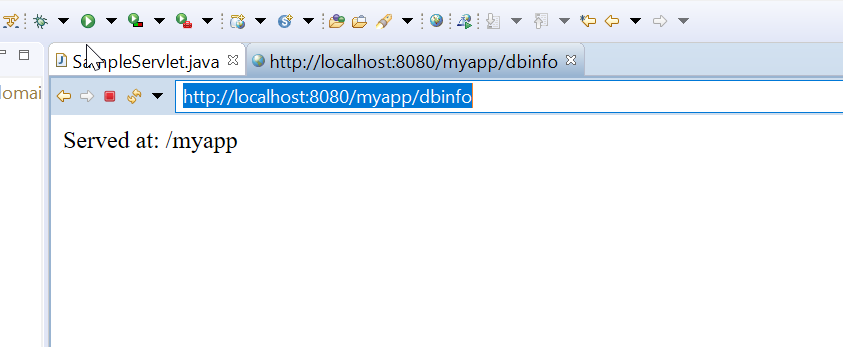
Finishing the run dialog will automatically start Payara and open a browser to the root URL of the app. Our initial servlet should respond with a simple text at the http://localhost:8080/myapp/dbinfo endpoint.
This is a quick way to run from within Eclipse (you can also stop the server, clean its state, and otherwise manage it in the Servers view). But it can be more convenient to run Payara separately and manage it from its Admin Console.
Managing Payara From the Console
To stop the running instance of Payara, run on the command line:
asadmin stop-domainThe asadamin executable exists under payara_install/bin. Payara is derived from GlassFish Server Open Source Edition, so all the administration commands from it can be used on Payara. To run the server again:
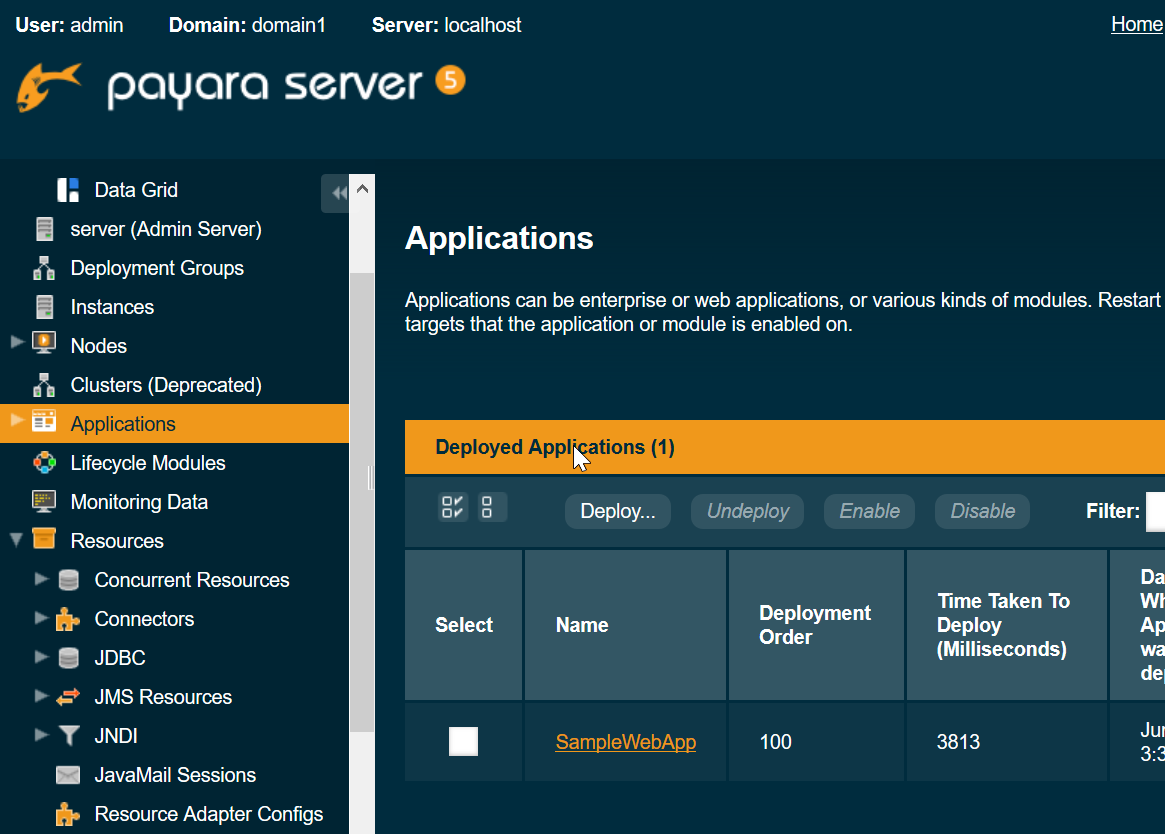
asadmin start-domainOnce started, you can open the Admin Console on http://localhost:4848, where you can manage apps and resources on the server. We can already see the application that Eclipse has deployed from the Applications section.
Next, we’ll update the application to connect to the data source. The way to access the DataSource object in this context is using the JNDI lookup facility provided by the application server. We will first register the DataSource of the database via the Admin Console, then inject it via its JNDI name.
Setting up the Database
First, we start the database process, which can be done using the mysqld executable. MariaDB has a predefined database called test, so we can connect to it to create some tables. See Connecting to MariaDB for how to do it this. If you choose a different database vendor, the steps to connect will be different so check the documentation of that particular database.
Assuming we have populated the database test with a few tables, the next step is to register a DataSource for it in Payara. This requires the JDBC driver Jar to be added to the server in order for it to access the DataSource implementation. The JDBC driver for MariaDB can be downloaded from this link. To add the Jar to Payara, run the command:
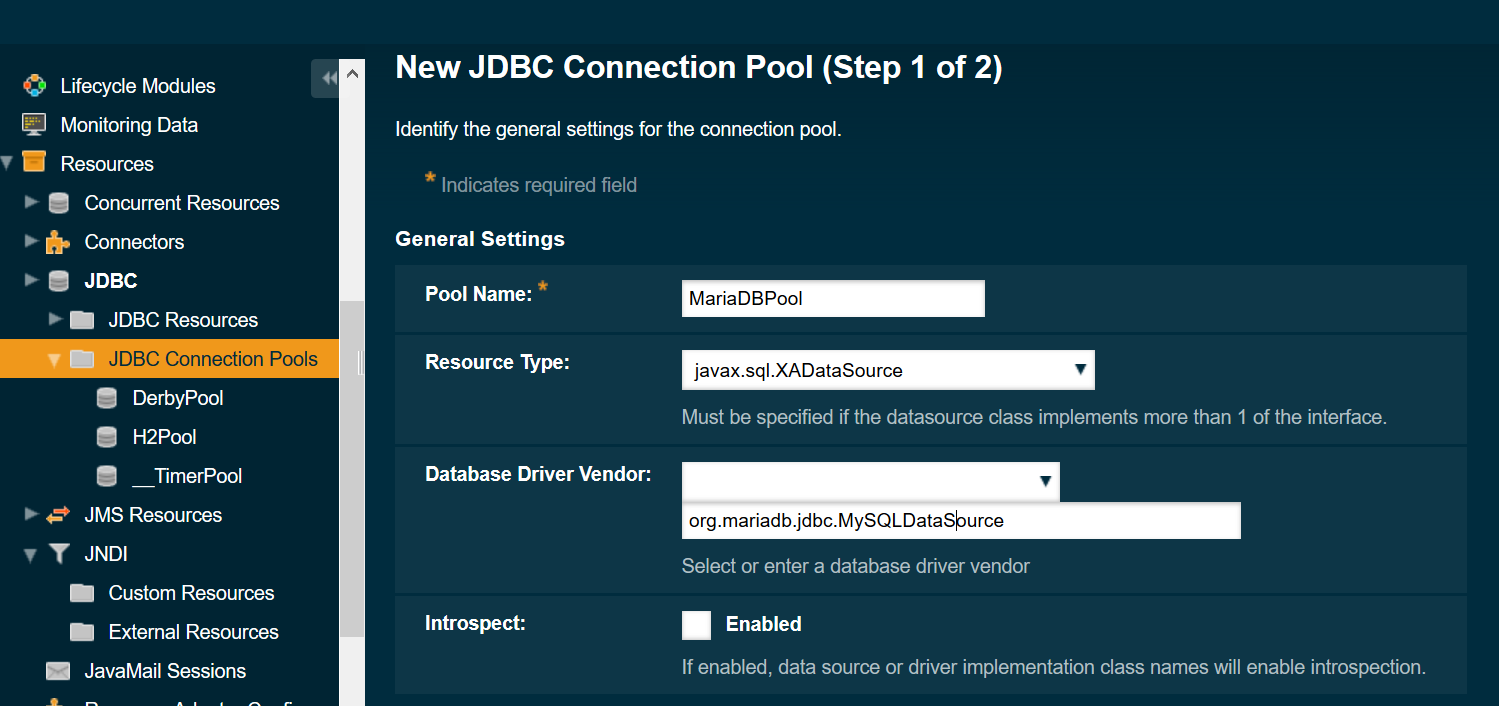
asadmin add-library path_to_jarIn the Admin Console at http://localhost:4848, go to Resources -> JDBC -> JDBC Connection Pools in the left navigation panel. A list of already existing connection pools exist, e.g. for H2 which comes by default with Payara. Click the New button to create a new Connection Pool.
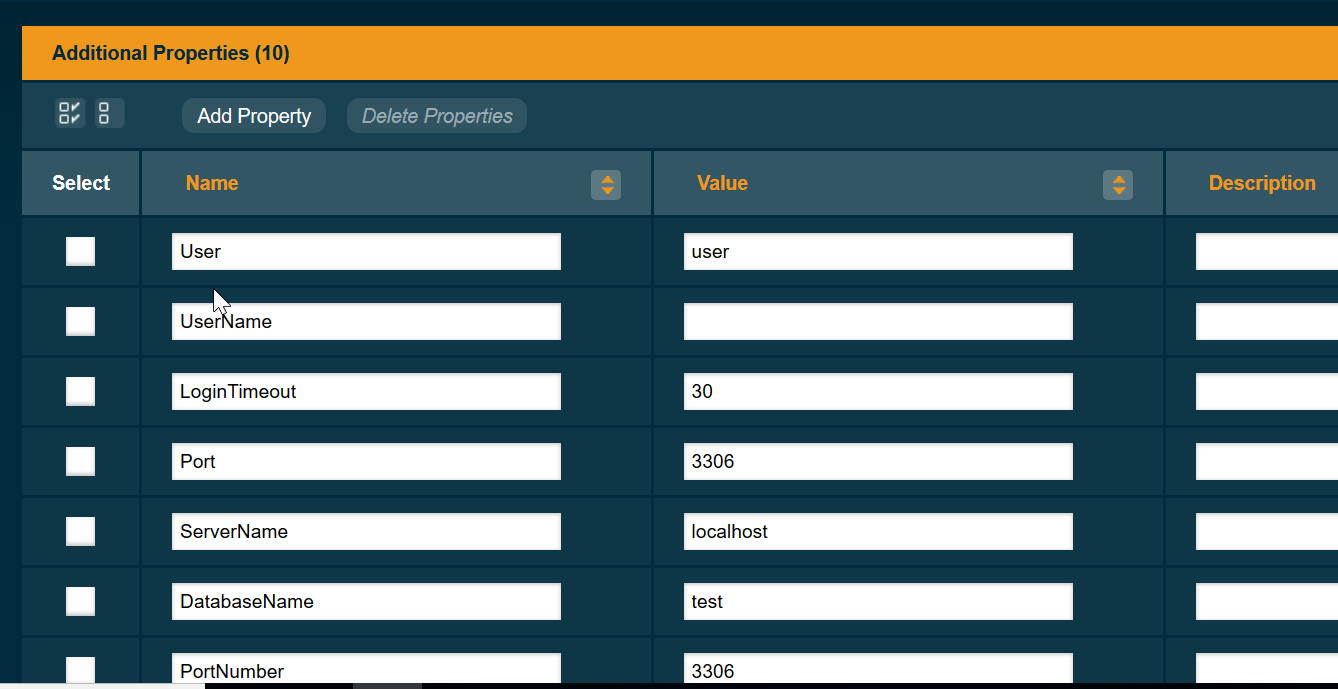
The pool can be given any human-friendly name, and we specify the name of the DataSource implementation org.mariadb.jdbc.MySQLDataSource. Upon providing the implementation, Payara seemingly uses it to derive a list of properties to configure the DataSource, e.g. the host, port, and database, which need to be filled.
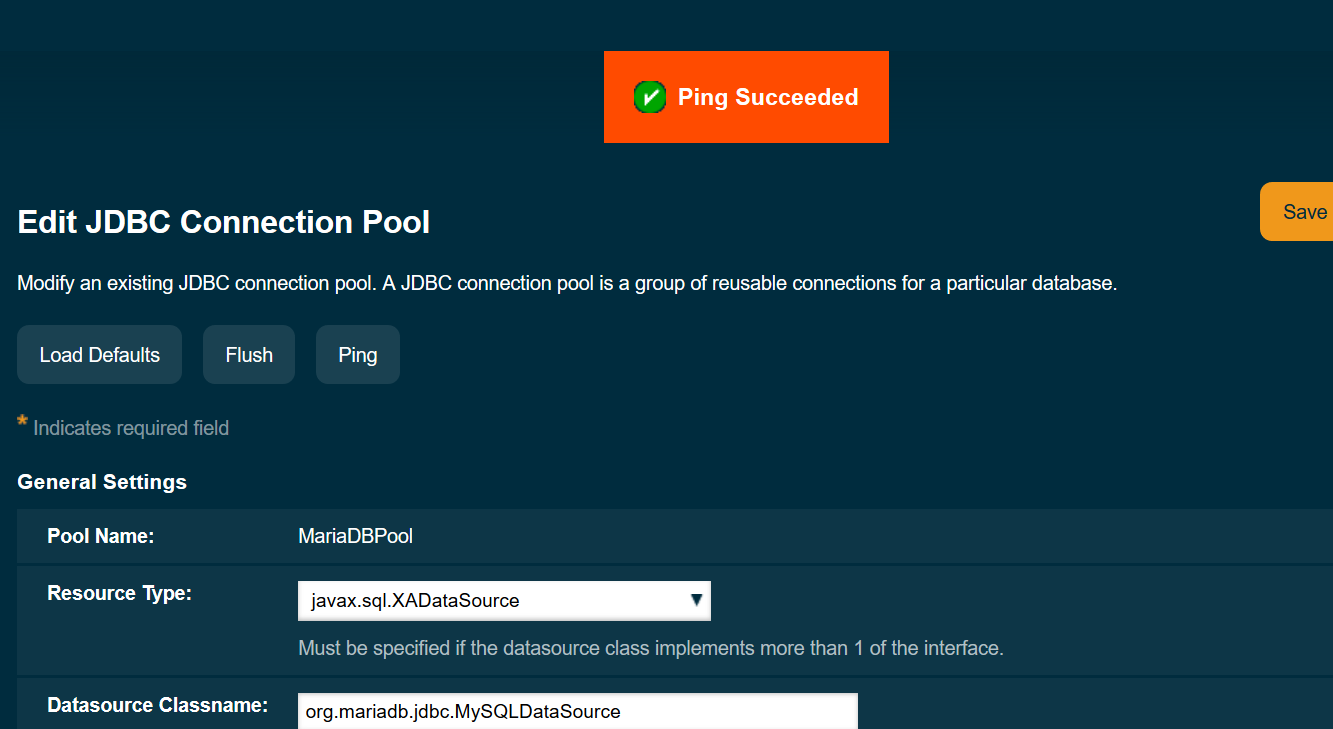
After filling all needed properties and saving the JDBC Connection Pool, make sure that clicking the Ping button successfully connects to it.
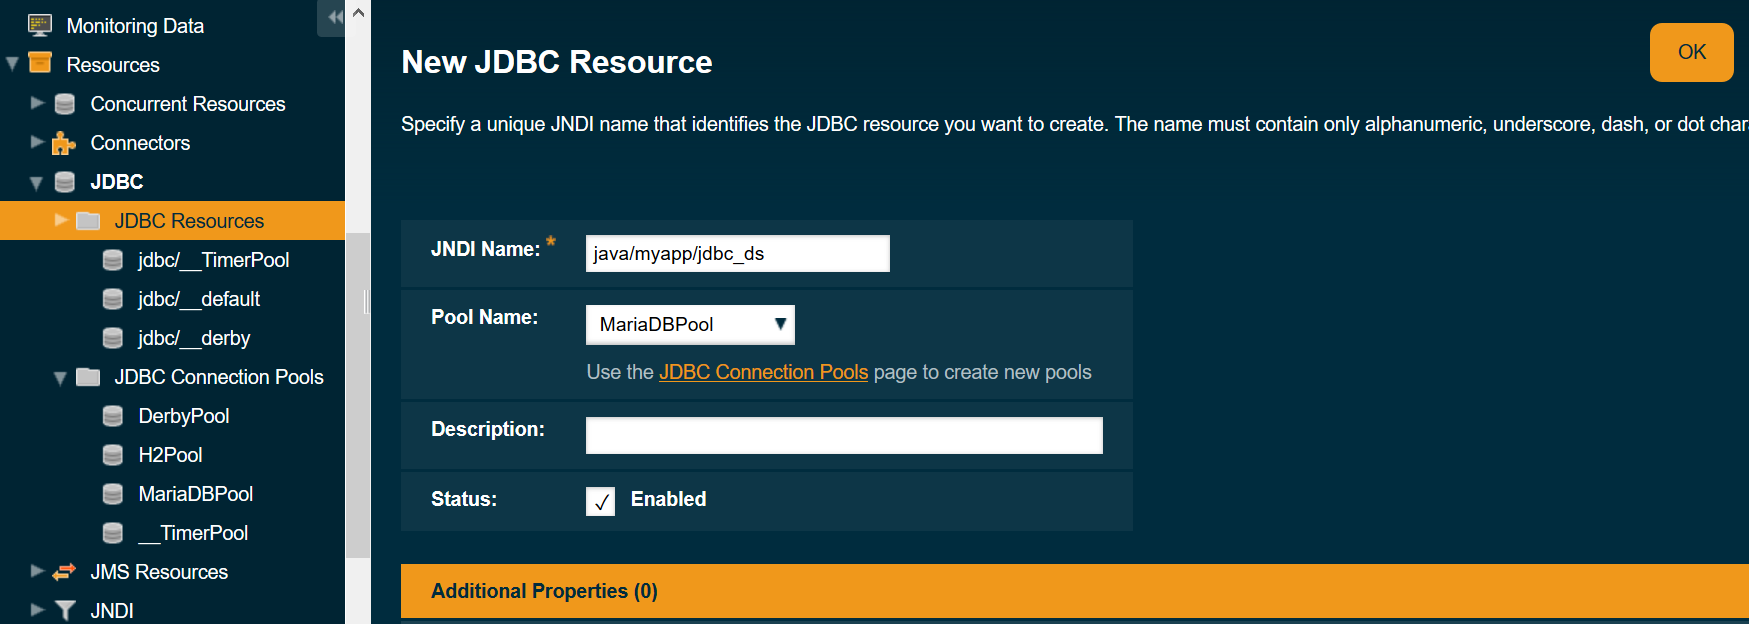
Now that the JDBC Connection Pool is created, we can register a JNDI binding for the DataSource, by going to Resources -> JDBC -> JDBC Resources, and selecting New. The JDBC Resource must reference the Pool just created and have a unique name.
Accessing the DataSource
With the DataSource registered, the servlet class can declare it as a dependency using @Resource:
@Resource(name="java/myapp/jdbc_ds")
DataSource dataSource;

@Override
protected void doGet(HttpServletRequest request, HttpServletResponse response) throws ServletException, IOException {
    try(Connection connection = dataSource.getConnection()) {
        DatabaseMetaData databaseMetaData = connection.getMetaData();
        PrintWriter writer = response.getWriter();
        writer.append("DB info: ")
              .append(databaseMetaData.getDatabaseProductName())
              .append("\nCatalog name: ")
              .append(connection.getCatalog());
        try(ResultSet tables = databaseMetaData.getTables(connection.getCatalog(), null, null, new String[] { "TABLE" })) {
            while(tables.next()) {
                writer.append("\n" + tables.getString("TABLE_NAME"));
            }
        }
    } catch(SQLException ex) {
        response.getWriter().append("Error " + ex.getMessage());
        getServletContext().log("Error connecting to DB", ex);
    }
}
Note that the underlying implementation will use a pool of connections from which every request will borrow a connection from the pool and return it once done. The pool configuration can be adjusted from the JDBC Connection Pool just created.
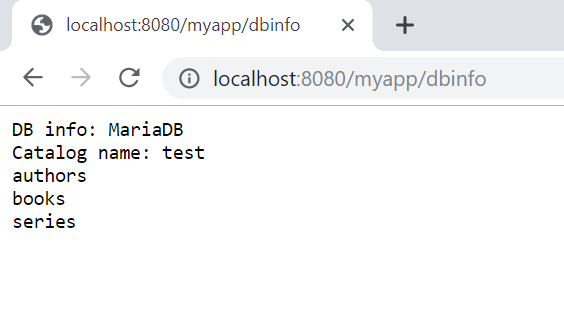
We can now run the example just like we did using Eclipse. Another way of doing it is by packaging the app in a WAR file by right-clicking on the project and selecting Export -> WAR file. Then deploy it by running:
asadmin deploy --force path_to_war_fileNote the use of --force to force redeploying the app if it already existed. The result of http://localhost:8080/myapp/dbinfo should look like the below.
Download Links
OpenJDK 8 – https://adoptopenjdk.net/index.html
Payara Server – https://www.payara.fish/software/downloads
Eclipse – https://www.eclipse.org/downloads/
Payara Tools for Eclipse – https://marketplace.eclipse.org/content/payara-tools
MariaDB – https://mariadb.org/download/
MariaDB JDBC driver – https://downloads.mariadb.com/Connectors/java/
References
https://docs.payara.fish/documentation/payara-server/
https://eclipse-ee4j.github.io/glassfish/docs/latest/quick-start-guide/toc.html
https://blog.payara.fish/an-intro-to-connection-pools-in-payara-server-5
Published at DZone with permission of Mahmoud Anouti. See the original article here.
Opinions expressed by DZone contributors are their own.
Comments