

Creating Custom Widgets Displayed in the Jupyter Notebook
Widgets can be used to build interactive GUIs for your notebooks, synchronize information between Python and JavaScript, and display HTML elements in the Jupyter notebook.
Join the DZone community and get the full member experience.
Join For FreeWidgets are eventful python objects that have a representation in the browser such as sliders, Google charts, and Plotly charts. Widgets can be used to build interactive GUIs for your notebooks, synchronize information between Python and JavaScript, and display HTML elements in the Jupyter notebook. Jupyter notebook allows us to develop custom widgets to be presented in the Jupyter notebook.
In addition to Python and web technologies (HTML, CSS, and JavaScript) knowledge, there are three main things that we need to know before developing custom widgets.
1. Built-in Magic Commands
Magic commands are supported by the IPython kernel. They are prefixed by the % or %% characters. These magic commands are designed to solve common problems in data analysis and control the behavior of IPython itself. The magic command used to create custom widgets are:
%%htmlis used to render and define HTML templates and cascading style sheets for widgets%%javascriptis used to run the cell block of JavaScript code for widgets. Typically, it is used to create JavaScript modules and views for the widget front-end components
2. Traitlets
Traitlets is a framework that allows attributes in Python classes to support type checking, default values, and change events (observer pattern). Widgets use Traitlets to notify changes of the Python classes’ properties to JavaScript. Then JavaScript will update the HTML elements according to the changes.
3. Backbone.js
Backbone.js is a lightweight JavaScript library designed for developing single-page web applications. It is based on the MVC (model–view–controller) framework. The IPython widget framework relies heavily on Backbone.js for the front-end components.
In the next section, I will use this knowledge including CSS bootstrap and jQuery to create a Quote widget displaying real-time financial data in the Jupyter notebook.
Quote Widget
Quote Widget is a widget that displays real-time financial data in the Jupyter notebook.
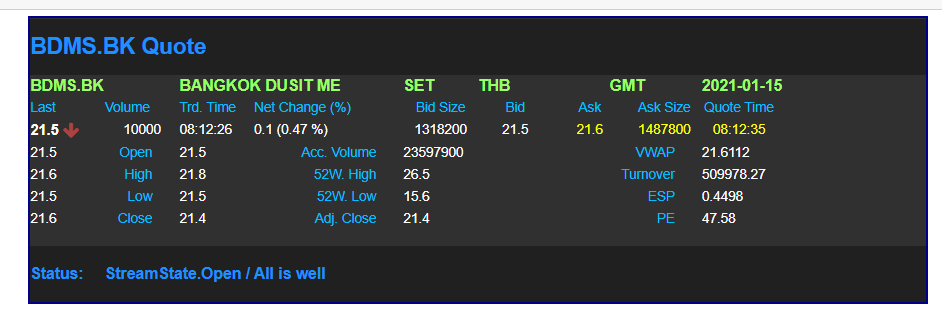
There are three steps to implement this quote widget. All code is written in the Jupyter notebook (QuoteWidget.ipynb).
1. Python Widget Class
The first step is defining a Python class inheriting from the DOMWidget base class. The DOMWidget class defined in the ipywidgets package represents a widget that is displayed on the page as an HTML DOM element.
xxxxxxxxxx
import ipywidgets as widgets
from traitlets import Unicode, Dict
class QuoteWidget(widgets.DOMWidget):
_view_name = Unicode('QuoteView').tag(sync=True)
_view_module = Unicode('Quote').tag(sync=True)
_view_module_version = Unicode('0.1.0').tag(sync=True)
payload = Dict().tag(sync=True)
status = Unicode("").tag(sync=True)
name = Unicode("Quote1").tag(sync=True)
The QuoteWidget class contains several traitlets properties. The _view_module, _view_module_version, and _view_name properties define the Backbone.js view class for the model. The payload, status, and name are the properties of the model. The name property contains the unique name of the quote widget. It represents a unique ID in the HTML DOM element. The status property contains a text representing the status of the quote widget. The payload property contains real-time financial data in the field list format.
xxxxxxxxxx
{'BID': 21.2, 'BIDSIZE': 445800, 'QUOTIM': '08:20:06', 'SEQNUM': 3693049}
The data in the quote widget will be updated when the value of the payload property has been changed. The sync=True keyword argument tells the widget framework to synchronize the value to the Backbone.js front end.
2. HTML Template
The next step is using the %%html built-in magic command to define an HTML template and styles of the quote widget. The template is defined inside the script tag with the text/template type. The ID of the template is quote-template. This template will be loaded by the Backbone.js front end. It uses the Bootstrap CSS framework to create a layout of the widget.
xxxxxxxxxx
%%html
<style>
.update {
color: yellow;
}
.arrow-up {
vertical-align: top;
}
.arrow-down {
vertical-align: middle;
}
.quote_label {
color: DeepSkyBlue;
}
…
</style>
<script type="text/template" id="quote-template">
<div class="container quote_box">
<div class="row quote_title">
<div>
<span data-field="X_RIC_NAME"></span> Quote
</div>
</div>
<div class="row quote_header">
<div class="col-xs-2" data-field="X_RIC_NAME"> </div>
<div class="col-xs-3" data-field="DSPLY_NAME"> </div>
<div class="col-xs-1" data-field="RDN_EXCHD2"> </div>
<div class="col-xs-1" data-field="CURRENCY"> </div>
<div class="col-xs-2 text-center">GMT</div>
<div class="col-xs-2" data-field="TRADE_DATE"> </div>
</div>
…
The data-field attribute is used to define where the value of the field will be displayed and the data-animated attribute indicates the style of the element will be changed when the value has been updated.
xxxxxxxxxx
<div class="col-xs-1 text-center" data-field="BIDSIZE" data-animated></div>
<div class="col-xs-1 text-center" data-field="BID" data-animated></div>
<div class="col-xs-1 text-center" data-field="ASK" data-animated></div>
<div class="col-xs-1 text-center" data-field="ASKSIZE" data-animated></div>
<div class="col-xs-1 text-center" data-field="QUOTIM" data-animated></div>
3. Backbone.js Front End
The last step is using the %%javascript built-in magic command to define a Backbone.js front end. This is the main component used to control and display the widget. In the IPython widget framework, Backbone.js is used to create a front end’s module and view linked to the Python class defined in the first step. The values of _view_name (QuoteView) and _view_module (Quote) properties in the first step are used to define the front end module and view.
First, it uses require.js to define the Quote module which depends on the @jupyter-widgets/base module. Then, it uses the extend method to create the QuoteView class by inheriting from the DOMWidgetView class.
xxxxxxxxxx
%%javascript
require.undef('Quote');
define('Quote', ["@jupyter-widgets/base"], function(widgets) {
var QuoteView = widgets.DOMWidgetView.extend({
});
return {
QuoteView: QuoteView
}
});
Next, it uses underscore.js to load the HTML template created in the second step, and then override the base render method of the view to add the template into the HTML DOM document. It uses the name property defined in the first step as a unique ID of the DOM element.
xxxxxxxxxx
var QuoteView = widgets.DOMWidgetView.extend({
template: _.template($("#quote-template").html()),
render: function(){
var name = this.model.get('name');
this.model.on('change:payload',this.payload_changed, this);
this.model.on('change:status',this.status_changed, this);
this.div = $('<div/>',{id: name}).append(this.template);
$(this.el).append(this.div);
},
In the render function, the model.on method is called to register functions (payload_changed, and status_changed) to update the view’s values when the payload and status properties change.
The status_changed function is called when a value of the status property changes.
xxxxxxxxxx
status_changed: function(){
var status_text = this.model.get('status');
var name = this.model.get('name');
var statusField = $("#"+name+" [data-field=status_text]");
statusField.text(status_text);
},
This function uses jQuery to select an HTML element in the widget that has the “status_text” in the data-field attribute, and then update the text attribute of the selected HTML element to the value of the status property.
xxxxxxxxxx
<div class="col-xs-11" data-field="status_text"></div>
The payload_changed function is called when a value of the payload property changes.
xxxxxxxxxx
payload_changed: function(){
var payload = this.model.get('payload');
var name = this.model.get('name');
Object.getOwnPropertyNames(payload).forEach(
(value, index, array)=>
{
var updatedField = $("#"+name+" [data-field="+value+"]");
check_ripple(name, updatedField);
if(updatedField.data('value')!=undefined){
var selvalue = updatedField.data('value');
updatedField.removeClass().addClass(selvalue[payload[value]]);
}else{
updatedField.text(payload[value]);
}
if(updatedField.data('animated')!=undefined){
updatedField.addClass('update');
setTimeout(function() {
updatedField.removeClass('update');
}, 1000);
}
});
}
This function iterates all fields in the payload. For each field, it does the following tasks:
- Use jQuery to select an HTML element in the widget that has the updated field’s name in the
data-fieldattribute and then update thetextattribute of the selected HTML element to the field’s value:
xxxxxxxxxx
<div class="col-xs-3" data-field="DSPLY_NAME"> </div>
- Handle the ripple fields via the
data-rippleattribute where the previous value of the updated field is moved to another field when the field has been updated:
xxxxxxxxxx
<span data-field="TRDPRC_1" class="quote_trade_price1" data-ripple="TRDPRC_2" data-animated></span>
- Change the style of the updated HTML element for 1 second if it contains the data-animated attribute. It is used to notify users that the field’s value has been updated:
xxxxxxxxxx
<div class="col-xs-1 text-center" data-field="BID" data-animated></div>
Quote Widget Usage
The Quote Widget is implemented in the QuoteWidget.ipynb file. To use the widget, please follow these steps:
1. Use the %run built-in magic command to run the QuoteWidget.ipynb file:
xxxxxxxxxx
%run ./QuoteWidget.ipynb
2. Create a QuoteWidget and set a unique name:
xxxxxxxxxx
quote = QuoteWidget()
quote.name = "Quote1"
quote
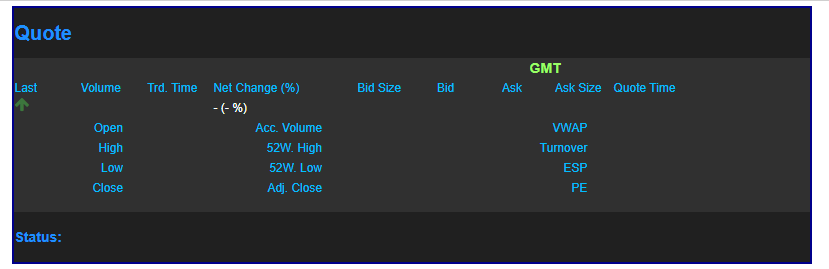
3. Set the payload and status properties to update the widget:
xxxxxxxxxx
quote.payload = {'DSPLY_NAME': 'BANGKOK DUSIT ME', 'RDN_EXCHD2': 'SET', 'CURRENCY': 'THB', 'NETCHNG_1': -0.1, 'PCTCHNG': -0.47, 'TRDVOL_1': 1000, 'TRADE_DATE': '2021-01-18', 'TRDTIM_1': '08:19:41', 'TRDPRC_1': 21.3, 'TRDPRC_2': 21.3, 'TRDPRC_3': 21.2, 'TRDPRC_4': 21.3, 'TRDPRC_5': 21.3, 'PRCTCK_1': 1, 'BID': 21.2, 'BIDSIZE': 585900, 'ASK': 21.3, 'ASKSIZE': 936900, 'OPEN_PRC': 21.4, 'ACVOL_1': 17884500, 'VWAP': 21.2084, 'VWAP_VOL': 17884500, 'HIGH_1': 21.5, '52WK_HIGH': 26.5, 'TURNOVER': 379301.91, 'LOW_1': 21.1, '52WK_LOW': 15.6, 'PERATIO': 47.58, 'HST_CLOSE': 21.4, 'ADJUST_CLS': 21.4, 'EARNINGS': 0.4498, 'QUOTIM': '08:19:55', 'SEQNUM': 3690282, 'X_RIC_NAME': 'BDMS.BK'}
quote.status = "Open/Ok"

Moreover, the Quote Widget can be used with any APIs that support real-time financial data, such as Refinitiv Eikon Data API, Refinitiv WebSocket API, and Refinitv Data Platform. The sample code (EDAPIQuoteWidget.ipynb) for Eikon Data API is available on GitHub. To use EDAPIQuoteWidget, please follow these steps:
1. Use the %run built-in magic command to run the EDAPIQuoteWidget.ipynb file:
xxxxxxxxxx
%run ./EDAPIQuoteWidget.ipynb
2. Import the Eikon Data API package and set the application key:
xxxxxxxxxx
import eikon as ek
ek.set_app_key('<application key>')
3. Load data dictionary files used to expand enumerated strings for the enumeration fields:
xxxxxxxxxx
dict = RDMFieldDictionary("RDMFieldDictionary", "enumtype.def")
4. Create an EDAPIQuoteWidget with the Eikon Data API, widget name, and data dictionary, and then call the widget method to display the widget:
xxxxxxxxxx
q = EDAPIQuoteWidget(ek, "quote1", dict)
q.widget()
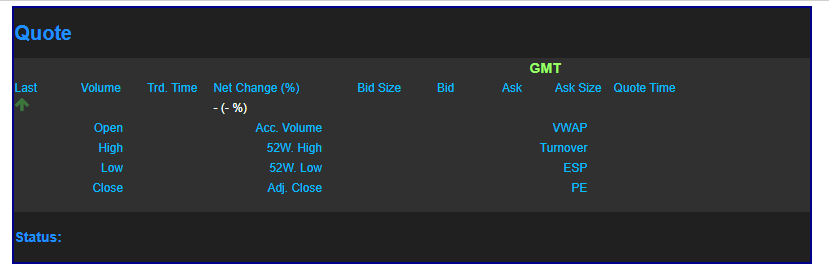
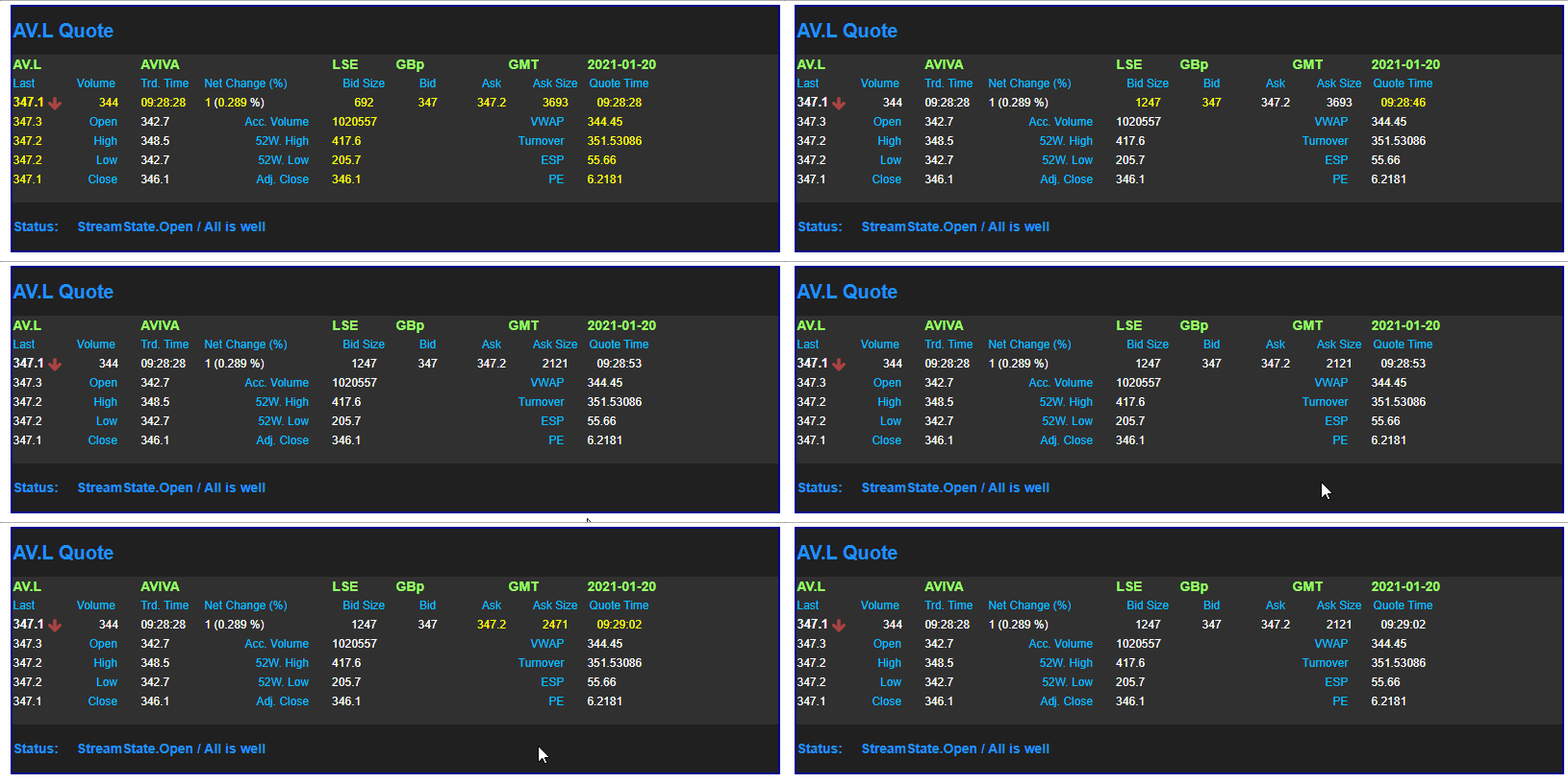
5. Call the open method with the instrument name to subscribe to the Real-Time service. The retrieved real-time data will be displayed on the widget:
xxxxxxxxxx
q.open("AV.L")
Summary
This article demonstrates how to develop custom widgets displayed on the Jupyter Notebook. The widget framework uses Traitlets to notify changes of the Python classes’ attributes to JavaScript and uses Backbone.js for the front end javascript parts. Then, it shows steps to create a quote widget for displaying financial real-time on the Jupyter Notebook. Finally, it presents how to use the quote widget with Refinitiv Eikon Data API. All widget and example files are available on GitHub. This article is also available on the Refinitiv Developer Community.
References
1. Backbonejs.org. n.d. Backbone.Js. [online] Available at: <https://backbonejs.org/> [Accessed 20 January 2021].
2. Ipywidgets.readthedocs.io. 2017. Building A Custom Widget - Email Widget — Jupyter Widgets 7.6.2 Documentation. [online] Available at: <https://ipywidgets.readthedocs.io/en/stable/examples/Widget%20Custom.html> [Accessed 20 January 2021].
3. Ipython.readthedocs.io. n.d. Built-In Magic Commands — Ipython 7.19.0 Documentation. [online] Available at: <https://ipython.readthedocs.io/en/stable/interactive/magics.html> [Accessed 20 January 2021].
4. Developers.refinitiv.com. n.d. Eikon Data API | Refinitiv Developers. [online] Available at: <https://developers.refinitiv.com/en/api-catalog/eikon/eikon-data-api> [Accessed 20 January 2021].
5. Jquery.com. n.d. Jquery. [online] Available at: <https://jquery.com/> [Accessed 20 January 2021].
6. Mark Otto, a., n.d. Bootstrap. [online] Getbootstrap.com. Available at: <https://getbootstrap.com/> [Accessed 20 January 2021].
7. Developers.refinitiv.com. n.d. Refinitiv Data Platform Libraries | Refinitiv Developers. [online] Available at: <https://developers.refinitiv.com/en/api-catalog/refinitiv-data-platform/refinitiv-data-platform-libraries> [Accessed 20 January 2021].
8. Developers.refinitiv.com. n.d. Refinitiv Websocket API | Refinitiv Developers. [online] Available at: <https://developers.refinitiv.com/en/api-catalog/elektron/refinitiv-websocket-api> [Accessed 20 January 2021].
9. Rossant, C., 2018. Ipython Interactive Computing And Visualization Cookbook, Second Edition. 2nd ed. Birmingham: Packt Publishing.
10. Traitlets.readthedocs.io. 2015. Traitlets — Traitlets 5.0.5 Documentation. [online] Available at: <https://traitlets.readthedocs.io/en/stable/> [Accessed 20 January 2021].
Published at DZone with permission of Jirapongse Phuriphanvichai. See the original article here.
Opinions expressed by DZone contributors are their own.
Comments