Cucumber — Selenium — Jenkins Integration
This article explains how to integrate automated testing.
Join the DZone community and get the full member experience.
Join For FreeDevOps is on the most widely accepted concept that integrates automated testing into a continuous integration process. Automated testing runs automatically and creates execution reports once it is integrated.
Step 1: Creating Cucumber Selenium Files
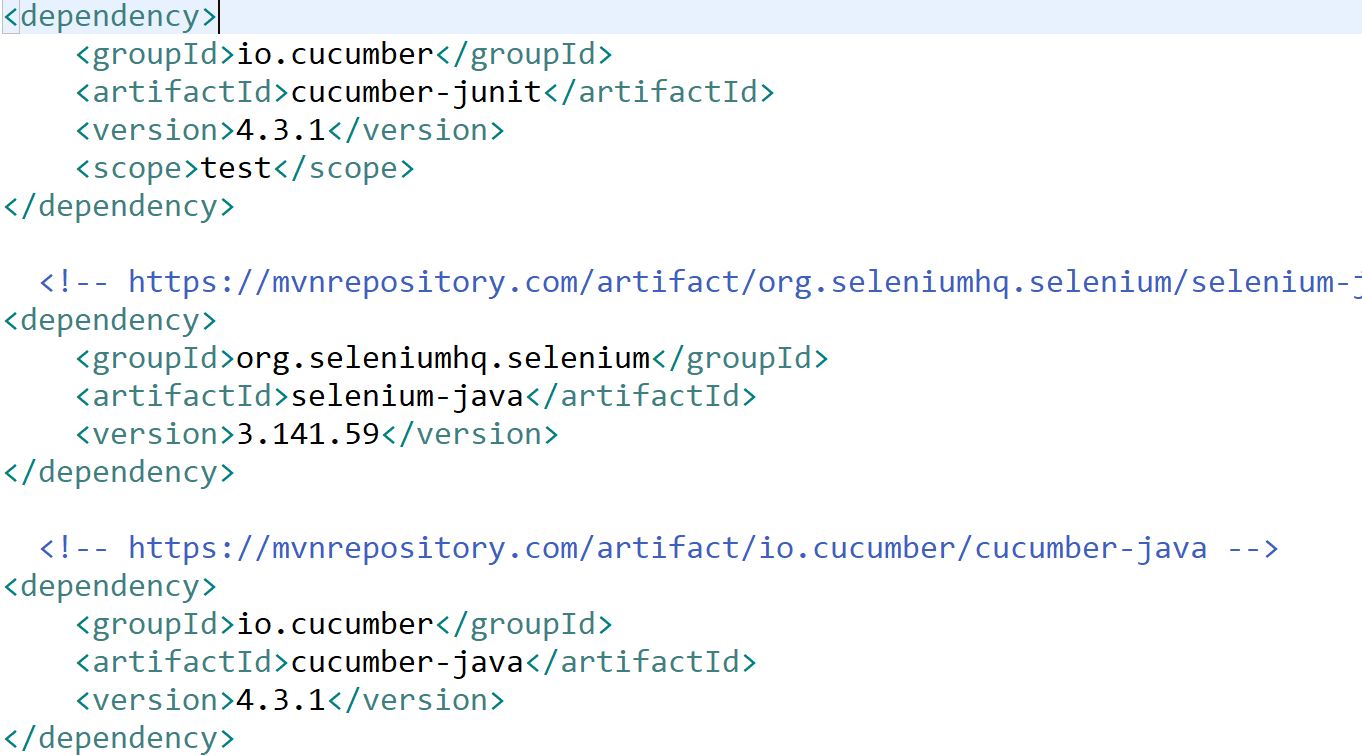
Create a Maven project in Eclipse and add the following dependencies in pom.xml:
Selenium Java
Cucumber-Junit
Cucumber-Java
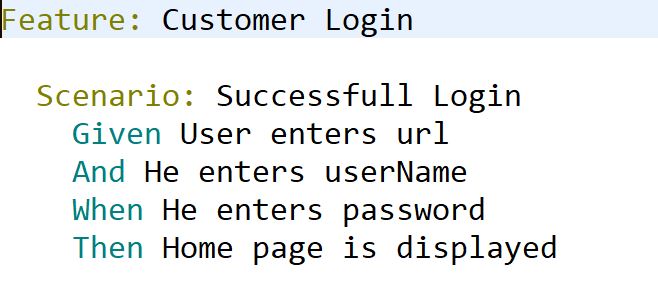
Creating a Cucumber Feature FIle: Login.Feature
Create StepDefinition (Selenium) for Feature
package SeCu;
import java.util.concurrent.TimeUnit;
import org.openqa.selenium.By;
import org.openqa.selenium.WebDriver;
import org.openqa.selenium.chrome.ChromeDriver;

import cucumber.api.java.Before;
import cucumber.api.java.en.And;
import cucumber.api.java.en.Given;
import cucumber.api.java.en.Then;
import cucumber.api.java.en.When;

public class CucSelenium {
WebDriver driver;
@Before public void setUp(){
System.setProperty("webdriver.chrome.driver", "src/main/resources/chromedriver.exe");
driver = new ChromeDriver();
driver.manage().window().maximize();
driver.manage().timeouts().implicitlyWait(10, TimeUnit.SECONDS);
}

@Given("User enters url")
public void user_enters_url() {
driver.get("http://demowebshop.tricentis.com/");
driver.findElement(By.linkText("Log in")).click();

}

@And("He enters userName")
public void he_enters_userName() {
// Write code here that turns the phrase above into concrete actions
driver.findElement(By.id("Email")).sendKeys("[email protected]");
}

@When("He enters password")
public void he_enters_password() {
// Write code here that turns the phrase above into concrete actions
driver.findElement(By.id("Password")).sendKeys("123456");

}

@Then("Home page is displayed")
public void home_page_is_displayed() {
// Write code here that turns the phrase above into concrete actions

System.out.println("home page");

//driver.findElement(By.xpath("//*[@value='Log in'])")).click();
driver.findElement(By.xpath("/html/body/div[4]/div[1]/div[4]/div[2]/div/div[2]/div[1]/div[2]/div[2]/form/div[5]/input")).click();

}


}
Create a RunnerFile to Execute- Runner>java
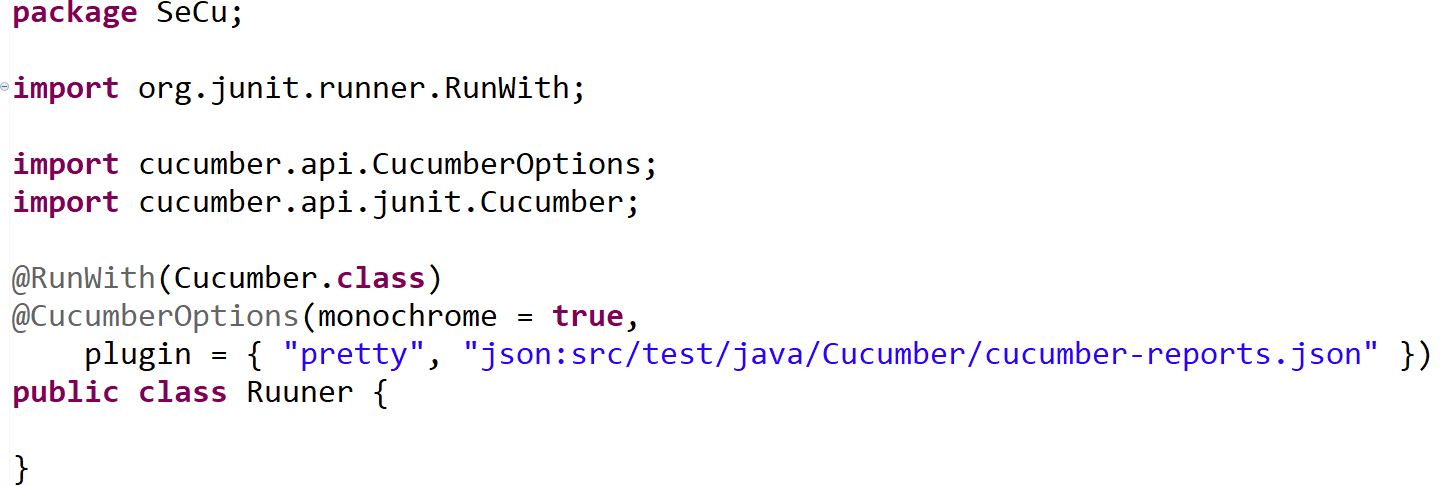
Note: JSON report is used to create Cucumber reports.
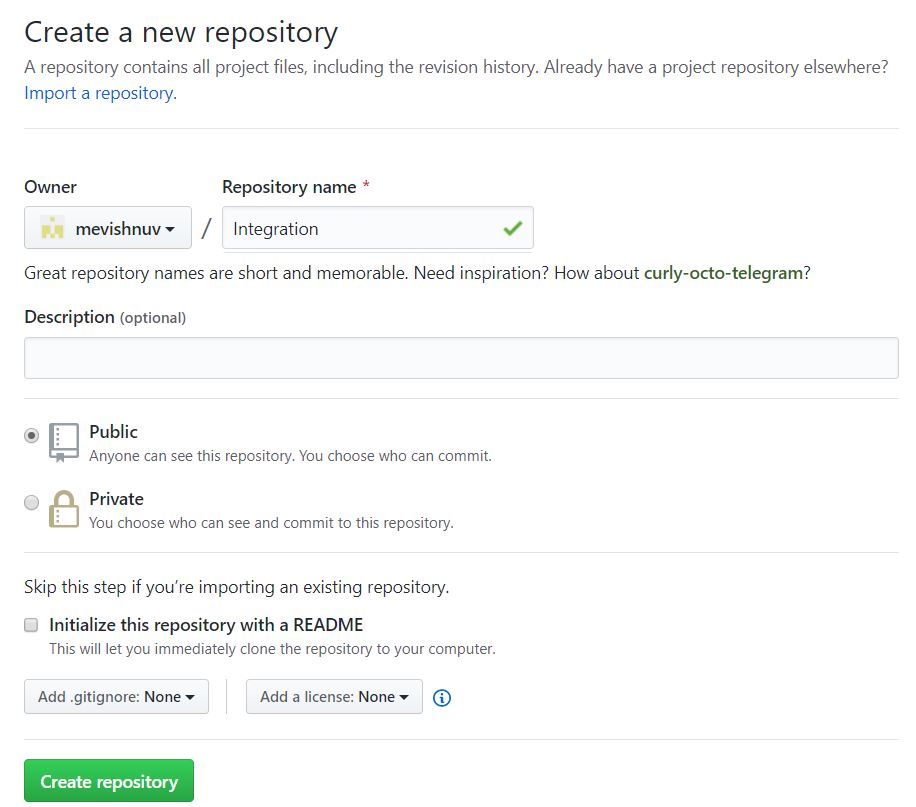
Step 2: Adding the Source Code on GitHub
Create a new repository on GitHub.
In the Eclipse root folder, right-click and select "Team" and click on share project and click create.
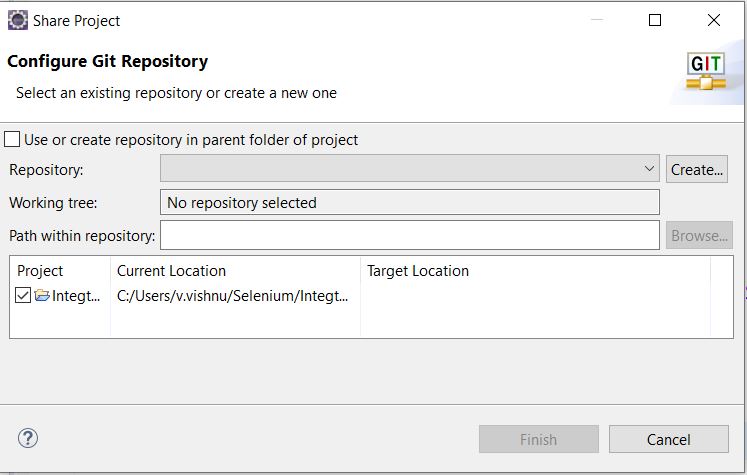
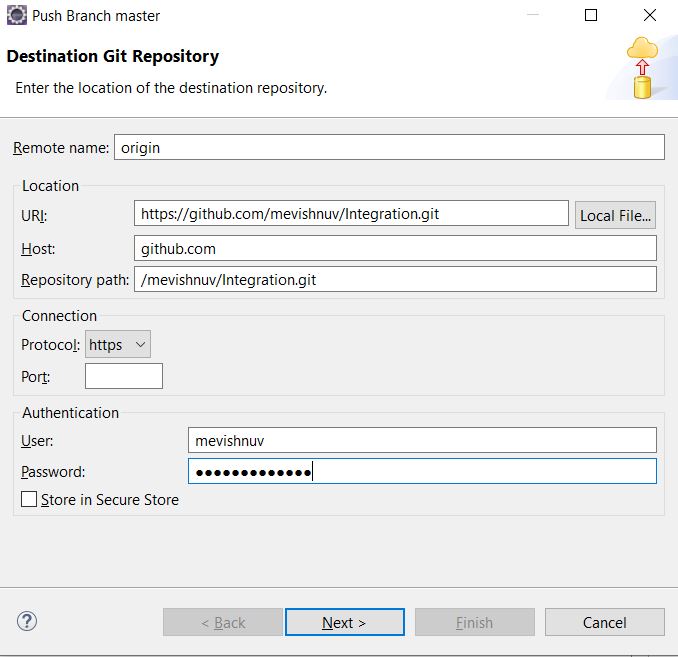
Provide the URL and credentials of the newly created git repository.
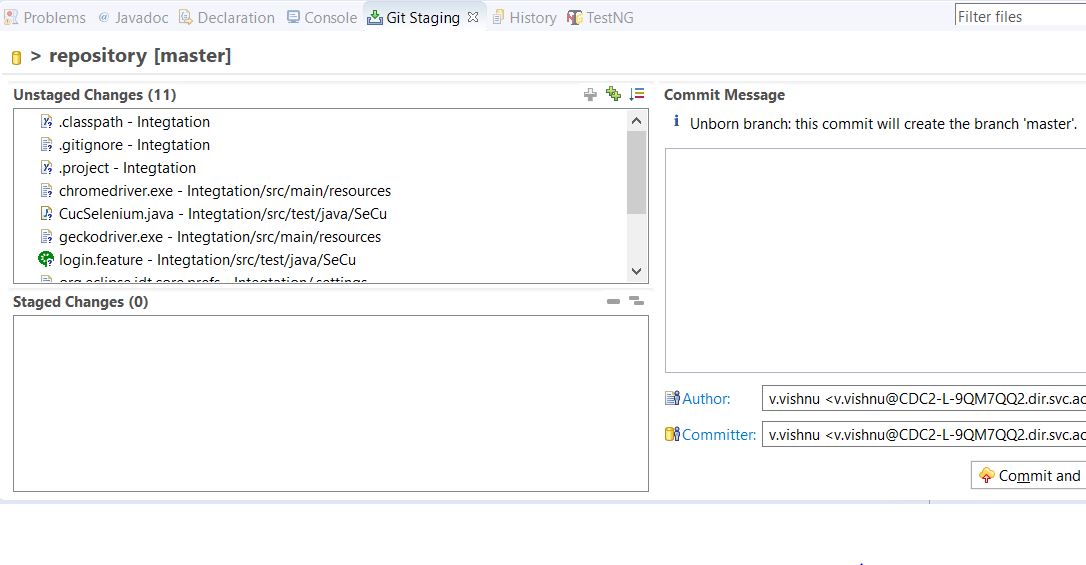
Select all the unstaged changes and add to staged changes and click on commit and push after providing a commit message.
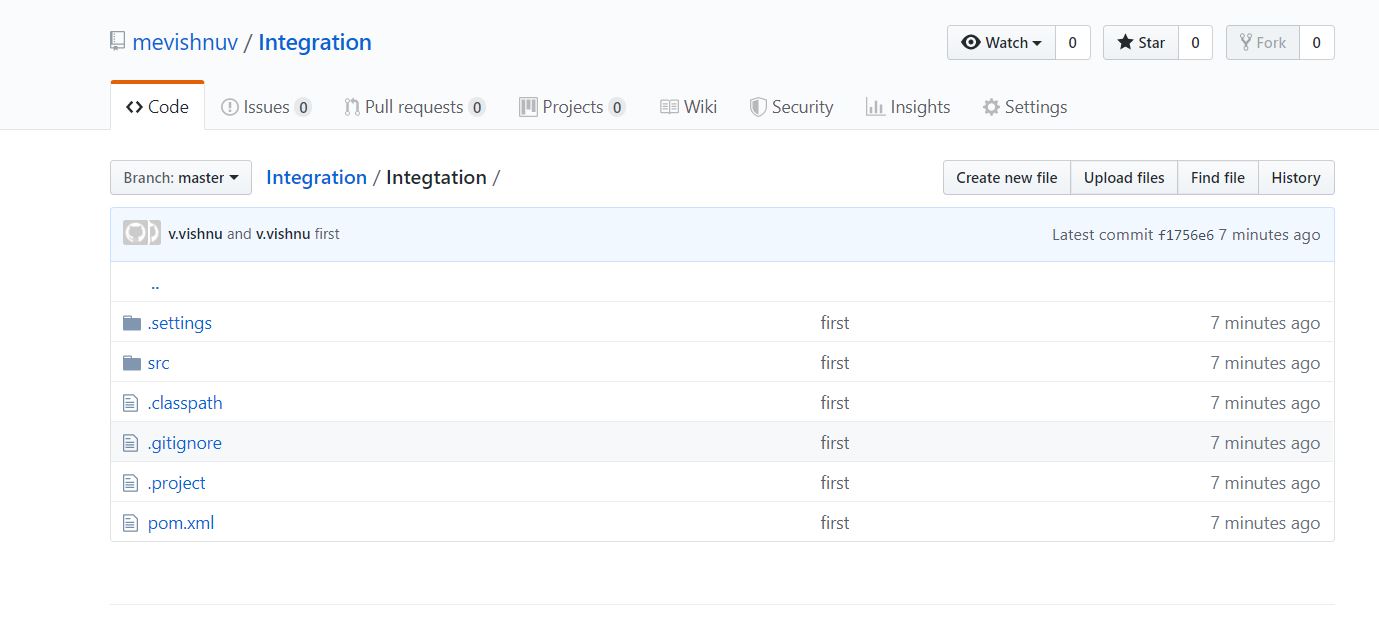
Provide the credentials when asked for. Your source code is updated in the GitHub repository.
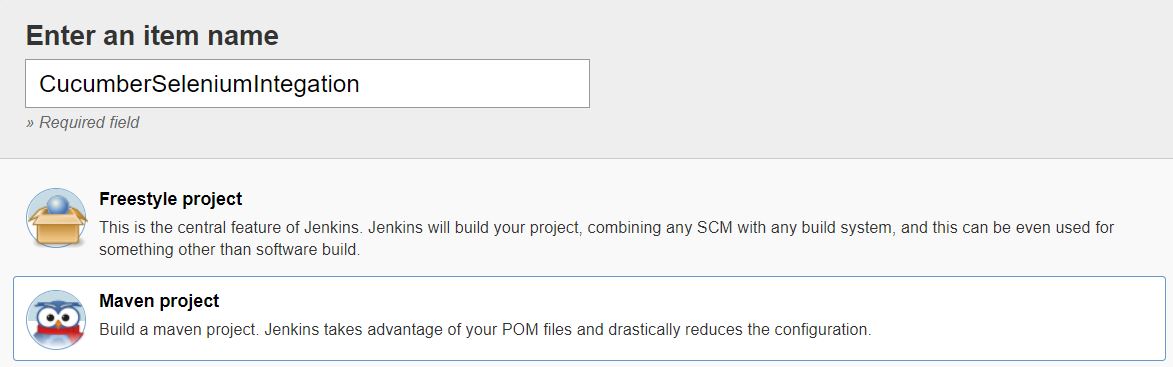
Step 3: Configuring Jenkins and Building a Job
In Jenkins, create a new Maven project:
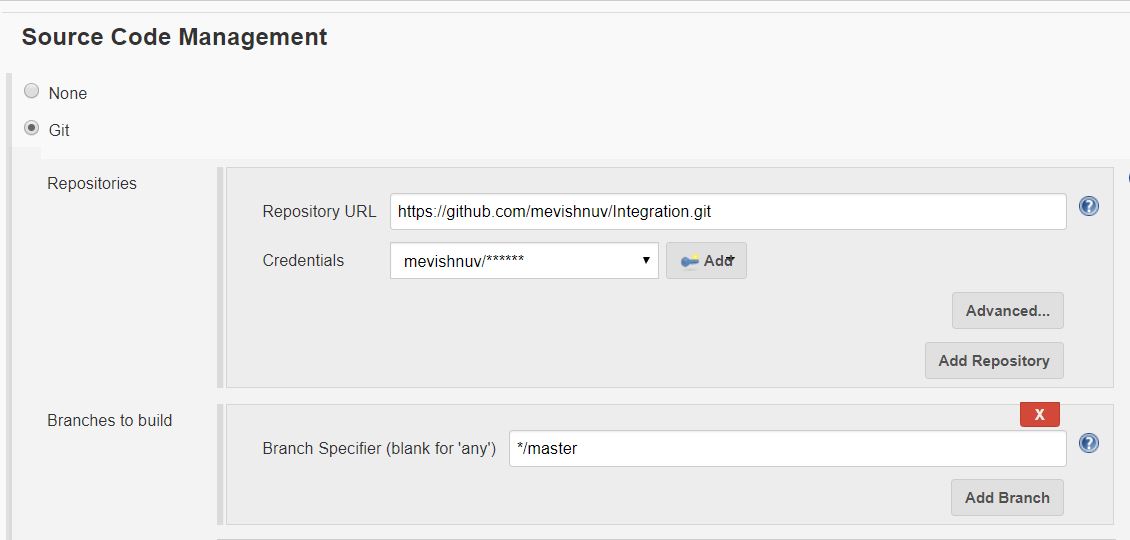
In the Source code management configuration, select GIT and provide the URL and credentials:
In the Build Step
Provide the POM.xml path and provide the goal as a clean install:

Click on Save and Build. You can see a build is created, and if you want to see Cucumber reports post-build, add the Cucumber reports plugin and verify the reports.
Opinions expressed by DZone contributors are their own.
Comments