Customizing Oracle EBS Applications
In this article, we will use RMA Label (developed using XML Publisher report) as an example to display embedded PDF in the browser window on a button click in EBS.
Join the DZone community and get the full member experience.
Join For FreeOracle EBS is the largest selling suite of applications across North America and it is well integrated with other corporate applications. Often times, there is a business requirement to Preview report outputs (in browser). In this article, we will use RMA Label (developed using XML Publisher report) as an example to display embedded PDF in the browser window on a button click in EBS.
High-level Steps for Implementation
- Designing a label in XML Publisher with a client-specific format.
- Upload the XML publisher template in Oracle Repository and register as a concurrent program.
- Create new pages using OA framework and JDeveloper to trigger XML Publisher label for preview and email.
- Add buttons on existing business functions (such as RMA Label Screen) using Personalization to call newly developed pages.
Pre-requisites
I’m using the following for my setup:
- Oracle EBS 12.2.8 release.
- Setup Oracle JDeveloper with OAF Extension (10.1.3.4) project and workspace.
- Putty and FileZilla FTP tool.
- Design Label using XML Publisher.
I won’t be going through the setup of these pre-requisites — setting up JDeveloper and designing labels is reasonably straightforward. Please get in touch in case you need any help regarding pre-requisites.
Designing Label and Register Concurrent Program
Labels are designed using XML Publisher report template and uploaded in XML Publisher Administrator repository as below:
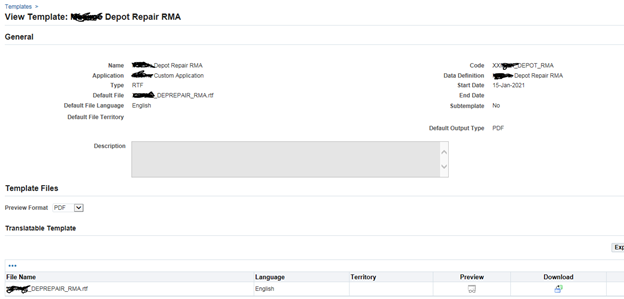
- Login to Oracle EBS and navigate to XML Publisher Administrator > Home > Templates. Create a new Template as below and upload the RTF template:
- Login to Application Developer and Create a new Concurrent Program as below:
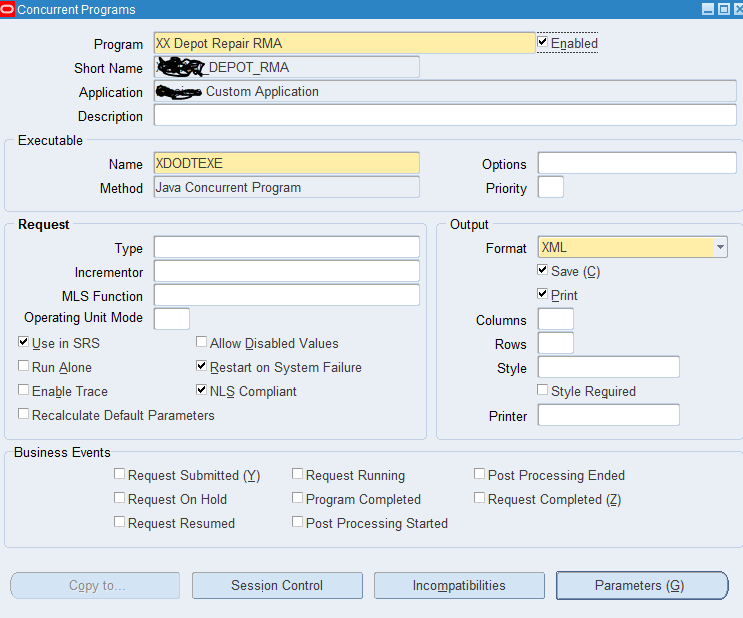
Please note that concurrent Program Executable is 'Java Concurrent Program.'
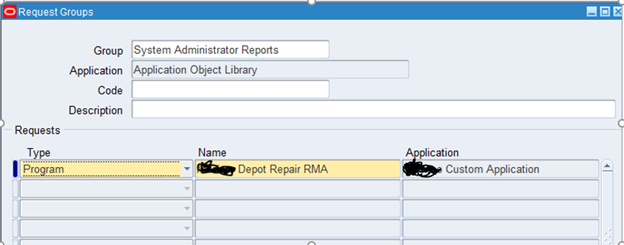
- Login to System Administrator > Responsibility > Request to assign the concurrent program (created in the previous step) to Application Developer Responsibility.
- Test Concurrent Program by submitting manually and Review the output. Make sure, your output is displayed in PDF format as desired.
Develop Oracle Application Framework Page to Preview the PDF Output
- Launch JDeveloper and create a new page by going to OA Components > Page:
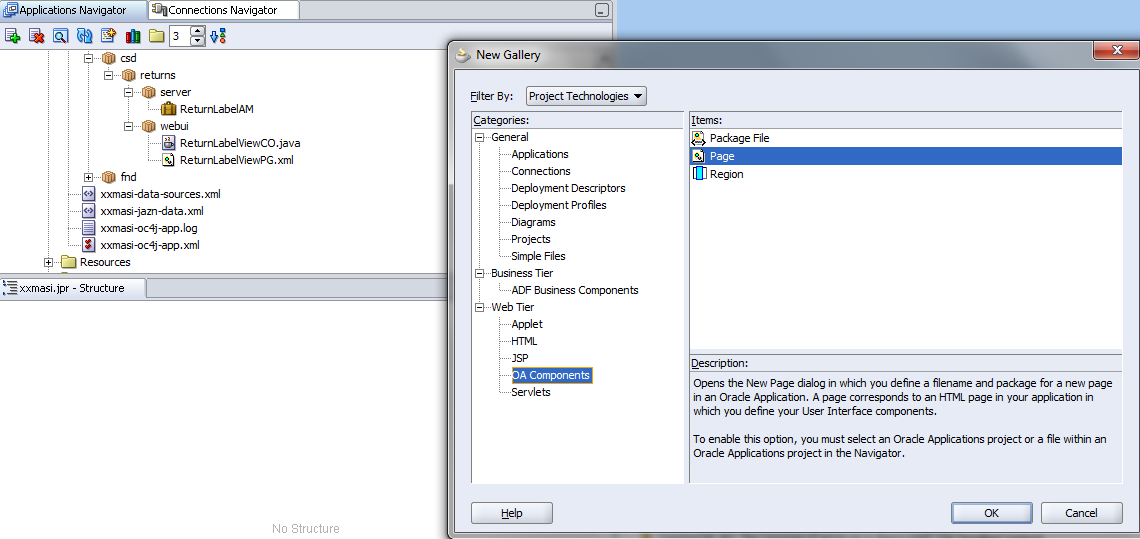
- Give a name (something like 'ReturnLabelViewPG') and package name (xx.oracle.apps.csd.returns.webui) and click OK.
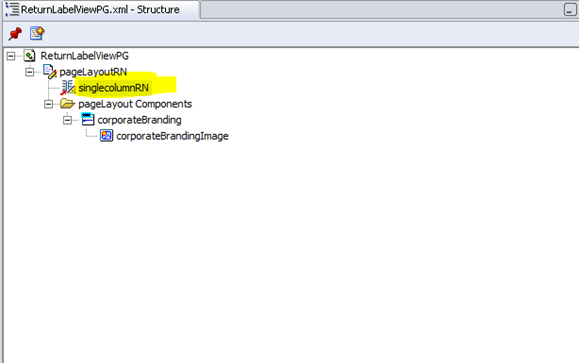
- Under the Page Layout Region, add a single column Layout Region as below.
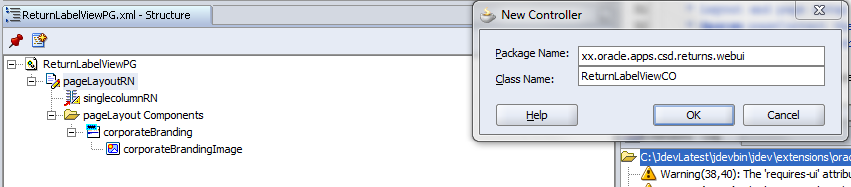
- Right-click 'PageLayoutRN' and set a new Controller as below.
- Package Name — xx.oracle.apps.csd.returns.webui
- Class Name — ReturnLabelViewCO
- Add a new method
printReportin your Controller as below, pasting the code as well:
public void printReport(OAPageContext pageContext, OAWebBean webBean , String orderId) {
OAApplicationModule oaAM = pageContext.getApplicationModule(webBean);
pageContext.putParameter("p_DataSource",DocumentHelper.DATA_SOURCE_TYPE_BLOB);
pageContext.putParameter("p_DataSourceCode","XX_DEPOT_RMA");// Data Definition Short Name
pageContext.putParameter("p_DataSourceAppsShortName","XX");// Data Definition Registered Application Short Name
pageContext.putParameter("p_TemplateCode","XX_DEPOT_RMA");//XML Report Template Short Code
pageContext.putParameter("p_TemplateAppsShortName","XX");//XML Report Template Application Short Name
pageContext.putParameter("p_Locale","English:United States");//XML Report Template Language and Territory
pageContext.putParameter("p_OutputType","PDF");//Desired XML Report Output
pageContext.putParameter("p_XDORegionHeight","200%");//Desired XML output frame size
Serializable[] oaParams = {orderId}; //Parameter passed to the report
BlobDomain result = (BlobDomain)oaAM.invokeMethod("submitReport",oaParams);
pageContext.putSessionValueDirect("XML_DATA_BLOB", result);
}
- Update the
processRequestmethod in Controller as below to callprintReportmethod coded in the previous step.
xxxxxxxxxx
public void processRequest(OAPageContext pageContext, OAWebBean webBean)
{
super.processRequest(pageContext, webBean);
String strOrderId = pageContext.getParameter("OrderId");//Get this value from calling Page
printReport(pageContext, webBean, strOrderId);
}

- Create a new Application Module by doing a right-click on the project, and click new Application Module.
- Package name — xx.oracle.apps.csd.returns.server
- Name — ReturnLabelAM
- Once the Application Module is created, add a new method
submitReportas below. I have pasted the contents as well. This method is called from Controller (previous step) to trigger the label report by passing orderID as the input parameter.
xxxxxxxxxx
public BlobDomain submitReport (String strOrderId)
{
BlobDomain blobDomain = new BlobDomain();
try
{
DataTemplate datatemplate = new DataTemplate(((OADBTransactionImpl)getOADBTransaction()).getAppsContext(), "XX", "XX_DEPORT_RMA");
Hashtable parameters = new Hashtable();
parameters.put("P_ORDER_ID",strOrderId);
datatemplate.setParameters(parameters);
datatemplate.setOutput(blobDomain.getBinaryOutputStream());
datatemplate.processData();
}
catch(SQLException e)
{
throw new OAException("SQL Error=" + e.getMessage(),OAException.ERROR);
}
catch (OAException e)
{
throw new OAException("XDOException" + e.getMessage(),OAException.ERROR);
}
catch(Exception e)
{
throw new OAException("Exception" + e.getMessage(),OAException.ERROR);
}
return blobDomain;
}
}
Deployment
- The next steps will be to deploy your locally developed Java components/ OAF page to the Application server.
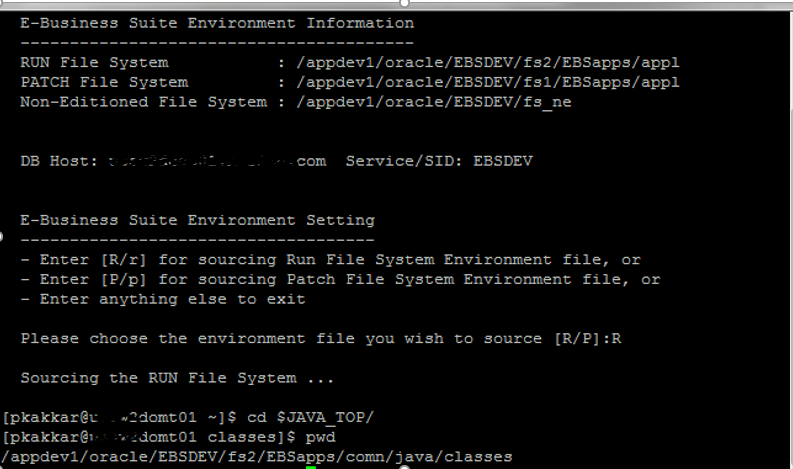
- Login to the Unix box on the server using putty and go to
$JAVA_TOP.
- Create new Directories (same as your package structure in JDeveloper):
mkdir -p xx/oracle/apps/csd/returns/server #directory to hold server componentsmkdir -p xx/oracle/apps/csd/returns/webui #directory to hold webui componentschmod 777 xx/oracle/apps/csd/returns/server #set permission to read/write/execchmod 777 xx/oracle/apps/csd/returns/webui #set permission to read/write/exec
- Login to FileZilla and move the files to the locations above.
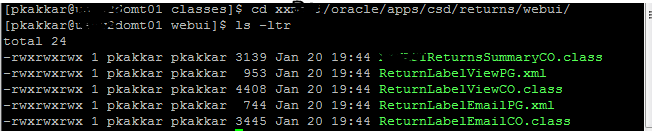
Review the files as below for
xx/oracle/apps/csd/returns/webui.![]()
- Login to putty and go to $JAVA_TOP, run the below command to generate the customall.jar file. Take a backup of the existing customall.jar file present on this location:
- adgcnjar
- it prompts for you to enter APPS (database user name) and password. Once entered, it will generate a customall.jar file on the server.
Import the OAF page into Oracle Repository using the below command from putty, while connecting to the Middle tier:
JAVA_TOP/xx/oracle/apps/csd/returns/webui/ReturnLabelViewPG.xml -username apps-password <apps_password> -dbconnection"(DESCRIPTION=(ADDRESS=(PROTOCOL=tcp)(HOST= <host_name> )(PORT=<host_port>))(CONNECT_DATA=(SID=<host_SID>)))" -rootdir $JAVA_TOP- Bounce application services on the middle tier of EBS, so Oracle can pick customall.jar file on run time execution.
Personalize Oracle Application Screen to Add Preview Button
Add a button to the screen in EBS where you want to see the preview output. For demonstration purposes, the Depot Repair screen has been used. Use the Personalization feature to add the Preview button and set the properties as below. Note the Destination URL, which calls the custom page developed.
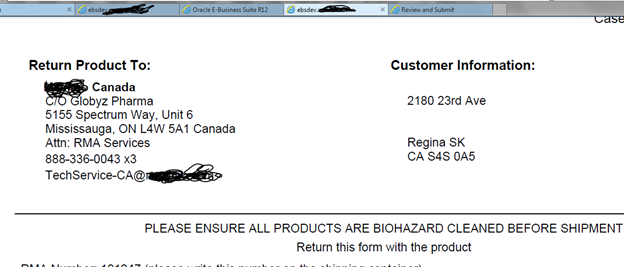
Test RMA Preview Changes
Click the RMA Preview button. Clicking this button calls the XML publisher template and embeds the output in the frame as below.
Conclusion
In this article, we learned about extending Oracle Applications to add Preview functionality using Oracle standards. You can use the same approach and extend any Oracle provided screen to add more functionality. I hope you find this article useful for your business requirements. In the next article, we will see how we can leverage the same label and enable it for emails.
Opinions expressed by DZone contributors are their own.
Comments