Approach Data-driven framework in Software Testing
In this automated testing tutorial, learn how to execute data-driven tests with the Katalon Studio test automation framework.
Join the DZone community and get the full member experience.
Join For FreeWhat Is Data-Driven Testing?
Data-driven testing (DDT) is a term used in the testing of computer software to describe testing done using a table of conditions directly as test inputs and verifiable outputs as well as the process where test environment settings and control are not hard-coded.
Data Driven Testing can be best understood by the following diagram:
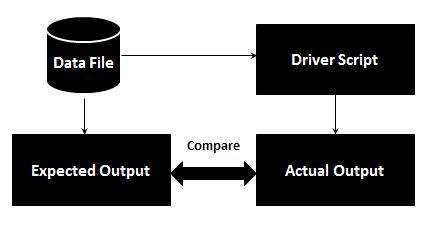
Data-Driven Testing Approach With Katalon Studio
Katalon Studio supports data-driven testing which allows users to define data sets and execute test scripts that use these data sets.
This tutorial will provide you a simple example on how to create an automation test case and execute it multiple times using different sets of data.
Given a sample test case whose scenario is as below:
- Open the login page of the Katalon demo AUT website (http://demoaut.katalon.com/profile.php#login)
- Login using three different accounts
- Validate if the login is success
- Close the browser
You can use the following steps to automate the above test scenario:
1. Create a new test case and proceed to generate the steps to:
- Access http://demoaut.katalon.com/profile.php#login
- Enter username/password
- Click Login
- Validate if the Appointment page is displayed
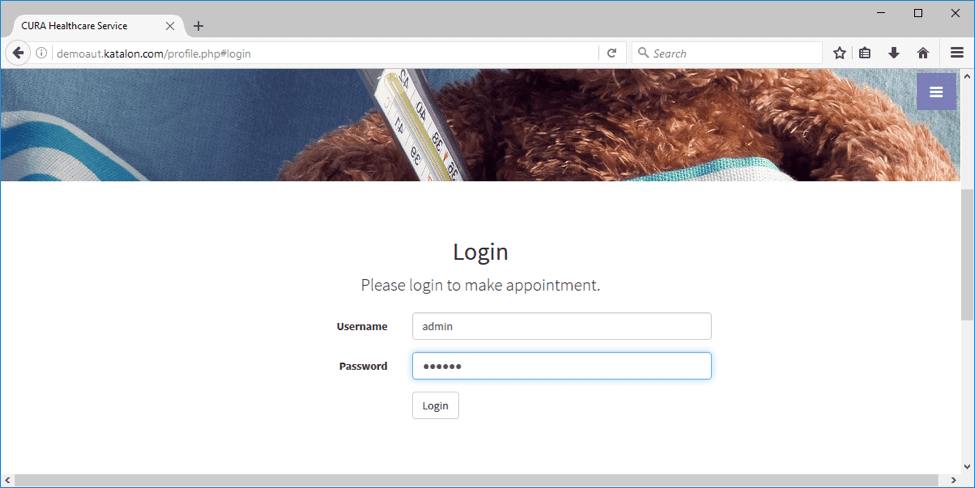
You can utilize the Web Record function to quickly generate test steps. Refer to this guide for more details on the Record & Playback feature of Katalon Studio.
2. The generated test case should be similar to the following:
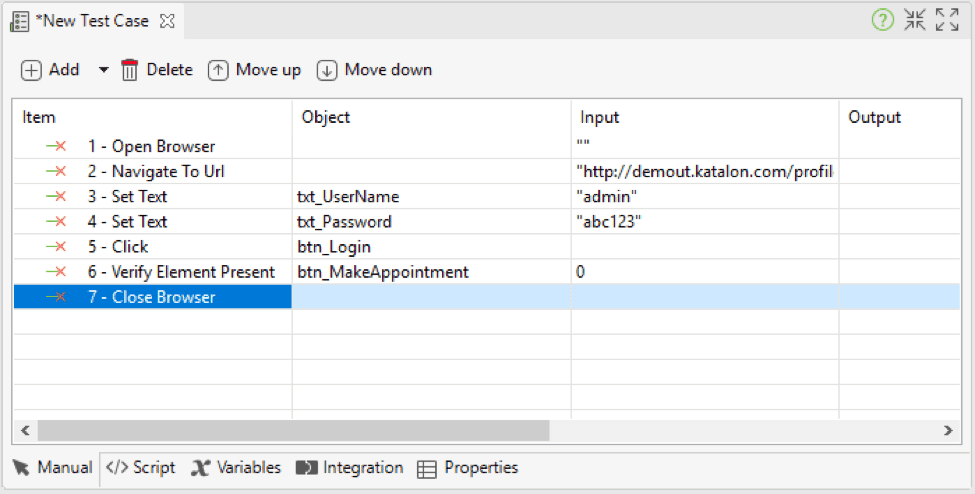
You can see that the input values for username and password are hard-coded as what you typed during recording (in this case it’s admin/abc123). In order to run this script multiple times using different accounts, you need to parameterize these values. Please continue to the next step.
3. Switch to the Variables tab of the test case and create two variables named ‘demo_usn’ and ‘demo_pwd.’
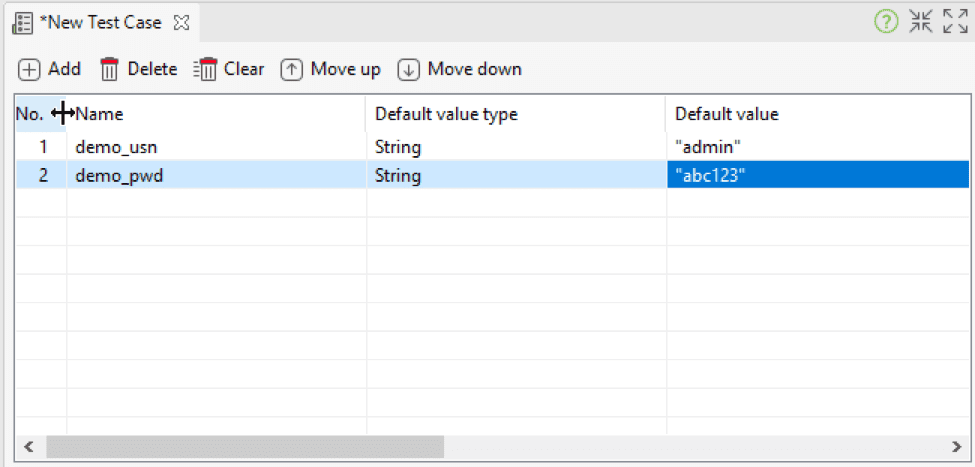
4. Switch back to the Manual view of the test case and set those two variables as inputs for the username/password fields.
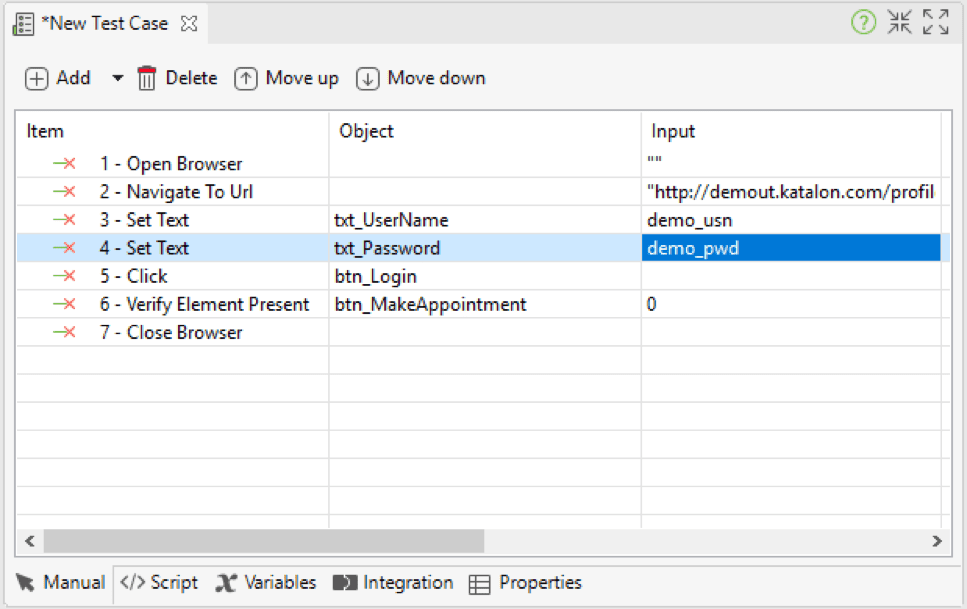
Now that you have done the necessary steps to parameterize the required fields for login, proceed to the next steps to prepare data for execution.
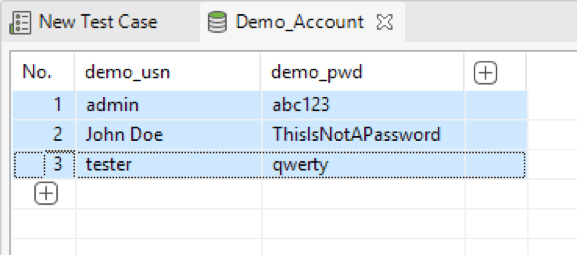
5. Create a data file in Katalon to have a dataset containing three login accounts. You can generate data file from sources such as Excel, CSV, Database etc…. Refer to Manage Test Data for more details on how to create test data from different sources. The following example shows the internal data file with three login accounts for http://demoaut.katalon.com (note that only ‘John Doe’ is valid):
Data-Driven Tests Execution
From here you can apply Data-driven using two methods, either using Test Suites or Loop statement in Test Scripts.
A. Execution From test Suites
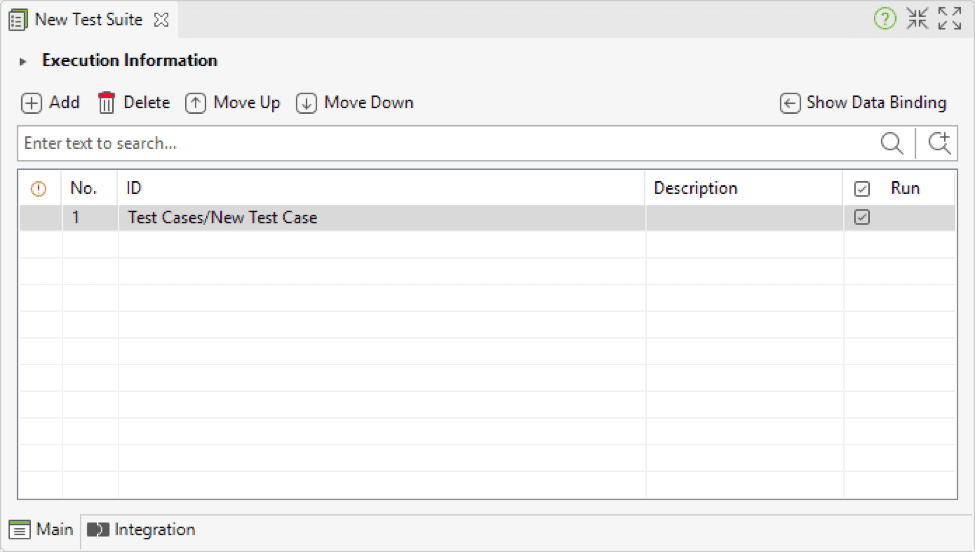
6. Next, create a test suite to execute the test case using the defined dataset.
7. Expand the Data Binding section, add the created data file to the Test Data section and proceed to bind the two variables ‘demo_usr’ and ‘demo_pwd’ to the respective columns of the data file. You may refer to Data for test execution for more details about variable binding.
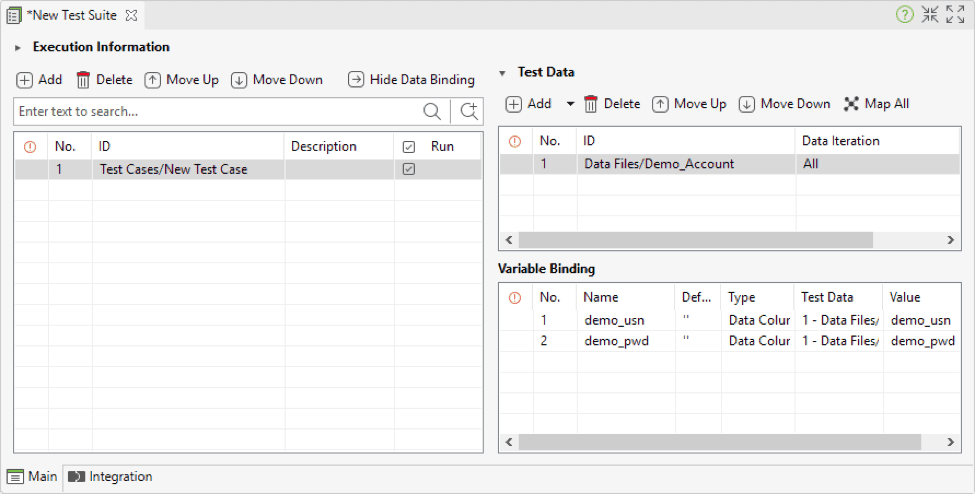
8. Finally, you can run the test suite, and your login test case will be executed three times using the accounts defined in the test data file.
B. Execute From a Test Case
6. We can also implement Data-driven tests in a test case. Just create a new test case and switch to Script Mode. To iterate tests with multiple sets of data, we need to use FOR statement and call the test data objects. Copy and paste the below code:
import com.kms.katalon.core.testdata.InternalData

InternalData data = findTestData("Demo_Account")

for (def index : (0..data.getRowNumbers() - 1)) {
    WebUI.openBrowser('')

    WebUI.navigateToUrl('http://demoaut.katalon.com/profile.php')

    WebUI.setText(findTestObject('Page_Login/txt_UserName'), data.internallyGetValue("demo_usn", index))

    WebUI.setText(findTestObject('Page_Login/txt_Password'), data.internallyGetValue("demo_pwd", index))

    WebUI.click(findTestObject('Page_Login/btn_Login'))

    WebUI.verifyElementPresent(findTestObject('Page_CuraHomepage/btn_MakeAppointment'), 0)

    WebUI.closeBrowser()
}
Where:
- Import InternalData class from Katalon built-in library and define data variable to locate test data table
- For statement to loop through all row of test data table which indicates how many times the test case will run
- To get a row value in test data table, use getRowNumbers() method syntax. For example:
Username field: data.internallyGetValue(“demo_usn”, index)
Password field: data.internallyGetValue(“demo_pwd”, index)\
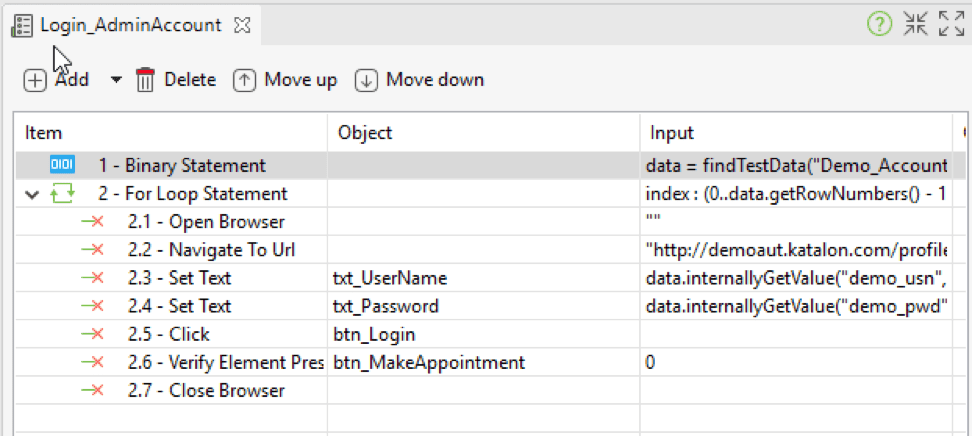
7. When you are done in Scripts view, switch back to Manual view, the test case will look like the following screenshot:
8. Finally, you can run the test case, and your login test case will be executed three times using the accounts defined in the test data file.
Congratulations! You now understand how to approach Data-driven testing with Katalon Studio. To kickstart your web automation testing project, please refer to A sample web automation test project, a step by step tutorial that helps you start working on your testing project easily.
For more tutorials about automation testing tools, please visit Katalon’s Tutorials.
Opinions expressed by DZone contributors are their own.

Comments