DZone
Thanks for visiting DZone today,
Edit Profile
  • Manage Email Subscriptions
  • How to Post to DZone
  • Article Submission Guidelines
Sign Out View Profile
  • Post an Article
  • Manage My Drafts
Over 2 million developers have joined DZone.
Log In / Join
Refcards Trend Reports
Events Video Library
Refcards
Trend Reports

Events

View Events Video Library

Related

  • Auto Logging in Class and Method Level Using Custom Annotations in Spring Boot App
  • Spring Boot Pet Clinic App: A Performance Study
  • Aggregating REST APIs Calls Using Apache Camel
  • Improving Backend Performance Part 1/3: Lazy Loading in Vaadin Apps

Trending

  • Navigating the Complexities of AI-Driven Integration in Multi-Cloud Environments: A Veteran’s Insights
  • Kafka and Spark Structured Streaming in Enterprise: The Patterns That Hold Up Under Pressure
  • Building a Skill-Based Agentic Reviewer with Claude Code: A Practical Guide Using Skills.MD, MCP Servers, Tools, and Tasks
  • LLM-Powered Deep Parsing for Industrial Inventory Search
  1. DZone
  2. Coding
  3. Frameworks
  4. Externalize Apache Camel Route Configurations for Spring Boot Apps

Externalize Apache Camel Route Configurations for Spring Boot Apps

Time to get your Camel where it needs to go.

By 
Vignesh Prabhu user avatar
Vignesh Prabhu
·
Jan. 31, 21 · Tutorial
Likes (2)
Comment
Save
Tweet
Share
7.0K Views

Join the DZone community and get the full member experience.

Join For Free

In this article, we will discuss how we can externalize Apache Camel route configurations in a Spring Boot application using Spring profiles.

Below is a sample code of a Camel Route, which we will externalize.

Java


x
16


1
package com.demo.camelspringboot.route;
2

          
3
import org.apache.camel.builder.RouteBuilder;
4
import org.springframework.stereotype.Component;
5

          
6
@Component
7
public class CamelRoute extends RouteBuilder {
8
    @Override
9
    public void configure() throws Exception {
10
        from("timer:test?period=5s")
11
                .log("Timer has been invoked")
12
                .pollEnrich("file:inputdirectory/input?delete=true")
13
                .to("file:outputdirectory/output");
14
    }
15
}
16


Create application-dev.yml, application-tst.yml, application-prod.yml, and move the route configurations specific to the environments (dev, tst, prod) to the respective YML files.
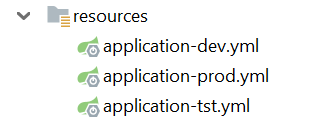
application-dev.yml

YAML


xxxxxxxxxx
1


1
server:
2
  port: 8081
3

          
4
routeStart: timer:dev?period=5s
5
routeFrom: file:dev/input?delete=true
6
routeTo: file:dev/output


application-tst.yml 

YAML


xxxxxxxxxx
1


1
server:
2
  port: 8081
3

          
4
routeStart: timer:test?period=5s
5
routeFrom: file:tst/input?delete=true
6
routeTo: file:tst/output


application-prod.yml

YAML


xxxxxxxxxx
1


1
server:
2
  port: 8081
3

          
4
routeStart: timer:prod?period=5s
5
routeFrom: file:prd/input?delete=true
6
routeTo: file:prd/output


Reference the values from the YML file in the code as below:

Java


x


1
package com.demo.camelspringboot.route;
2

          
3
import org.apache.camel.builder.RouteBuilder;
4
import org.springframework.stereotype.Component;
5

          
6
@Component
7
public class CamelRoute extends RouteBuilder {
8
    @Override
9
    public void configure() throws Exception {
10
        from("{{routeStart}}")                  //Referenced from yml
11
                .log("Timer has been invoked")
12
                .pollEnrich("{{routeFrom}}")    //Referenced from yml
13
                .to("{{routeTo}}");             //Referenced from yml
14
    }    
15
}
16


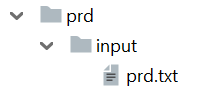
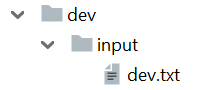
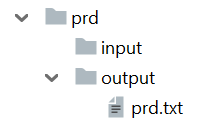
Create input directories specific to the environment as shown:
Edit the Run configuration of the Spring Boot application and provide the Active Profile as dev and start the application.
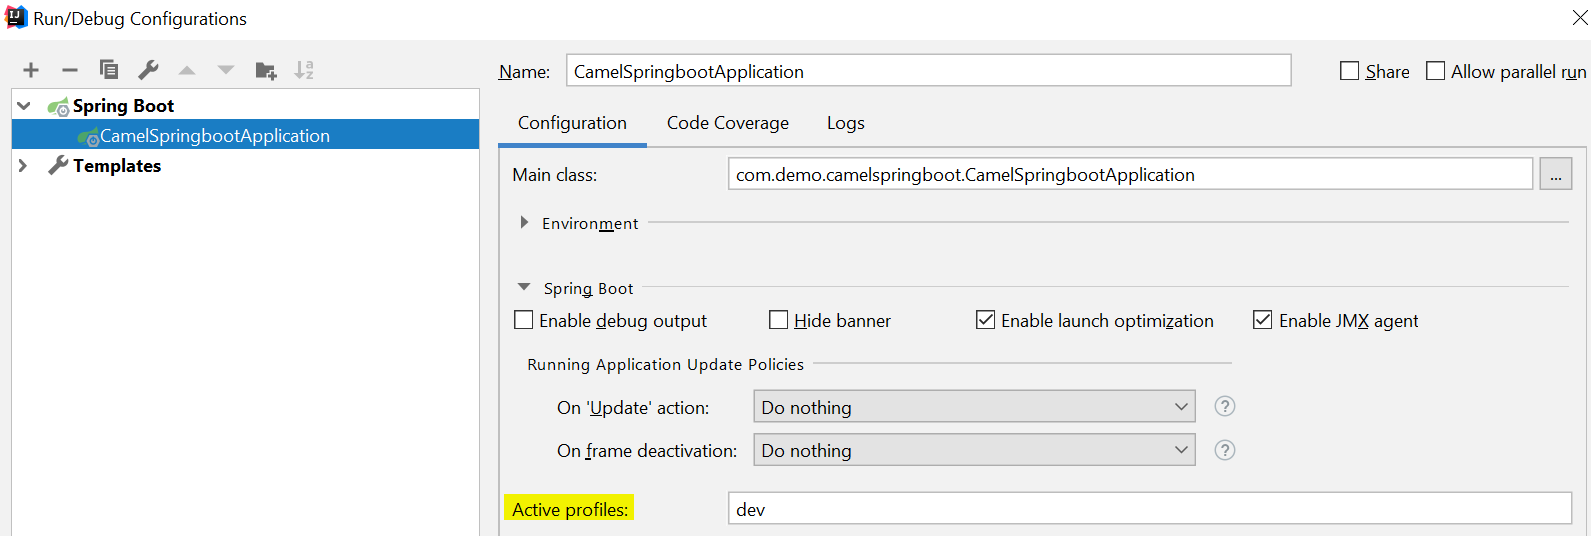

Notice that the file is deleted from the input directory of the dev folder and copied to the output directory as per the configuration.
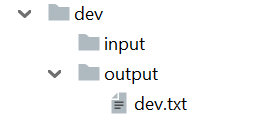
Similarly, modify the Run configuration and set the Active profile as tst and prod. Notice that the file is deleted from the input directory of the respective environment folder and copied to the output directory as per the configuration and active profile set.

Spring Framework Spring Boot Apache Camel app

Opinions expressed by DZone contributors are their own.

Related

  • Auto Logging in Class and Method Level Using Custom Annotations in Spring Boot App
  • Spring Boot Pet Clinic App: A Performance Study
  • Aggregating REST APIs Calls Using Apache Camel
  • Improving Backend Performance Part 1/3: Lazy Loading in Vaadin Apps

Partner Resources

×

Comments

The likes didn't load as expected. Please refresh the page and try again.

  • RSS
  • X
  • Facebook

ABOUT US

  • About DZone
  • Support and feedback
  • Community research

ADVERTISE

  • Advertise with DZone

CONTRIBUTE ON DZONE

  • Article Submission Guidelines
  • Become a Contributor
  • Core Program
  • Visit the Writers' Zone

LEGAL

  • Terms of Service
  • Privacy Policy

CONTACT US

  • 3343 Perimeter Hill Drive
  • Suite 215
  • Nashville, TN 37211
  • [email protected]

Let's be friends:

  • RSS
  • X
  • Facebook