Getting Started With RingCentral APIs
See how to get started with RingCentral APIs.
Join the DZone community and get the full member experience.
Join For FreeRing Central, as we know, offers reliable VoIP calling, web meetings, fax, and more, empowering our multi-location business with a secure cloud phone system and other cloud-based communication systems.
I started exploring the different APIs that Ring Central provides. What I found are amazing APIs offered by Ring Central to send SMSs, calls, faxes, and many more services. What was more interesting is that we can control all of these via APIs.
Creating an application was also very easy and can be created and implemented in minutes, which I can show in the below steps:
Step 1: We need to get into a Ring Central developer account to start with: https://developers.ringcentral.com

Step 2: Once there, we need to log into the developers account with our email id and password. For a new user, we need to create a new developer account.
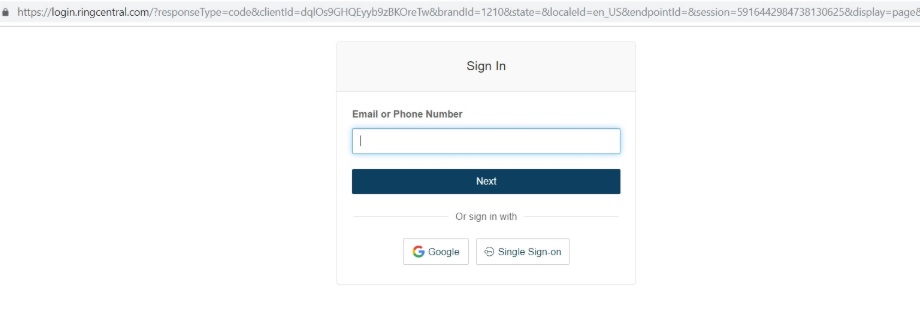
Step 3: We can now see the dashboard of the developers platform. All we need to do now is create a new application by hitting the CreateApp button in the top right:

Now, we can start creating our new application. We need to fill in the application name and description, as shown below:
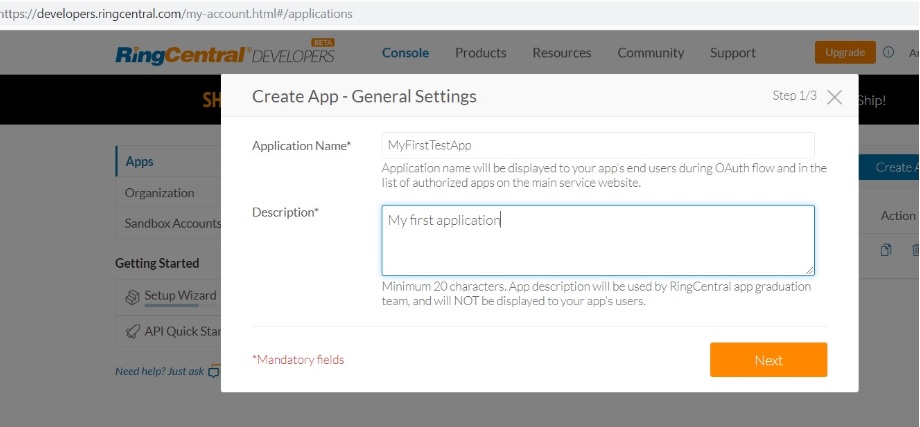
You can choose any name and description.
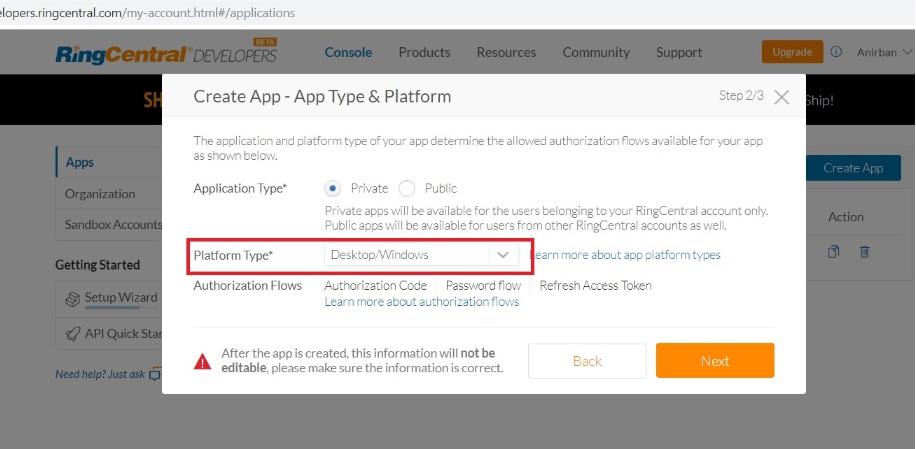
Step 4: In our application configuration, we need to select the platform type. Since it was my first application and I didn't have a programming platform installed on my system, I chose Windows as my platform, as shown below:
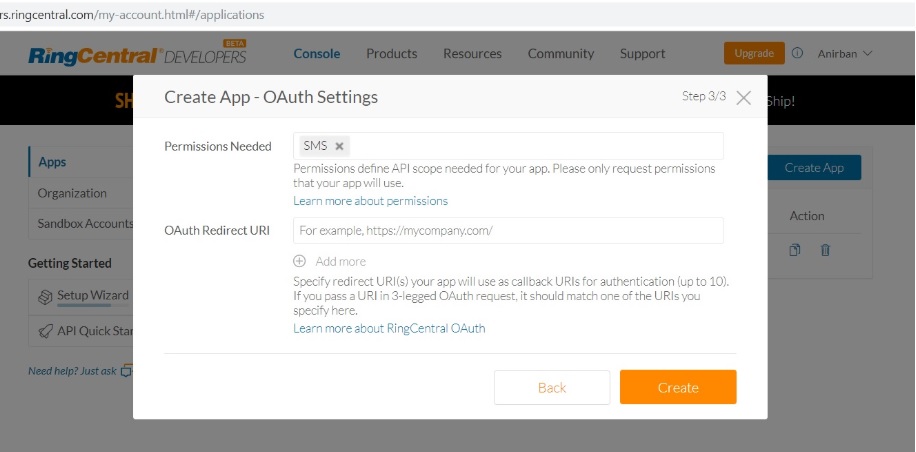
Step 5: The next step is simple. We need to choose the type of application I am creating. For now, I selected SMS,as I am going to create an application that will be capable of sending an SMSfeature using the APIs:
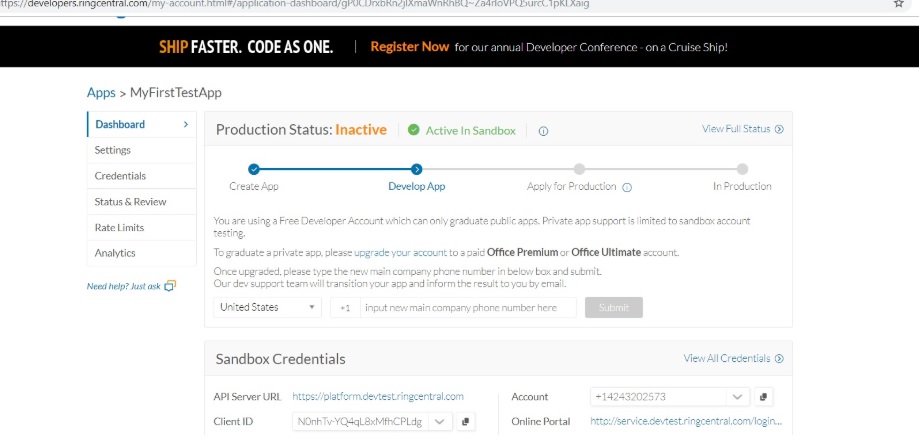
Once the creation of the application is done, we can see it in the dashboard of the developers platform, as below:
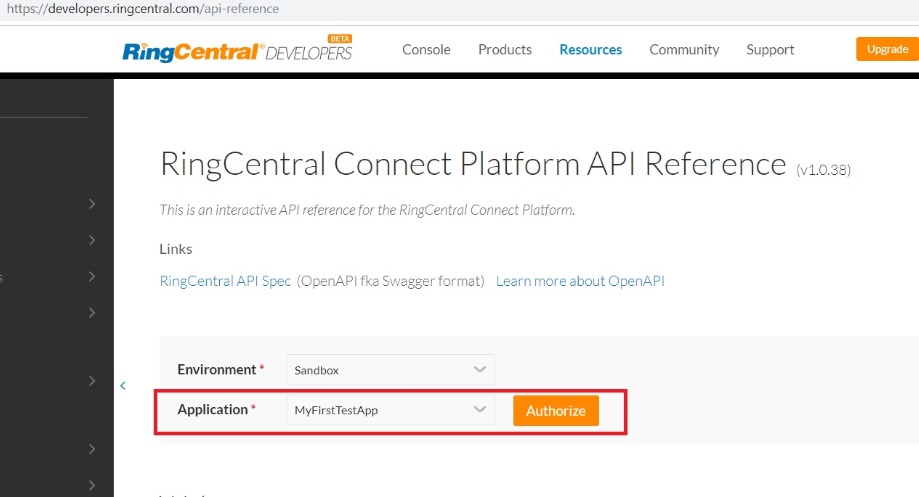
We will now move to https://developers.ringcentral.com/api-reference to test our application with Ring Central APIs, where we need to authorize our created application:
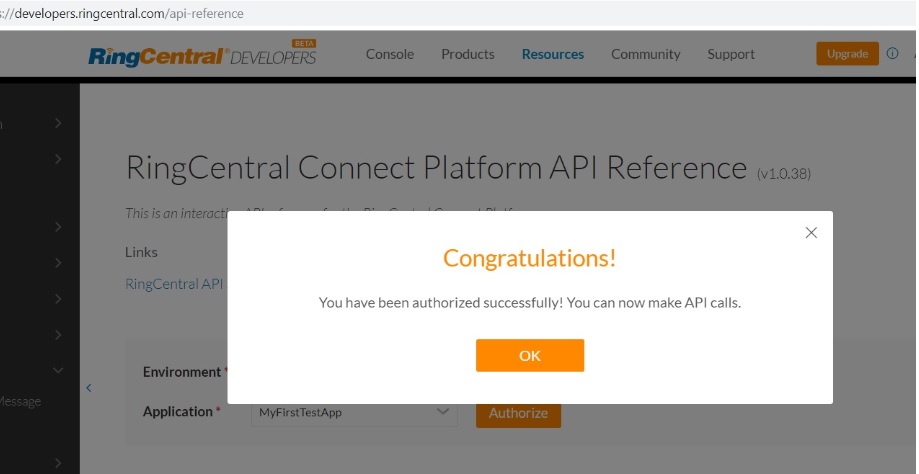
Once done, we will be greeted with the following message:
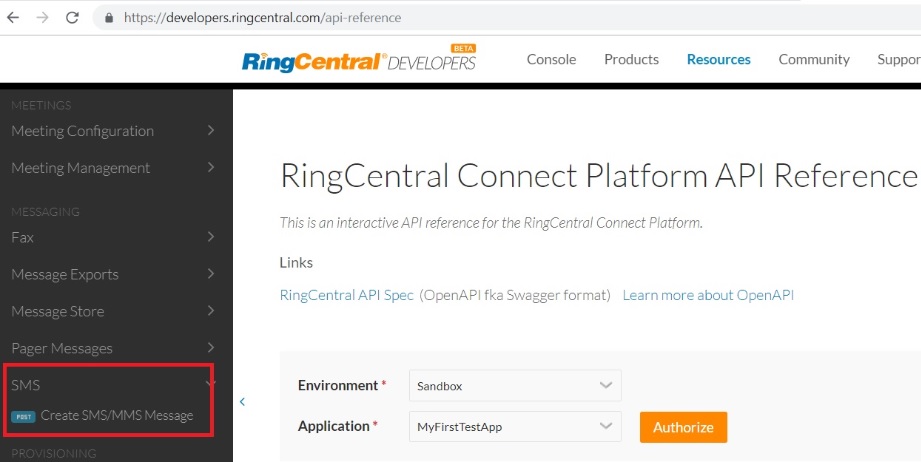
Step 7: Now for the most important step. We need to select the feature the application was created for. The first application I created is to send SMSs via the Ring Central API. So I need to select the SMS feature, as shown below:
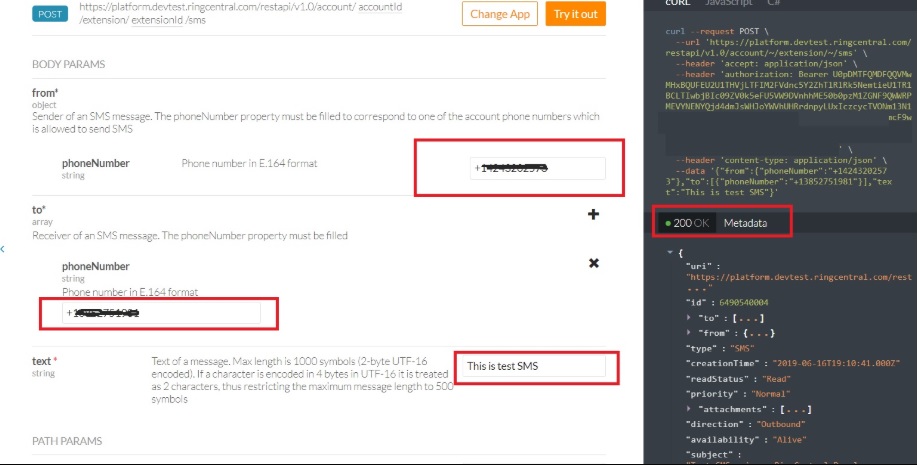
Step 8: That's it! We can now test our application via the Ring Central API by providing all the required inputs. In the below image, I am testing the API feature of sending an SMS by providing the number, text, etc. I have blurred the input for security:
We can see how easy it was to create a Ring Central application and test it via the Ring Central API. As there are APIs available for different features like SMS, voice, fax, etc., Ring Central made it easy for users to create an application in minutes and use those features via APIs.
There is, indeed, a lot of scope with these Ring Central APIs, allowing us to explore more of the communication system and data transmission facilities via APIs.
Published at DZone with permission of Anirban Sen Chowdhary, DZone MVB. See the original article here.
Opinions expressed by DZone contributors are their own.

Comments