How to Configure Selenium in Eclipse
This article discusses how to configure Selenium in Eclipse to use Selenium for Java.
Join the DZone community and get the full member experience.
Join For FreeManaging user experience is pivotal for software development. Test automation enables user preferences and convenience to remain at the center of the development process while saving time and effort. That is why comprehensive automation testing has become necessary to retain customers and meet their expectations. With significantly shorter time frames for development, Selenium Testing, in particular, has become an integral part of the development to facilitate automated testing of web applications.
Selenium is the most popular automated tool in existence today. 59.5% of people consider Selenium for Cross Browser Testing because of the robustness and flexibility it offers by supporting multiple languages like Java, C#, Python, Perl, Ruby, etc. However, a majority (67%) of the Selenium users prefer Java as their language for Selenium Testing.
This article discusses how to configure Selenium in Eclipse to use Selenium for Java.
Prerequisites for Configuring Selenium in Eclipse
Install Java
Download Java SE Development Kit 16.0.2 according to the Windows, Linux, or macOS platform being used.
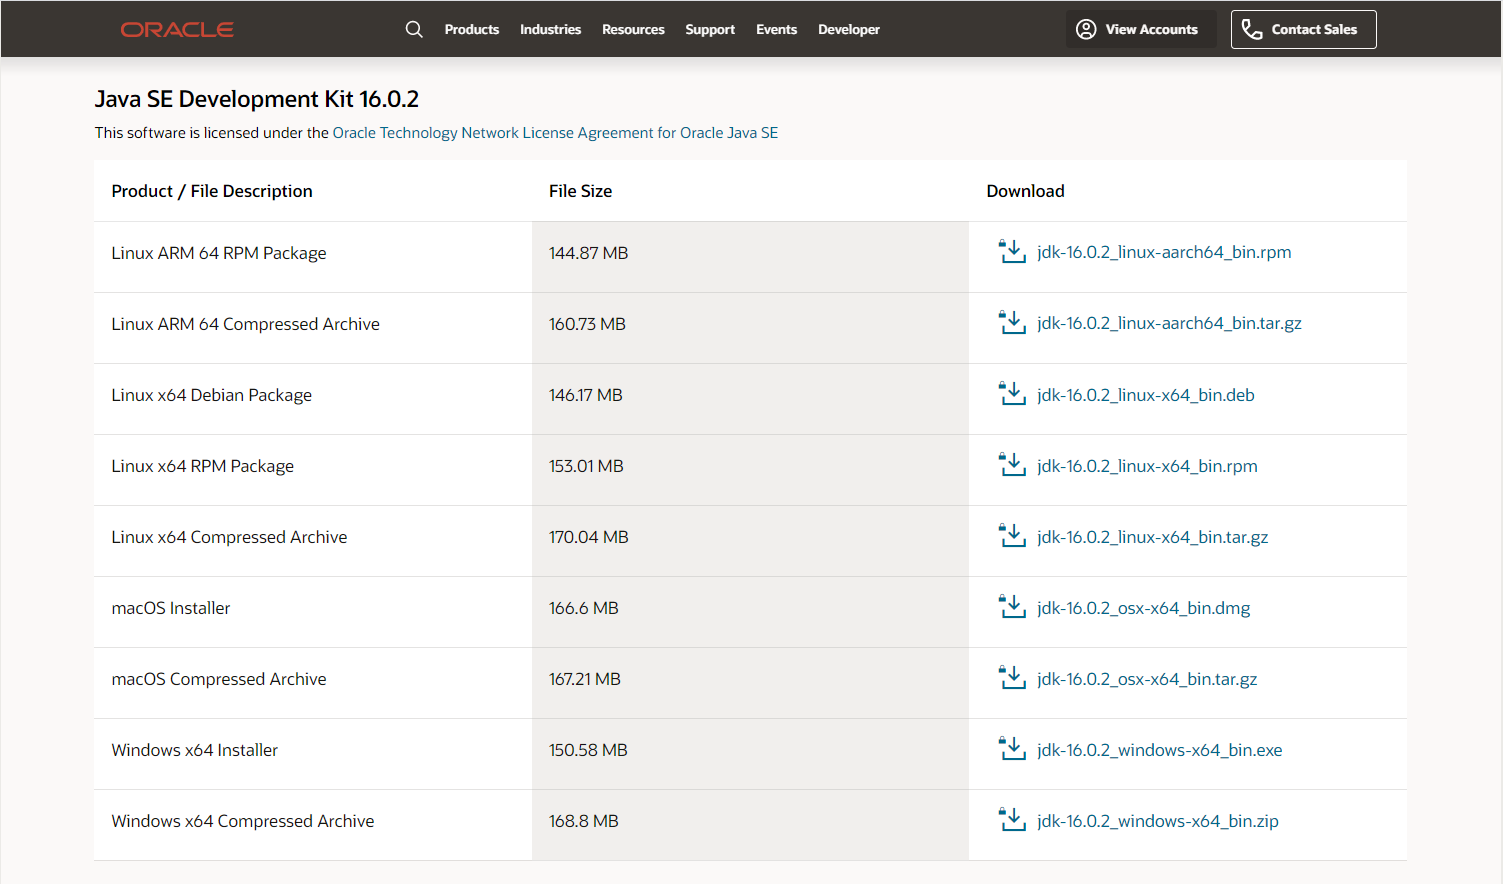
Run the JDK Installer by double-clicking on the file name in the download location and following the instructions on the instruction wizard. Alternatively, silently install JDK by entering the following command:
jdk.exe /s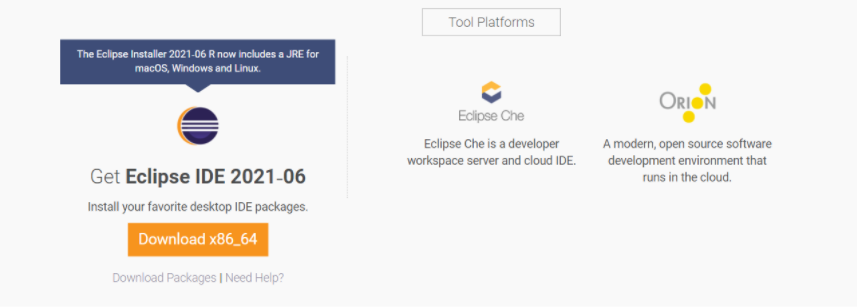
Download and Install Selenium to be set up in Eclipse.
Install Browser Driver
For cross-browser testing, download the relevant Browser Driver – ChromeDriver (for Chrome), GeckoDriver (for Firefox), SafariDriver (for Safari), and InternetExplorerDriver and MSEdgeDriver (IE and Edge respectively). Place these browser driver files in a directory that is part of the environment PATH. This will allow a command-line call to the programs to execute them irrespective of the working directory.
Install Java Language Bindings
How to Configure Selenium in Eclipse
Here are the steps to configure Selenium Webdriver with Eclipse:
Step 1: Launch Eclipse
To launch Eclipse double click on the eclipse.exe file in the download location.
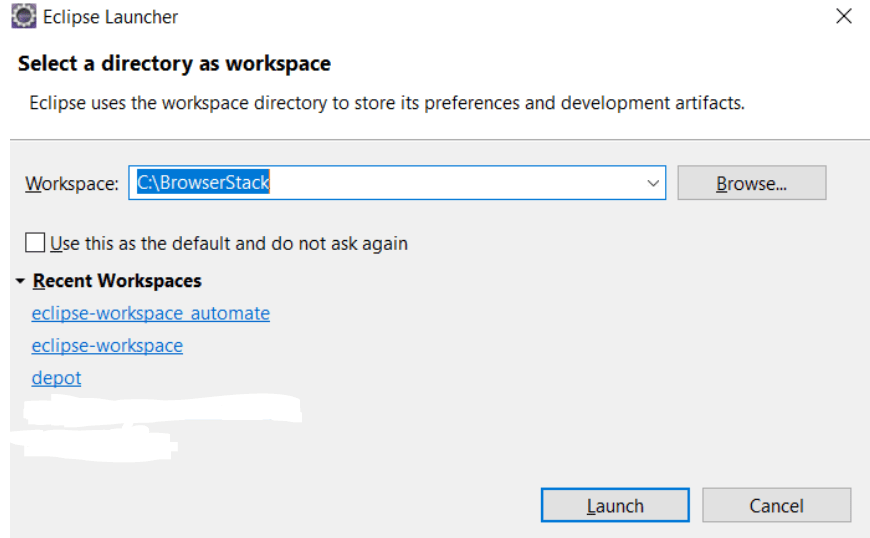
Step 2: Create Workspace in Eclipse
This workspace named “C:\BrowserStack” is like any other folder, which will store all the test scripts. Launch the BrowserStack workspace.
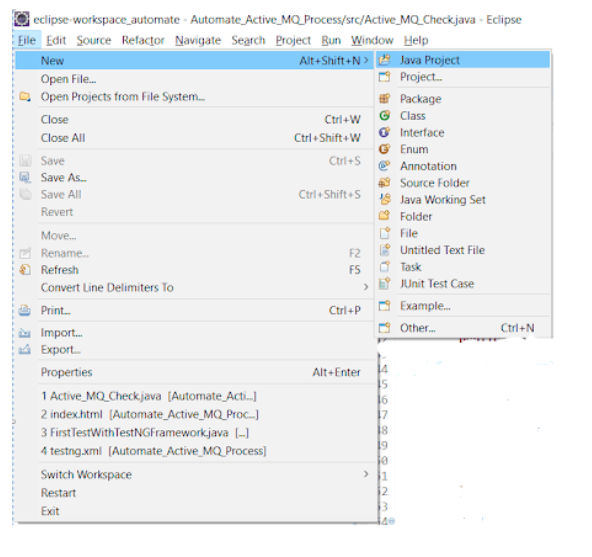
Step 3: Create New Java Project in the BrowserStack Workspace
Create a new Java Project by clicking on File > New > Java Project and name it.
Step 4: Create Package and Class Under the Java Project
By clicking on the src folder (which is the source folder), create a new package and name it (BrowserStack). Then right-click on the package name and create a class.

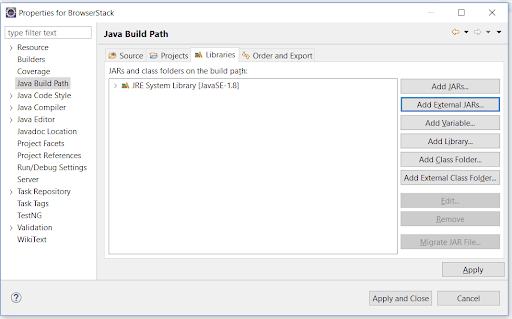
Step 5: Add Selenium JARs to the Java Project in Eclipse
To add the Selenium Jars to the BrowserStack Java right click on the BrowserStack Project folder and select the Properties option. In the properties window, click on the Java Build Path and Add External JARs. Browse and add the downloaded Selenium JARs i.e. Client Combined JAR and all the JARs under the Libs folder, then click Apply and Close.
This configures Selenium with Eclipse, making it ready to execute the first Selenium test script in Java.
In a Nutshell
Automation testing using Selenium with Java has simplified software development. Being an open-source tool, it provides an opportunity to speed up the time of execution and remove errors for a better user experience.
Java is quite popular among the developers, given the extensive support being available, making it a preferred choice as a Selenium Client Language Binding. Selenium with Java has proved helpful in optimizing regression testing and cross-browser testing. With the support of continuous integration tools like Jenkins, Selenium with Java can be used in continuous delivery models.
However, to make testing more efficient and get accurate results every time, all Selenium tests must be run on real browsers and devices for accurate results as a best practice.
Published at DZone with permission of Garima Tiwari. See the original article here.
Opinions expressed by DZone contributors are their own.
Comments