

How To Create a Crud App in OutSystems — A Low Code Development Platform
Using the step-by-step instructions outlined in this article, the reader will learn how to create a CRUD application in OutSystems.
Join the DZone community and get the full member experience.
Join For FreeOutSystems is a low-code development platform that allows you to build web and mobile applications rapidly. In this example, we'll create a simple employee management CRUD system. It took me around eight hours to get started with the platform and build my first CRUD app.
Let's get started!
Register Yourself
- Launch
- Create a new login.
- Download OutSystems Service Studio.
- You will be given a playground as TrialPortal for development.
Create a New Application
- Launch OutSystems Service Studio.
- Create a new Reactive Web Application.
- Provide a name for your application, e.g., "EmployeeManagementSystem."
- Choose a theme and click "Create."
- Click on "Create Module"
Create Entities
- In the "Logic" tab, go to the "Data" section.
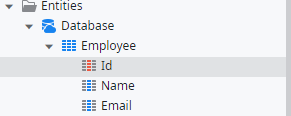
- Right-click on "Entities" and create an "Employee" table
- The fields I have used are ID (Auto increment), Name, and Email
Create Server Actions
Create a Server Action for Creating an Employee
- Right-click on "Server Actions" and choose "Add Server Action."
- Name it "AddEmployee" and input parameters "Name" and "Email"
- Use the SQL widget to add an Employee instance with the SQL:
INSERT into {Employee} VALUES (@Name, @Email)
Create a Server Action for Updating an Employee
- Right-click on "Server Actions" and choose "Add Server Action."
- Name it "EditEmployee" and input parameters "ID," "Name," "Email"
- Use the SQL widget to edit an Employee instance with the SQL:
UPDATE {Employee} set Name = @Name, Email = @Email where Id = @Id
Create a Server Action for Deleting an Employee
- Right-click on "Server Actions" and choose "Add Server Action."
- Name it "DeleteEmployee" and input parameters "ID" only
- Use the SQL widget to delete an Employee instance with the SQL:
DELETE from {Employee} where @Id = @Id
Design the User Interface
The UI we are trying to build will look like below:
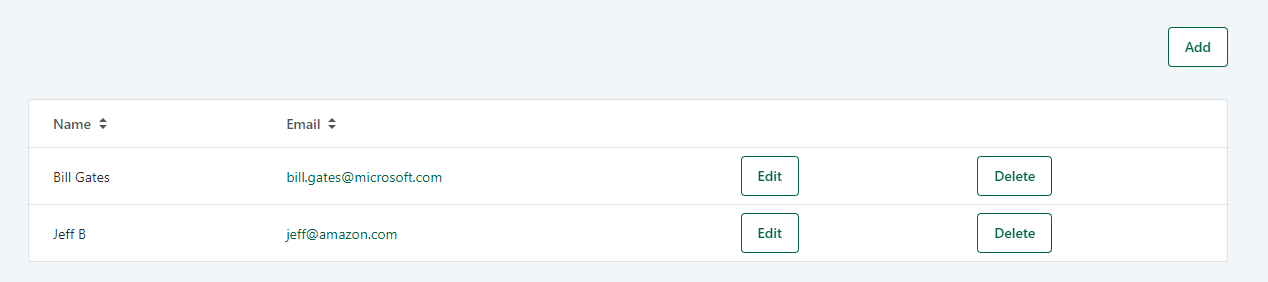 Design the List Employees Screen
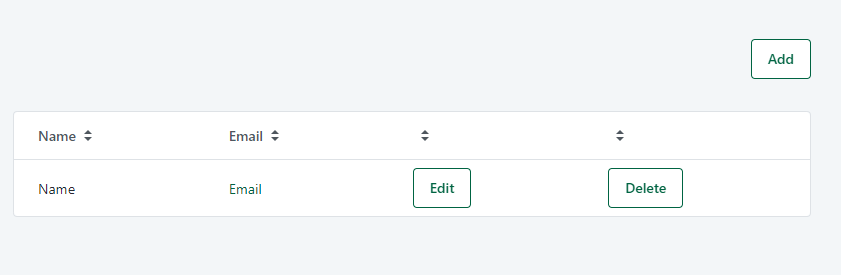
- Use the "Tables" widget to list the Employee table
- Introduce Edit, Delete, and Add buttons
- Use the "anonymous" option to avoid the login screen
Implement Screen Logic
Implement the Button Actions
- "Add" button:
- On click event of the "Add" button should open the "AddEmployee" screen
- On entering the name and email of the employee, the client action "AddEmployee" is called, which in turn calls the server action
- In the client action screen, redirect to the "EmployeeDetails" screen after a new record is created.
- "Edit" button:
- On click event of the "Edit" button should open the "EditEmployee" screen
- On updating the name and email of the employee, the client action "EditEmployee" is called, which in turn calls the server action
- In the client action screen, redirect to the "EmployeeDetails" screen after a new record is updated.
- "Delete" button:
- On click event of the "Delete" button, the client action "DeleteEmployee" is called, which in turn calls the server action
- In the client action screen, the refresh data widget is called on the "EmployeeDetails" screen after the record is deleted.
Publish and Test
- Save your changes and publish the application to generate the web app.
- Run the application and test the CRUD operations by adding, updating, and deleting employees.
That's it! You have created a basic CRUD application in OutSystems using a simple employee management system as an example. Remember to customize and enhance the application as per your requirements.
Screenshots
Data
Server Actions

Interfaces

Opinions expressed by DZone contributors are their own.
Comments