How To Create a “Hello, World!” Module in Magento 2
Follow along with this tutorial to learn how to easily create a "Hello, World!" module in the PHP framework Magento 2.
Join the DZone community and get the full member experience.
Join For FreeIn this blog post, we will explain how to easily create a "Hello, World!" module in Magento 2. Take note that the concept of local/community/core/folders only existed in Magento 1 and we don’t use them in Magento 2.
Steps To Create the Hello, World! Module
All of our custom modules in Magento 2 go under the app/code directory. The first step towards creating a module in Magento 2 is to create a folder inside your project directory named after the module. This will be where all the files related to the module will reside. The modules have a 2-part naming structure; i.e., Namespace/Module. This is so that the modules can be organized more efficiently.
So, assuming our Namespace is “Codilar” and our first module will be called “HelloWorld”, the directory structure for our module is gonna be app/code/Codilar/HelloWorld/…
Now that we’ve established the directory structure, let’s make a simple module that will show “Hello World” on the content section of the page when we hit the URL “http://mywebsite.com/helloworld/”.
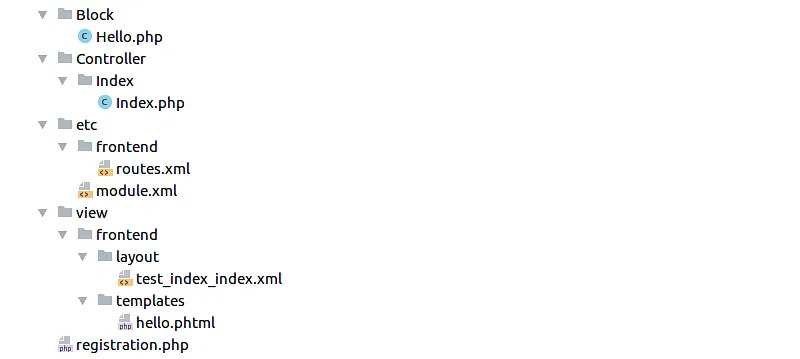
First things first - this is going to be our directory structure for the complete project:
So let's start with the registration.php file, app/code/Codilar/HelloWorld/registration.php:
<?php
\Magento\Framework\Component\ComponentRegistrar::register(
 \Magento\Framework\Component\ComponentRegistrar::MODULE,
 'Codilar_HelloWorld',
  __DIR__
 );
Every module must contain this file. This basically tells Magento, “Please register my module; its name is Codilar_HelloWorld, which is the Namespace and the Module name underscore separated."
Next, we come to the etc/module.xml app/code/Codilar/HelloWorld/etc/module.xml:
<?xml version="1.0"?>
 <config xmlns:xsi="http://www.w3.org/2001/XMLSchema-instance" xsi:noNamespaceSchemaLocation="urn:magento:framework:Module/etc/module.xsd">
 <module name="Codilar_HelloWorld" setup_version="0.0.1"/> </config>
This file just contains some basic information about the module, like the module name and module version.
Now the basic files absolutely necessary for any module to work are created. Next, we would create a frontend route inside our etc/frontend/routes.xml file, which would tell Magento to “Forward the request to our module’s controller whenever the URL is {{base_url}}/helloworld/."
app/code/Codilar/HelloWorld/etc/frontend/routes.xml:
<?xml version="1.0"?>
 <config xmlns:xsi="http://www.w3.org/2001/XMLSchema-instance" xsi:noNamespaceSchemaLocation="urn:magento:framework:App/etc/routes.xsd">
 <router id="standard">
 <route id="helloworld" frontName="helloworld">
<module name="Codilar_HelloWorld" />
 </route>
 </router>
</config>
Now we make the actual controller where the request would be routed, app/code/Codilar/HelloWorld/Controller/Index/Index.php:
<?php /** *
* @package magento2 * @author Codilar Technologies
* @license https://opensource.org/licenses/OSL-3.0 Open Software License v. 3.0 (OSL-3.0)
* @link https://www.codilar.com/
*/ namespace Codilar\HelloWorld\Controller\Index;
use Magento\Framework\App\Action\Action; use Magento\Framework\App\Action\Context; use Magento\Framework\App\ResponseInterface; use Magento\Framework\View\Result\PageFactory;
class Index extends Action {
 /**     * @var PageFactory
*/    private $pageFactory;
/**     * Index constructor.
* @param Context $context
* @param PageFactory $pageFactory
*/    public function __construct(
 Context $context,        PageFactory $pageFactory    )
 {        parent::__construct($context);        $this->pageFactory = $pageFactory;    }
    /**     * Execute action based on request and return result     *     * Note: Request will be added as operation argument in future     *     * @return \Magento\Framework\Controller\ResultInterface|ResponseInterface     * @throws \Magento\Framework\Exception\NotFoundException     */    public function execute()
 {        $page = $this->pageFactory->create();
 return $page;
}
}
Now we make our layout file to handle the request app/code/Codilar/HelloWorld/view/frontend/layout/helloworld_index_index.xml:
<?xml version="1.0"?>
<page xmlns:xsi="http://www.w3.org/2001/XMLSchema-instance" xsi:noNamespaceSchemaLocation="urn:magento:framework:View/Layout/etc/page_configuration.xsd">
 <body>
 <referenceContainer name="content">
<block class="Codilar\HelloWorld\Block\Hello" name="helloworld" template="Codilar_HelloWorld::hello.phtml" />        </referenceContainer>
</body>
</page>
The layout file basically “references” the “content” container, and inserts our own block Codilar\HelloWorld\Block\Hello into it. And remember, blocks and templates always come in pairs. Hence our block also uses the template Codilar_HelloWorld::hello.phtml.
Now, create our block file app/code/Codilar/HelloWorld/Block/Hello.php:
<?php /** * * @package
 magento2 * @author
 Codilar Technologies * @license
https://opensource.org/licenses/OSL-3.0 Open Software License v. 3.0 (OSL-3.0) * @link
 https://www.codilar.com/ */
namespace Codilar\HelloWorld\Block;
use Magento\Framework\View\Element\Template;
class Hello extends Template {    public function getText() {
 return "Hello World";
}
}
Notice that the block has a function getText(). The block’s function within Magento’s MVC architecture is to structure and provide data to the template, which the template will then display.
And now, we finally are coming to the template file app/code/Codilar/HelloWorld/view/frontend/templates/hello.phtml:
<?php /* @var \Starlabs\HelloWorld\Block\Hello $block */ ?> <label><?= __("Data retrieved from Block is ") ?></label> <h1><?= $block->getText() ?></h1>
The template’s job is to fetch data from it’s relevant block (mentioned as an @var comment at the beginning of the template file) and display it accordingly. Ideally, the template should not be responsible for any logical decisions.
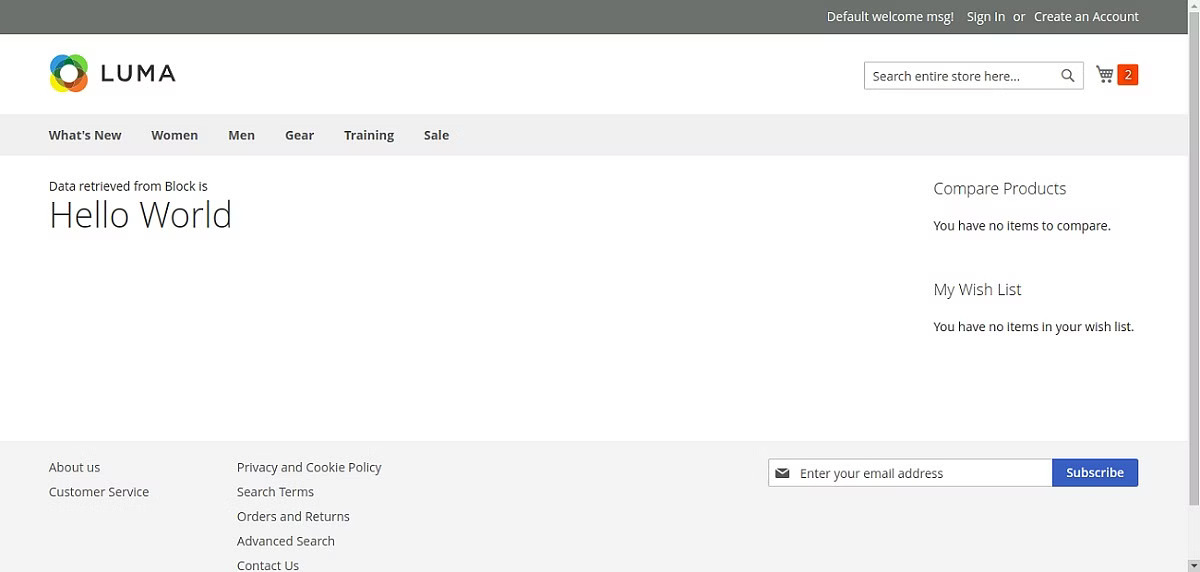
Well, that’s about it. Now we just run the php bin/magento setup:upgrade command from our terminal to install our new module, then open our favorite browser and type http://mywebsite.com/helloworld/, and we should be able to see our template in action, like this:
This was my first blog among a series of blogs that I’m planning to release eventually which will hopefully clear all your doubts on how to work with Magento, one of the most beautiful PHP frameworks I’ve ever worked with, personally.
Thanks a lot for sticking through this. Do let me know in the comment section below about what you want my next Magento tutorial blog to be about. See you next time!
Published at DZone with permission of Venugopal Madathil. See the original article here.
Opinions expressed by DZone contributors are their own.
Comments