

How to Create EC2 Instance in AWS — Tutorial for Beginners
This tutorial is for beginners which include how to create an account in AWS EC2 as well as how to create a new instance of ubuntu.
Join the DZone community and get the full member experience.
Join For FreeEC2 stands for, Elastic Compute Cloud. It is a part of Amazon’s cloud-computing platform, Which allows users to rent virtual computers on which they can run their own computer applications. Creating and using the EC2 instance is very simple. Following are the steps:
Step 1: Create an Account in EC2
1.1) Go to and the following screen will get a display.
1.2) Click on "Create an AWS Account"
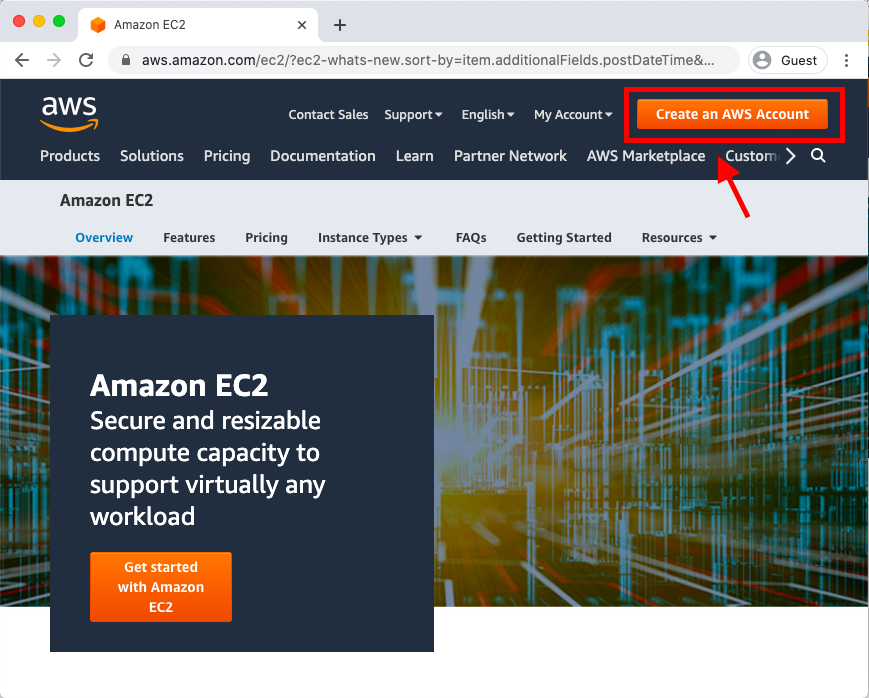
1.3) Start filling the account creation form.
You will require your email Id, Phone Number, and Credit/Debit card details. AWS is free for 12 months, however, it is mandatory to fill in payment details to create an account.

1.4) After filling in all the required information, your account will get created. Within 24 hours all the services (like EC2) will get activated on your account. (but mostly it take 5-10 minutes)
Step 2: Log in to EC2 Instance
2.1) Go to EC2's homepage, you will redirect to the login page. https://console.aws.amazon.com/ec2/v2/home
2.2) Select the Root User option, enter an email address, click on Next to enter a password.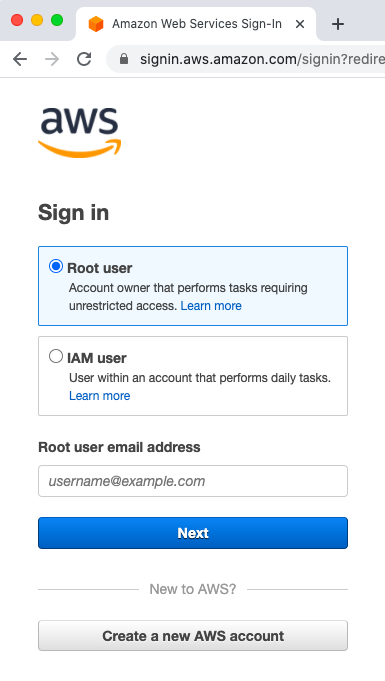
Step 3: EC2 Home Page
3.1) After signing in you will redirect to the EC2 homepage.
3.2) Else you can directly go to the Home Page Link - https://console.aws.amazon.com/ec2/v2/home
3.3) Else from any AWS page, click on service, and find EC2 option.
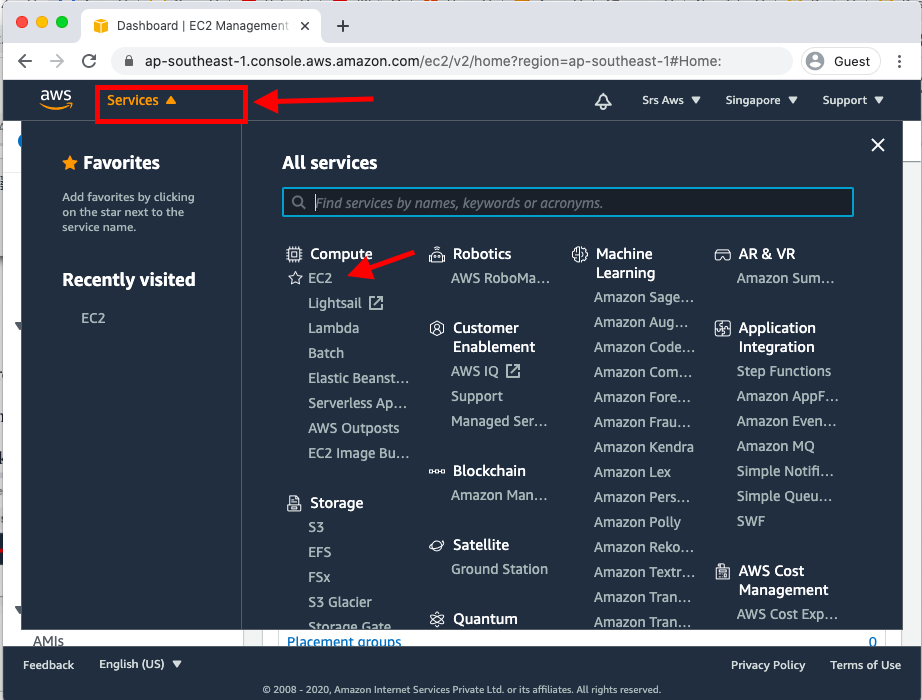
Step 4: Create an Instance
4.1) Click on Instance Tab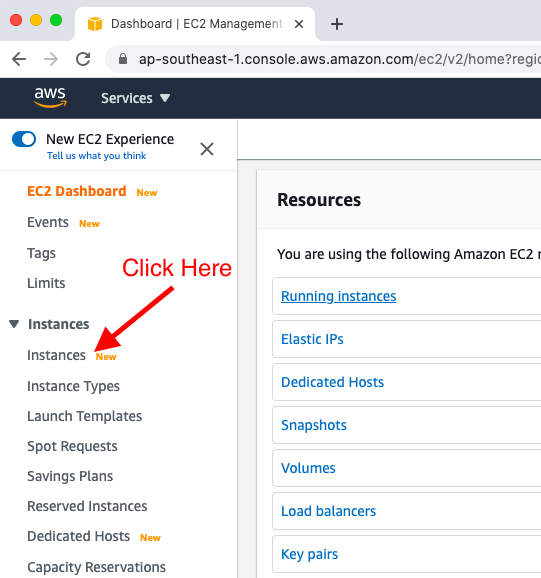
4.2) Click on "Launch Instance > Launch Instances".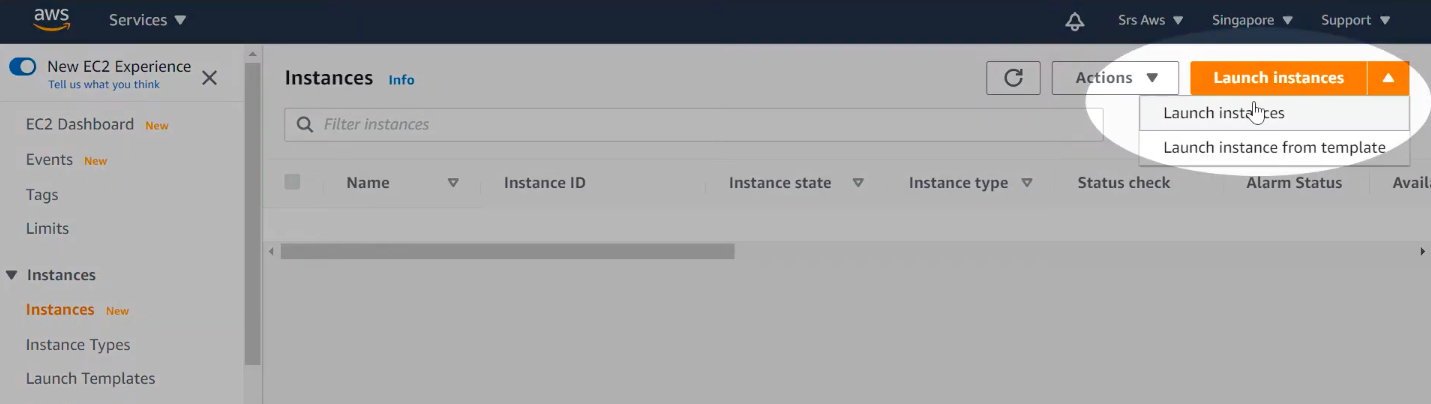
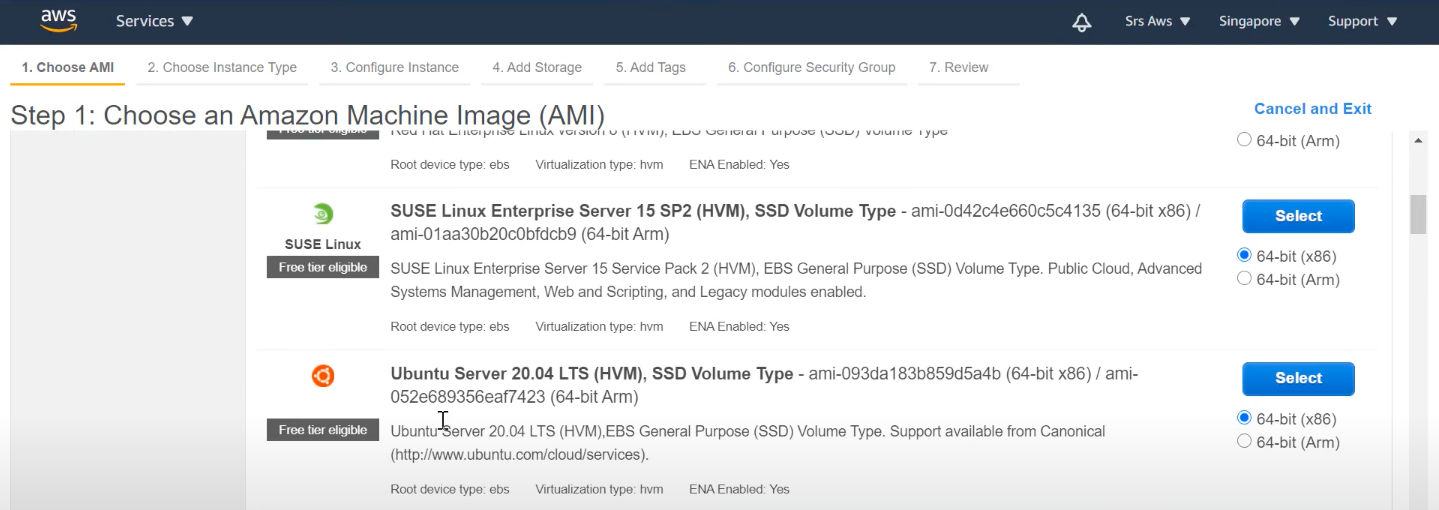
4.3) Launch Instance Step 1 — "Choose an AMI "
Now choose the latest Ubuntu server here. Currently, the latest is 20.04
4.4) Launch Instance Step 2 — "Choose Instance Type"
Select the one with Free tier eligible.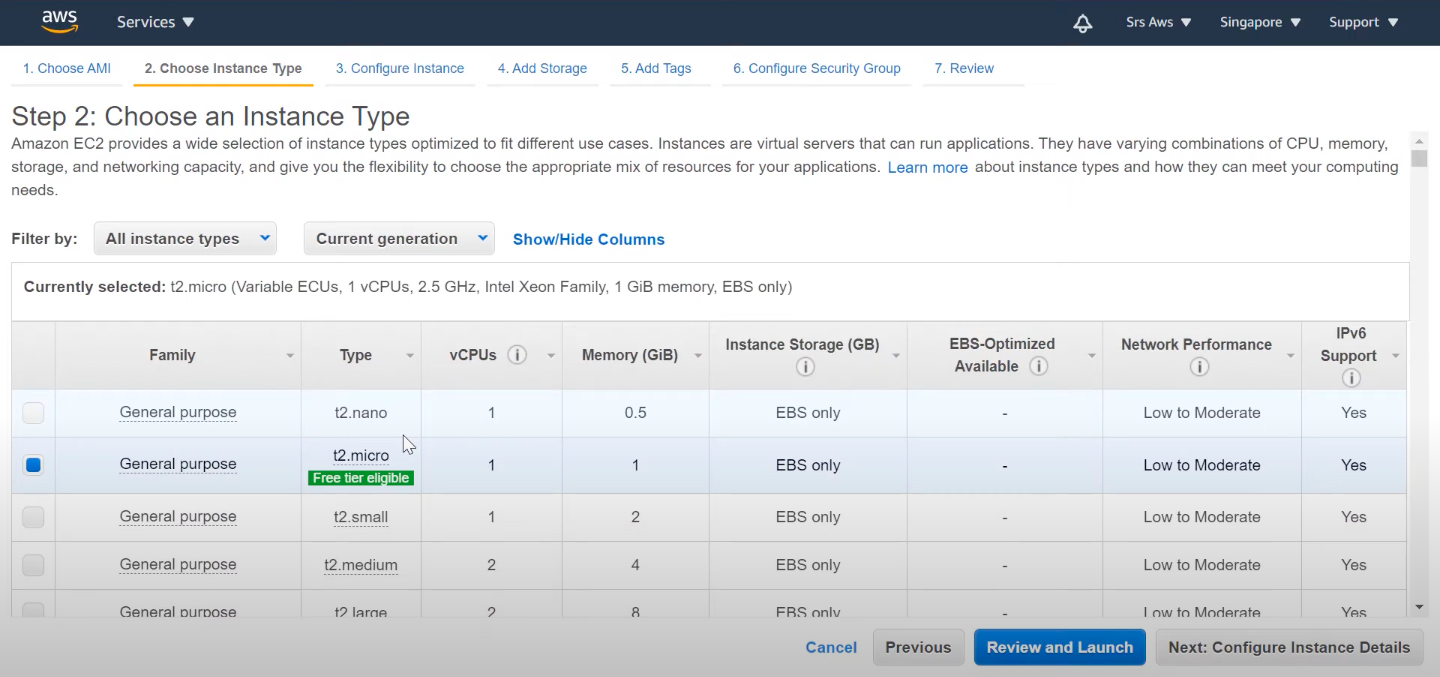
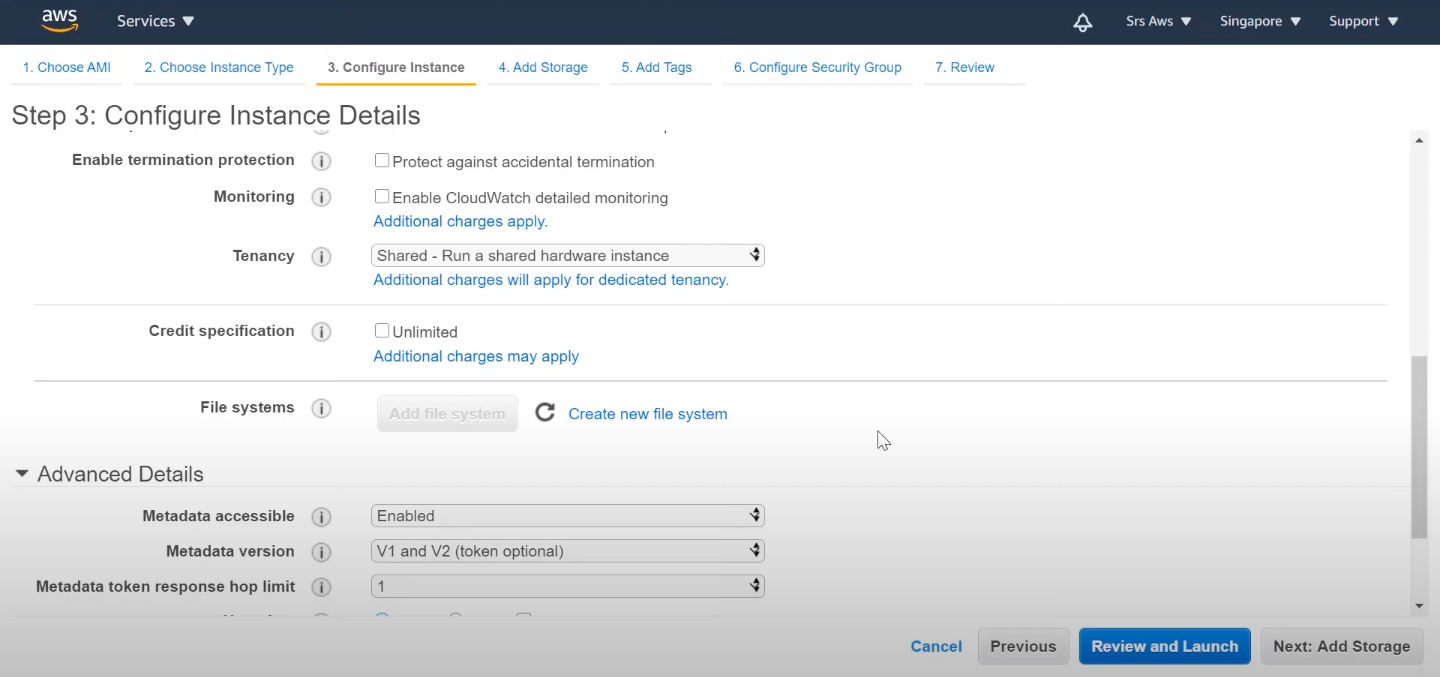
Skip this step as of now. Also, skip the step "4. Add-Storage" and "5. Add Tags"
4.6) Launch Instance Step 6 — "Configure Security Group"
Add the ports which you wanted to Open to the outside world. I have added Port 8000 since I want to deploy my website to this port.
Also, I have added HTTP and HTTPS port.
0.0.0.0 means you can access these ports from anywhere. If you want to access your ports from a known IP address then mention those addresses here.
Click on the Review and Launch Button.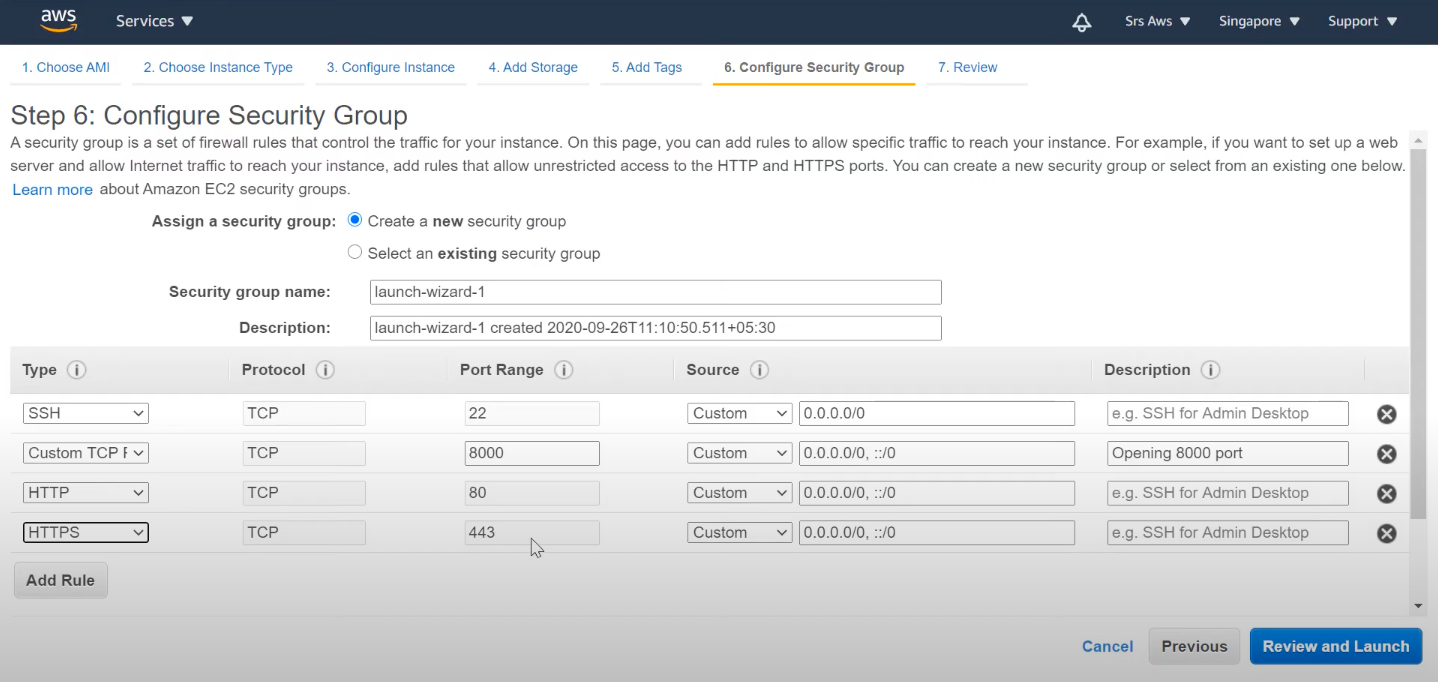
4.7) Launch Instance Step 7 — "Review"
Review the information and click on the "Launch" button. You will get an option to create a new or select an existing Keypair.
Download and save this file in a safe place. You will need this file while connecting with the instance via putty, WinSCP, Filezilla.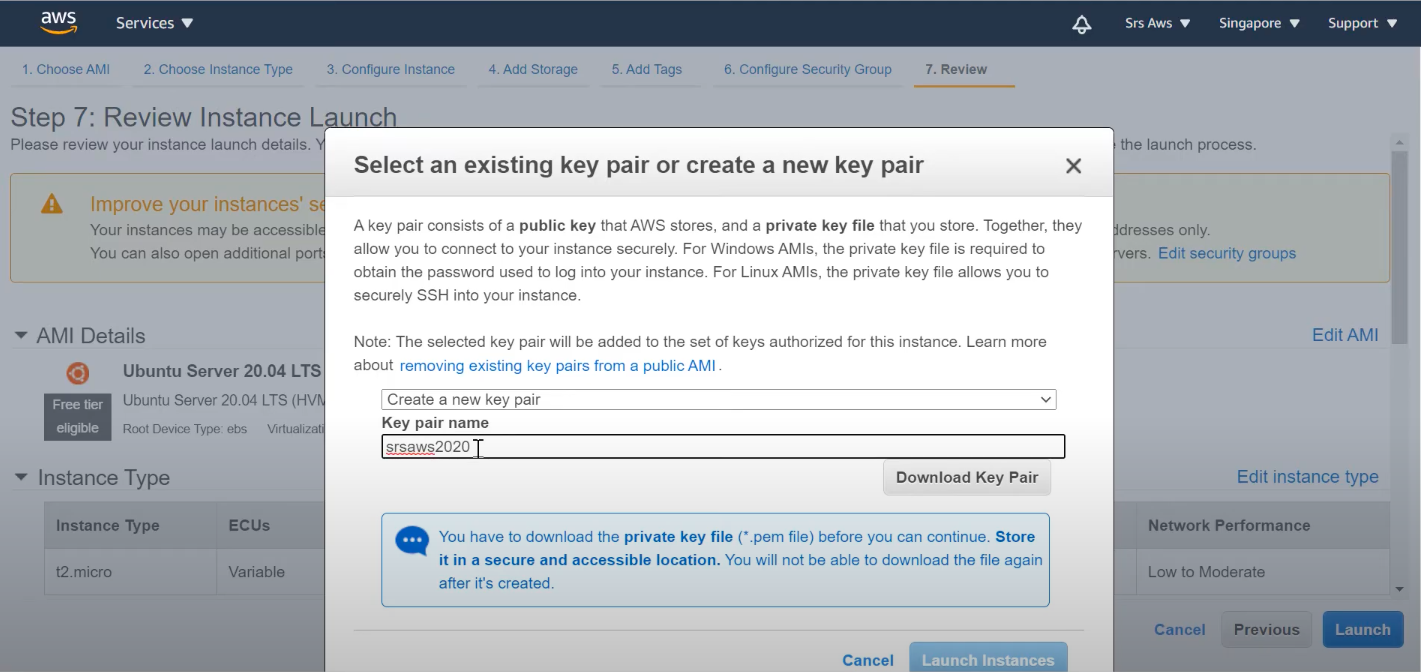
4.8) Click on the "Launch Instance" button. This is the final step. And your instance will be created.
Go to the instance Tab, and find your instance. Review the information and Rename the instance with any alias.

Step 5: Connect to the Instance
5.1) Select the instance and Click on Actions > Connect
5.2) You will redirect to a page. Your default username is "ubuntu". Click on connect.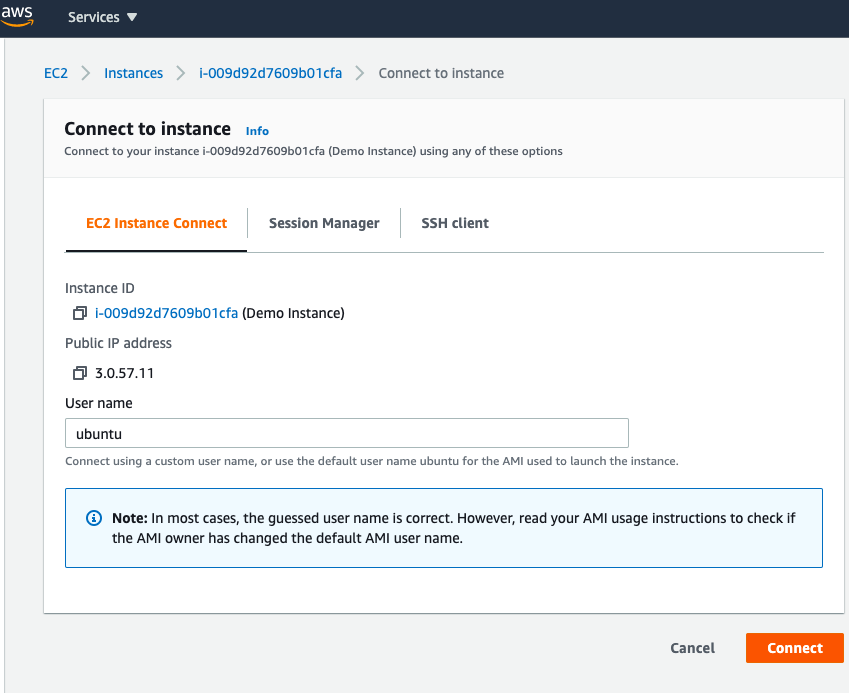
5.3) Hurray! You will get connected to your instance. Enjoy!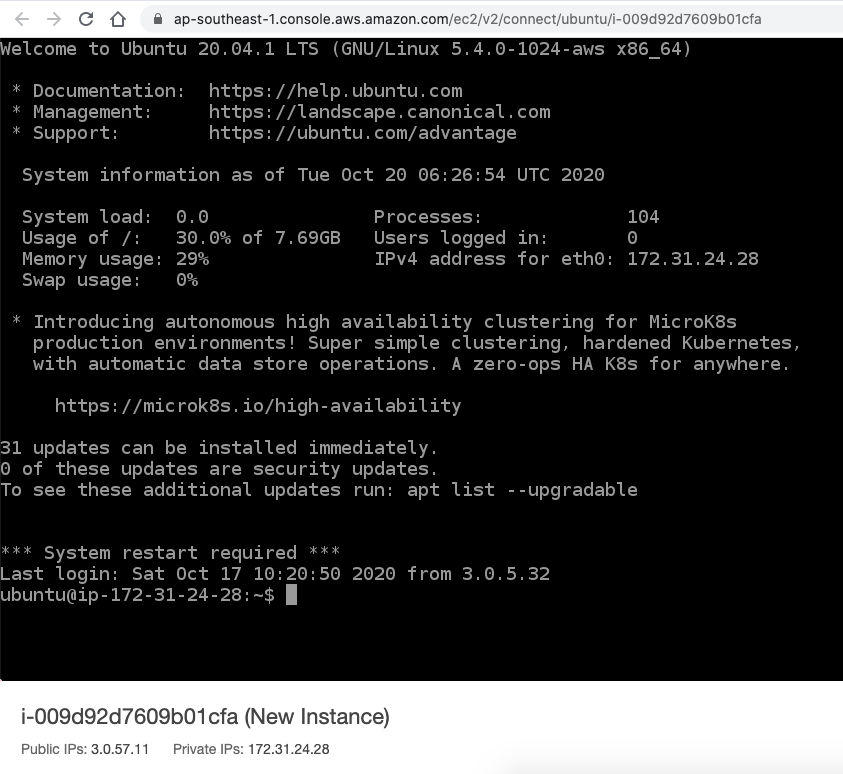
Opinions expressed by DZone contributors are their own.
Comments