How to Manage a Red Hat MicroShift Cluster with Shipa
Run Kubernetes clusters in environments with tight resource constraints (e.g. edge / IoT devices) without spending a lot of time on deployments and governance.
Join the DZone community and get the full member experience.
Join For FreeFor developers working with low-resource environments that nevertheless wish to harness the full advantages of Kubernetes, the open-source Red Hat MicroShift project and Shipa (an application-as-code platform you can spin up for free) offer a rather compelling pairing. In this article, I’ll take you through the steps of using MicroShift to set up a lightweight Kubernetes distribution, and then manage the same cluster using the “free forever” version of Shipa Cloud.
But first, why MicroShift? A research project started by Red Hat, MicroShift is built for running Kubernetes clusters in environments with tight resource constraints, such as edge and IoT devices. It’s a memory-optimized lightweight flavor of OpenShift/Kubernetes, and currently supports Fedora, RHEL, and CentOS Linux distributions. Shipa fits in here by helping solve some of the usual problems faced by developers and platform operators. It lets developers focus on what they’re good at and want to do (building applications) and reduces the time platform operators spend on deployments and governance. Onboarding MicroShift to Shipa offers some nice benefits by making it possible to manage multiple clusters from an administration and operations perspective.
According to Shipa documentation, the Red Hat OpenShift/MicroShift Kubernetes distribution is not officially supported, which led me to investigate how to run MicroShift on Shipa Cloud. Internally, MicroShift uses the CRI-O lightweight container runtime, and I wanted to test its compatibility beyond the containerd and Docker solutions suggested by Shipa’s documentation (don’t worry, this solution works!).
Getting Set Up
First, let’s provision a self-managed MicroShift cluster on any cloud VM (AWS/Azure/GCP) or even a local machine. The steps are almost the same for any cloud service provider (I’m using Azure for this example):
- Provision a VM with minimum resources of 2 vCPU and 4 GB RAM.
- Install Red Hat MicroShift.
- Update the kube-api certificate to include an IP and DNS name.
- Connect to Shipa Cloud and deploy an app.
1) Provisioning
As of now, MicroShift officially runs on Fedora, RHEL, and CentOS. For our use case, we will create a VM with CentOS on Azure. Provisioning is done via Pulumi.
Install Pulumi
You can install Pulumi with a one-line bash, using this code snippet:
curl -fsSL https://get.pulumi.com | sh
Create a Pulumi Account
Once you have installed the binary, create a Pulumi account, and then an access token to access the project and stack. A stack is an isolated, independently configurable instance of a Pulumi program. Stacks are commonly used to denote different phases of development (such as development, staging, and production) or feature branches (such as feature-x-dev). A project can have as many stacks as you need.
You can also sign in using GitHub or GitLab as well. Once you have logged in, go to Settings and create the access token which enables you to programmatically access the Pulumi organization and stack.
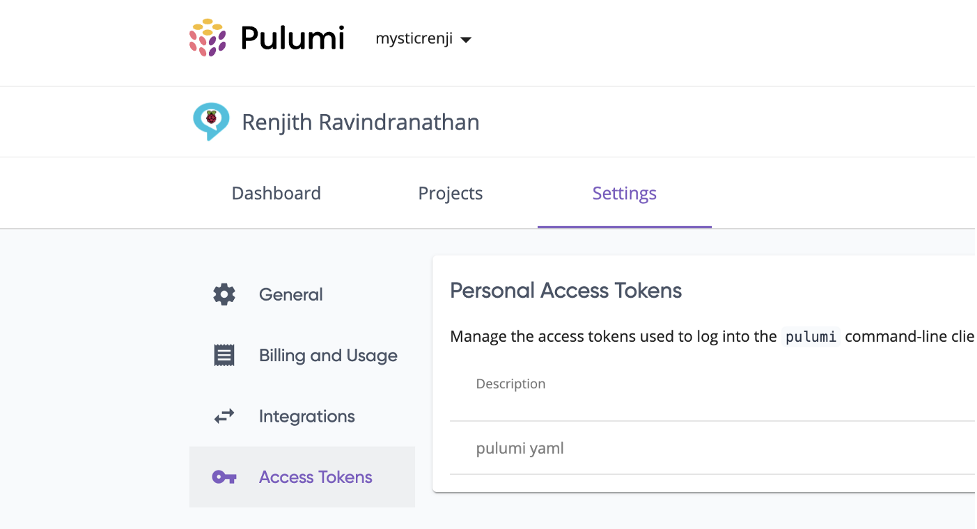
(Pulumi settings page)
Use Pulumi and YAML
Pulumi supports YAML files, which makes it easy to provision your infrastructure. The IaC for creating Azure VM is described in the following YAML file:
name: azure-vm
runtime: yaml
description: A minimal Azure Native Pulumi YAML program

configuration:
  prefix:
    type: String
    default: tfvmex
resources:
  microshift:
     type: azure:core:ResourceGroup
     properties:
  	location: West US
  mainVirtualNetwork:
    type: azure:network:VirtualNetwork
    properties:
      addressSpaces:
        - 10.0.0.0/16
      location: ${microshift.location}
      resourceGroupName: ${microshift.name}
  internal:
    type: azure:network:Subnet
    properties:
      resourceGroupName: ${microshift.name}
      virtualNetworkName: ${mainVirtualNetwork.name}
      addressPrefixes:
        - 10.0.2.0/24
  mainNetworkInterface:
    type: azure:network:NetworkInterface
    properties:
      location: ${microshift.location}
      resourceGroupName: ${microshift.name}
      ipConfigurations:
        - name: testconfiguration1
          subnetId: ${internal.id}
          privateIpAddressAllocation: Dynamic
  mainNetworkSecurityGroup:
    type: azure:network:NetworkSecurityGroup
    properties:
      location: ${microshift.location}
      resourceGroupName: ${microshift.name}
      securityRules:
        - name: SSH
          priority: 100
          direction: Inbound
          access: Allow
          protocol: Tcp
          sourcePortRange: '*'
          destinationPortRange: '22'
          sourceAddressPrefix: '*'
          destinationAddressPrefix: '*'
        - name: Kubernetes-API
          priority: 101
          direction: Inbound
          access: Allow
          protocol: Tcp
          sourcePortRange: '*'
          destinationPortRange: '6443'
          sourceAddressPrefix: '*'
          destinationAddressPrefix: '*'
        - name: Kubelet
          priority: 102
          direction: Inbound
          access: Allow
          protocol: Tcp
          sourcePortRange: '*'
          destinationPortRange: '10250'
          sourceAddressPrefix: '*'
          destinationAddressPrefix: '*'
  mainVirtualMachine:
    type: azure:compute:VirtualMachine
    properties:
      location: ${microshift.location}
      resourceGroupName: ${microshift.name}
      networkInterfaceIds:
        - ${mainNetworkInterface.id}
      vmSize: Standard_B2s
      storageImageReference:
        publisher: cognosys
        offer: centos-8-3-free
        sku: centos-8-3-free
        version: latest
      storageOsDisk:
        name: microshiftos
        caching: ReadWrite
        createOption: FromImage
        managedDiskType: Standard_LRS
      plan:
        name: centos-8-3-free
        product: centos-8-3-free
        publisher: cognosys
      osProfile:
        computerName: microshift
        adminUsername: microshift
        adminPassword: Password1234!
If the configuration is set, fire up the provisioning with the “pulumi up” command, and it will be up within the time it takes to have a coffee break:
pulumi up
2) Install MicroShift on CentOS
Once you have your VM provisioned, the next step is to install MicroShift on the machine. There are a few binaries that need to be installed first on the OS level. The whole installation has been consolidated into a shell script and can be used right away.
The script will add an IP to the host file and then install the cri and cri-o lightweight container runtime. After that, it will install MicroShift and the OC CLI to interact with the cluster:
# Install script for https://github.com/redhat-et/microshift
# Can be installed using:
# curl -sfL https://raw.githubusercontent.com/nerdalert/microshift-installer/main/microshift-install.sh |  sh -s -
#!/bin/sh
set -e
set -o noglob

# If the node does not have a FQDN
export IP=$(hostname -I | awk '{print $1}')
echo -e "- Adding the following host entry to /etc/hosts if it doesn't exist: $(hostname) $IP"
if ! grep --quiet "$IP $hostname" /etc/hosts; then
  echo $IP $(hostname) | sudo tee -a /etc/hosts
fi
echo -e "\xE2\x9C\x94 Done\n"

# Detect the OS and install cri-o
uname=$(uname -r)
if echo "$uname" | grep -Eq 'fc'; then
  echo "Fedora OS detected"
  echo '- Installing cri-o container runtime...'
  sudo dnf module enable -y cri-o:1.21
  sudo dnf install -y cri-o cri-tools
  sudo systemctl enable crio --now
  echo -e "\xE2\x9C\x94 Done"
  sleep 15
elif echo "$uname" | grep -Eq 'el'; then
  echo 'CentOS/RHEL OS detected'
  echo '- Installing cri-o container runtime...'
  sudo curl -L -o /etc/yum.repos.d/devel:kubic:libcontainers:stable.repo https://download.opensuse.org/repositories/devel:/kubic:/libcontainers:/stable/CentOS_8_Stream/devel:kubic:libcontainers:stable.repo
 sudo curl -L -o /etc/yum.repos.d/devel:kubic:libcontainers:stable:cri-o:1.21.repo https://download.opensuse.org/repositories/devel:kubic:libcontainers:stable:cri-o:1.21/CentOS_8_Stream/devel:kubic:libcontainers:stable:cri-o:1.21.repo
  sudo dnf install -y cri-o cri-tools
  sudo systemctl enable crio --now
  echo -e "\xE2\x9C\x94 Done"
else
  echo "No supported OS detected (requires CentOS or Fedora) exiting install.."
  exit
fi

echo '- Installing Microshift packages...'
sudo dnf copr enable -y @redhat-et/microshift
sudo dnf install -y microshift
sudo systemctl enable microshift --now
echo -e "\xE2\x9C\x94 Done"

# wait for the kubeconfig file to become available
echo "Wating for cri-o pods to initiate.."
count=1
kubeconf=/var/lib/microshift/resources/kubeadmin/kubeconfig
until sudo test -f $kubeconf; do
  if [ $count -gt 180 ]; then
    echo -e "\u274c kubeconfig not found in $kubeconf, there may be an issue with the installation"
    break
  fi
  count=$((count + 1))
  sleep 1
done

cricount=1
while ! sudo crictl ps | grep -q 'flannel'; do
  cricount=$((cricount + 1))
  if [ $cricount -gt 180 ]; then
    echo "timed out waiting on cri-o pods"
    break
  fi
  sleep 1
done

# check for kubectl
if ! command -v oc &> /dev/null
then
    echo -e "Warning: the oc binary was not found, install it with:\n"
    curl -O https://mirror.openshift.com/pub/openshift-v4/$(uname -  m)/clients/ocp/stable/openshift-client-linux.tar.gz
    sudo tar -xf openshift-client-linux.tar.gz -C /usr/local/bin oc kubectl
fi


echo "pods are initiating may take a couple of minutes depending on resources.."
echo "- Installation complete, view the pods with the following:"
echo "########################################################################"
echo "mkdir ~/.kube"
echo "sudo cat /var/lib/microshift/resources/kubeadmin/kubeconfig > ~/.kube/config"
3) Update kube-api Server Certificate
Since we’re setting up a self-managed MicroShift cluster on a VM with a public IP and trying to connect with Shipa Cloud, we’re likely to get an “Unable to connect to the server: x509: certificate..” error. To mitigate this issue, we need to regenerate the certificate that includes the VM IP and DNS label. To make this operation successful, we need to install OpenSSL libraries.
As an initial step, we’ll check out the IP and DNS names mapped in the certificate. To do this, we need to have OpenSSL installed on the system:
sudo dnf install openssl

cd /var/lib/microshift/certs/kube-apiserver/secrets/service-network-serving-certkey/

# Execute to find the currently mapped IP and DNS names
openssl x509 -in tls.crt -text | grep "X509v3 Subject Alternative
Name:" -A1
Note down the output from the above command. Then, create a new config, amended with the new IP and DNS:
cat <<EOF | tee api.conf
[req]
req_extensions = v3_req
distinguished_name = req_distinguished_name
[req_distinguished_name]
[ v3_req ]
basicConstraints = CA:FALSE
keyUsage = nonRepudiation, digitalSignature, keyEncipherment
subjectAltName = @alt_names
[alt_names]
DNS.1 = kubernetes
DNS.2 = kubernetes.default
DNS.3 = kubernetes.default.svc
DNS.4 = localhost
DNS.5 = kube-apiserver
DNS.6 = microshift.example.com
DNS.7 = <VM DNS label>IP.1 = 127.0.0.1
IP.2 = 10.114.101.2
IP.3 = 10.43.0.1
IP.4 = 192.168.1.209
IP.5 = 192.168.1.212
IP.6 = <xxx.xxx.x.xxx>
EOF
Execute the below commands to regenerate the TLS certificate:
openssl genrsa -out tls.key 2048
openssl req -new -key tls.key -subj "/CN=kube-apiserver" -out tls.csr -config api.conf
openssl x509 -req -in tls.csr -CA /var/lib/microshift/certs/ca-bundle/ca-bundle.crt -CAkey /var/lib/microshift/certs/ca-bundle/ca-bundle.key -CAcreateserial -out tls.crt -extensions v3_req -extfile api.conf -days 1000
rm -f tls.csr
openssl x509 -in tls.crt -text # Check that the new IP address is added
We now have a kube-api certificate with the VM public IP and DNS label. Next, let’s connect to Shipa Cloud and deploy some apps.
4) Connect to Shipa Cloud
Because Red Hat OpenShift/MicroShift is not officially supported by Shipa, making it work requires a workaround.
To connect our cluster to Shipa Cloud, first provide the VM Public IP in the Kubernetes Control Plane in this format: https://<vm-public-ip>:6443.
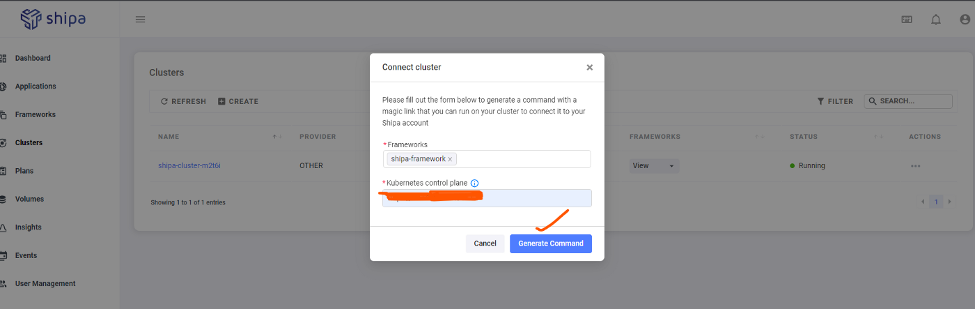
Next, execute the generated command on the cluster. This will create the Shipa CRD and related components.
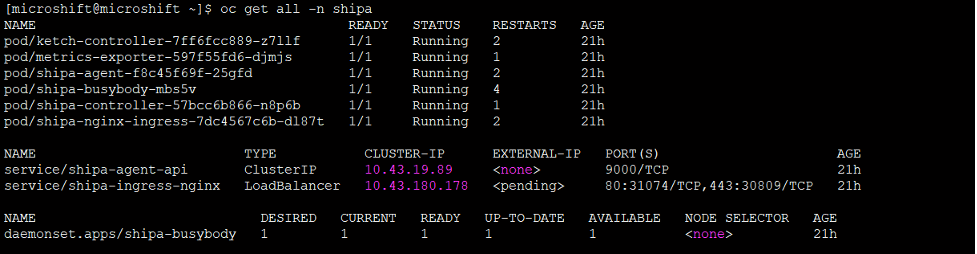
Run this command to view all Shipa components running on MicroShift:
oc get all -n shipa
Now let's deploy a simple Nginx pod via Shipa Cloud.
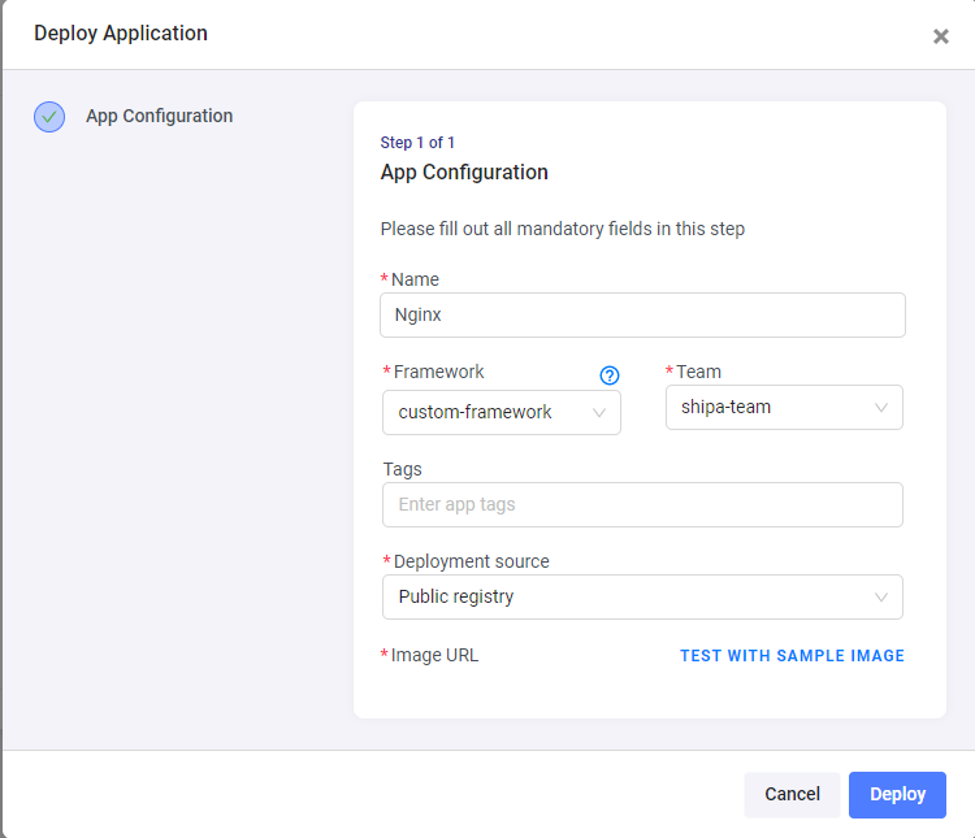
In the first attempt at deployment, you will get an error saying that the Shipa nginx service is not able to start. This is because shipa-ingress-nginx is deployed with the type “LoadBalancer”, and isn’t able to get an external IP to continue. This is a common error when deploying a self-managed cluster on a VM. To resolve this, edit shipa-ingress-nginx and change the type to NodePort.
oc edit svc shipa-ingress-nginx -n shipa
#Patching the service type to NodePort oc patch svc shipa-ingress-nginx -n shipa -p '{"spec":{"type":"NodePort"}}'
Now the Nginx deployment will run.
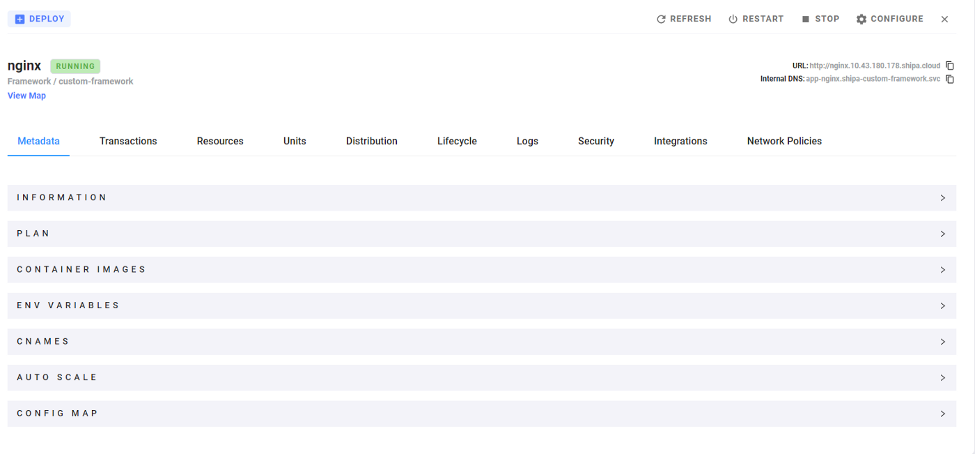
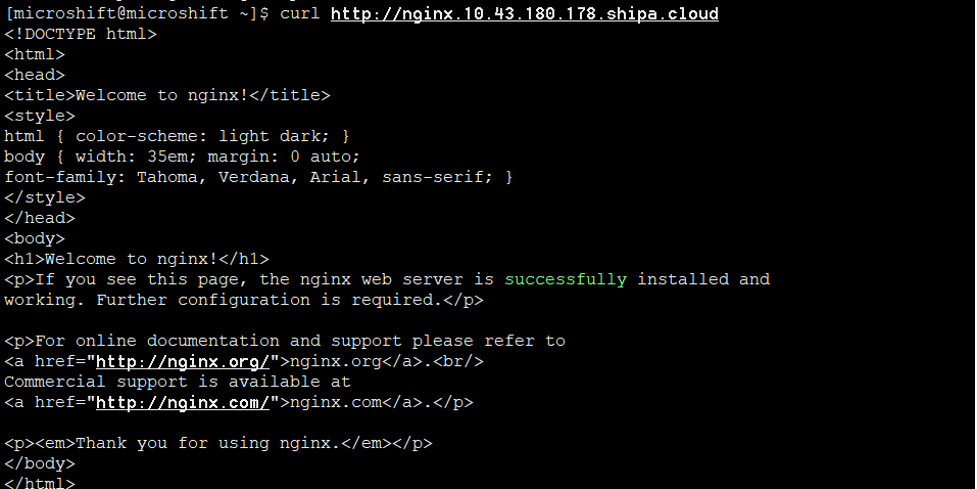
(The Nginx deployment is successful!)
Conclusion
Through this article, we learned how to set up a MicroShift cluster and manage it through Shipa Cloud. This experiment with a lightweight cluster makes it evident that Shipa can support the Red Hat MicroShift flavor of Kubernetes, which runs the CRI-O container runtime under the hood.
Opinions expressed by DZone contributors are their own.
Comments