How to Use Augury to Check Lazy Loading in Angular 8
Join the DZone community and get the full member experience.
Join For Free
Introduction
In this article, I am going to explain how to check the flow of lazy loading in an Angular application using the Augury Google Chrome extension. When I was implementing lazy loading in my project, I faced some difficulty checking which module was lazy-loaded. I came to know about Augury extension, which shows the flow of lazy loading of all modules with a diagram. By seeing visually that our work is half done, if any modules are left behind in code, then we can easily check their routing in the route tree of Augury.
Installing Augury
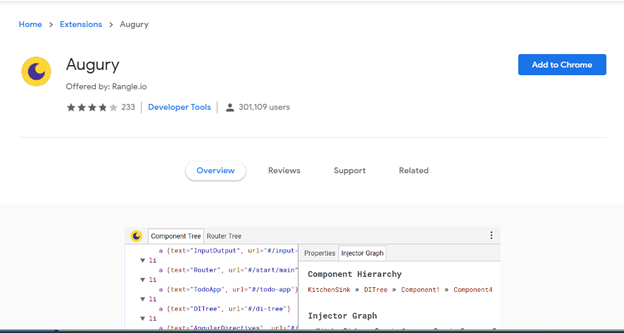
You can install Augury from the Chrome Web Store.
For Windows and Linux, use Ctrl + Shift + I.
For Mac OS X, use Cmd + Opt + I.
You may also like: Real-World Angular Series, Part 8a: Lazy Loading, Production Deployment, SSL.
Steps to Install Angular
Prerequisites
- Basic knowledge of Angular.
- Visual Studio Code must be installed.
- Angular CLI must be installed.
- Node.js must be installed.
Step 1
Let's create an Angular project using the following npm command:
ng new AuguryDemo
First, open this project in VS Code and install Bootstrap by using the following command.
xxxxxxxxxx
npm install bootstrap --save
Now, open the styles.css file and add the Bootstrap file reference. To add a reference in the styles.css file, add this line:
xxxxxxxxxx
@import '~bootstrap/dist/css/bootstrap.min.css';
Now, create two modules named, Companies and Product:
Companies
xxxxxxxxxx
ng g m Companies --routing
Product
xxxxxxxxxx
ng g m product --routing
Now, create some demo components in the company module by using the following command:
xxxxxxxxxx
ng g c company1
xxxxxxxxxx
ng g c company2
Now, open the companies-routing.module.ts file and add the following code:
xxxxxxxxxx
import { NgModule } from '@angular/core';
import { Routes, RouterModule } from '@angular/router';
import { Compnay1Component } from './compnay1/compnay1.component';
import { Compnay2Component } from './compnay2/compnay2.component';
import { CompnayComponent } from './compnay.component';
const routes: Routes = [
{
path:'Compnay1',component:Compnay1Component
},
{
path:'Compnay2',component:Compnay2Component
},
{
path:'Compnay',component:CompnayComponent
}
];
@NgModule({
imports: [RouterModule.forChild(routes)],
exports: [RouterModule]
})
export class CompaniesRoutingModule { }
Now, create some demo components in the Product module by using the following commands:
For Product:
xxxxxxxxxx
ng g c product1
xxxxxxxxxx
ng g c product2
Now, open Product-routing.module.ts file and add the following code inside this file:
xxxxxxxxxx
import { NgModule } from '@angular/core';
import { Routes, RouterModule } from '@angular/router';
import { Product1Component } from './product1/product1.component';
import { Product2Component } from './product2/product2.component';
import { ProductComponent } from './product.component';
const routes: Routes = [
{path:'Product1',component:Product1Component},
{path:'Product2',component:Product2Component},
{path:'prod',component:ProductComponent},
];
@NgModule({
imports: [RouterModule.forChild(routes)],
exports: [RouterModule]
})
export class ProductRoutingModule { }
Now, add a new component, Home and open the home.component.html file. Add the following code in this file:
xxxxxxxxxx
<div class="container">
<button style="margin: 10px;" class="btn btn-info" (click)="product()" >Product</button>
<button style="margin: 10px;" class="btn btn-info" (click)="company()">Company</button>
</div>
Now, add the following code in the home.component.ts file:
xxxxxxxxxx
import { Component, OnInit } from '@angular/core';
import { Router } from '@angular/router';
@Component({
selector: 'app-home',
templateUrl: './home.component.html',
styleUrls: ['./home.component.css']
})
export class HomeComponent implements OnInit {
constructor(private router:Router) { }
ngOnInit() {
}
product()
{
this.router.navigate([`/product/prod`]);
}
company()
{
this.router.navigate([`/company/Compnay`]);
}
}
After that, open the app-routing.module.ts file and add the following code:
xxxxxxxxxx
import { NgModule } from '@angular/core';
import { Routes, RouterModule } from '@angular/router';
const routes: Routes = [
{
path: 'product',
loadChildren: './product/product.module#ProductModule'
},
{
path: 'company',
loadChildren: './companies/companies.module#CompaniesModule'
},
];
@NgModule({
imports: [RouterModule.forRoot(routes)],
exports: [RouterModule]
})
export class AppRoutingModule { }
Now, open app.module.ts file and add the following code:
xxxxxxxxxx
import { BrowserModule } from '@angular/platform-browser';
import { NgModule } from '@angular/core';
import { AppRoutingModule } from './app-routing.module';
import { AppComponent } from './app.component';
import { HomeComponent } from './home/home.component';
@NgModule({
declarations: [
AppComponent,
HomeComponent
],
imports: [
BrowserModule,
AppRoutingModule
],
providers: [],
bootstrap: [AppComponent]
})
export class AppModule { }
Open the app.component.html file and add the following code:
xxxxxxxxxx
<app-home></app-home>
<router-outlet></router-outlet>
Now, run the project by using the ng serve command in VS Code
Then, run this project with ng serve -o to compile the code, open your Chrome browser, and test lazy loading.
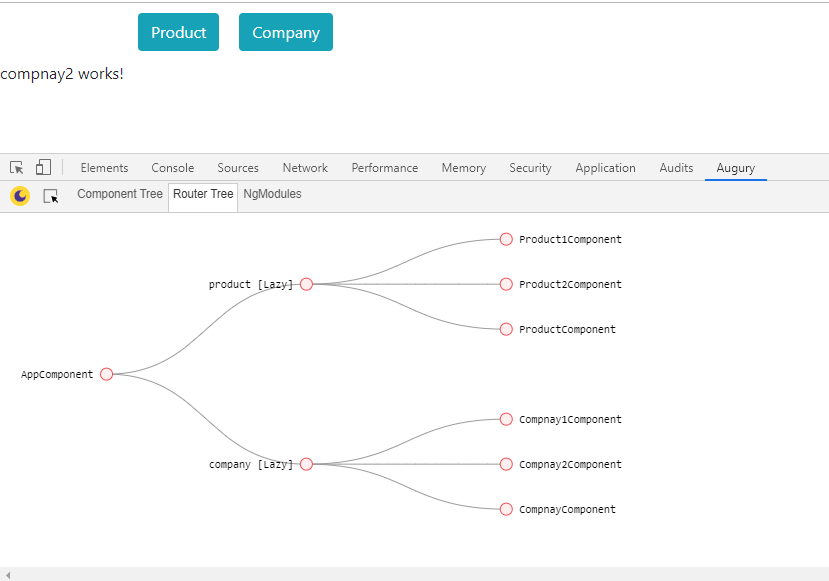
If you want to check how lazy loading works and how lazy loading routing flow, then Augury is the best tool we have.
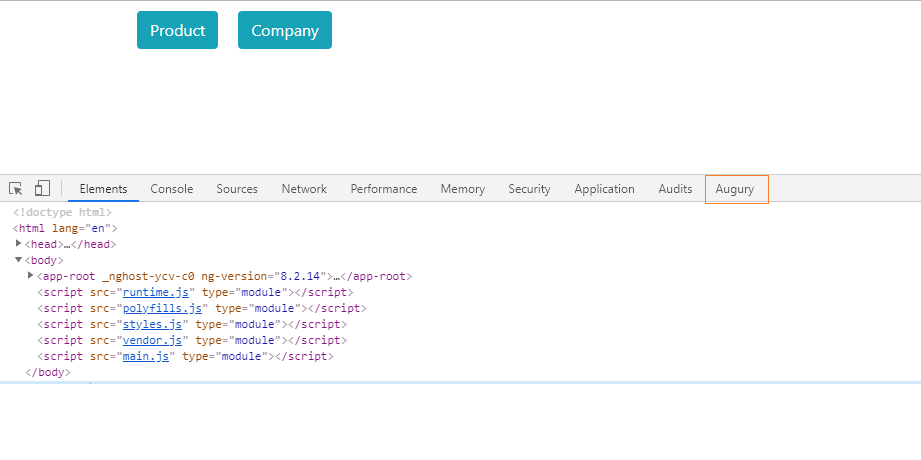
Click on ctrl+F12 to enable the debugger and click on the Augury tab.
Click on the router tree. Here, it will show the route flow of our modules. If your project has implemented lazy loading then it will be represented in square brackets.
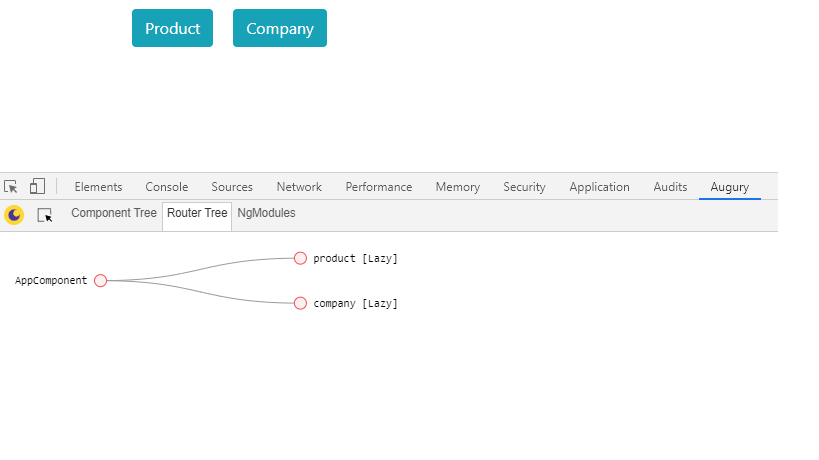
Now, click on their child components to load the child route after clicking on all child components. This will be shown like in the below image:
The first view that is visible is the Component Tree, which shows the loaded components belonging to the application.
This is my small article about the Augury extension. You can check my previous article and give me some feedback which would be very useful for me to improve in the technological field.
"Knowledge increases through sharing".
Conclusion
In this article, I discussed how to use Augury Extention to check the flow of lazy loading in Angular 8.
Please give your valuable feedback/comments/questions about this article. Let me know if you liked and understood this article and how I can improve it.
Further Reading
- Angular Tutorial: Angular 7 and the RESTEasy Framework
- Angular 7 + Spring Boot Application: Hello World Example
- Building an Angular 5 Application Step-By-Step
Opinions expressed by DZone contributors are their own.
Comments