JSF Checkbox Styled Using HTML and CSS
In this post, we use the common use case of checkboxes on a web page to learn how to use JSF with HTML and CSS. Let's get started!
Join the DZone community and get the full member experience.
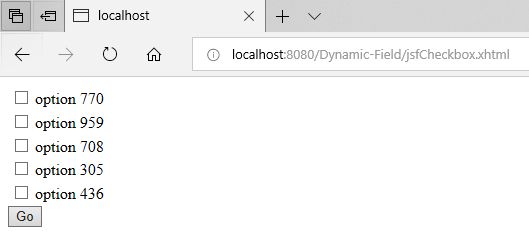
Join For FreeWant to style your checkboxes with HTML/CSS code? Want to change this:
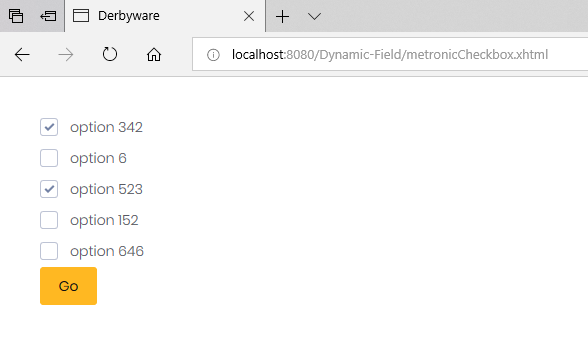
to look like this?
First, let’s write code that uses JSF 2.2 to display a checkbox.
Here is the JSF code:
<h:body>

       <h:form prependId="false">

              <h:selectManyCheckbox value="#{dynamic.selectedOptions}" layout="pageDirection">

                     <f:selectItems value="#{dynamic.entities}" var="entity" itemLabel="#{entity.name}" itemValue="#{entity.id}" />

              </h:selectManyCheckbox>


              <h:commandButton value="Go" action="#{dynamic.rawJSF()}">

                     <f:ajax execute="@form" render="@form" />

              </h:commandButton>

       </h:form>

</h:body>
Here is the dynamic view scoped bean (javax.faces.view.ViewScoped)
@Named
@ViewScoped

public class Dynamic implements Serializable{
       private static final long serialVersionUID = 1L;

       private List<Entity> entities = new ArrayList<>();
       private String[] selectedOptions;

       public Dynamic() {
              Random random = new Random();
              for(int i = 0; i < 5; i++) {
                     Entity radio = new Entity();
                     radio.setId(i);
                     radio.setName("option " + (random.nextInt(999)));
                     entities.add(radio);
              }
       }

       public void rawJSF() {
              System.out.println("Printing selected options :");
              if(selectedOptions != null) {
                     for(String s : selectedOptions) {
                           System.out.println("Entity with ID : " + s + " is selected");
                     }
              }
       }
Getters and Setters for Entities and Selected Options
Running the code above will give us this:

We get the following messages printed out when we select three of the choices:
2018-06-30T21:23:09.976+0000|Info: Printing selected options :

2018-06-30T21:23:09.976+0000|Info: Entity with ID : 2 is selected

2018-06-30T21:23:09.976+0000|Info: Entity with ID : 4 is selected
Now, I'll be using the Metronic HTML template, which I purchased on Themeforest. Using this template, the checkboxes now look like this:
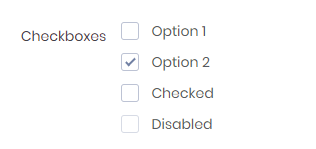
The HTML for the above checkboxes looks like this:
<div class="m-checkbox-list">
              <label class="m-checkbox">
                     <input type="checkbox"/>
                     Option 1
                     <span></span>
              </label>
              <label class="m-checkbox">
                     <input type="checkbox"/>
                     Option 2
                     <span></span>
              </label>
              <label class="m-checkbox">
                     <input type="checkbox" checked="checked"/>
                     Checked
                     <span></span>
              </label>
       </div>
Here is how to use the Metronic HTML/CSS code in JSF. First, I will show you the code then the I will explain it.
New JSF Page: CSS and JS Declaration Omited
New DynamicMetro View scoped bean:
<h:body >
       <h:form prependId="false" styleClass="m--margin-40">
              <div class="m-checkbox-list">
                     <ui:repeat var="entity" value="#{dynamicMetro.entities}" >
                           <label class="m-checkbox" for="checkbox#{entity.id}">
                                  <input id="checkbox#{entity.id}" type="checkbox"
                     jsf:value="#{dynamicMetro.oneChecked[entity.id]}"/>
                                  #{entity.name}
                                  <span></span>
                           </label>
                     </ui:repeat>
              </div>

              <h:commandButton value="Go" action="#{dynamicMetro.metronicJSF()}" styleClass="btn btn-warning">
                     <f:ajax execute="@form" render="@form" />
              </h:commandButton>
       </h:form>
@Named
@ViewScoped
public class DynamicMetro implements Serializable{
private static final long serialVersionUID = 1L;
private List<Entity> entities = new ArrayList<>();
private Map<Integer, Boolean> oneChecked = new HashMap<>();
public DynamicMetro() {
Random random = new Random();
for(int i = 0; i < 5; i++) {
Entity radio = new Entity();
radio.setId(i);
radio.setName("option " + (random.nextInt(999)));
entities.add(radio);
oneChecked.put(radio.getId(), false);
}
}
public void metronicJSF() {
System.out.println("Printing selected options :");
for(Entry<Integer, Boolean> entry : oneChecked.entrySet()) {
System.out.println("Entity with ID : " + entry.getKey() + " is selected ? " + entry.getValue());
}
}Getters and Setters for Entities and the Checked Option
Select these options and press go:

This will print the following:
2018-06-30T22:29:04.766+0000|Info: Printing selected options :

2018-06-30T22:29:04.766+0000|Info: Entity with ID : 0 is selected ? true

2018-06-30T22:29:04.766+0000|Info: Entity with ID : 1 is selected ? false

2018-06-30T22:29:04.766+0000|Info: Entity with ID : 2 is selected ? true

2018-06-30T22:29:04.766+0000|Info: Entity with ID : 3 is selected ? false

2018-06-30T22:29:04.766+0000|Info: Entity with ID : 4 is selected ? false
The only thing here that needs explaining is the map, oneChecked. This map holds the id of the entity as the key and a boolean as its value.
The JSF part (jsf:value="#{dynamicMetro.oneChecked[entity.id]}" ) sets the value in the map for the corresponding entity if checked to true, otherwise it's false.
Bonus: Permitting Only One Option to Be Selected (Radio):
Update your JSF code:
<div jsf:id="selectAnswer" class="m-checkbox-list">
       <ui:repeat var="entity" value="#{dynamicMetro.entities}" >
              <label class="m-checkbox" for="checkbox#{entity.id}">
                     <input id="checkbox#{entity.id}" type="checkbox"
              jsf:value="#{dynamicMetro.oneChecked[entity.id]}"
              jsf:valueChangeListener="#{dynamicMetro.selectOnlyThis(entity.id)}">
                           <f:ajax event="click" execute="@this" render="selectAnswer" />
                     </input>
                     #{entity.name}
                     <span></span>
              </label>
       </ui:repeat>
</div>
The apply a new Java method:
public void selectOnlyThis(int id){
       boolean oldChecked = oneChecked.get(id);
       for(Entry<Integer, Boolean> entry : oneChecked.entrySet()){
              oneChecked.put(entry.getKey(), false);
       }
       oneChecked.put(id, oldChecked ? false : true );
}Opinions expressed by DZone contributors are their own.
Comments