

How to Hide Sensitive Information Before You Share a File
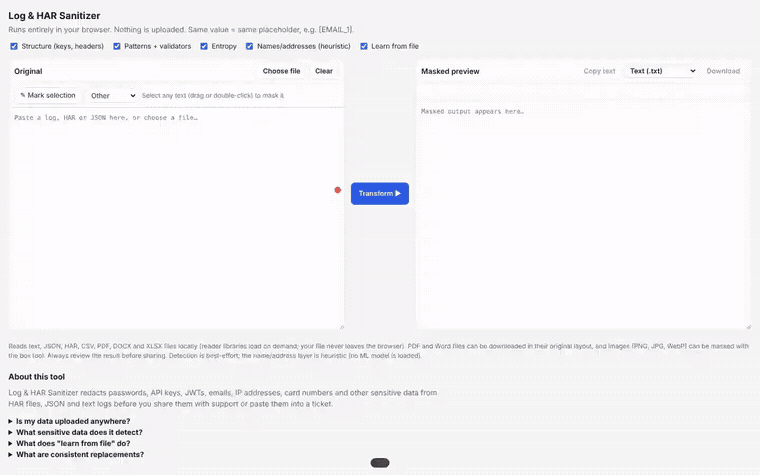
A guide to the Log & HAR Sanitizer: paste text or open a Word file, PDF, or photo, and blur out the private parts in a few clicks. No sign-up. Nothing is uploaded.
 CORE
·
Why This Exists
If you test software or manage a product, you constantly send things to other people: a bug report with an attached log, a screenshot of a customer problem, a contract, an ID card photo. Those files often contain details that should not leave the team: a customer's name, a phone number, a login token, a password that scrolled past in a terminal.
Most "redaction" websites ask you to upload the file first. That means you hand over the very secret you wanted to protect. This tool does the opposite: it runs on your computer, so the file never travels anywhere.
How Safe Is It?
Here is what is happening behind the scenes, in plain words, and what the tool can and cannot promise.
1. Your File Stays on Your Computer
The page is a single program that runs in your web browser. When you paste text or choose a file, the program on your device reads it. There is no server receiving it, no account to create, and no place where your file is saved.
- Open the tool and wait for it to load.
- Turn off your Wi-Fi or switch on airplane mode.
- Paste some text and press Transform. It still works because nothing needs the internet.
One honest detail: when you open a PDF or Word file for the first time, the page downloads a few helper programs (the code that knows how to read those formats) from well-known public code libraries. That code comes in. Your file never goes out. Plain text works without any download.
2. "Masked" Means Replaced, Not Just Covered
| File type | What you get back |
|---|---|
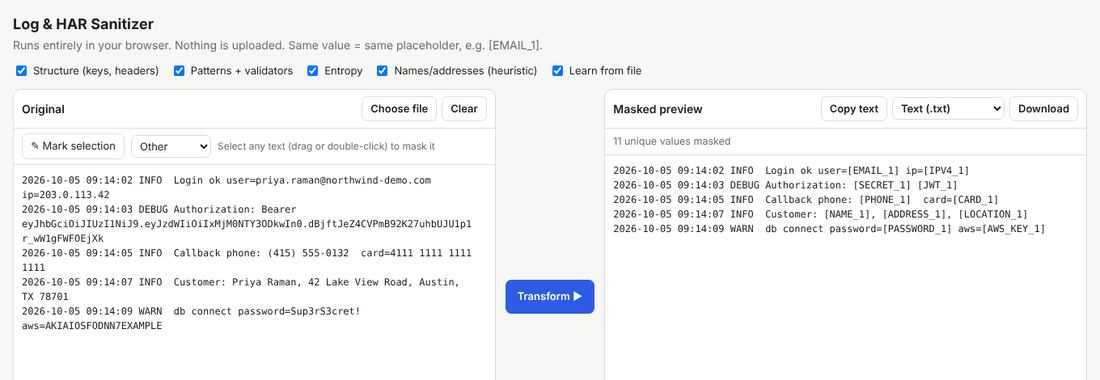
| Text, logs, JSON, HAR | The private value is replaced by a label. The original value is not in the result. |
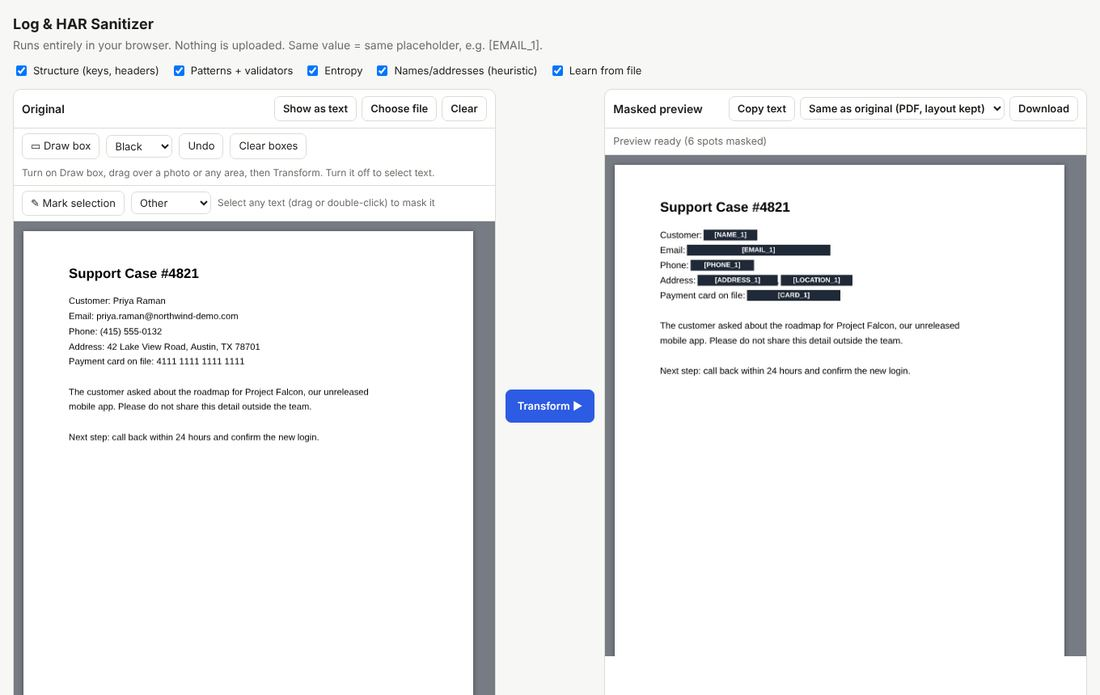
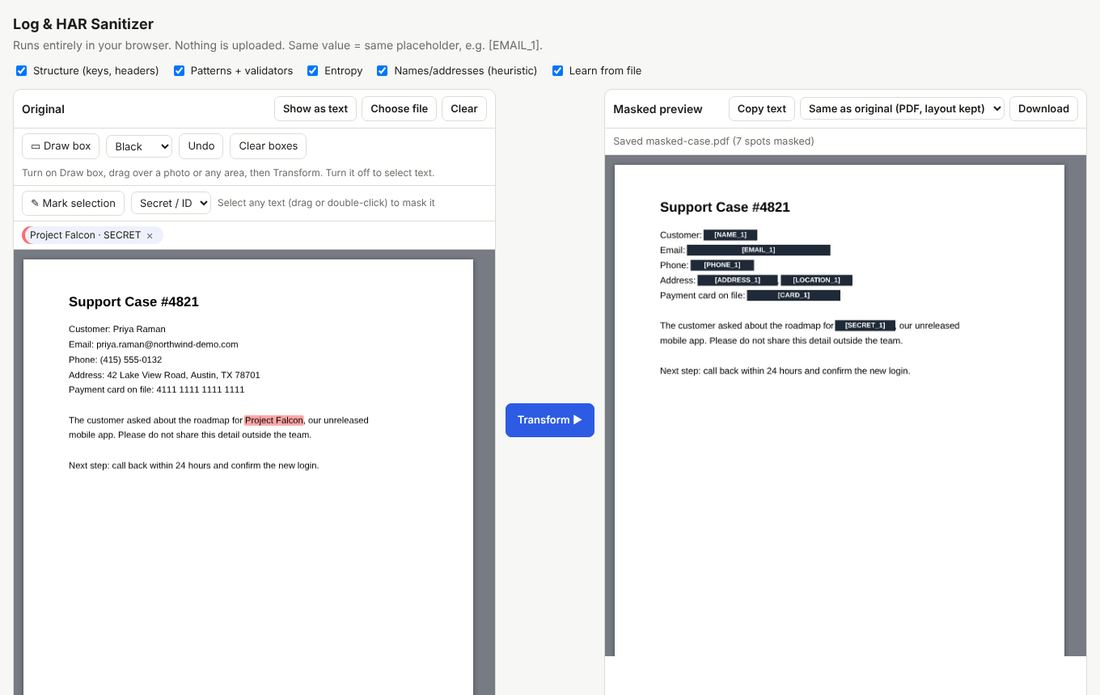
| Each page is re-drawn as a picture with dark boxes over the private parts. The new PDF has no hidden text layer, so you cannot select or copy the covered words. (Trade-off: the new PDF is not searchable.) | |
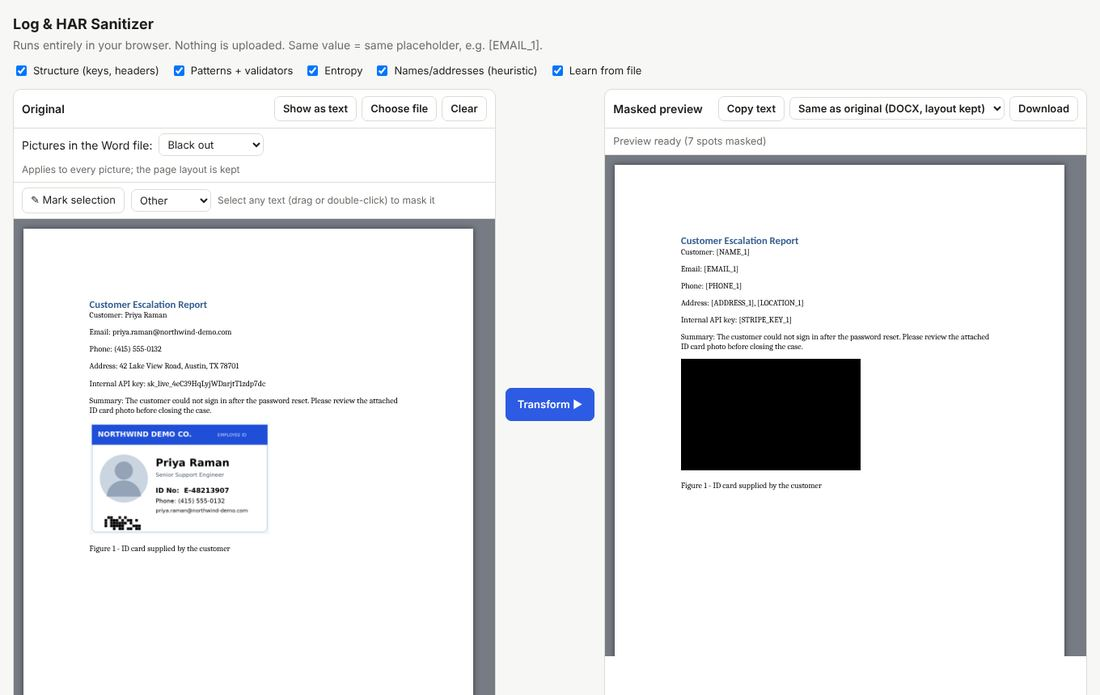
| Word (.docx) | The text is replaced inside the document, so the fonts and layout stay. Author names, "last saved by", company name, and the small preview picture are cleared. Pictures can be blacked out or removed. |
| Images (JPG, PNG, WebP) | The covered area is painted over in the picture itself, then the image is saved again. Hidden camera and location details (EXIF) are not carried over. |
3. The Same Value Always Gets the Same Label
If the same email appears ten times, it becomes [EMAIL_1] all ten times. The person you share it with can still follow what happened ("[EMAIL_1] logged in, then [EMAIL_1] failed to pay") without knowing who it is.
4. What It Is Not
- It is a safety net, not a guarantee. The tool finds common patterns very reliably (emails, phone numbers, card numbers, keys, passwords). Names, company names, and project code names are harder. It catches names that follow a label such as "Customer:" or "Name:", but a name sitting alone in a sentence can be missed.
- It cannot read text inside pictures. A screenshot is just a picture to it. You draw boxes over the private parts yourself (use case 4).
- Always look at the right-hand side before you share. It takes thirty seconds and is the most important step.
- It is not a legal or compliance certificate. If your company has rules for handling regulated data, follow them.
A good habit: try it first with made-up data (like the examples below), then with the real thing.
What It Finds Automatically
| Category | Examples |
|---|---|
| Contact details | Email addresses, phone numbers, street addresses, city and state |
| Money and identity | Credit card numbers (checked so random numbers are not flagged), IBAN, social security style numbers |
| Secrets | Passwords, access tokens, API keys, cloud keys, long random-looking strings |
| Network | IP addresses |
| Names | Names after a label (Customer, Name, Contact, Prepared by...) or a title (Mr, Dr...) |
| Anything else | You select it, pick a type, and it is masked everywhere it appears |
All the examples below use invented people and numbers.
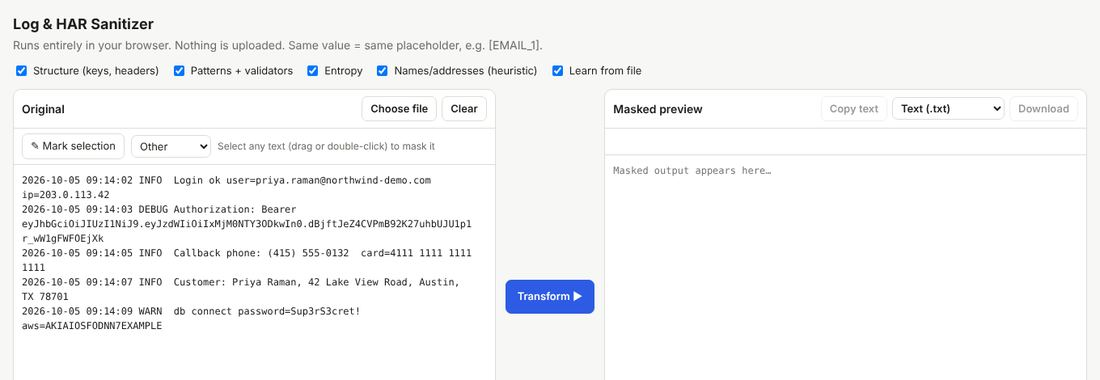
1. Paste Text From the Clipboard
Best for log lines, error messages, chat transcripts, or anything you can copy.
- Copy the text you want to share.
- Click inside the Original box on the left and paste (Ctrl+V, or Cmd+V on a Mac).
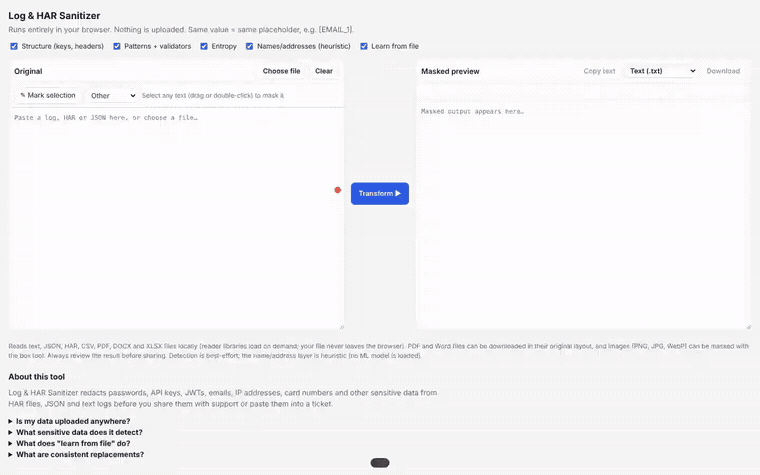
- Click the blue Transform button in the middle.
- Read the Masked preview on the right. Click Copy text and paste it into your email or ticket, or click Download.
2. Import a Word File and Mask the Text and the Picture
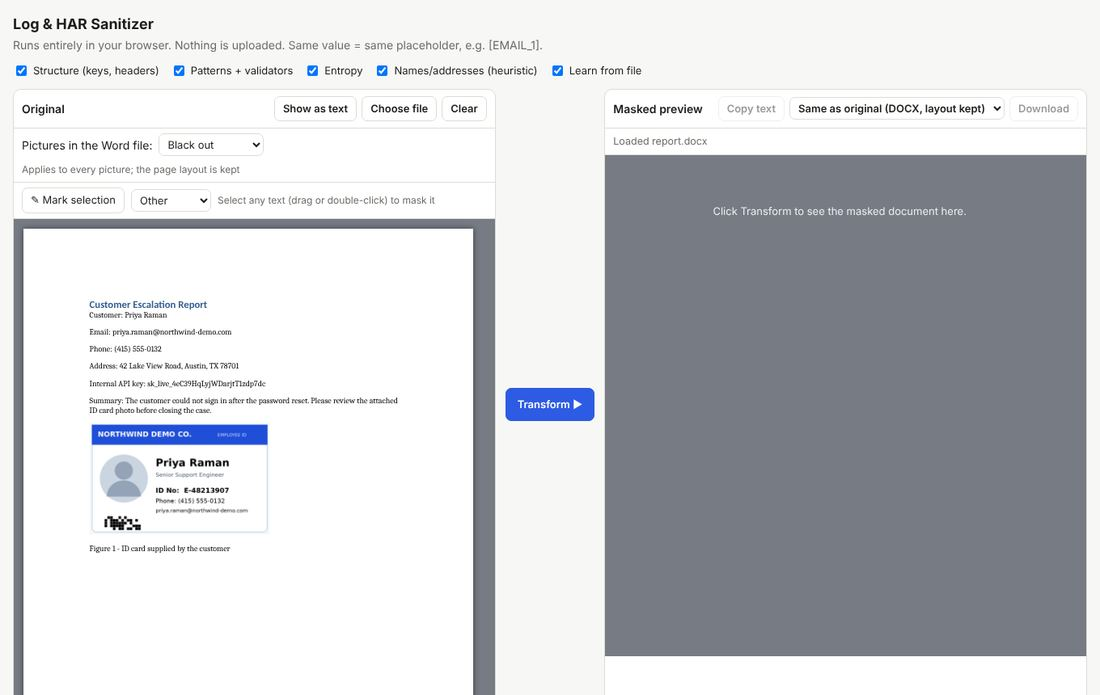
Best for reports, contracts, resumes, and case notes. The masked file keeps the same look as the original.
- Click Choose file (top of the left side) and pick your
.docxfile. It appears with its original fonts and layout. - If the document contains pictures, set Pictures in the Word file to Black out (solid black) or Remove (blank space). The default, Keep, leaves them as they are.
- Click Transform. The right side shows the masked document.
- Click Download. You get a normal Word file named
masked-…docx.
.doc files are not supported: open them in Word and use Save As → .docx first.
3. Import a PDF, Auto-Mask, Then Add Your Own Mask
Best for invoices, statements, scanned forms, and anything that must stay a PDF.
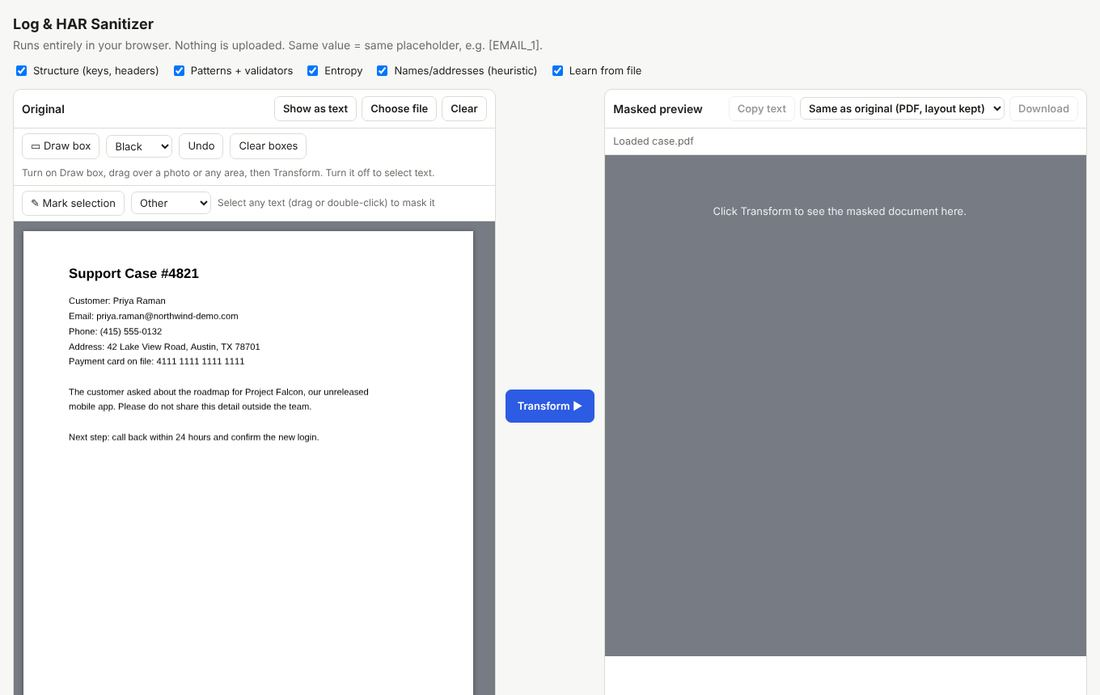
- Click Choose file and pick the PDF. The pages show on the left exactly as they look in the file.
- Click Transform. The right side shows the pages with dark boxes and labels over the private parts.
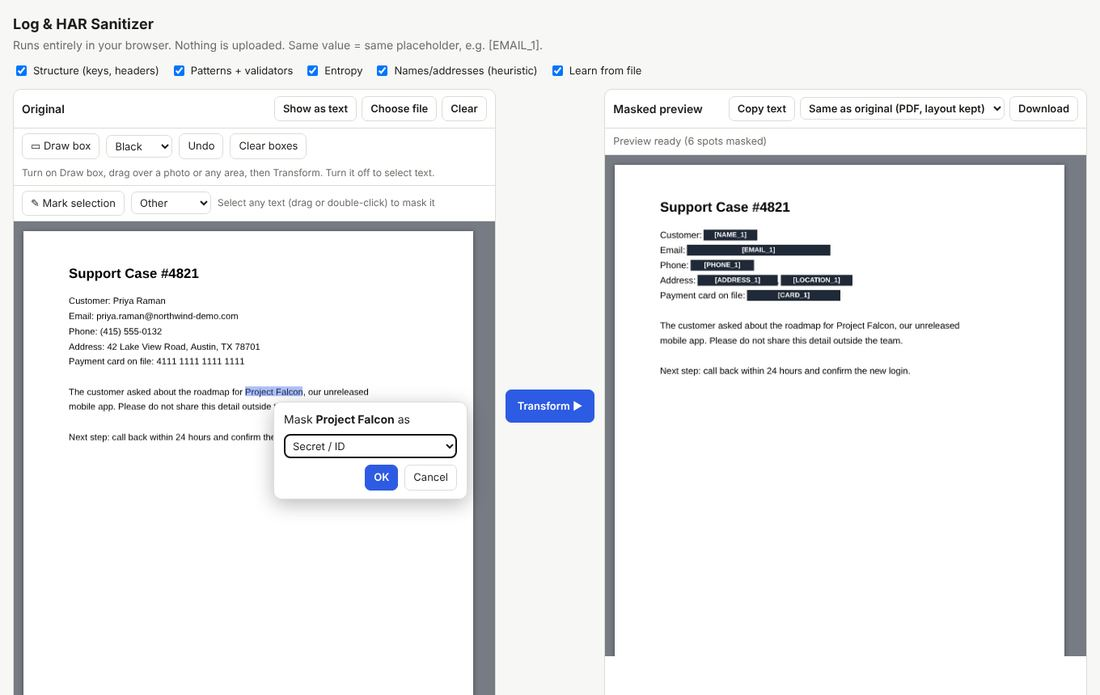
- Add your own mask: the tool does not know that "Project Falcon" is secret. Select those words, choose a type in the pop-up (here, Secret/ID), and press OK.
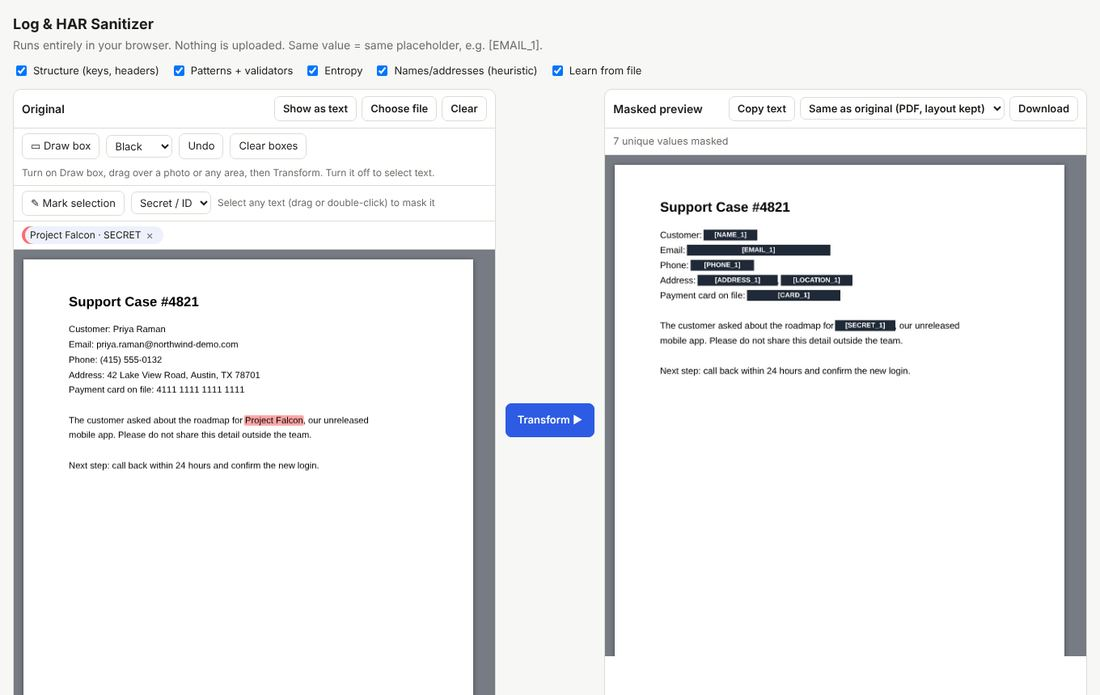
- Click Transform again. The right side updates and now covers your custom words too.
- For a picture, a signature, or a whole area, click Draw box and drag a rectangle over it before you press Transform.
- Click Download to save the masked PDF.
4. Import a JPEG Photo and Hide Parts With a Black or White Box
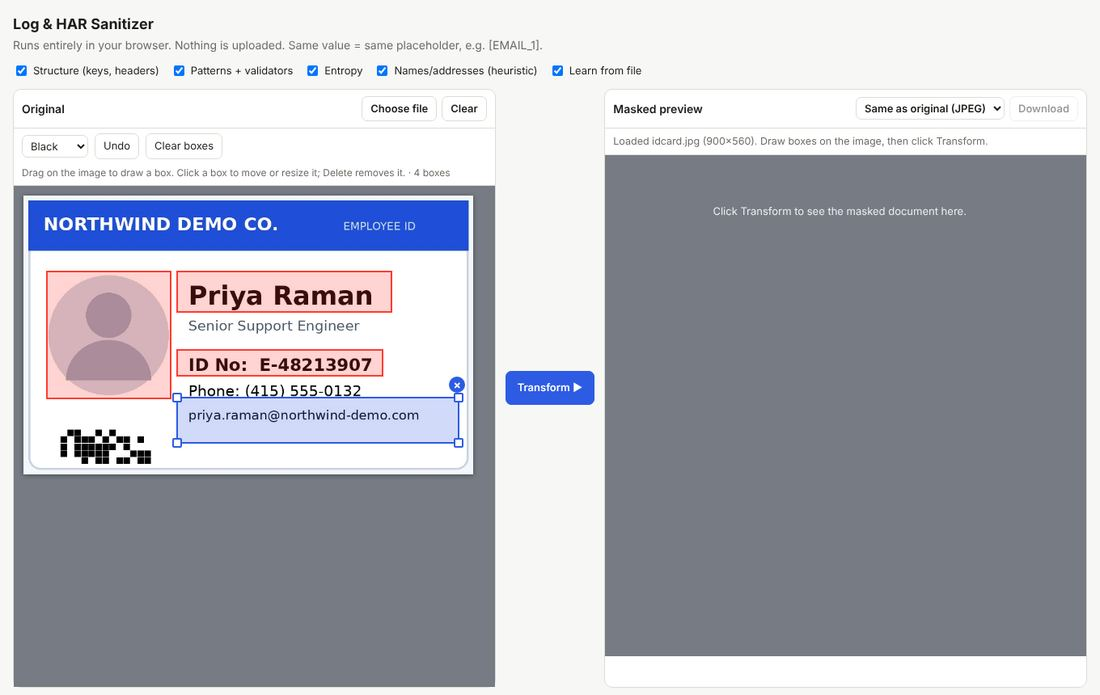
Best for screenshots, photos of documents, and ID cards. This is done by hand, because the tool does not read text inside pictures.
- Click Choose file and pick a
.jpg,.pngor.webpimage. It appears on the left. - Drag with your mouse to draw a box over each private part. Click a box to move it or resize it from the corners. Press Delete to remove it, or Ctrl+Z to undo.
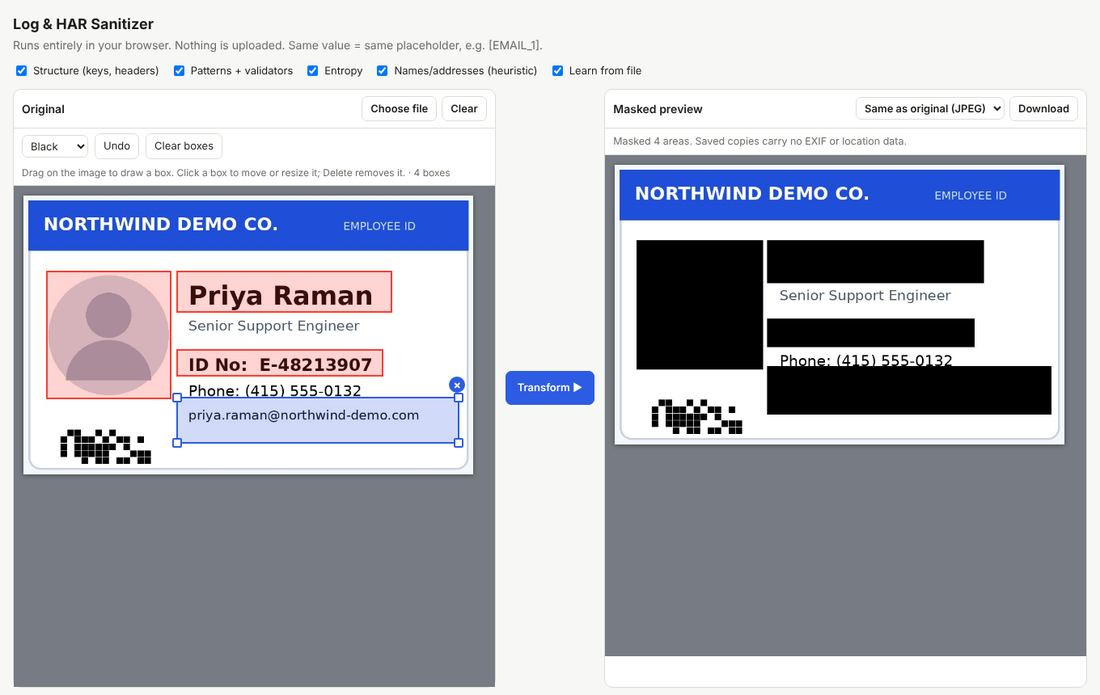
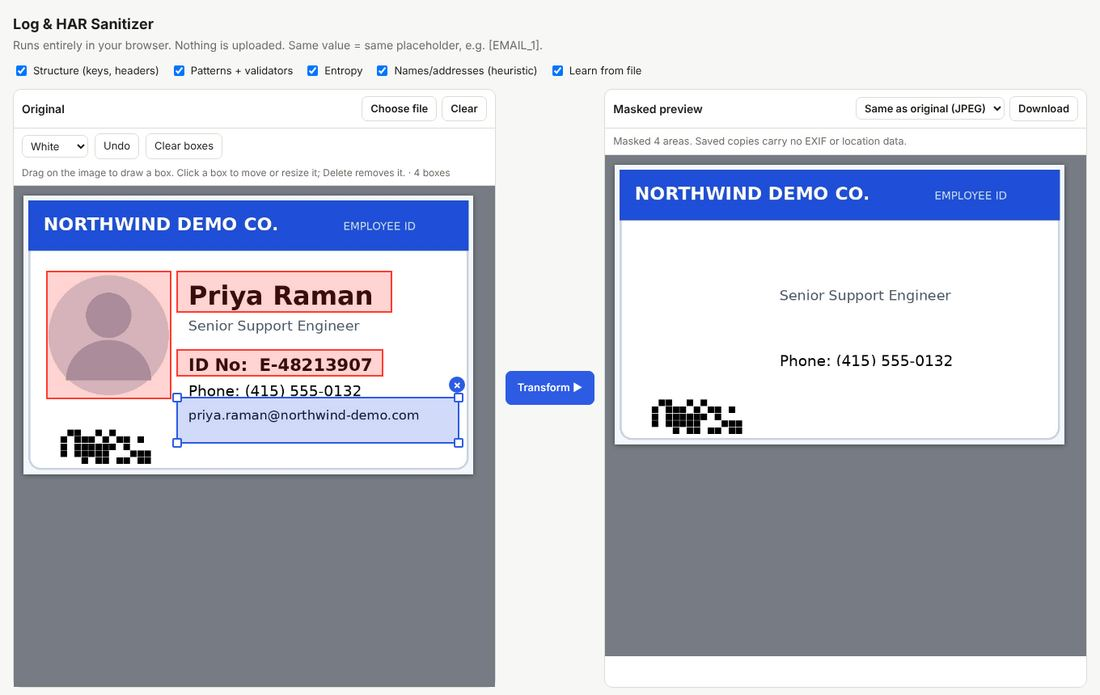
- Pick the color in the first drop-down: Black, White (blanks the area out), or Pixelate. Use Black or White for anything readable. Pixelated text can sometimes be recovered.
- Click Transform and check the right side.
- Click Download. You can keep the same format or save as PNG or JPEG.
A 30-Second Checklist Before You Press Send
- Look at the right-hand side, not the left.
- Scan for names, company names, project names, and anything in a picture.
- Zoom in on PDFs and images. Make sure each box fully covers the text.
- Use Black or White boxes rather than Pixelate for readable text.
- Send the downloaded masked file, never the original.
Questions People Ask
-
Do I need to create an account or pay?
No. It is free and needs no sign-up. -
Does it keep a copy of my file?
No. It runs in your browser tab. Close the tab and it is gone. There is no server that receives your file. -
Can it undo the masking later?
No. The masked file contains only the labels, not the original values. Keep your original file somewhere safe if you need it. -
Will it find everything?
No tool can promise that. It is very good at patterns like emails, phones, cards and keys. For names, company names, secret project names and anything inside a picture, you add masks yourself. That is why the review step matters. -
Does it work on my phone?
The page adapts to a phone screen, but it is designed for a computer. Drawing boxes on images and checking PDFs is much easier with a mouse or trackpad. -
Which files can I use?
Pasted text,.txt,.log,.json,.har,.csv,.pdf,.docx,.xlsx(masked as text) and images (JPG, PNG, WebP).
See It In Action
This short clip shows the Word, PDF, and image flows from start to finish, using a sample screenshot.
Try It Now
Opinions expressed by DZone contributors are their own.