Clean Up Your Workbench With a VNC Server on a Raspberry Pi
Avoid having too many input and output devices on your workbench by using a virtual network computing server, and an accompanying viewer, and a Rasbperry Pi.
Join the DZone community and get the full member experience.
Join For FreeThe Raspberry Pi is a versatile mini computer. As such, I can use it with a USB keyboard, mouse, and HDMI LCD monitor. But having multiple keyboards and mice on my desktop is not my thing; somehow I always grab the wrong one. So what I prefer is to run the Raspberry with VNC (Virtual Network Computing). That way, I have the Linux GUI as a window on my normal desktop, and no messing up with keyboards and mice:
VNC is a graphical desktop sharing program. It requires software to be installed on the Linux machine as a server, and as the viewer runs on the other client machine (e.g. Windows), it connects over the network to the server. That way, the input devices and displays of the client machine can be used as if they are attached to the server.
In my setup, the Raspberry Pi is booting to the desktop environment by default.
If you want to check it out, the process of installing VNC on a Raspberry Pi is described in the documentation. To start the server on the Pi, use $ vncserver.
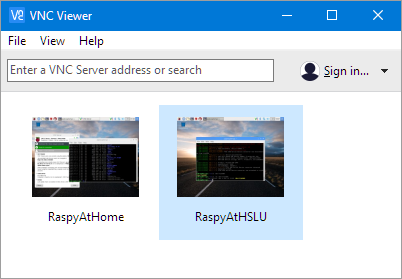
On my laptop, I’m using the free VNC Viewer from RealVNC.
Connecting
In the client connection settings, I specify the IP address plus the screen number (:1):
I had problems connecting the client and the server if they were not in the same subnetwork. I did not investigate this further, but I believe it is about which ports are open on the network router. From a security point of view, I’m OK with this.
The address to connect to is shown in the VNC Server:
Now when the Raspberry Pi gets rebooted, I have to restart the server manually. Here is how to get it started automatically:
Change the director to the user (pi, usually /home/pi/) account directory:
cd ~In that folder, there should be a .config directory. Change to that one:
cd .configIf it not already exists, create a directory named ‘autostart’:
mkdir autostartChange to that directory:
cd autostartIn that folder create (if it does not already exist) a file named tightnc.desktop. It can be created/edited with
nano tightvnc.desktopThen add the following:
[Desktop Entry]
Type=Application
Name=TightVNC
Exec=vncserver :1
StartupNotify=falseSave the content with CTRL-O and then exit with CTRL-X.
That’s it: Reboot Linux, and the VNC server will be running automatically.
Summary
Virtual Network Connection (VNC) with a VNC viewer is a good way to avoid too many input and output devices on a workbench: It allows me to use my desktop display, mouse, and keyboard for the Raspberry Pi. All it requires is a viewer on the desktop and a VNC server running on the Linux machine. To autostart the VNC server, a file (tightvnc.desktop) has to be created.
Happy VNCing!
Links
Published at DZone with permission of Erich Styger, DZone MVB. See the original article here.
Opinions expressed by DZone contributors are their own.


Comments