Spring Data: Easy MongoDB Migration Using Mongock
In this tutorial, we will learn how to manage and apply MongoDB database schema changes using Mongock.
Join the DZone community and get the full member experience.
Join For FreeIn one of my projects, I was looking for some simple options to manage MongoDB database schema changes similar to other projects like Flyway or Liquibase. I found Mongock, which is an open-source Java MongoDB tool.
Prerequisites
- Spring Boot 2.5.0
- Maven 3.6.1
- JAVA 11
- Mongo 4.4
Getting Started
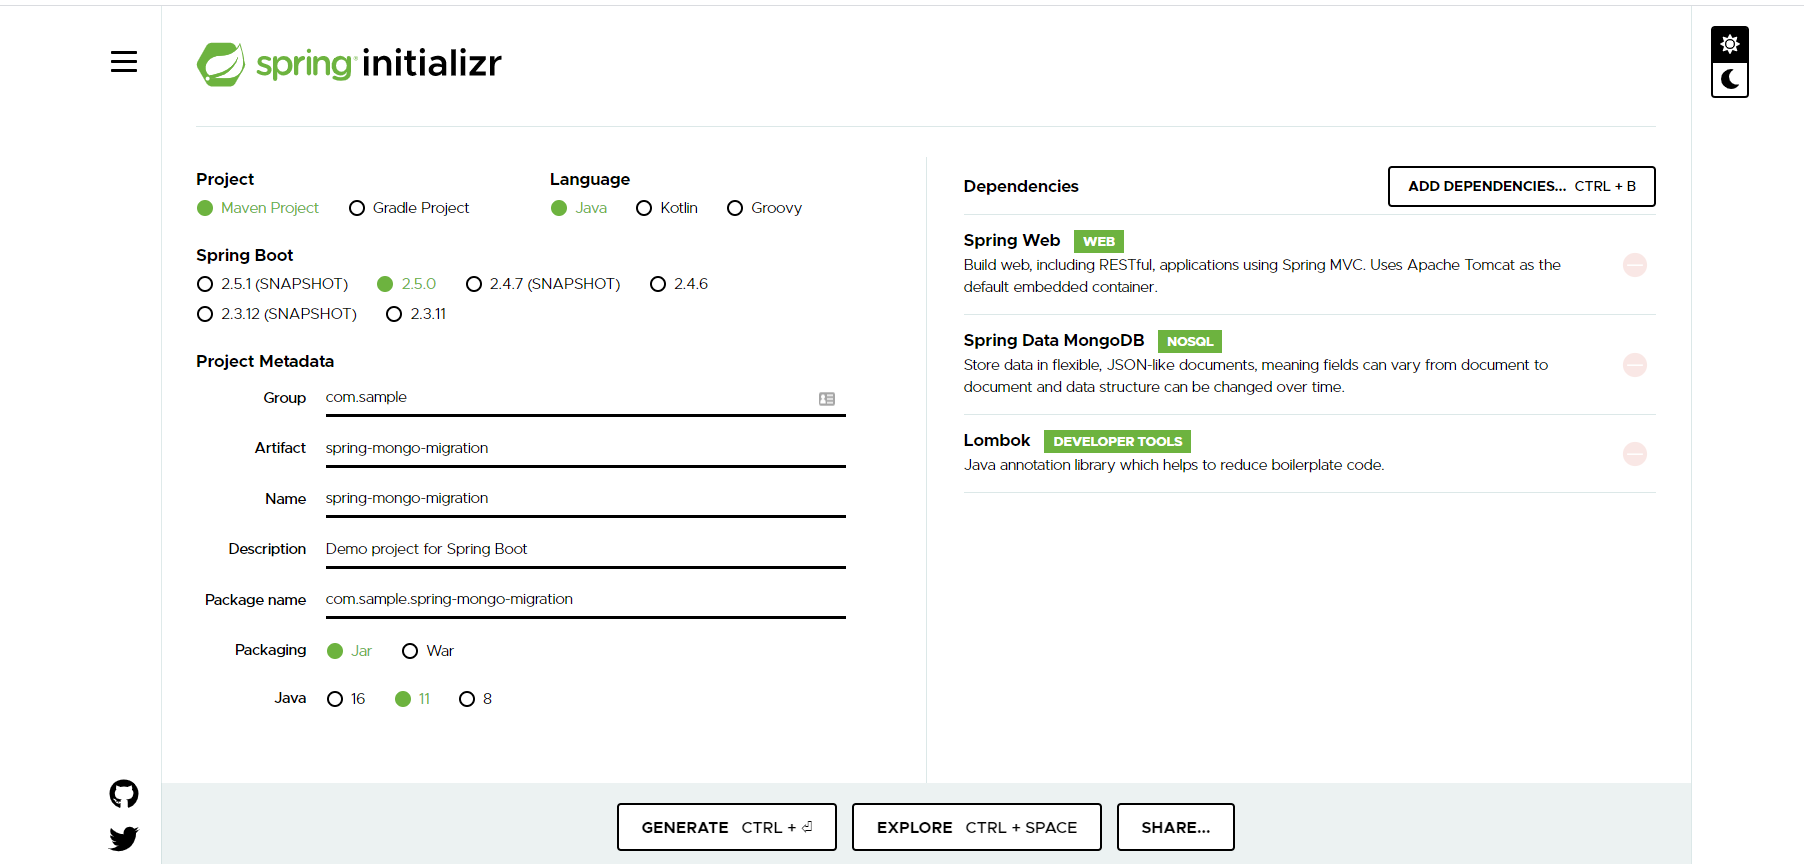
We will start by creating a simple Spring Boot project from start.spring.io, with the following dependencies: Web, MongoDB, and Lombok.
To start using Mongock in our project, we need to add the dependencies below in the pom.xml file.
- Import the last version of Mongock's bom to your pom file. You can check the latest version here.
<dependencyManagement>
    <dependencies>
        <dependency>
            <groupId>com.github.cloudyrock.mongock</groupId>
            <artifactId>mongock-bom</artifactId>
            <version>4.3.8</version>
            <type>pom</type>
            <scope>import</scope>
        </dependency>
    </dependencies>
</dependencyManagement>
- Add the runner dependency.
<dependency>
    <groupId>com.github.cloudyrock.mongock</groupId>
    <artifactId>mongock-spring-v5</artifactId>
</dependency>
- Add the driver dependency.
<dependency>
    <groupId>com.github.cloudyrock.mongock</groupId>
    <artifactId>mongodb-springdata-v3-driver</artifactId>
</dependency>
Enable Mongock
Once you have successfully imported the necessary dependencies, there are two ways to activate Mongock in our project. In most cases, when using the Spring framework, the easiest and most convenient way is the annotation approach. However, sometimes you don't use Spring or you need more control over your Mongock bean. In this case, you should go for the traditional builder approach.
We opt for the annotation approach in our project.
- Add the
@EnableMongockannotation to the main class.

- Add your changeLog package path to your property file (application.yml). it's an array, so you can add more than one.

We are now going to create the first models of the project.
For this tutorial, we have an Employeemodel class in which the Department class is embedded.
@Builder
@Data
@AllArgsConstructor
@NoArgsConstructor
public class Department {
    @Id
    private String id;

    @NonNull
    private String code;

    private String name;
}@Builder
@Data
@AllArgsConstructor
@NoArgsConstructor
@Document(collection = "employee")
public class Employee {
@Id
private String id;
private String firstName;
private String lastName;
private String email;
@NonNull
private Department department;
}For each model, we will create a Repository interface.
ChangeLogs and ChangeSets
ChangeLogs are migration classes. They contain ChangeSets, which are the methods that actually perform the migration.
To tell Mongock to run the migration, you need:
- Annotate the
changeLogclasses by@ChangeLog. - Annotate the
changeSetmethods by@ChangeSet.
Let's create our first ChangeLog class to initialize the basic data.
@ChangeLog(order = "001")
public class DatabaseInitChangeLog {


    @ChangeSet(order = "001", id = "init_departments", author = "aek")
    public void initDepartments(DepartmentRepository departmentRepository) {
        departmentRepository.save(Department.builder()
                .name("Human Resource Management")
                .code("HR")
                .build());
        departmentRepository.save(Department.builder()
                .name("R&D")
                .code("Research and Development (often abbreviated to R&D)")
                .build());
        departmentRepository.save(Department.builder()
                .name("Prod")
                .code("Production")
                .build());
    }

    @ChangeSet(order = "002", id = "init_Employee_HR", author = "aek")
    public void initHrEmployees(EmployeeRepository employeeRepository,
                              DepartmentRepository departmentRepository) {
        Optional<Department> hrDepartment = departmentRepository.findAllByCode("HR");

        if (hrDepartment.isPresent()){
            Employee employee1 = employeeRepository.save(Employee.builder()
                    .firstName("Dioms")
                    .lastName("Kane")
                    .email("[email protected]")
                    .department(hrDepartment.get())
                    .build());
            employeeRepository.save(employee1);

            Employee employee2 = employeeRepository.save(Employee.builder()
                    .firstName("Astrid")
                    .lastName("Flob")
                    .email("[email protected]")
                    .department(hrDepartment.get())
                    .build());
            employeeRepository.save(employee2);
        }
    }
    @ChangeSet(order = "003", id = "init_Employee_RAD", author = "aek")
    public void initRadEmployees(EmployeeRepository employeeRepository,
                              DepartmentRepository departmentRepository) {
        Optional<Department> radDepartment = departmentRepository.findAllByCode("R&D");

        if (radDepartment.isPresent()){
            Employee employee1 = employeeRepository.save(Employee.builder()
                    .firstName("Luis")
                    .lastName("Siruis")
                    .email("[email protected]")
                    .department(radDepartment.get())
                    .build());
            employeeRepository.save(employee1);
        }
    }


}
Mongock provides different ways of applying the ChangeSets. In our case, we are using the Spring Data Repository to save the data to a database. See the documentation for details.
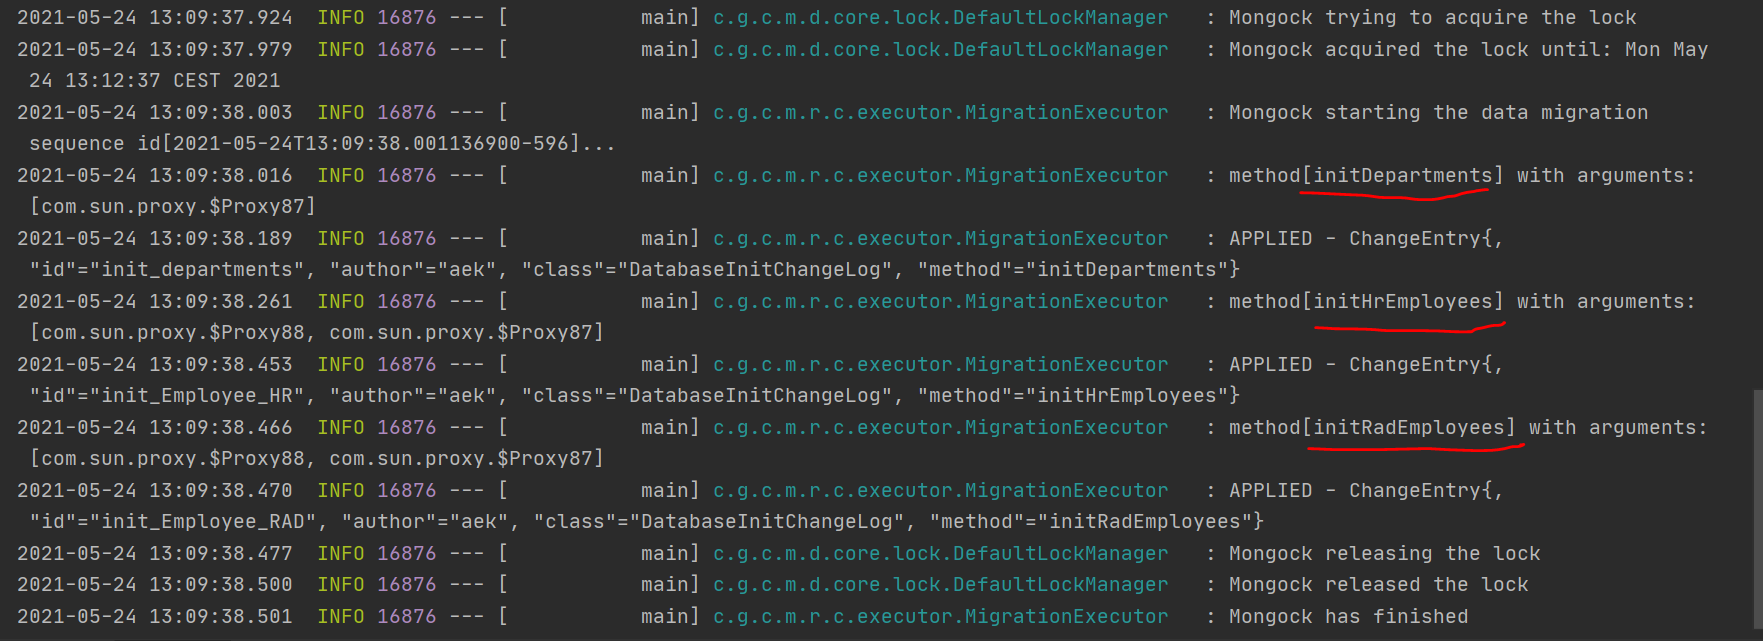
Run the application and check the log which clearly shows us that the migration script is executed:
Suppose we want to add a new "salary" field to the Employee collection. It is important to update the data of existing documents.
After adding the field in Employee.java, create the Changelog class.
@ChangeLog(order = "002")
public class DatabaseUpdateChangeLog {

    @ChangeSet(order = "002", id = "update_employees", author = "aek")
    public void updateEmployees(EmployeeRepository employeeRepository) {

        employeeRepository.findAll().forEach(employee -> {
            employee.setSalary(0.0);
            employeeRepository.save(employee);
        });
    }

}In this post, we have learned how to manage and apply MongoDB database schema changes using Mongock.
Full source code can be found on GitHub.
Opinions expressed by DZone contributors are their own.
Comments