Spring Boot REST Service Protected Using Keycloak Authorization Services
Learn more about one open-source IAM solution that provides authentication and authorization to protect Spring Boot REST services.
Join the DZone community and get the full member experience.
Join For Free
Keycloak is an open-source Identity and Access Management (IAM) solution aimed at modern applications and services. Keycloak provides out-of-the-box authentication and authorization services as well as advanced features like User Federation, Identity Brokering, and Social Login.
Keycloak provides fine-grained authorization services as well. This allows you to manage permissions for all your services from the Keycloak admin console and gives you the power to define exactly the policies you need.
We are going to see how to use Keycloak Authorization services to protect REST APIs by using a set of permissions and policies defined in Keycloak. Access to these APIs is enforced by a policy enforcer that intercepts every REST call.
Spring Boot and Keycloak
Keycloak Client Adapters makes it really easy to secure applications and services. The Client Adapter is available for a number of platforms and programming languages. There are adapters for JBoss EAP/Wildfly, Spring Boot, Angular, NodeScript, and JavaScript.
We will write a RESTful service with SpringBoot and then secure it with Keycloak. Here, we will create REST API for course management at a university. Before that, we need to set up Keycloak Server.
Set Up Keycloak
Download Keycloak from here, unzip, and start the Keycloak using the following:
./standalone.sh(bat)In your browser, go to http://localhost:8080/auth/.
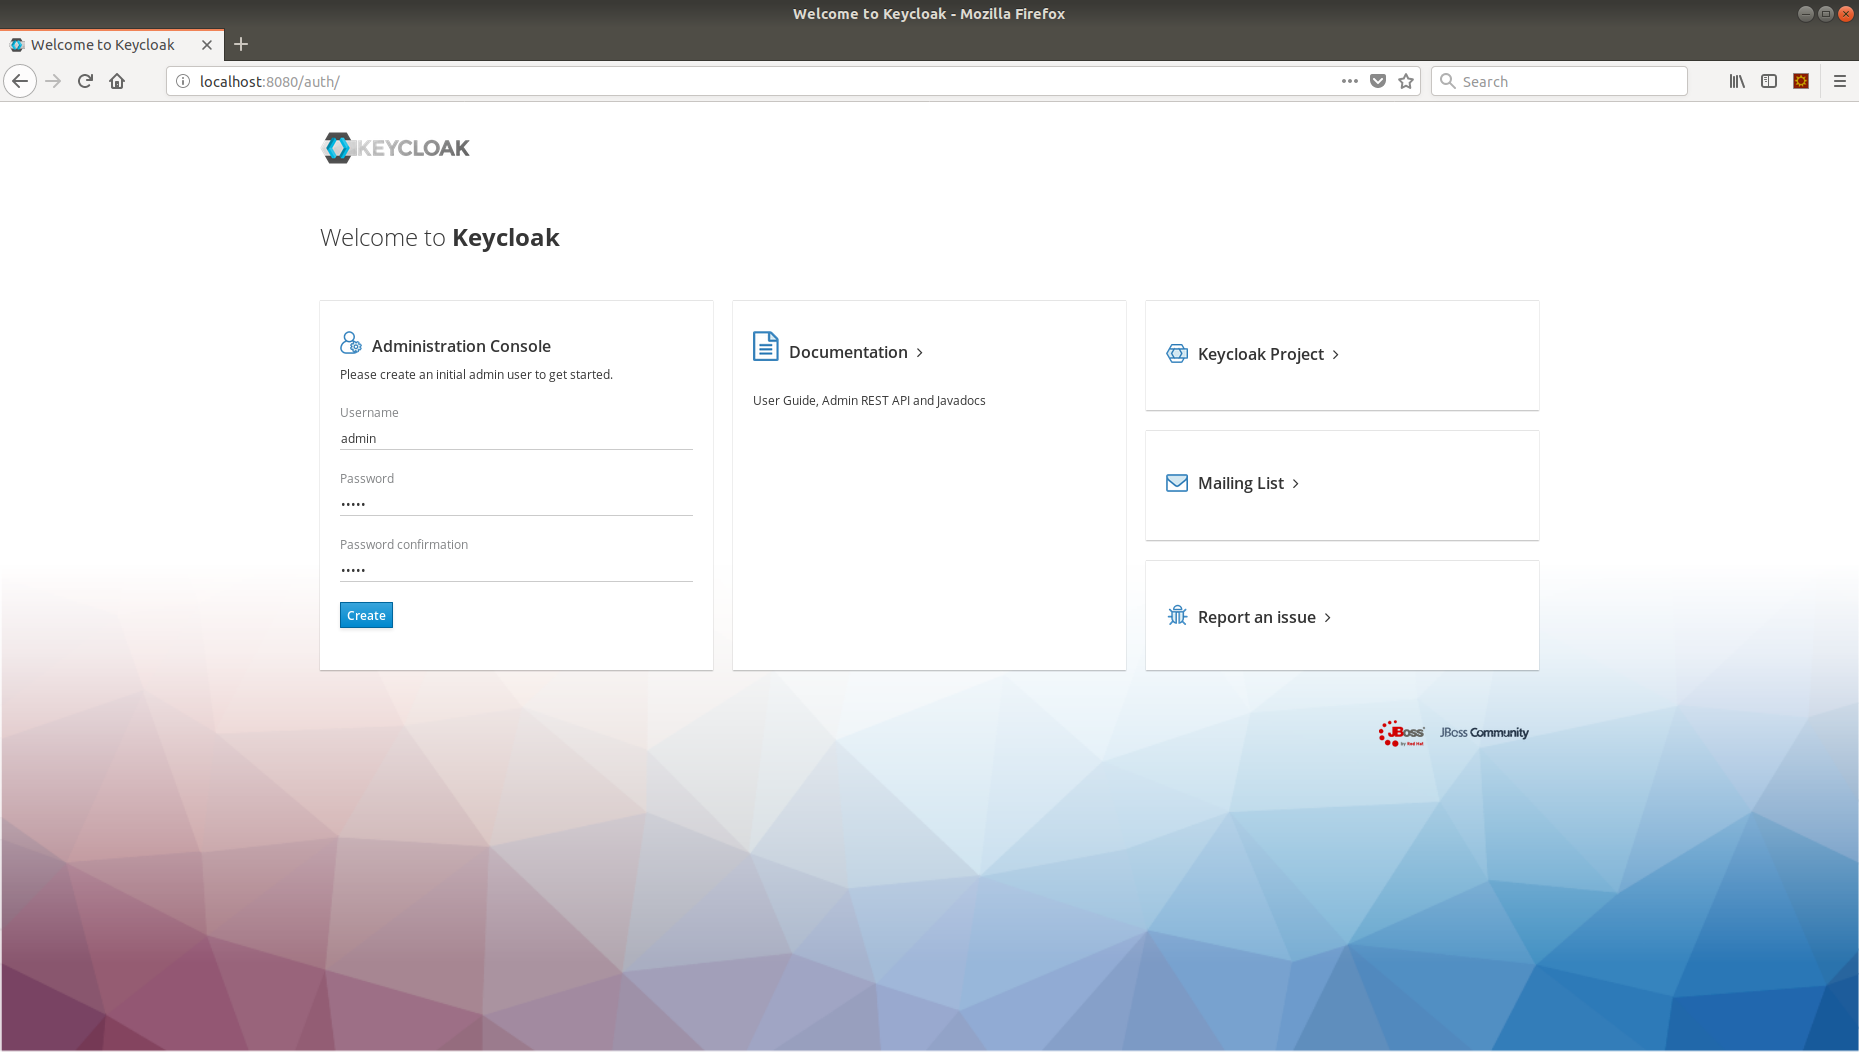
Since it’s the first time that the Keycloak server is running, you will have to create an admin user, so let’s create an admin user with admin as the username and password as admin.

Now, log in to Keycloak using admin user and start configuring Keycloak; the admin user is created in the default realm called master.
A realm secures and manages security metadata for a set of users, applications, and registered oauth clients. Users can be created within a specific realm within the Administration console. Roles (permission types) can be defined at the realm level and you can also set up user role mappings to assign these permissions to specific users.
Creating a Realm
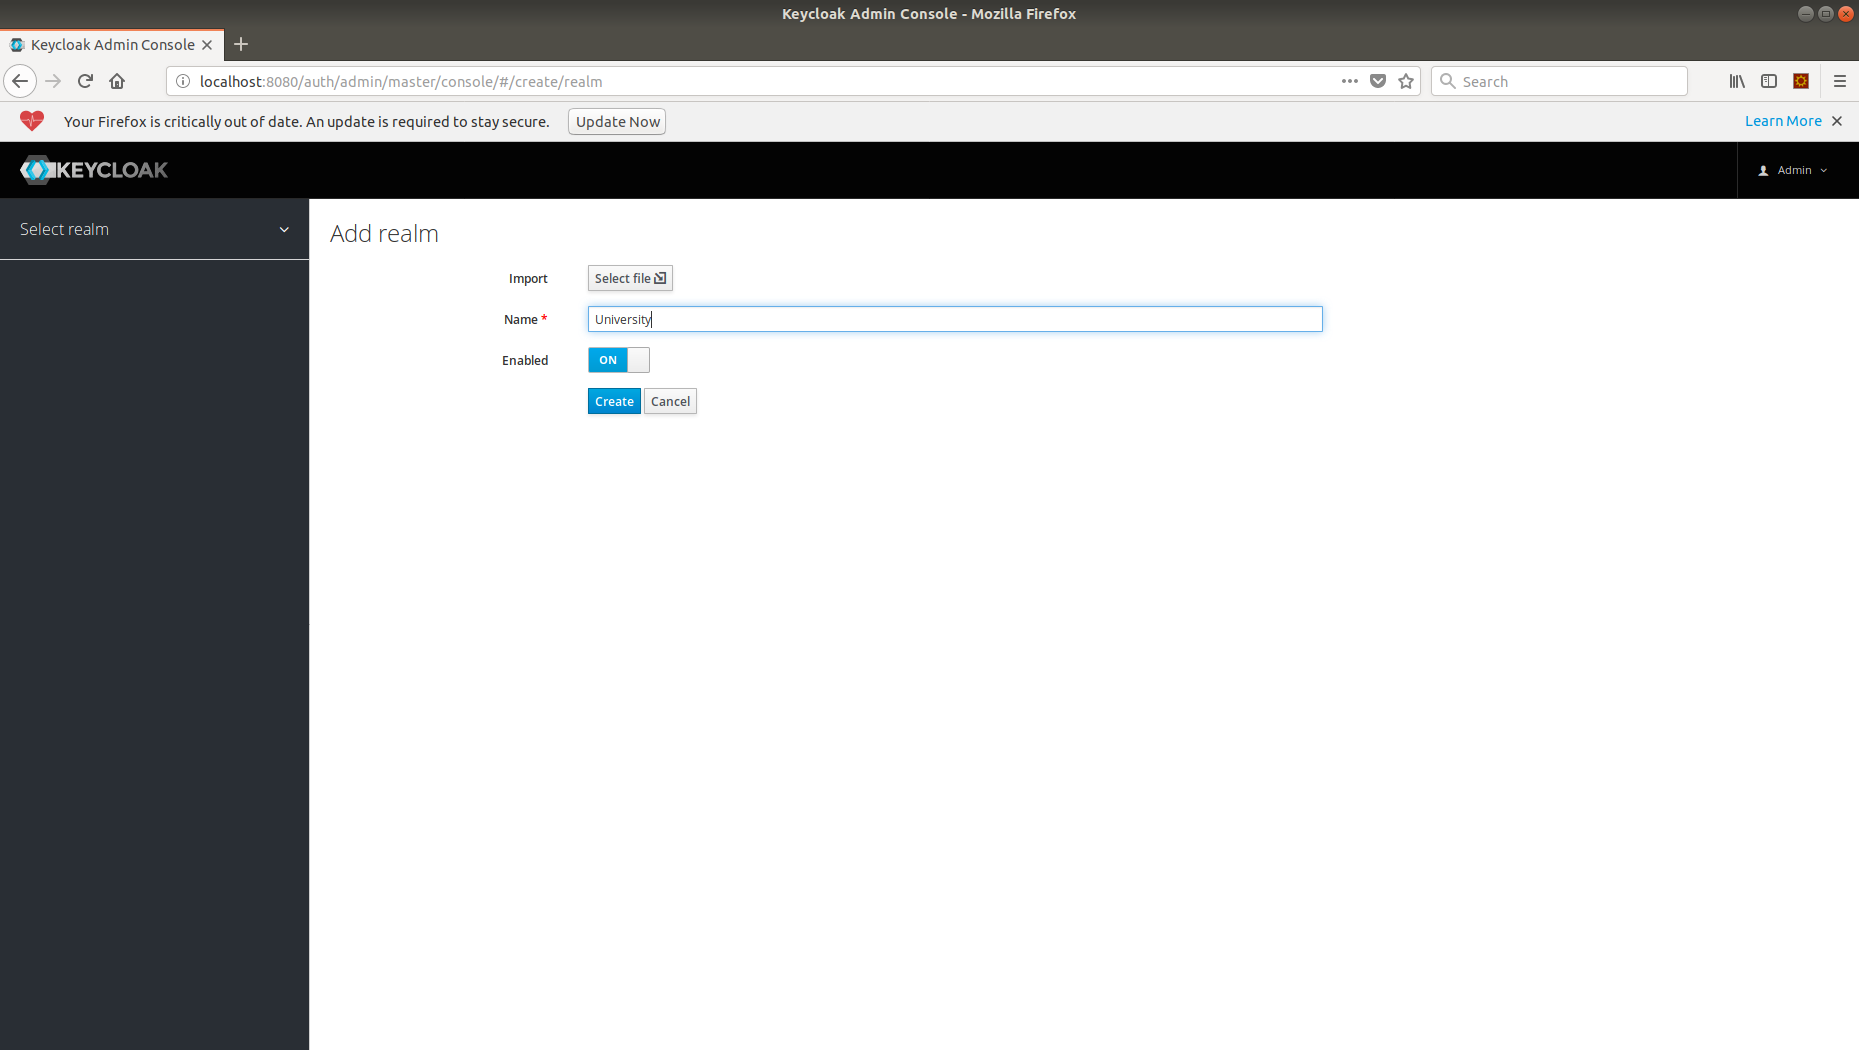
Now, we will create a new realm called University using Add Realm button under master Realm.
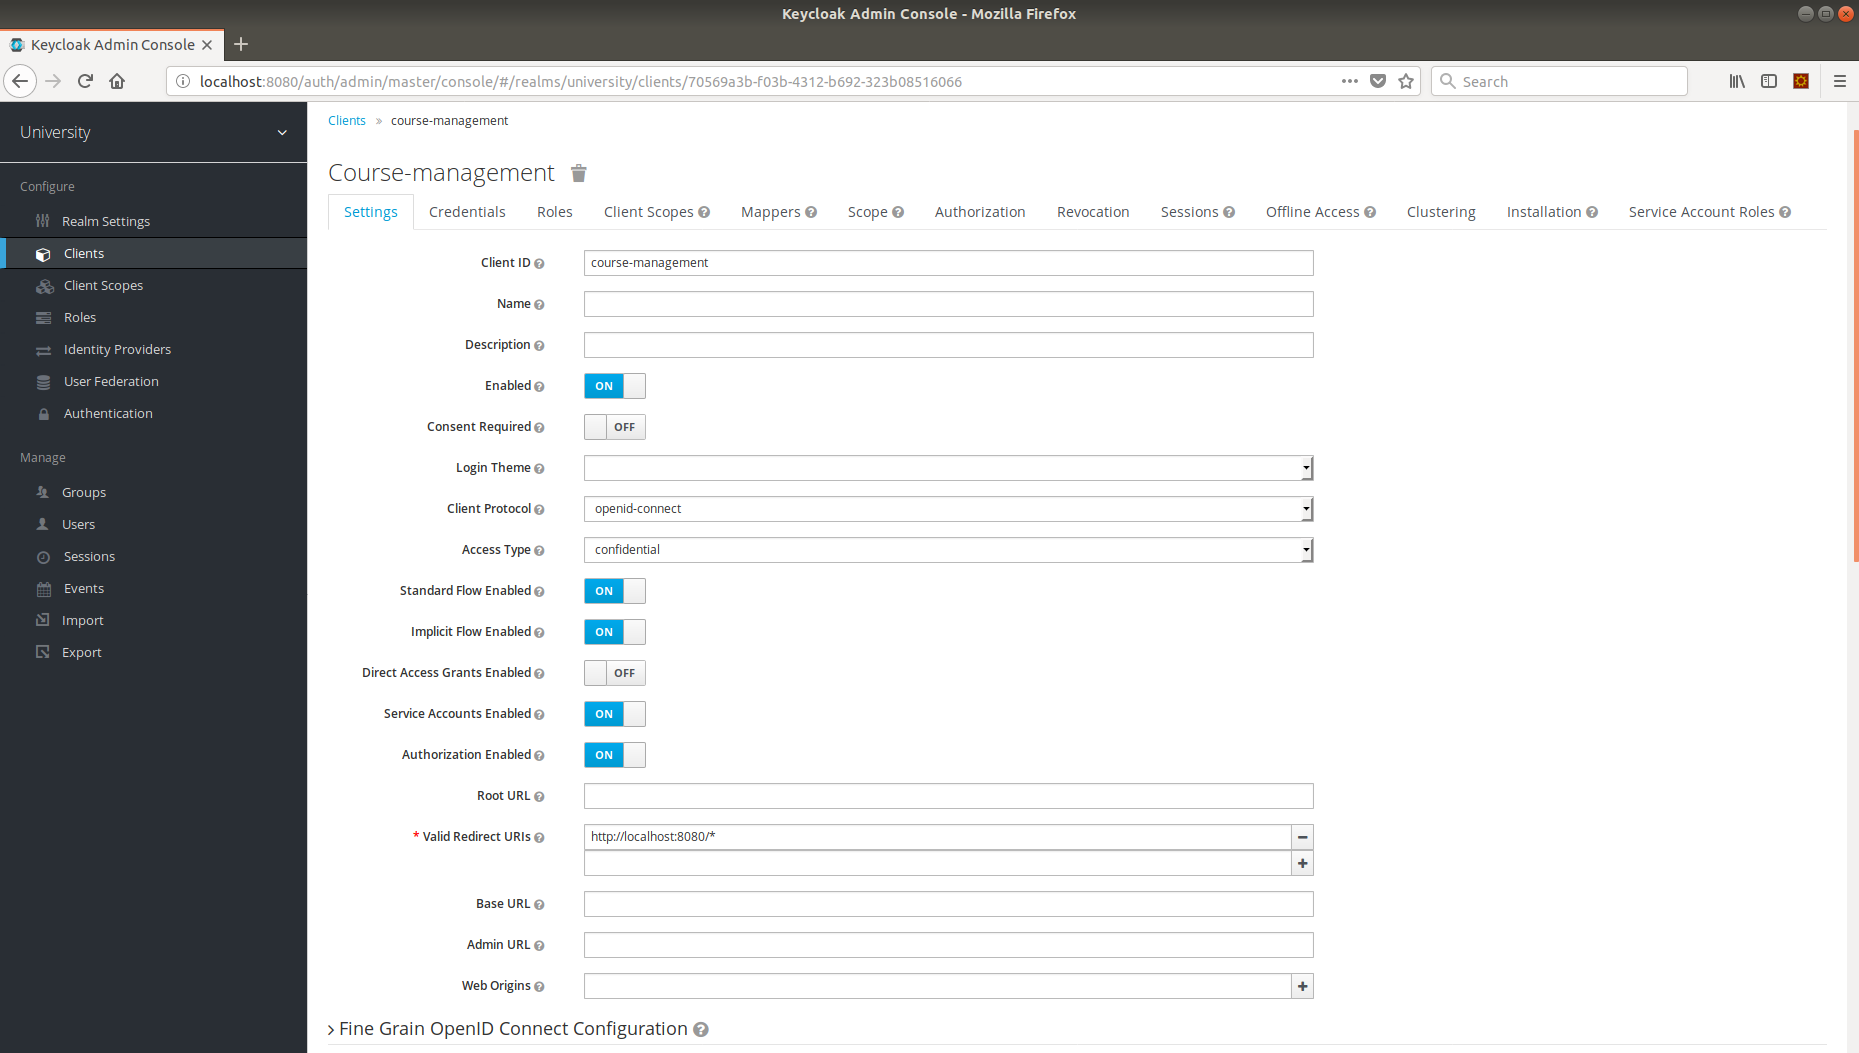
Now, create a client called Course-managment under University realm; we are going to secure course-management Client, which provides REST Service for managing university courses.

Here, you need to note we are setting Access Type as confidential and set Authorization Enabled to on so we can configure set permissions for our course-management REST API services.
Opinions expressed by DZone contributors are their own.

Comments