How to Use a Metronic in Java EE and to Integrate it in JSF
Want to learn how to use a theme like Metronic in Java EE? Check out this post to learn how to integrate it in JSF.
Join the DZone community and get the full member experience.
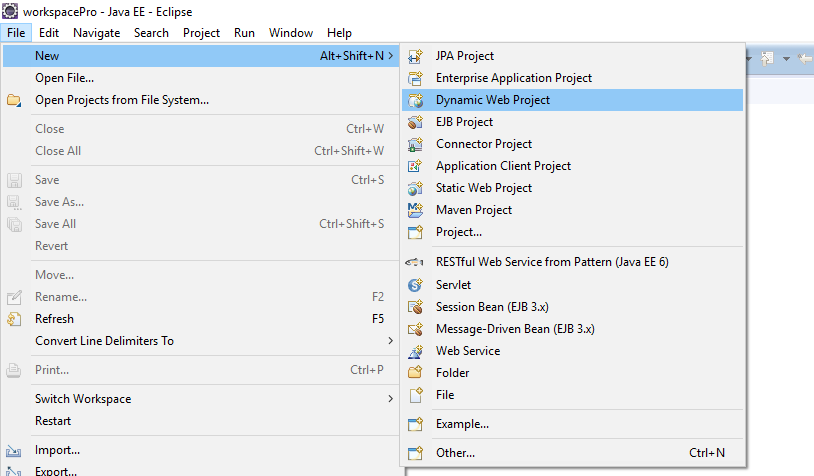
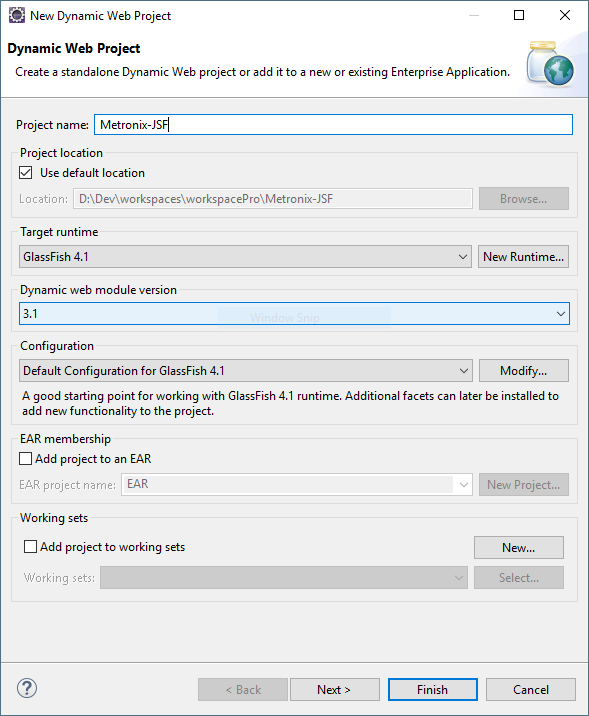
Join For FreeIf you head to themeforest.com, you will find a lot of HTML admin themes. For example, let's pick Metronic. If you’re wondering how to use it as the front of your Java EE 7/8 application, here is how to do it! You will use JDK8, Eclipse Oxygen, and Glassfish 4.1. The first step is to create a dynamic web project, as shown below:
Next, setup the web.xml:
<?xml version="1.0" encoding="UTF-8"?>
<web-app xmlns:xsi="http://www.w3.org/2001/XMLSchema-instance" xmlns="http://xmlns.jcp.org/xml/ns/javaee"
xsi:schemaLocation="http://xmlns.jcp.org/xml/ns/javaee http://xmlns.jcp.org/xml/ns/javaee/web-app_3_1.xsd"
id="WebApp_ID" version="3.1">
<display-name>Metronix-JSF</display-name>
<context-param>
<param-name>javax.faces.PROJECT_STAGE</param-name>
<param-value>Development</param-value>
</context-param>
<servlet>
<servlet-name>Faces Servlet</servlet-name>
<servlet-class>javax.faces.webapp.FacesServlet</servlet-class>
<load-on-startup>1</load-on-startup>
</servlet>
<servlet-mapping>
<servlet-name>Faces Servlet</servlet-name>
<url-pattern>*.xhtml</url-pattern>
</servlet-mapping>
<mime-mapping>
<extension>eot</extension>
<mime-type>application/vnd.ms-fontobject</mime-type>
</mime-mapping>
<mime-mapping>
<extension>otf</extension>
<mime-type>font/opentype</mime-type>
</mime-mapping>
<mime-mapping>
<extension>svg</extension>
<mime-type>image/svg+xml</mime-type>
</mime-mapping>
<mime-mapping>
<extension>ttf</extension>
<mime-type>application/x-font-ttf</mime-type>
</mime-mapping>
<mime-mapping>
<extension>woff</extension>
<mime-type>application/x-font-woff</mime-type>
</mime-mapping>
<mime-mapping>
<extension>woff2</extension>
<mime-type>application/x-font-woff2</mime-type>
</mime-mapping>
<welcome-file-list>
<welcome-file>template.xhtml</welcome-file>
</welcome-file-list>
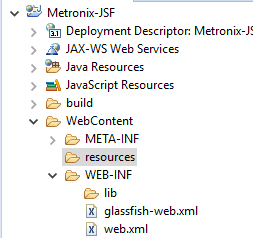
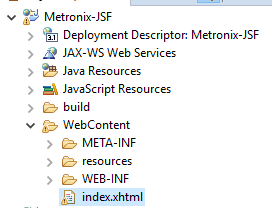
</web-app>Now, create a ‘resources’ folder in WebContent:
Now, head to the Metronic default folder in “metronic_v5.0.6.1\metronic_v5.0.6.1\theme\default\dist\default”

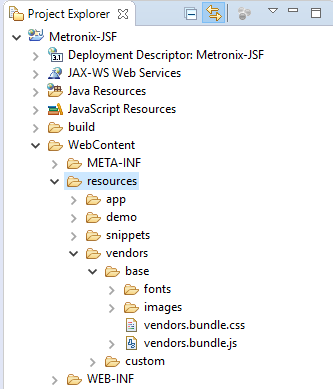
By examining the index.html, we found that all CSS and JS files are under the ‘assets’ folder. We select all folders in assets and copy them under the resources folder like this:
Metronic declares fonts it uses in vendors.bundle.css . However, in my experience, if you did not change the declaration of each font, JSF will not recognize the fonts (in chrome it says 404 error for the resource ..) and will default back to OS font.
You fix this by simply opening vendors.bundle.css . search for @font-face. Here is the first font declaration:
@font-face {

  font-family: "summernote";

  font-style: normal;

  font-weight: normal;

  src: url("fonts/summernote/summernote.eot?0d0d5fac99cc8774d89eb08b1a8323c4");

  src: url("fonts/summernote/summernote.eot?#iefix") format("embedded-opentype"), url("fonts/summernote/summernote.woff?0d0d5fac99cc8774d89eb08b1a8323c4") format("woff"), url("fonts/summernote/summernote.ttf?0d0d5fac99cc8774d89eb08b1a8323c4")  format("truetype"); }
Now, you can change it by adding “.xhtml?ln=vendors” after the font format type. It should look like this:
@font-face {
  font-family: "summernote";

  font-style: normal;

  font-weight: normal;

  src: url("fonts/summernote/summernote.eot.xhtml?ln=vendors&0d0d5fac99cc8774d89eb08b1a8323c4");

  src: url("fonts/summernote/summernote.eot.xhtml?ln=vendors#iefix") format("embedded-opentype"), url("fonts/summernote/summernote.woff.xhtml?ln=vendors&0d0d5fac99cc8774d89eb08b1a8323c4") format("woff"), url("fonts/summernote/summernote.ttf.xhtml?ln=vendors&0d0d5fac99cc8774d89eb08b1a8323c4") format("truetype"); }
You will need to do this for all of the fonts. Next, let’s create a template .xhtml file that all other pages are going to be based on.
You will need to add this first:
<!DOCTYPE html >

<html lang="en"

       xmlns="http://www.w3.org/1999/xhtml"

       xmlns:h="http://xmlns.jcp.org/jsf/html"

xmlns:ui="http://xmlns.jcp.org/jsf/facelets"

xmlns:c="http://xmlns.jcp.org/jsp/jstl/core"

       xmlns:f="http://xmlns.jcp.org/jsf/core"

       xmlns:jsf="http://xmlns.jcp.org/jsf"

       xmlns:p="http://xmlns.jcp.org/jsf/passthrough">
Next, create the Head :
<h:head>
       <meta charset="utf-8" />

       <meta name="viewport" content="width=device-width, initial-scale=1, shrink-to-fit=no" />

       <ui:insert name="meta-tag"></ui:insert>


       <script src="https://ajax.googleapis.com/ajax/libs/webfont/1.6.16/webfont.js"></script>

       <script>

         WebFont.load({

           google: {"families":["Poppins:300,400,500,600,700","Roboto:300,400,500,600,700"]},

           active: function() {

               sessionStorage.fonts = true;

           }

         });

       </script>

       <h:outputStylesheet library="vendors" name="custom/fullcalendar/fullcalendar.bundle.css" />

       <h:outputStylesheet library="vendors" name="base/vendors.bundle.css" />

       <h:outputStylesheet library="demo" name="default/base/style.bundle.css" />


       <title><ui:insert name="title">Page Title</ui:insert></title>

       <ui:insert name="page-style"></ui:insert>

       <link rel="shortcut icon" type="image/png" href="resources/custom/images/icon-derbyware.PNG" />

</h:head>
Next is the body. I cannot show the whole code for this because it’s 1000+ lines of code, but here are the guide lines :
The Metronic HTML page starts with this:
<body class="m-page--fluid m--skin- m-content--skin-light2 m-header--fixed m-header--fixed-mobile m-aside-left--enabled m-aside-left--skin-dark m-aside-left--offcanvas m-footer--push m-aside--offcanvas-default"  >

              <!-- begin:: Page -->

              <div class="m-grid m-grid--hor m-grid--root m-page">
Now, simply make it like this:
<h:body styleClass="m-page--fluid m--skin- m-content--skin-light2 m-header--fixed m-header--fixed-mobile m-aside-left--enabled m-aside-left--skin-dark m-aside-left--offcanvas m-footer--push m-aside--offcanvas-default" >

       <!-- start:: Page -->

       <div class="m-grid m-grid--hor m-grid--root m-page">
Then, copy the rest of the code of the head tag in index.xhtml.
If you go to line 3044 in the index.html, you will look for where the main content is located (other than top and left sidebars).
Once you do that, you put this code instead of the HTML one:
<div class="m-content">
<ui:insert name="m-content">
<!-- TODO -->
<div class="m-portlet">
<ui:insert name="remove-m-portlet__head">
<div class="m-portlet__head">
<div class="m-portlet__head-caption">
<div class="m-portlet__head-title">
<ui:insert name="m-content-head">
<h3 class="m-portlet__head-text">
Derbyware.com - Tests Platform
</h3>
</ui:insert>
</div>
</div>
<div class="m-portlet__head-tools">
<ui:insert name="m-content-head-tools"></ui:insert></div>
</div>
</ui:insert>
<!--begin::Form-->
<div class="m-portlet__body">
<ui:insert name="m-content-body">
<h1 class="m--font-success">Content</h1>
</ui:insert>
</div>
</div>
</ui:insert>
</div>
Now, after the ending tag of:
<div class="m-grid m-grid--hor m-grid--root m-page">You will need to add this:
<!-- end:: Page -->

       <!-- begin::Scroll Top -->

       <div class="m-scroll-top m-scroll-top--skin-top" data-toggle="m-scroll-top" data-scroll-offset="500" data-scroll-speed="300">

              <i class="la la-arrow-up"></i>

       </div>

<!-- Scripts -->

       <h:outputScript library="vendors" name="base/vendors.bundle.js" />

       <h:outputScript library="demo" name="default/base/scripts.bundle.js" />

       <h:outputScript library="vendors" name="custom/fullcalendar/fullcalendar.bundle.js" />

       <h:outputScript library="app" name="js/dashboard.js" />

       <ui:insert name="page-script"></ui:insert>

</h:body>
</html>
Congratulations, now you have your template page up and running.
Let's make the first page that we will be using (assuming the page exists in WebContent, so is index.xhtml–index is the template).
<?xml version='1.0' encoding='UTF-8' ?>
<!DOCTYPE html >
<html lang="en"
xmlns="http://www.w3.org/1999/xhtml"
xmlns:h="http://xmlns.jcp.org/jsf/html"
xmlns:jsf="http://xmlns.jcp.org/jsf"
xmlns:ui="http://xmlns.jcp.org/jsf/facelets"
xmlns:c="http://xmlns.jcp.org/jsp/jstl/core"
xmlns:f="http://xmlns.jcp.org/jsf/core"
xmlns:p="http://xmlns.jcp.org/jsf/passthrough">
<ui:composition template="index.xhtml">
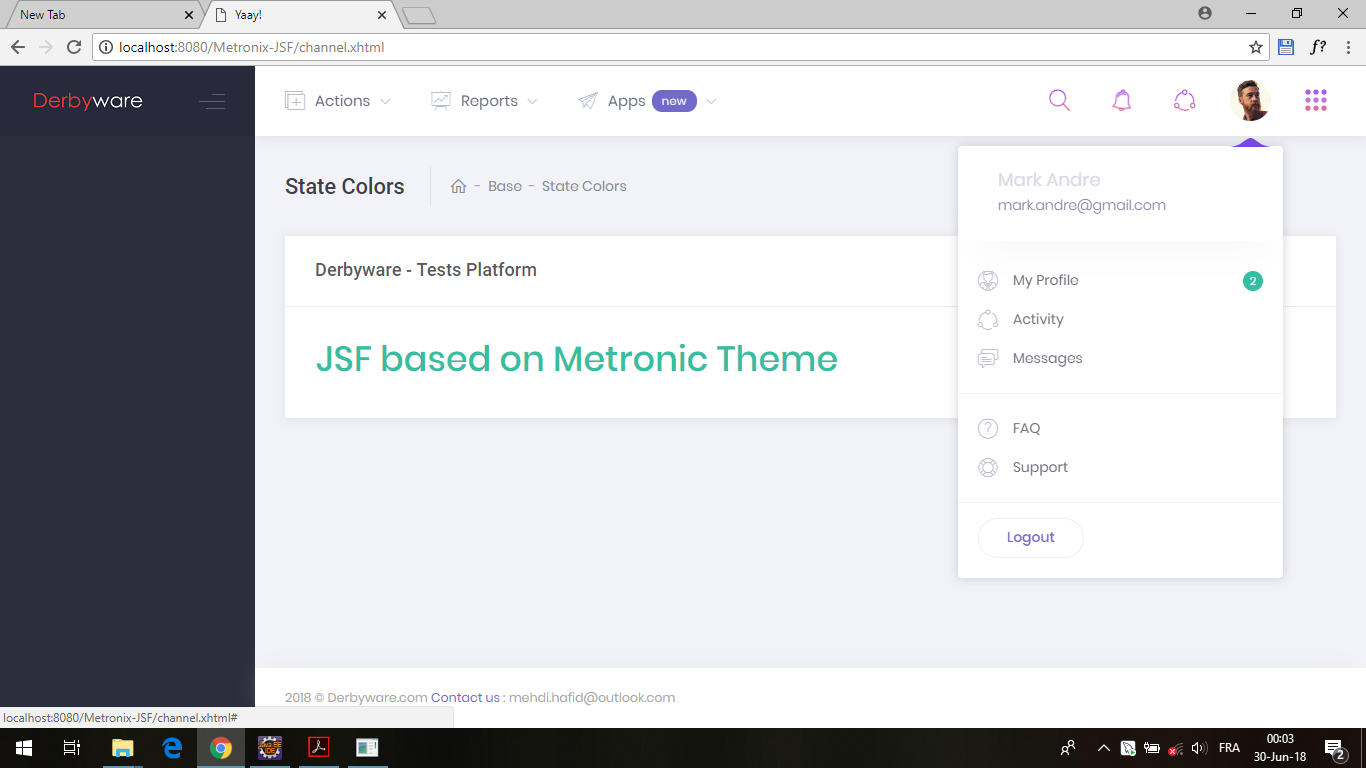
<ui:define name="title">Yaay!</ui:define>
<ui:define name="m-content-body">
<h1 class="m--font-success">JSF based on Metronic Theme</h1>
</ui:define>
</ui:composition>
</html>
That’s it! Now you have a Java EE 7/8 that is using the HTML theme “Metronic” as the front.
Mehdi HAFID: Founder of https://derbyware.com, the place where Java developers can prepare for Java OCA / OCP certification exams. And unlike Whizlabs and Enthuware it’s a powerful and modern solution. And best of all it’s FREE.
Opinions expressed by DZone contributors are their own.
Comments