ZapBot: Building a Chatbot With OpenAI and Gradio
Create your own AI-powered chatbot using GPT-4 and Gradio. This hands-on Python tutorial walks you through setup, code, UI, and secure API key handling.
Join the DZone community and get the full member experience.
Join For FreeChatbots have become a foundational element of modern digital systems, revolutionizing the way businesses and individuals interact with users and automate workflows. Their importance lies in their ability to deliver instant, scalable, and personalized communication while reducing the need for human intervention. As artificial intelligence and natural language processing evolve, chatbots are increasingly capable of handling complex tasks with high efficiency and consistency.
One of their key advantages is the enhancement of user experience. By offering 24/7 availability and consistent responses, chatbots improve customer satisfaction and reduce service delays. For instance, retail websites use chatbots to assist users with product searches or order tracking, providing real-time support around the clock.
Chatbots also play a critical role in automation and operational efficiency. They can manage repetitive tasks such as answering FAQs, booking appointments, or processing transactions—freeing human agents to focus on more strategic work. In high-demand scenarios, a single chatbot can handle hundreds of conversations simultaneously, a level of scalability that traditional teams cannot match.
AI-powered chatbots take this further through personalization. Models like GPT-4 adapt responses based on user input and behavior, making interactions more engaging and relevant. A common application is personalized product recommendations in e-commerce based on user history and preferences.
Beyond business, chatbots improve accessibility by supporting multiple languages and offering voice-enabled interfaces, thus assisting users with disabilities. They also serve as valuable tools for developers to explore AI and interface design, often becoming entry points into learning advanced technologies like API integration and machine learning.
From driving customer engagement and boosting efficiency to enabling social good—such as delivering mental health resources or educational content—chatbots have a broad impact. As their presence grows across industries like healthcare, retail, and education, they represent not just a technological convenience but a strategic asset and a powerful learning opportunity for developers and organizations alike.
This tutorial will guide you through creating ZapBot, a simple and interactive chatbot powered by OpenAI's GPT-4 model and Gradio's user interface library. I'll break down the provided code, explain key concepts, and include detailed instructions on obtaining and using API keys. By the end, you'll have a functional chatbot with a simple interface.
Pre-requisites
Before we get started, make sure you've got the following ready:
- Python 3.8+ installed on your system.
- Basic familiarity with Python programming.
- You'll need an OpenAI account so you can grab your API key.
- A code editor (e.g., VS Code or Jupyter Notebook).
- Web based editors can also be used (e.g., Colab)
You'll also need to install the required Python libraries. Just pop this command into your terminal or command prompt.
pip install openai gradio
# OR
!pip install openai gradio
# OR
pip3 install openai gradio

# Depends on which platform and which pip version is installed on your Editor/System
Key Libraries Explained
- OpenAI: A Python library for interacting with OpenAI's API, which provides access to powerful language models like GPT-4.
- Gradio: A Python library for quickly creating customizable web-based user interfaces, perfect for building interactive apps like chatbots.
- datetime: A built-in Python module for handling dates and times, used here to timestamp chat messages.
Step 1: Obtaining an OpenAI API Key
To use OpenAI's GPT-4 model, you need an API key. Follow these steps to get one:
1. Sign Up/Log In:
- Visit platform.openai.com.
- Go ahead and sign up—or just log in if you already have an account.
2. Navigate to API Keys:
- Once logged in, go to the API section.
- Click on API Keys in the sidebar (or navigate to https://platform.openai.com/account/api-keys).
3. Create a New API Key:
- Click Create new secret key.
- Give your key a descriptive name (e.g., "ZapBot Key").
- Copy the generated key immediately—it won't be shown again. Store it securely (e.g., in a password manager or environment variable).
4. Secure Your API Key:
- Never hardcode your API key in your code for security reasons, especially if sharing or uploading to a public repository like GitHub.
- A better way? Save it in an environment variable or a config file instead. For example, on Windows, set an environment variable:
- set OPENAI_API_KEY=your-api-key-here
- On macOS/Linux:
export OPENAI_API_KEY=your-api-key-here- Alternatively, use a
.envfile with thepython-dotenvlibrary:
pip install python-dotenv- Create a
.envfile in your project directory:
OPENAI_API_KEY=your-api-key-here5. Billing Setup
- OpenAI's API is not free. You may need to add a payment method in the Billing section of your OpenAI account to cover API usage costs.
- Check OpenAI's pricing page for details on costs per token for GPT-4.
Step 2: Understanding the Code Structure
The provided code creates a chatbot interface with a dark theme, neon-green accents, and a conversational flow. Here's a high-level overview:
- OpenAI Integration: The script sends user questions to OpenAI's GPT-4 model and retrieves responses.
- Gradio Interface: Gradio creates a web-based UI with a chat history, input textbox, and send button.
- Styling: Custom CSS gives the app a modern, dark-themed look with a funky vibe.
- Timestamps: Messages are timestamped for clarity.
Let's break down each section of the code.
Step 3: Detailed Code Walkthrough
Below is the complete code with explanations and improvements (e.g., loading the API key securely).
import openai
import gradio as gr
from datetime import datetime
import os
from dotenv import load_dotenv
Load Environment Variables From .env File
load_dotenv()
openai.api_key = os.getenv("OPENAI_API_KEY")
if not openai.api_key:
raise ValueError("OPENAI_API_KEY not found. Please set it in your .env file or environment variables.")


def ask_openai(question):
"""
Sends a question to OpenAI's GPT-4 model and returns the response.
Args:
    question (str): The user's input question.

Returns:
    str: The model's response or an error message if the request fails.
"""
try:
    response = openai.ChatCompletion.create(
        model="gpt-4",
        messages=[
            {"role": "system", "content": "You are a funky and friendly assistant named ZapBot."},
            {"role": "user", "content": question}
        ],
        temperature=0.3,  # Controls randomness (0.0 = deterministic, 1.0 = creative)
        max_tokens=200   # Limits response length
    )
    return response['choices'][0]['message']['content']
except Exception as e:
    return f"❗ Error: {str(e)}"
Define Custom CSS for a Dark, Neon-Themed Interface
custom_css = """
body {
background-color: #121212;
color: #f0f0f0;
}
h1, p {
color: #00FFB3 !important;
}
.gr-textbox textarea {
height: 100px !important;
font-size: 16px;
}
 """

with gr.Blocks(css=custom_css) as demo:
# Header with title and description
 gr.HTML("""

ZapBot: The Chat With a Spark!

Always ready to zap some answers your way

 """)

# Chat history display

with gr.Row():

     chatbot = gr.Chatbot(

         label="Chat - Chat History",
         height=450,
         bubble_full_width=False,
         layout="bubble",
         show_label=False
     )

# Input textbox and send button

with gr.Row():
     message = gr.Textbox(
         placeholder="Type your question here...",
         label=None,
         show_label=False,
         lines=4
     )
     send_btn = gr.Button("Send", size="lg")


def respond(user_message, chat_history):

     """
     Processes user input, gets a response from OpenAI, and updates chat history.

     Args:

         user_message (str): The user's input message.

         chat_history (list): List of tuples containing previous messages.

     Returns:

         tuple: (empty string to clear textbox, updated chat history)

     """

     if user_message.strip() == "":

         return "", chat_history

     bot_response = ask_openai(user_message)

     timestamp = datetime.now().strftime("%H:%M")

     chat_history.append((f"({timestamp})\n{user_message}", f"({timestamp})\n{bot_response}"))

     return "", chat_history


# Bind the respond function to button click and textbox submit

send_btn.click(respond, inputs=[message, chatbot], outputs=[message, chatbot])

message.submit(respond, inputs=[message, chatbot], outputs=[message, chatbot])
Launch the Gradio app
demo.launch(share=True)Below is the sample window after successful run of the application.
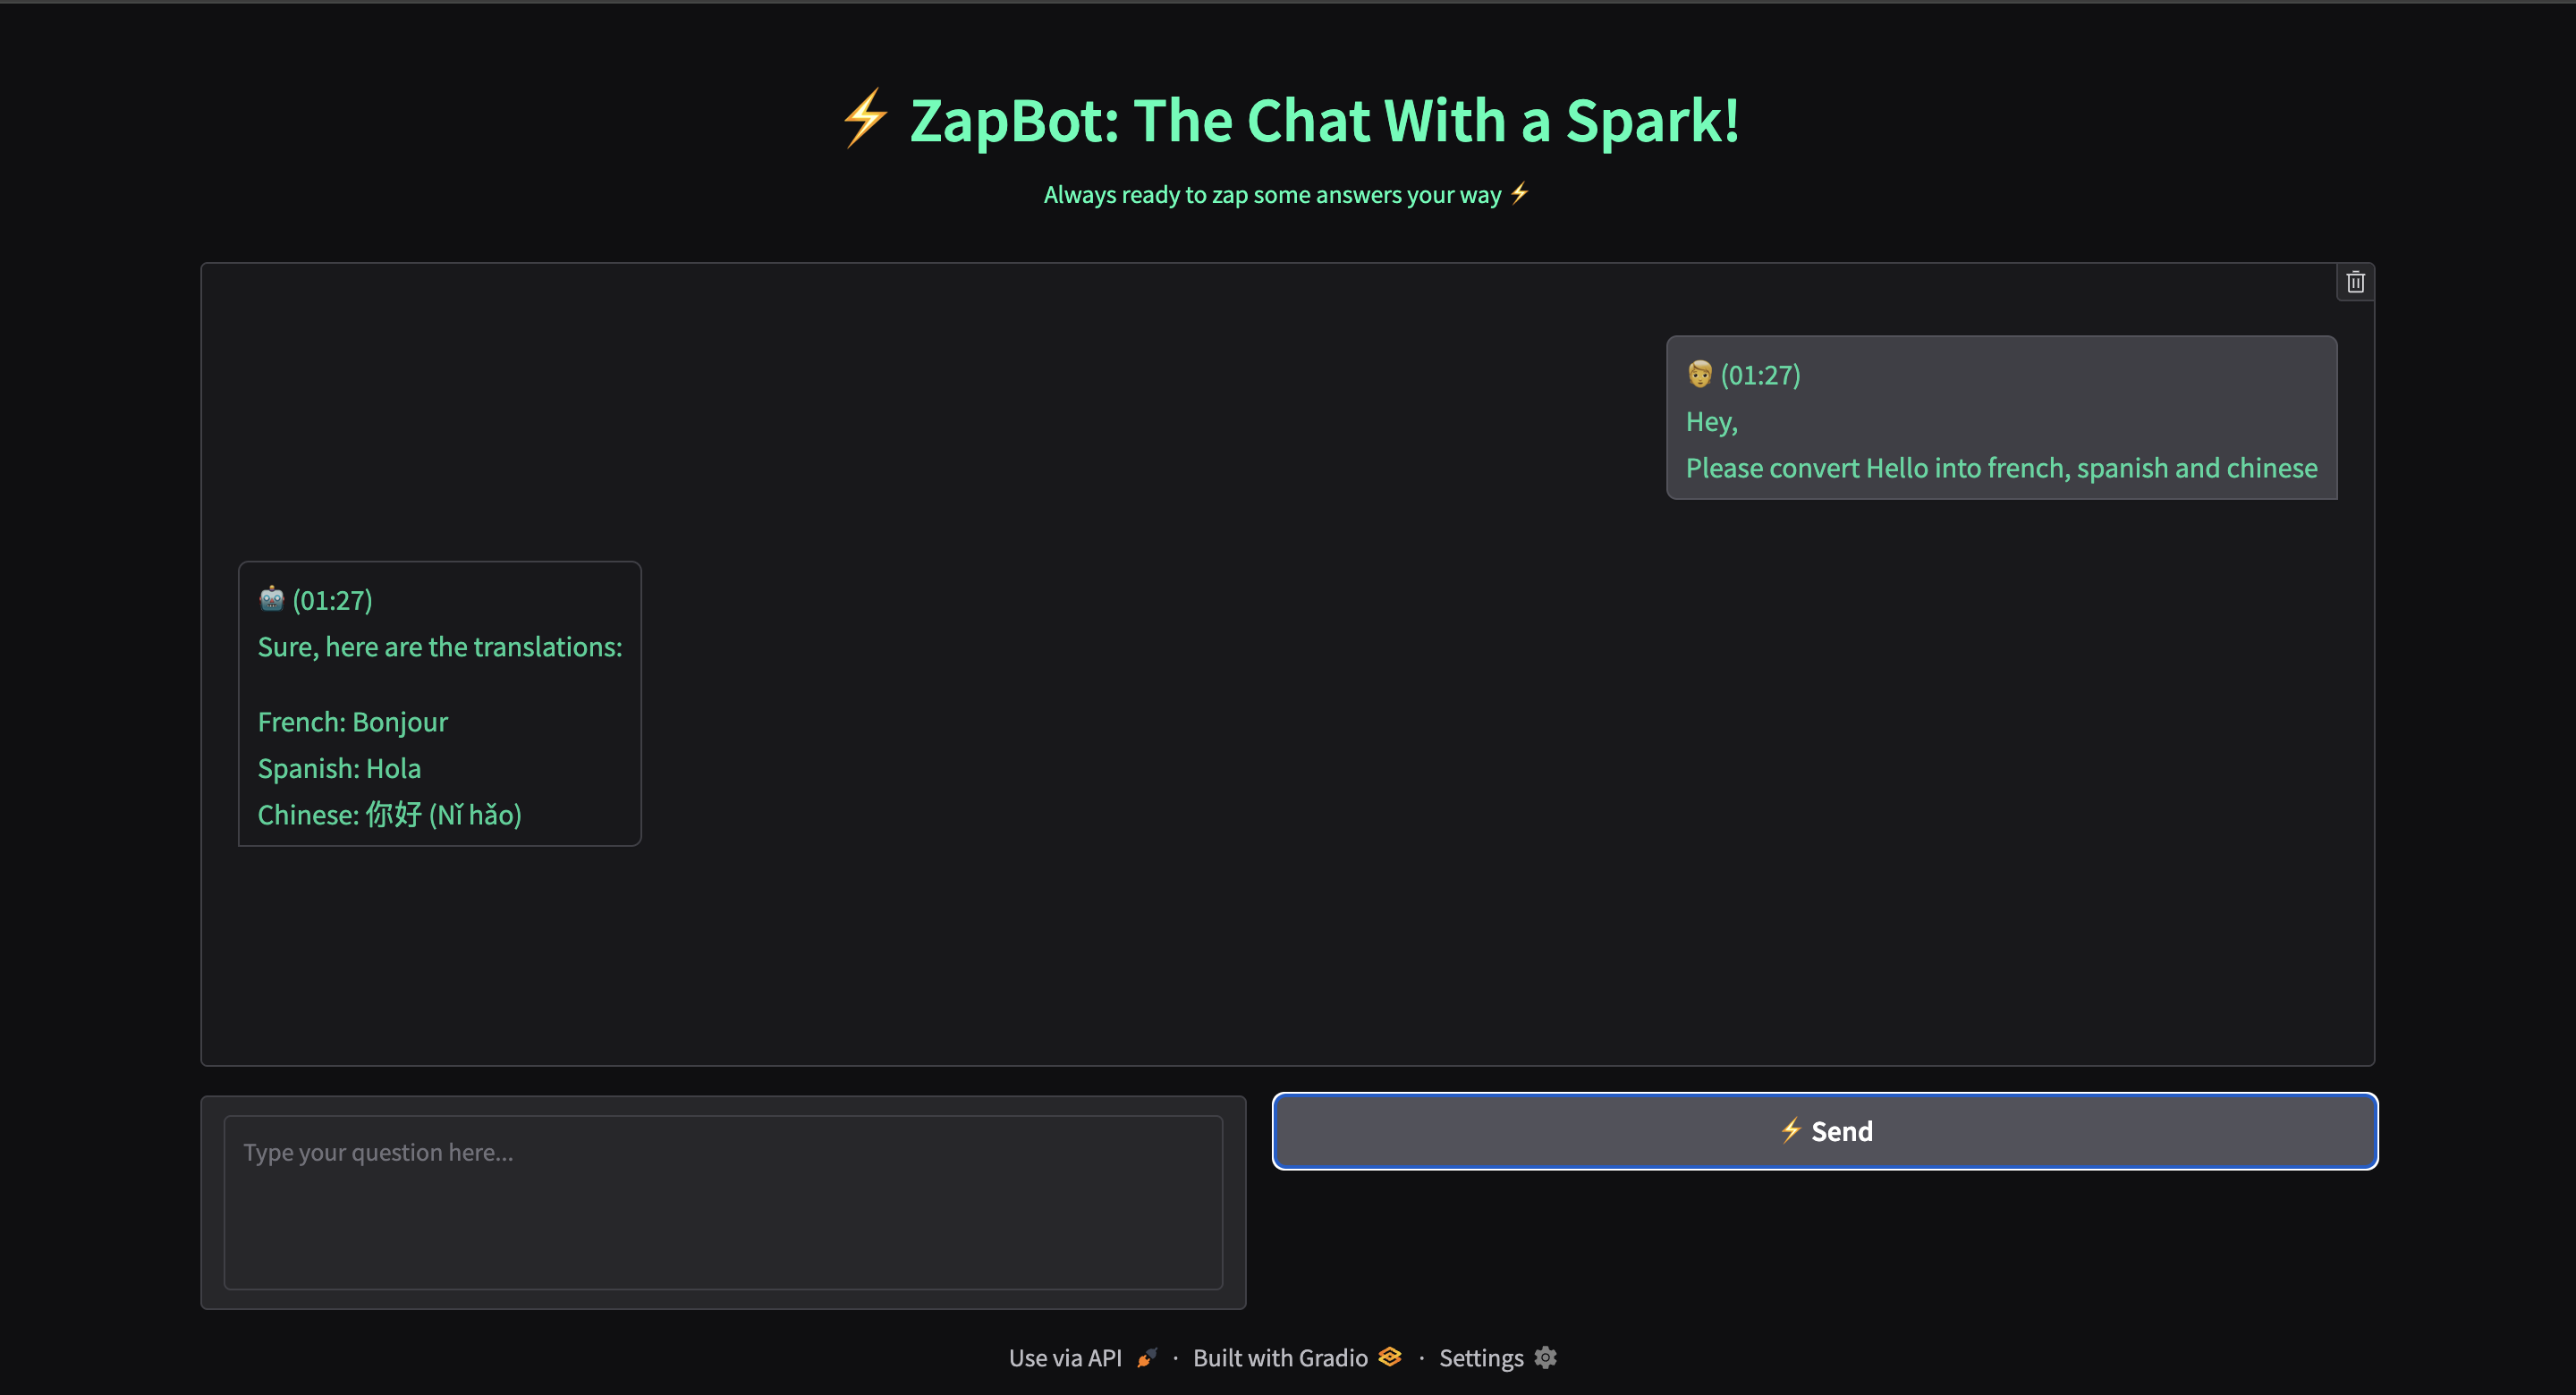
This tutorial serves as an accessible and impactful starting point for individuals venturing into the world of AI-powered chatbot applications. It demystifies artificial intelligence, demonstrating that powerful tools like GPT-4 can be integrated with just a few lines of code. The hands-on experience of building and deploying a functional chatbot fosters confidence while equipping learners with foundational, transferable skills applicable to more advanced development projects involving APIs, frameworks, and interactive interfaces.
Feel free to experiment with the code and tailor it to your specific needs or interests. Whether you're looking to enhance the user interface, integrate additional APIs, or refine the chatbot’s personality.
Happy Coding!!!
Opinions expressed by DZone contributors are their own.
Comments