The easiest way to start with an AMQP protocol client-side would be to use a high level language implementation like Java (Apache Qpid Proton-J) or C# (AMQP .Net Lite). On the broker side, to avoid using a Cloud platform, an ActiveMQ instance running locally on the PC is a great choice.
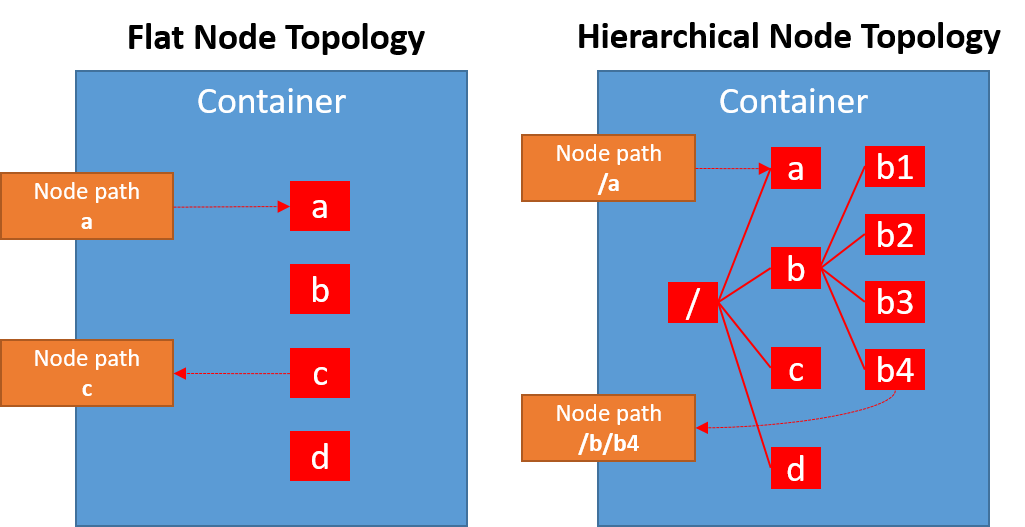
The following example is a simple message exchange using a queue between two clients, a sender and a receiver; the queue is an AMQP node created inside the ActiveMQ broker as container.
The ActiveMQ broker is available here, and the getting started guide to install it and create a queue (using the Web UI console) is here.
The AMQP .Net Lite library is open source, and you can clone the code from GitHub.
Open Communication
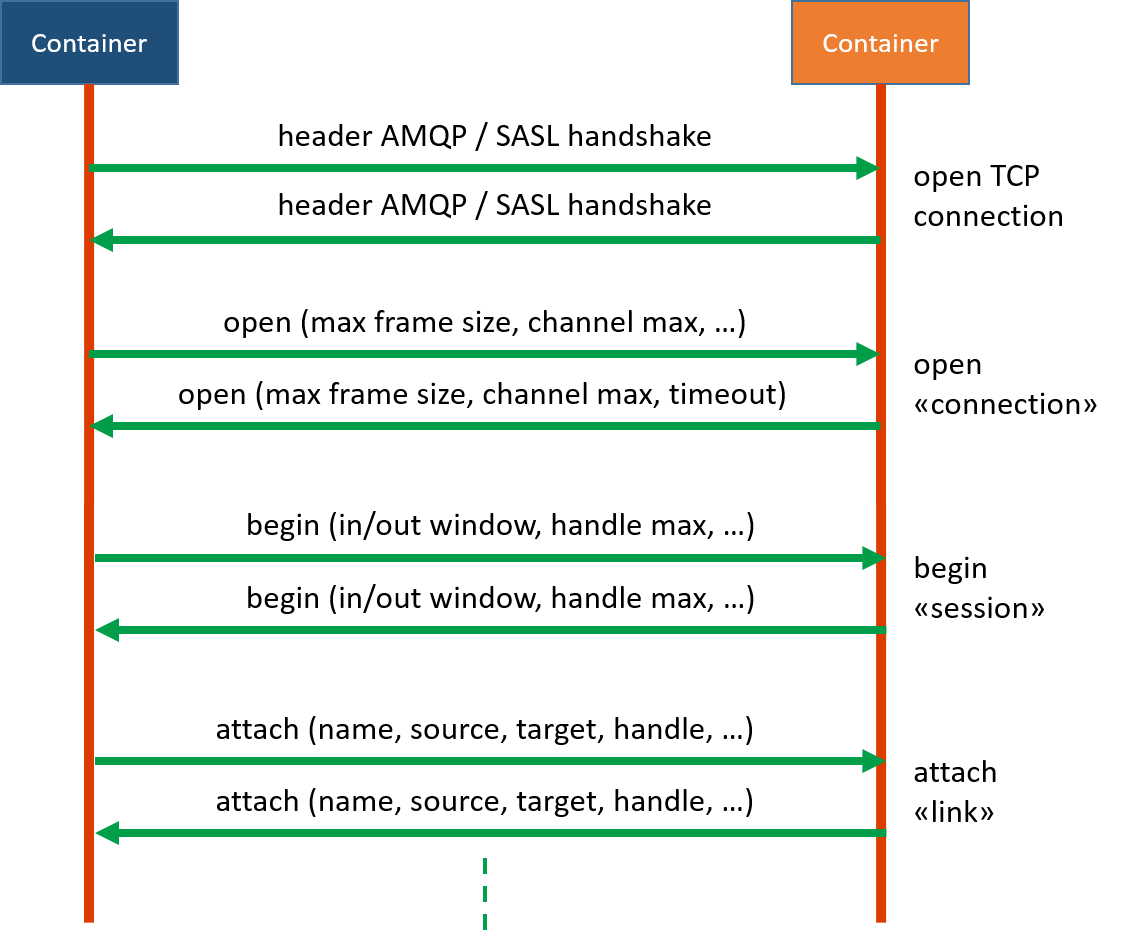
First of all we need to define the base address of the broker for connecting. For this purpose, the AMQP .Net Lite library exposes the Address class that we can use in the following way:
Address address = new Address(“amqp://admin:admin@192.168.1.103:5672”);
That has the format amqp://[username]:[password]@[host]:[port]. Opening the communication with the broker means open a connection and begin a session:
Connection connection = new Connection(address);
Session session = new Session(conn
After that we need to create and attach the link with the destination queue to send data:
SenderLink sender = new SenderLink(session, “sender-link”, “q1”);
In this example, the queue already created and available in the broker is named “q1”.
At the end of this three steps, the connection is established and the sender can start to send messages to the queue.
Send Message
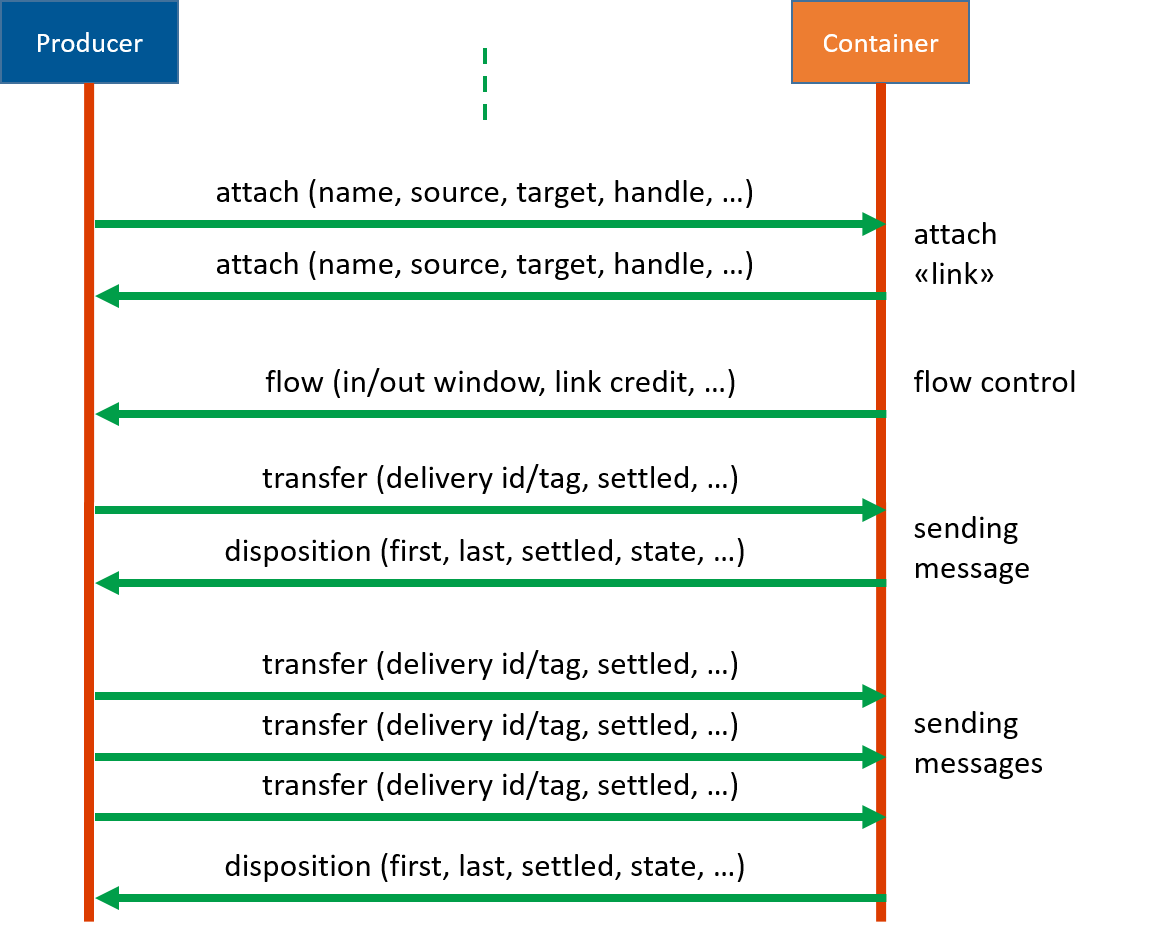
Each message is implemented through the Message class that exposes system and application properties other than a body that can be filled with any payload.
message = new Message(“Hello DZone!”);
message.Properties = new Properties();
message.Properties.MessageId = messageId;
message.ApplicationProperties = new ApplicationProperties();
message.ApplicationProperties[“my_app_prop”] = value;
sender.Send(message, 60000);
After creating the message, the Send() method provided by the SenderLink class is able to send the message in a synchronous way with a specified timeout.
Receive Message
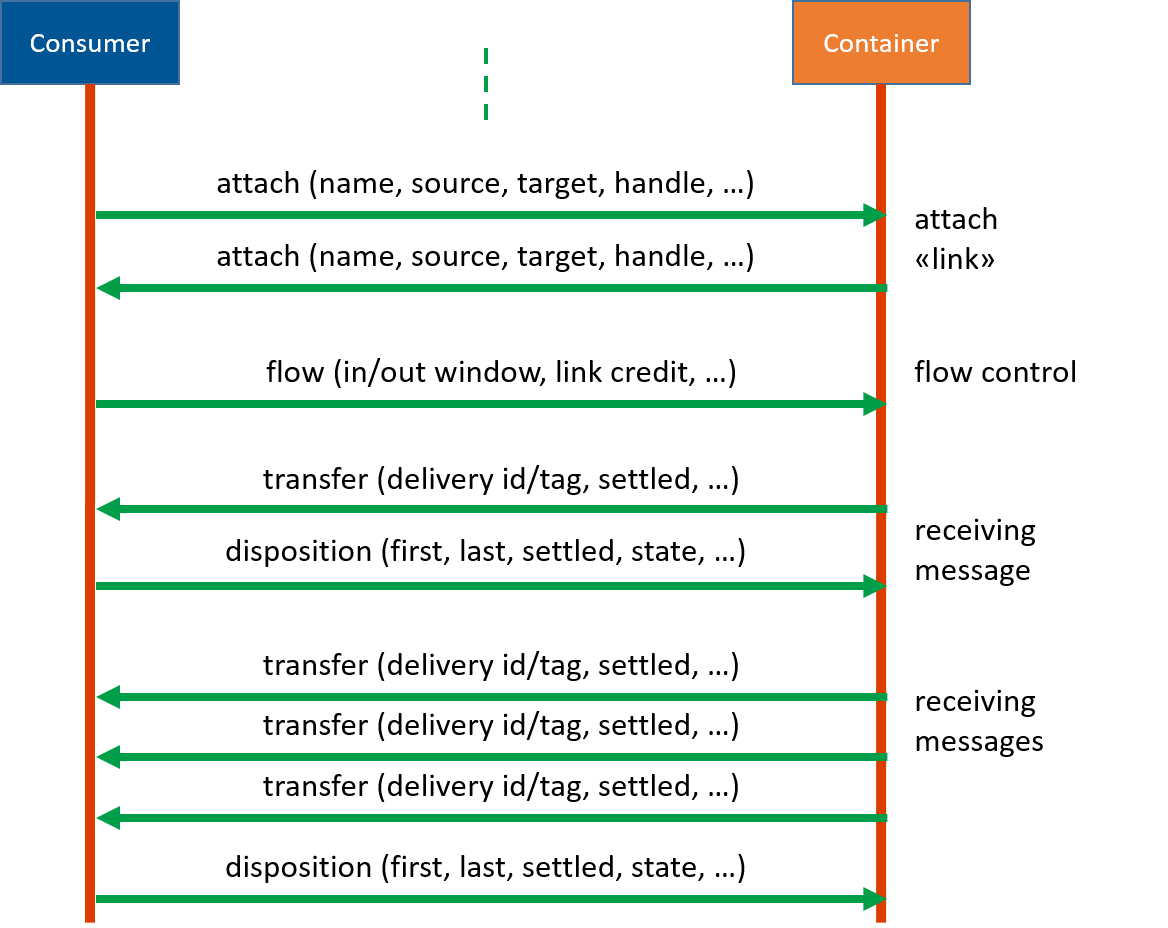
On the receiver side, the connection and the session are created in the same way but the attached link is specified using the ReceiverLink class.
ReceiverLink receiver
= new ReceiverLink(session, “receiver-link”, “q1”);
This class provides the Receive() method to wait synchronously for an available message in the queue and get it. The returned message can be “null” if the receiving timeout expires.
Message message = receiver.Receive();
After receiving the message, the receiver needs to update the delivery status calling the Accept(), Reject() or Release() method with message as parameter to complete the action.
receiver.Accept(message);
Before receiving the message, the receiver can use the SetCredit() to apply flow control at link level to specify the maximum number of messages it can handle.
receiver.SetCredit(10, false);
Receive Message Asynchronously
The AMQP .Net Lite provides an asynchronous way to receive messages using a callback invoked when a message is received from the queue.
receiver.Start(10, (link, m) =>
{
// do work with message
link.Accept(m); });
In that case, the Start() method is used to specify both the credit and the lambda expression used as callback that has the link and the received message as parameters.
Close Communication
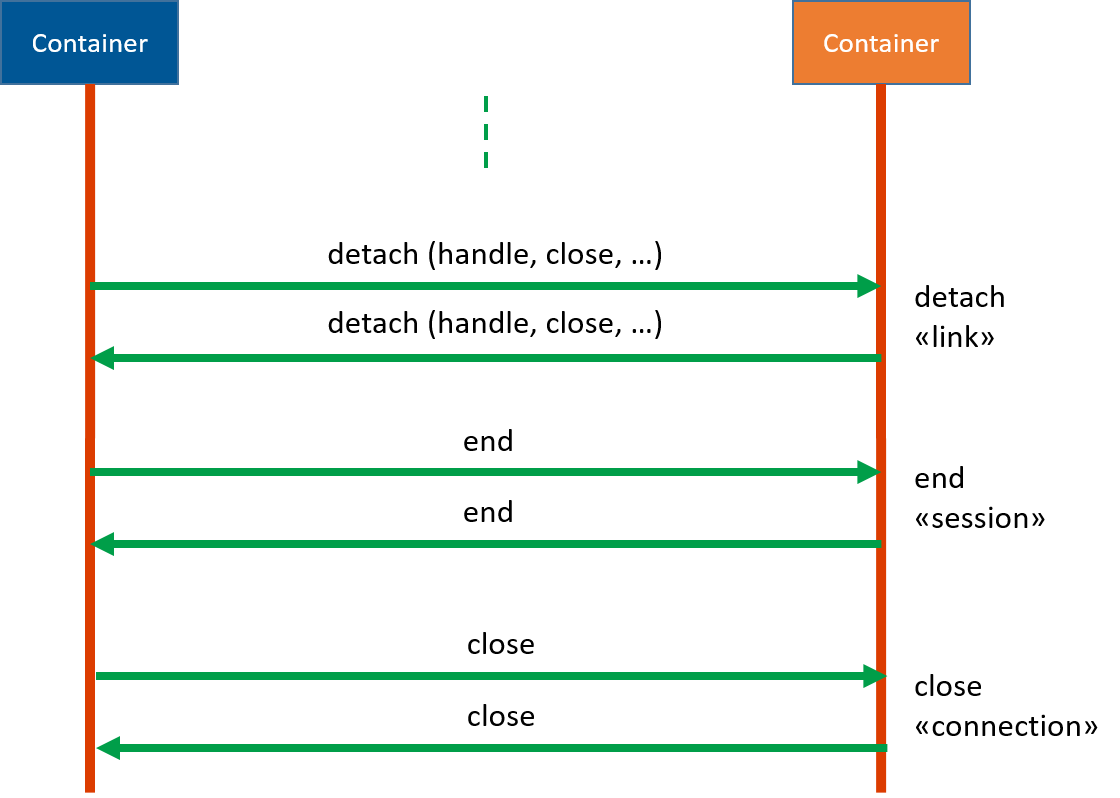
When the peers don’t need the channel anymore, they can close it in the opposite order they open it. First detaching the link then ending the session and finally closing the connection.
sender.Close(); // or receiver.Close();





{{ parent.title || parent.header.title}}
{{ parent.tldr }}
{{ parent.linkDescription }}
{{ parent.urlSource.name }}