

6 Easy Steps to Testing Your Chrome Extension With Selenium
How to use Selenium to test your custom Chrome extensions rather than just your web apps.

Join the DZone community and get the full member experience.
Join For FreeMost of us these days are moving towards Continuous Integration (CI) and Continuous Deployment (CD) processes. And, in the majority of cases, we have the testing tools and processes to help us realize this vision.
Well, this is at least true when it comes to the continuous and automatic testing of web and mobile sites and apps, but some areas are proving to be more of a hindrance. Take browser extensions for example. Testing a browser extension — be it Chrome, Firefox, Safari, Opera, or Internet Explorer — is a different matter altogether.
The Challenges Of Testing Browser Extensions
Why? Well, browser extensions are embedded add-ons rather than regular HTML files. As the extension is out of scope, you can’t simulate user clicks, inspect elements, or run other such activities.
Let’s say you want to run client side testing. You can do this very easily on a website page or application by using Selenium to simulate user interaction. However, if you want to use Selenium on a browser extension, you need to first figure out where the extension's pages are located and then how to switch to their scope in the webUI to interact with them as DOM elements.
I found a very easy workaround to this problem when I was set the task of testing BlazeMeter’s Chrome Extension. I discovered that within just six steps, you can interact with an extension just like a normal HTML webpage - meaning you can automatically test your Chrome Extensions and move one step closer to flawless CI and CD processes.
In this article, I’m specifically showing you how to test a Chrome Extension, but the same principle can be applied to Firefox, Internet Explorer, and Safari.
How to Test Your Chrome Extension (In 6 Steps)
1. Download Your Chrome Extension
To do this, first get your webstore URL or the extension ID from the Google Web Store:
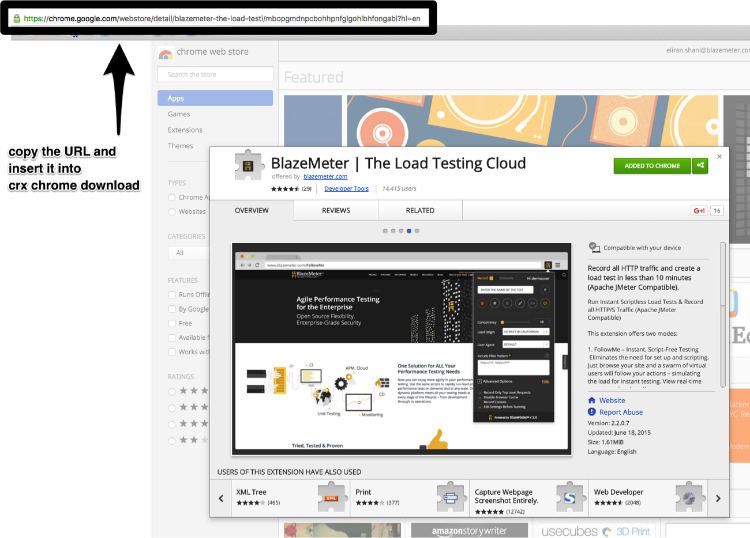
Now enter this data into the main field on this page:
http://chrome-extension-downloader.com/
Click download and save the CRX file. It’s best to store the file in the same location as your script.
Note: the CRX might also be a local file which hasn’t yet been uploaded to the Chrome WebStore. If the extension doesn’t exist in the web store, you’ll need to manually install it by dragging the CRX file into Chrome://extensions page and clicking ‘Add’. Find out more here
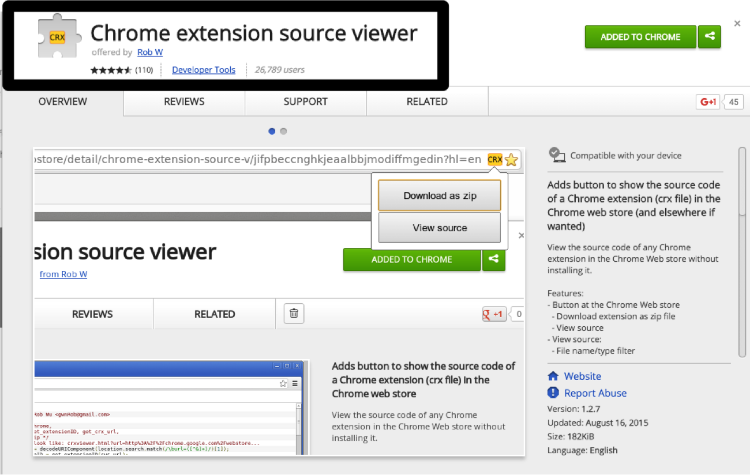
2. Download the Chrome Extension Source Viewer From the Google Web Store
3. View the Source Of Your CRX File
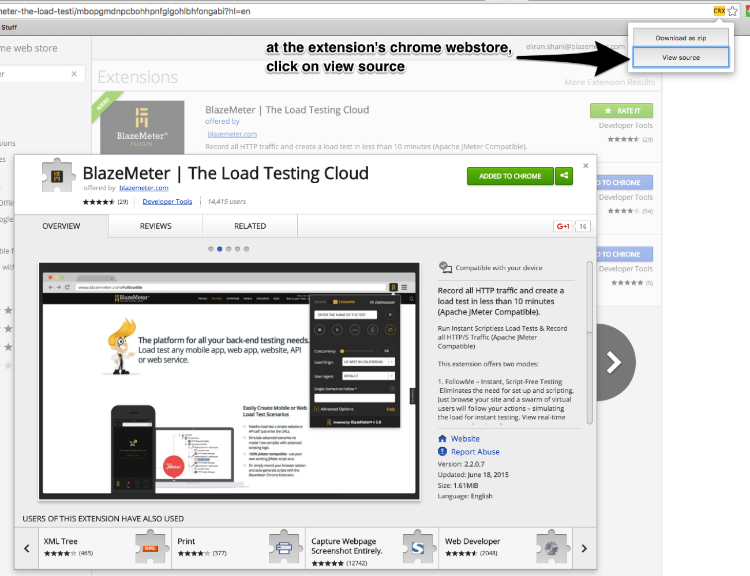
To do this, go to your Chrome Extension in the Google Web Store, click the yellow icon in the browser and go to ‘View Source’.
If the CRX file isn’t shown in the Web Store, you’ll need to view the source files manually. You can do this by clicking this link and uploading the CRX file.
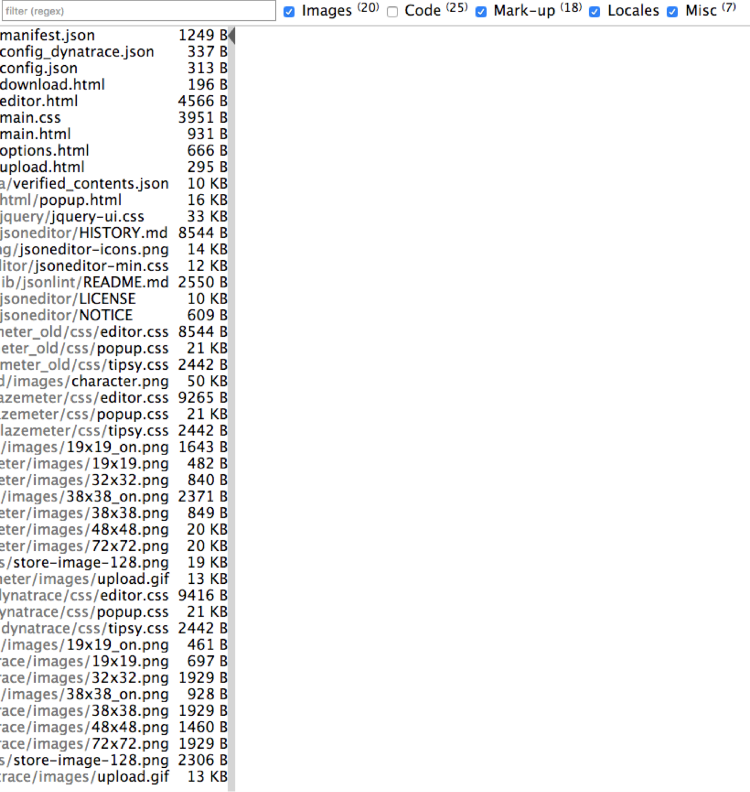
Now you will see a list of all the resources (images, javascript etc.) and pages available to you in the CRX. Take note of all the relevant resources here.
4. Identify the Page That You Want to Test
If you want to locate a specific page, you’ll need to extract the unique ID of the CRX in the Chrome Extension.
First off, get the unique ID of your Chrome Extension by right clicking on it and selecting ‘Options’.
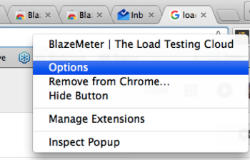
This will take you to your unique ID/page URL: chrome-extension://UNIQUEID/options.html (in this case it is: chrome-extension://mbopgmdnpcbohhpnfglgohlbhfongabi/options.html).
Alternatively, you can get your unique ID from the Chrome://extensions page (as in the screenshot below).
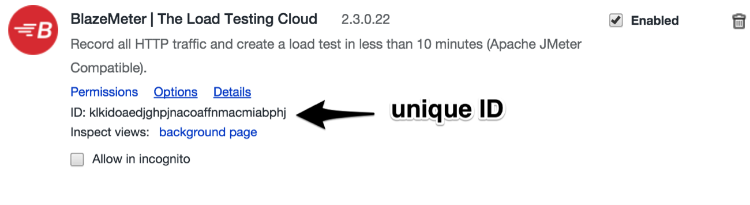
Now go back to the CRX resource list and select the specific page that you’re looking for: SPECIFICPAGE.HTML (in the screenshot below, this is: popup.html).
Now change options.html with your specific page on your unique URL.
FROM:
chrome-extension://UNIQUEID/options.html
TO:
chrome-extension://UNIQUEID/SPECIFICPAGE.html
(In my case, I changed it from this chrome-extension://mbopgmdnpcbohhpnfglgohlbhfongabi/options.html to this: chrome-extension://mbopgmdnpcbohhpnfglgohlbhfongabi/popup.html)
Now copy this URL. You’ll need to use it later in your Webdriver code.
5. Initiate Your Script to Create a New ChromeDriver
To enter your Chrome Extension into ChromeDriver (a standalone server which implements WebDriver’s wire protocol), you’ll need to add new code at the beginning of the script when creating the browser object.
Here’s the syntax for some of the supported Selenium programming languages:
a) Python
chop = webdriver.ChromeOptions()

chop.add_extension(EXTENSION_PATH)

# create new Chrome driver object with blazemeter extension

driver = webdriver.Chrome(chrome_options=chop)
b) Java
ChromeOptions options = new ChromeOptions ();

options.addExtensions (new File(“/path/to/extension.crx”));

DesiredCapabilities capabilities = new DesiredCapabilities ();

capabilities.setCapability(ChromeOptions.CAPABILITY, options);

ChromeDriver driver = new ChromeDriver(capabilities);
d) Javascript
var chromeOptions = webdriver.Capabilities.chrome();

chromeOptions: [

binary: '/Applications/Google\Chrome.app/Contents/MacOS/Google\ Chrome',

args: [ ],

extensions: ['EXTENSION_LOCATION.crx']

]

var driver = new webdriver.Builder().

withCapabilities(chromeOptions).

build();
e) PHPunit
//Setting extensions is also optional

$options->addExtensions(array(

‘extension_location.crx’,

));

$caps = DesiredCapabilities::chrome();

$caps->setCapability(ChromeOptions::CAPABILITY, $options);

$driver = RemoteWebDriver::create($url, $caps);
6. Navigate to Your ChromeDriver Website Page
Use the following to do this:
driver.get('chrome-extension://UNIQUEID/SPECIFICPAGE.html')
Now it’s back into your scope. This means that you interact and test it as you would a normal HTML webpage.
In most cases, an iFrame would be included in the HTML file. There’s a pretty easy way to switch the focus to the iframe. Here are some examples for some of the supported Selenium languages:
Python:
driver.switch_to.frame("FRAME_NAME")Java:
driver.switchTo().frame("FRAME_NAME");JavaScript:
driver.switchTo().frame("FRAME_NAME")PHPunit:
$this->selectFrame("FRAME_NAME");*FRAME_NAME = Id, name, xpath, css_selector and other element locators.
Next Steps
This is a pretty simple way to get your Chrome Extension into your scope so you can test it as you would a normal website page.
Now for my next challenge - to discover a way to test the dynamic elements (such as the Counter) on the Chrome Extension icon! Stay tuned! :)
If you have any questions or would like to tell us about related experiences, please share in the comments box below.
Published at DZone with permission of Eliran Shani. See the original article here.
Opinions expressed by DZone contributors are their own.
Comments