Step By Step Guide To Using Mule ESB
A step-by-step guide of the installation and use of Mulesoft/Mule ESB, a lightweight and Java-based ESP and integration platform by Mulesoft, for beginners
Join the DZone community and get the full member experience.
Join For FreeWhat Is Mule ESB and Why Do We Use It?
Mule ESB is a lightweight and Java-based ESB and integration platform provided by MuleSoft. This helps programmers or software developers to connect different applications very easily and quickly. Each application in the IT world uses a different type of technologies, regardless, Mule enables quick and simple integration of applications, enabling them to transfer data efficiently. MuleSoft has different types of subscriptions based on your requirements and budget.
Why Do We Use Mulesoft:
It has simple functionality called "drag & drop" with various components that contain a group of connectors for example
- Core component have connectors like 'set variable', 'remove variable', 'flow', 'for each', etc
- Salesforce component has connectors like create (that adds or create records) and query (executes a query for the specified object), which helps developers to conduct integration easily
- We can control Mule API by using a web-based console
- We can easily debug API
- We can easily use any Java, Python, or Groovy scripts in Mule
- Simple build and deployment process
- We can make our own custom connectors
Purpose of Mule Projects:
- Makes the life of API developers relatively easy!
- It connects applications across on-premises and cloud computing environments easily
Before installing Mule on your system, you need to take care of some system requirements for optimal performance
- 2 GHz CPU
- 64-bit operating system
- Minimum 8 GB RAM if it is your personal laptop but if you are using a laptop given by your company and that has multiple proxies enabled on it, then at least 16 GB RAM is recommended
- hard disk should be more than 50 GB as per my experience, but generally, all companies provide large memory hard disks so this should not be a cause of concern.
IDE to Develop the Code For Mulesoft API?
Mulesfot Anypoint Studio: this IDE is eclipse based and has user-friendly functionality such as drag and drop. It allows you to develop and test mule APIs.
we use the Anypoint Platform that is an integration platform and to manage such as API's deployment and apply the policies on API.
Prerequisites:
To start with Mulesoft into our machine, there are many OS that is supported by Mule like Windows, Linux, macOS, etc. Here we will talk about the windows:
- Anypoint Platform Account
- Java JDK
- Apache Maven
- Anypoint studio (Eclipse-based IDE)
- Notepadd++ (optional)
- Rest Client - postman, ARC, etc.
Download and Install All Required Prerequisites
Step 1
Create a trial account on the Anypoint Platform.
Fill in all the details and create the account. After the successful creation of the account, you will get the below window

Step 2
JDK - Mulesoft Anypoint Platform supports Oracle JAVA JDK or AdoptOpenJDK; we can use any
- Oracle JAVA JDK - download java 8 supported by Mulesoft. Go to the download link and their go-to section Java SE development Kit 8u261 and select and download windows x64 (64-bit version) as it can use more than 4 GB of RAM and Mulesoft is best for more than 8 GB of RAM.
- AdoptOpenJdk - download the latest version
Run the downloaded ".exe"(whichever you downloaded) and follow steps for software installation. For the final installation of JDK, you need to set the environment variable into your machine to point it to the correct installation directories. Follow the below steps to set the environment variable for JDK
- Assuming you have installed AdoptOpenJDK in "C:\Program Files\AdoptOpenJDK"
- Right-click on 'My Computer' and select 'Properties' and go to advanced system settings.
- Click the 'Environment variables' button under the 'Advanced' tab.
- Under System, variables click on New and set a variable JAVA_HOME and its value as "C:\Program Files\AdoptOpenJDK\jdk-8.0.252.09-hotspot.
- Now alter the 'Path' variable under system variables so that it also contains the path to the Java executable. select path variable and click on edit button and add new path "C:\Program Files\AdoptOpenJDK\jdk-8.0.252.09-hotspot\bin" or %JAVA_HOME%\bin
- To Test the installation open the command prompt (start -> command prompt) and type a command "java -version" and you should get the output as below

Step 3
Apache Maven download the Maven’s zip file, unzip that zip file to a folder, and configure the Windows environment.
- Assuming you unzipped it under "C:\Users\anurag-sha\SYSTEM\apache-maven-3.6.1"
- set two variables under system variables "M2_HOME" and "MAVEN_HOME" to point it to correct installation directories as shown below

- Now alter the path variable, add path "C:\Users\anurag-sha\SYSTEM\apache-maven-3.6.1\bin" or %MAVEN_HOME%\bin
- To Test the installation open the command prompt (start -> command prompt) and type the command "mvn -v" and you should get o/p as

Step 4
Anypoint Studio
- Download Anypoint Studio
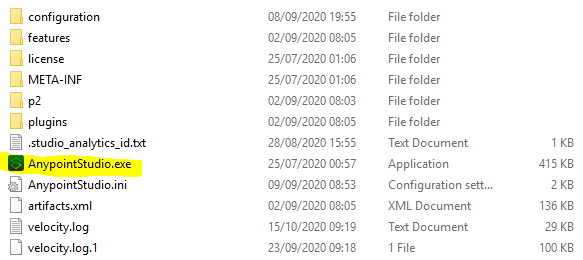
- Extract the installation file in a folder for example C:\Users\anurag-sha\SYSTEM\AnypointStudio
- open the .exe file from the installation folder
![]()
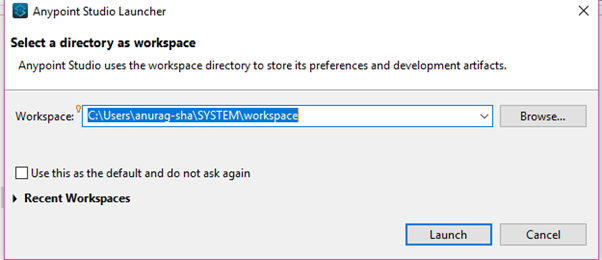
- Click ok to accept default workspace or you can add your own
![]()
- It will open Anypoint studio and now we need to configure it with JDK and maven.
Configure Anypoint Studio for JDK and Maven
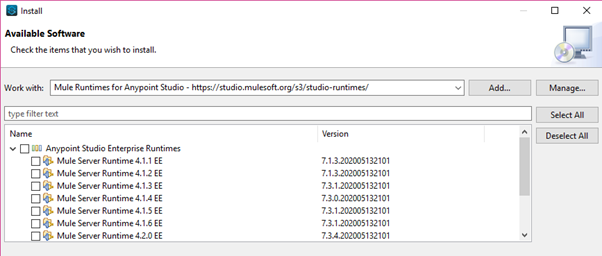
- first set runtime version by default it will be there but if you want to add any specific version then go to tab HELP -> install new software-> select Mule Runtimes for Anypoint Studio in Work with as below. select any desired version and install it as a general IT software installation
![]()
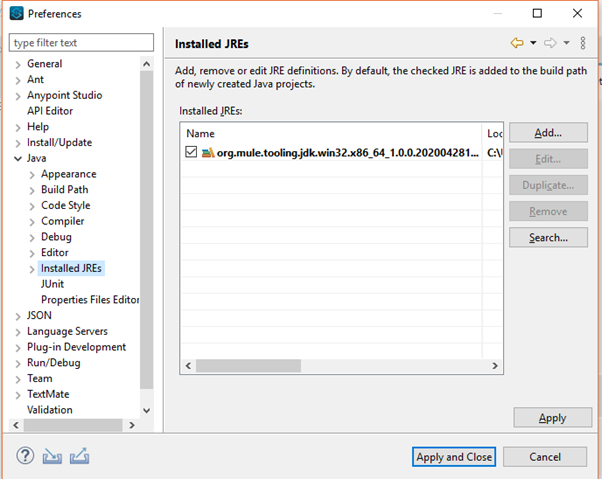
- Check installed JRE, Go to Window tab-> preferences->java->installed JRE. It should be as in below in the screenshot. If in case, it is not there then click on the add button and add JDK bin file location. Click Apply and Close.
![]()
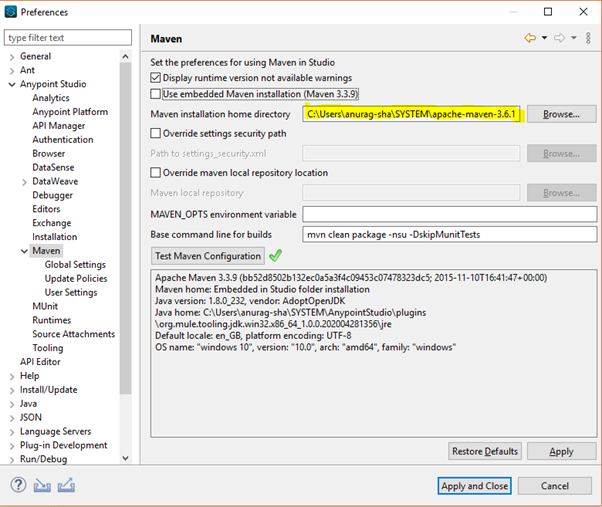
- Configure and test Maven Go to Window tab-> preferences->Anypoint Studio ->Maven set maven installation directory path as in below screenshot then to test it click on Test Maven Configuration
![]()
Congratulations !! Now you are ready to use Anypoint studio to develop the first Mulesoft API. By using Anypoint studio you can write java code too.
Step 5
Notepad++ It is a text/code editor and highly recommended to edit any type of code written in XML, JSON, etc.
Step 6
Rest client- Postman we use it to test an API. There are other rest-client also like ARC, nightingale, etc. and you can use curl command if curl command installed.
download and double-click the .exe file to install it.
This was all about the first step that needs at the very beginning to start with Mulesoft.
Opinions expressed by DZone contributors are their own.
Comments