ActiveMQ Read and Write Flow in Mule
Learn how to quickly and easily integrate the ActiveMQ open source messaging provider with a flow in MuleSoft to read and write messages to flows.
Join the DZone community and get the full member experience.
Join For FreeApache ActiveMQ is a popular open source messaging provider, which is easy to integrate with Mule. MuleSoft provides out of the box support for ActiveMQ.
In this tutorial, we will see a basic example of ActiveMQ integration with Mule, where we will be reading and writing messages from/to the queue.
How It Works
To write messages to ActiveMQ, we need a flow that has a JMS outbound endpoint at the end of the flow that writes the message to the queue.
To read messages from ActiveMQ, we need a flow that has a JMS inbound endpoint at the beginning of the flow that reads your queue.
Use Case
We basically have two flows:
1. Write Flow: an HTTP Inbound endpoint receives the Employee XML data through the HTTP Request and forwards it to the JMS queue.
2. Read Flow: reads the staged XMLs from the JMS queue and processes the messages based on the department of Employees.
Here’s an outline of the simple steps required to implement this example:
- Create an Anypoint Studio project.
- Import ActiveMQ libraries.
- Create an ActiveMQ connector.
- Enqueue the payload to JMS Queue.
- Dequeue the payload from the JMS Queue.
- Run the sample.
ActiveMQ Connector Configuration:
<jms:activemq-connector name="Active_MQ2" username="admin" password="password" brokerURL="tcp://localhost:61616" validateConnections="true" doc:name="Active MQ"/>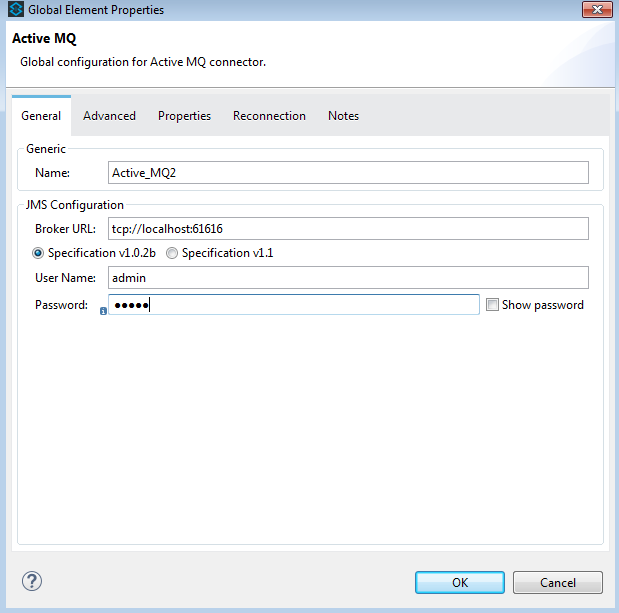
JMS Inbound Endpoint Configuration :
<jms:inbound-endpoint queue="myqueue" connector-ref="Active_MQ" doc:name="JMS">
<jms:transaction action="ALWAYS_BEGIN"/>
</jms:inbound-endpoint>
JMS Outbound Endpoint Configuration:
<jms:outbound-endpoint queue="myqueue" connector-ref="Active_MQ" doc:name="JMS"/>Note: The above mentioned is the minimum configuration that we have used in the demo exercise; there are n number of attributes which can be applied on the inbound and outbound endpoint. To understand all of the attributes, please refer the MuleSoft site.
Mule Flows
Let's walk through how to use an ActiveMQ read and write Mule application.
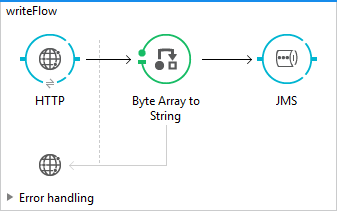
Write Flow
Create a new flow in Mule Studio and name it “writeFlow.” To configure the project to use ActiveMQ libraries, right-click on the project -> Properties -> Java Build Path -> Add External JARs. Select “activemq-all-5.4.3.jar” from <ACTIVEMQ_HOME>.
Drag and drop the HTTP Listener to the source of the flow to receive the incoming messages. Once the HTTP Listener is in place, drag and drop the JMS Outbound endpoint at the end of the flow. We will use the request payload received from an HTTP inbound endpoint to seed the ActiveMQ Queue.
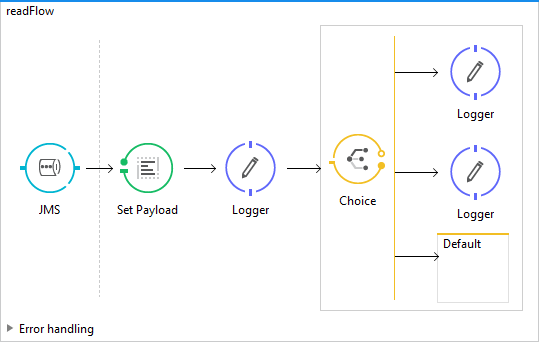
Read Flow
Create a new flow in Mule Studio and name it “readFlow.” Drag and drop the JMS Inbound endpoint at the beginning of the flow to receive the incoming messages. Once the message has been received in the flow, then we can start processing the payload.
Code:
<?xml version="1.0" encoding="UTF-8"?>
<mule xmlns:tracking="http://www.mulesoft.org/schema/mule/ee/tracking" xmlns:dw="http://www.mulesoft.org/schema/mule/ee/dw"
xmlns:http="http://www.mulesoft.org/schema/mule/http"
xmlns:jms="http://www.mulesoft.org/schema/mule/jms"
xmlns="http://www.mulesoft.org/schema/mule/core" xmlns:doc="http://www.mulesoft.org/schema/mule/documentation"
xmlns:spring="http://www.springframework.org/schema/beans"
xmlns:xsi="http://www.w3.org/2001/XMLSchema-instance"
xsi:schemaLocation="http://www.mulesoft.org/schema/mule/ee/dw http://www.mulesoft.org/schema/mule/ee/dw/current/dw.xsd
http://www.mulesoft.org/schema/mule/http http://www.mulesoft.org/schema/mule/http/current/mule-http.xsd
http://www.mulesoft.org/schema/mule/jms http://www.mulesoft.org/schema/mule/jms/current/mule-jms.xsd
http://www.springframework.org/schema/beans http://www.springframework.org/schema/beans/spring-beans-current.xsd
http://www.mulesoft.org/schema/mule/core http://www.mulesoft.org/schema/mule/core/current/mule.xsd
http://www.mulesoft.org/schema/mule/ee/tracking http://www.mulesoft.org/schema/mule/ee/tracking/current/mule-tracking-ee.xsd">

<http:listener-config name="HTTP_Listener_Configuration" host="localhost" port="8089"  doc:name="HTTP Listener Configuration"/>
<jms:activemq-connector name="Active_MQ" username="admin" password="password" brokerURL="tcp://localhost:61616" validateConnections="true" doc:name="Active MQ"/>
<flow name="writeFlow">
<http:listener path="/jms" config-ref="HTTP_Listener_Configuration" doc:name="HTTP"/>
<byte-array-to-string-transformer doc:name="Byte Array to String"/>
<jms:outbound-endpoint queue="myqueue" connector-ref="Active_MQ" doc:name="JMS"/>
</flow>

<flow name="readFlow">
<jms:inbound-endpoint queue="myqueue" connector-ref="Active_MQ" doc:name="JMS">
<jms:transaction action="ALWAYS_BEGIN"/>
</jms:inbound-endpoint>
<set-payload mimeType="application/xml" value="#[payload]" />
<logger message="#[message.payload]" level="INFO" doc:name="Logger"/>
<choice doc:name="Choice">
<when evaluator="xpath" expression="/Employees/Employee/Department = 'HR'">
<logger message="HR process has been started for Employee #[xpath3('//Employees/Employee/Name')] " level="INFO" doc:name="Logger"/>
</when>
<when evaluator="xpath" expression="/Employees/Employee/Department = 'Admin'">
<logger message="Admin process has been started for Employee #[xpath3('//Employees/Employee/Name')]" level="INFO" doc:name="Logger"/>
</when>
</choice>
</flow>
</mule>
Run the Sample
First, run ActiveMQ using the executable “activemq” from <ACTIVEMQ_HOME>/bin folder. Make sure you can access the ActiveMQ admin page using http://localhost:8161/.
Open REST Client and hit the URL with the payload on http://localhost:8089/jms. This will enqueue the request to the ActiveMQ JMS Queue “myqueue.”
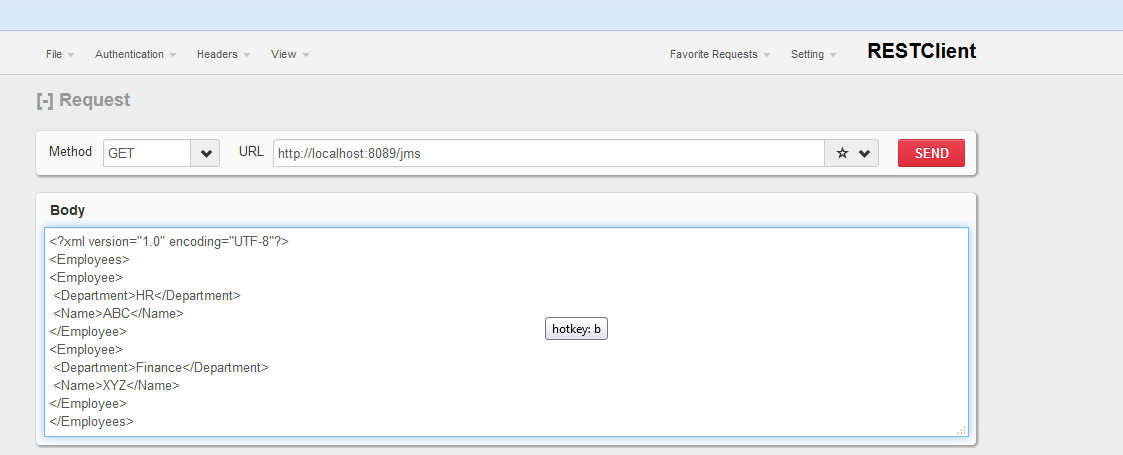
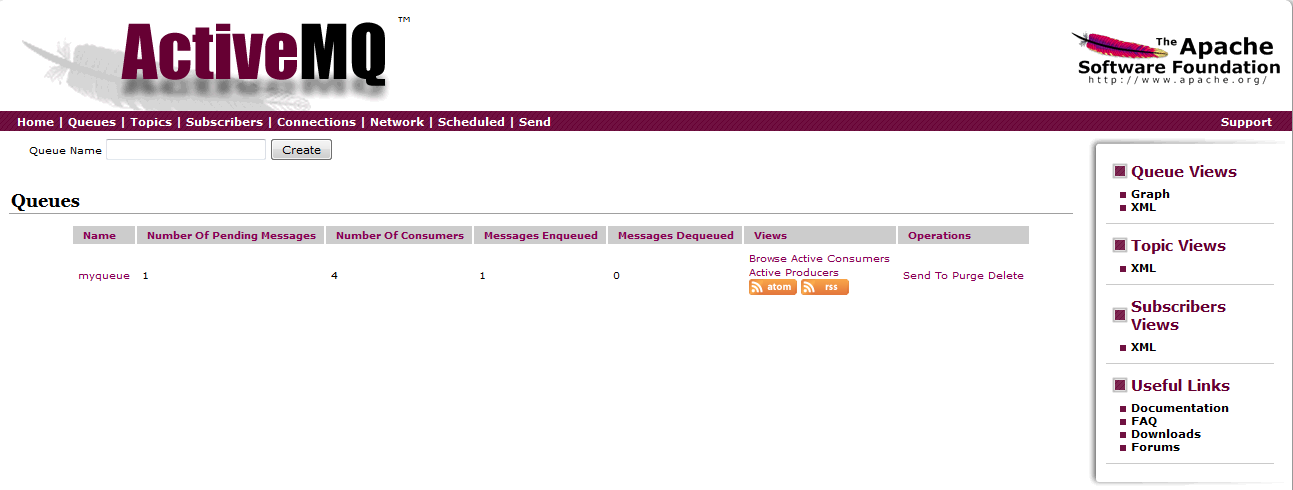
Message Enqueue to JMS Queue
Verify this by examining the ActiveMQ administration page at http://localhost:8161/admin/queues.jsp. We can see that there is one message under the “Messages Enqueued” column.
Thanks.
Keep learning.
Opinions expressed by DZone contributors are their own.
Comments