NetBeans: From Modulizing JavaFX on AdoptOpenJDK to Runtime Generation and Distribution
Explore a simple configuration for a modular project using NetBeans with this step-by-step guide.
Join the DZone community and get the full member experience.
Join For FreeIn this article, I’ll share with you a comprehensive guide to working with JavaFX with NetBeans. First, I’ll demonstrate how to modulize JavaFx from NetBeans. Then, you’ll learn how to generate a runtime from Maven before turning to focus on distribution. I’ll outline all of the programs, equipment, and information you need from start to finish.
Building a Modular JavaFX from NetBeans
I really struggled to get a clear lead on how to modulize my JavaFX applications on AdoptOpenJDK, therefore, I am going to share a simple configuration for a modular project.
First off, you will need to grab a few things and move them into the right places:
OpenJFX — from here, you'll need the jmods
Place the jmods inside the module jmods directory of the installed JDK and jpackager binary and supporting jar inside the bin directory.
We'll do this in maven because of the great integration with NetBeans. I am using the latest incarnation from the Apache Software Foundation, version 11.0.
Open a new Maven project. You can choose the JavaFX Application because it will create the default folder set to house the fxml, etc.
At this point, the project will not build, so it is a good time to ensure the correct JDK is selected. This can be done by selecting the project Properties -> Build -> Compile. To be honest, most of the pom.xml can be junked and replaced at this point.
The following illustrates the dependencies needed to get this project to build on the JDK. It will still not run at this point, but we're getting closer.
<dependencies>
  <dependency>
    <groupId>org.openjfx</groupId>
    <artifactId>javafx-base</artifactId>
    <version>${javafx.version}</version>
  </dependency>
  <dependency>
    <groupId>org.openjfx</groupId>
    <artifactId>javafx-fxml</artifactId>
    <version>${javafx.version}</version>
  </dependency>
  <dependency>
    <groupId>org.openjfx</groupId>
    <artifactId>javafx-graphics</artifactId>
    <version>${javafx.version}</version>
  </dependency>
  <dependency>
    <groupId>org.openjfx</groupId>
    <artifactId>javafx-controls</artifactId>
    <version>${javafx.version}</version>
  </dependency>
</dependencies>
The important thing to notice is that upon including these dependencies, the platform-specific versions are also included.
Let's now change them to create the module. The module-info.java goes in the root folder of the project, NetBeans will helpfully create this for you, but it will need a small tweak once generated to open the module to its dependencies. New -> Other (if not in the quick picks) -> Java -> Java Module Info.
module com.luff.javafx.test {
    requires javafx.baseEmpty;
    requires javafx.base;
    requires javafx.fxmlEmpty;
    requires javafx.fxml;
    requires javafx.controlsEmpty;
    requires javafx.controls;
    requires javafx.graphicsEmpty;
    requires javafx.graphics;

    opens com.luff.javafx.test;
}
And the FXMLController ensures that the paths are provided in this form...I have had lots of trouble with this in the past, and this format seems to get it done in every scenario.
 @Override
    public void start(Stage stage) throws Exception {
        Parent root = FXMLLoader.load(new URL(getClass().getResource("/fxml/Scene.fxml").toExternalForm()));

        Scene scene = new Scene(root);
        scene.getStylesheets().add(getClass().getResource("/styles/Styles.css").toExternalForm());

        stage.setTitle("JavaFX and Maven");
        stage.setScene(scene);
        stage.show();
    }
Once this is done, we have an effective module. This is the part that I figured out fairly quickly; it was all the plugins to get everything in the correct place that took most of the effort.
Include a properties section in the pom.xml.
<properties>
  <javafx.version>11.0.2</javafx.version>
  <mainClass>com.luff.javafx.test.MainApp</mainClass>
  <moduleName>com.luff.javafx.test</moduleName>
  <project.build.sourceEncoding>UTF-8</project.build.sourceEncoding>
</properties>
maven-compiler-plugin — 3.8.0, at the time of writing, is the latest version supporting Java 11 and modularity.
<plugin>
  <groupId>org.apache.maven.plugins</groupId>
  <artifactId>maven-compiler-plugin</artifactId>
  <version>3.8.0</version>
  <configuration>
    <release>11</release>
  </configuration>
</plugin>
exec-maven-plugin — effectively informing the runtime of the execution path and dependencies.
<plugin>
  <groupId>org.codehaus.mojo</groupId>
  <artifactId>exec-maven-plugin</artifactId>
  <version>1.6.0</version>
  <executions>
    <execution>
      <goals>
        <goal>exec</goal>
      </goals>
      <configuration>
        <executable>${java.home}/bin/java</executable>
        <arguments>
          <argument>--module-path</argument>
          <argument>${project.build.directory}/modules</argument>
          <argument>--module</argument>
          <argument>${moduleName}/${mainClass}</argument>
        </arguments>
      </configuration>
    </execution>
  </executions>
</plugin>
maven-dependency-plugin — no more or less, move all the dependencies into a place that will become the module path.
<plugin>
  <groupId>org.apache.maven.plugins</groupId>
  <artifactId>maven-dependency-plugin</artifactId>
  <version>3.1.1</version>
  <executions>
    <execution>
      <id>copy-libs</id>
      <phase>prepare-package</phase>
      <goals>
        <goal>copy-dependencies</goal>
      </goals>
      <configuration>
        <outputDirectory>${project.build.directory}/modules</outputDirectory>
        <includeScope>runtime</includeScope>
      </configuration>
    </execution>
  </executions>
</plugin>
copy-rename-maven-plugin — rename and copy our jar to the module path.
<plugin>
  <groupId>com.coderplus.maven.plugins</groupId>
  <artifactId>copy-rename-maven-plugin</artifactId>
  <version>1.0.1</version>
  <executions>
    <execution>
      <id>copy-target</id>
      <phase>package</phase>
      <goals>
        <goal>copy</goal>
      </goals>
      <configuration>
        <sourceFile>${project.build.directory}/${project.build.finalName}.jar</sourceFile>
        <destinationFile>${project.build.directory}/modules/${project.build.finalName}.jar</destinationFile>
      </configuration>
    </execution>
  </executions>
</plugin>
At this point, we have created a project, included the dependencies, built a module-info, included a whole host of plugins, and all we have to show for it is a successful compilation. So let's go ahead and set this up to run!
If you try to use the default run command in NetBeans at this point, you will not get very far — we need to tell NetBeans where the modules are. Guess what? We already know this because it was done to build the jar.
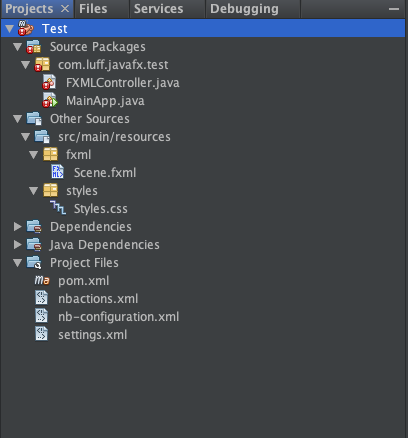
You'll notice in the Project Files section of the Projects Navigator that there is a file named nbactions.xml. This is how NetBeans executes the projects for us using maven plugins. All we need to do is replace the run command with a custom configuration.
<action>
  <actionName>run</actionName>
  <packagings>
    <packaging>jar</packaging>
  </packagings>
  <goals>
    <goal>process-classes</goal>
    <goal>org.codehaus.mojo:exec-maven-plugin:1.6.0:exec</goal>
  </goals>
  <properties>
    <!--<Env.JAVA_HOME>/Library/Java/JavaVirtualMachines/adoptopenjdk-12.jdk/Contents/Home</Env.JAVA_HOME>-->
    <exec.args>--module-path ${project.build.directory}/modules --module ${moduleName}/${mainClass}</exec.args>
    <exec.executable>java</exec.executable>
  </properties>
</action>
Instead of the classpath, we have the same commands as a regular debug and the module path. You'll be able to break and step as usual.
Of course, getting the application to run in the IDE is really only the first stage. Of course, we’ll want to be able to run it like a standard application with an icon and a delivery mechanism.
<properties>
  <!--<Env.JAVA_HOME>/Library/Java/JavaVirtualMachines/adoptopenjdk-12.jdk/Contents/Home</Env.JAVA_HOME>-->
  <exec.args>-agentlib:jdwp=transport=dt_socket,server=n,address=${jpda.address} --module-path ${project.build.directory}/modules --module ${moduleName}/${mainClass}</exec.args>
  <exec.executable>java</exec.executable>
  <jpda.listen>true</jpda.listen>
</properties>
Instead of the classpath, we have the same commands as a regular debug and the module path. You'll be able to break and step as usual.
Of course, getting the application to run in the IDE is really only the first stage. We'll, of course, want to be able to run it like a standard application with an icon and a delivery mechanism. In Part 2, we'll use the same project to include jlink, and in Part 3, jpackager.
Generating a Runtime from Maven
Next, we are going to start by removing the module-info from the root of the project. I know, counter-intuitive, right? We are going to use ModiTect, a Maven plugin authored for the very purpose of managing module descriptors and runtime images.
Compared to authoring module descriptors by hand, using ModiTect saves you work by defining dependence clauses based on your project's dependencies, describing exported and opened packages with patterns (instead of listing all packages separately), auto-detecting service usages, and more.
<plugin>
  <groupId>org.moditect</groupId>
  <artifactId>moditect-maven-plugin</artifactId>
  <version>1.0.0.Beta2</version>
  <executions>
    <execution>
      <id>add-module-info-to-deps</id>
      <phase>package</phase>
      <goals>
        <goal>add-module-info</goal>
      </goals>
      <configuration>
        <overwriteExistingFiles>true</overwriteExistingFiles>
        <jvmVersion>${jvm.version}</jvmVersion>
        <module>
          <moduleInfo>
            <name>com.luff.javafx.test</name>
            <opens>com.luff.javafx.test;</opens>
          </moduleInfo>
        </module>
      </configuration>
    </execution>
  </executions>
</plugin>
We'll add the plugin and some generic configuration to create the module-info and set us back to the same position we were, having previously manually detailed the module-info. Now, however, we want to go further and turn this into a runtime image.
<execution>
  <id>create-runtime-image</id>
  <phase>package</phase>
  <goals>
    <goal>create-runtime-image</goal>
  </goals>
  <configuration>
    <modulePath>
      <path>${project.build.directory}/modules</path> <!--our modules-->
    </modulePath>
    <modules> <!--everything we need-->
      <module>${moduleName}</module>
      <module>java.base</module>
      <module>javafx.base</module>
      <module>javafx.fxml</module>
      <module>javafx.swing</module>
      <module>javafx.controls</module>
      <module>javafx.graphics</module>
      <module>javafx.web</module>
    </modules>
    <excludedResources>
      <pattern>glob:/com.luff/**</pattern>
    </excludedResources>
    <launcher>
      <name>Test</name> <!--the name of the application executable-->
      <module>${moduleName}/${mainClass}</module>
    </launcher>
    <stripDebug>true</stripDebug>
    <compression>2</compression>
    <no-header-files>true</no-header-files>
    <no-man-pages>true</no-man-pages>
    <jdepsExtraArgs>
      <args>--strip-native-commands</args>
    </jdepsExtraArgs>
    <outputDirectory>${project.build.directory}/jlink-image</outputDirectory>
  </configuration>
</execution>
Add the create-runtime-image execution right after the add-module-info execution; they will run sequentially.
At this point, go ahead and run a clean:build again — you'll find it takes a little longer, but this time we are rewarded with a new jlink-image directory in the build location. Navigate through that and you'll see a folder structure similar to the below image.

Note the Test executable and if you execute it, we have our little app.
That was simple, right? The thing is, projects are not simple! They usually include stuff that is not always at the bleeding edge of development. Say, for example, I wanted to include a dependency that is not modular.
<dependency>
  <groupId>eu.hansolo</groupId>
  <artifactId>Medusa</artifactId>
  <version>8.3</version>
</dependency>
@FXML
private Clock clock;
private static final ScheduledExecutorService TICKING = Executors.newSingleThreadScheduledExecutor();;
private final Runnable run = FXMLController.this::changeDisplay;
@Override
public void initialize(URL url, ResourceBundle rb) {
TICKING.scheduleAtFixedRate(run, 0, 1, TimeUnit.SECONDS);
}
private void changeDisplay() {
Platform.runLater(() -> clock.setTime(ZonedDateTime.now()));
}<?xml version="1.0" encoding="UTF-8"?>
<?import eu.hansolo.medusa.Clock?>
<?import javafx.scene.layout.AnchorPane?>
<?import javafx.scene.text.Font?>
<AnchorPane id="AnchorPane" prefHeight="200" prefWidth="320" xmlns="http://javafx.com/javafx/11.0.1" xmlns:fx="http://javafx.com/fxml/1" fx:controller="com.luff.javafx.test.FXMLController">
<children>
<Clock fx:id="clock" animated="true" layoutX="14.0" layoutY="50.0" lcdFont="STANDARD" prefHeight="169.0" prefWidth="292.0" skinType="TEXT" AnchorPane.bottomAnchor="50.0" AnchorPane.leftAnchor="14.0" AnchorPane.rightAnchor="14.0" AnchorPane.topAnchor="50.0">
<customFont>
<Font name="Arial" size="12.0" />
</customFont></Clock>
</children>
</AnchorPane>Let's see what happens if we try to build the code:
Failed to execute goal org.moditect:moditect-maven-plugin:1.0.0.Beta2:create-runtime-image (create-runtime-image) on project Test: Execution create-runtime-image of goal org.moditect:moditect-maven-plugin:1.0.0.Beta2:create-runtime-image failed: Execution of jlink failed -> [Help 1]
Moditect did do its part: it generated the module-info for our project.
module Test {
  requires Medusa;
  requires javafx.base;

  requires transitive javafx.fxml;
  requires transitive javafx.graphics;

  exports com.luff.javafx.test;

}
Here is the issue. We need to tell Moditect that we have a jar that is not a module; it needs a module descriptor.
<plugin>
  <groupId>org.moditect</groupId>
  <artifactId>moditect-maven-plugin</artifactId>
  <version>1.0.0.Beta2</version>
  <executions>
    <execution>
      <id>add-module-info-to-deps</id>
      <phase>package</phase>
      <goals>
        <goal>add-module-info</goal>
      </goals>
      <configuration>
        <overwriteExistingFiles>true</overwriteExistingFiles>
        <jvmVersion>${jvm.version}</jvmVersion>
        <modules>
          <module>
            <artifact>
              <groupId>eu.hansolo</groupId>
              <artifactId>Medusa</artifactId>
            </artifact>
            <additionalDependencies>
              <dependency>
                <groupId>org.openjfx</groupId>
                <artifactId>javafx-controls</artifactId>
                <version>${javafx.version}</version>
                <classifier>mac</classifier>
              </dependency>
              <dependency>
                <groupId>org.openjfx</groupId>
                <artifactId>javafx-base</artifactId>
                <version>${javafx.version}</version>
                <classifier>mac</classifier>
              </dependency>
              <dependency>
                <groupId>org.openjfx</groupId>
                <artifactId>javafx-graphics</artifactId>
                <version>${javafx.version}</version>
                <classifier>mac</classifier>
              </dependency>
            </additionalDependencies>
            <moduleInfo>
              <name>eu.hansolo.Medusa</name>
            </moduleInfo>
          </module>
        </modules>
        <module>
          <moduleInfo>
            <name>com.luff.javafx.test</name>
            <opens>com.luff.javafx.test;</opens>
          </moduleInfo>
        </module>
      </configuration>
    </execution>
Notice the significantly expanded modules section. Medusa relies upon JavaFX and needs a module-info attaching that describes that dependency.
module Medusa {
  requires transitive javafx.base;
  requires transitive javafx.controls;
  requires transitive javafx.graphics;

  exports eu.hansolo.medusa;
  exports eu.hansolo.medusa.events;
  exports eu.hansolo.medusa.skins;
  exports eu.hansolo.medusa.tools;

}
With this modified section the project will now build, the correct module descriptors will be built and the code will run. To generate the binary, we simply add our newly-created module to the modules in the create-runtime-image-section.
<modules>
  <module>${moduleName}</module>
  <module>java.base</module>
  <module>javafx.base</module>
  <module>javafx.fxml</module>
  <module>javafx.swing</module>
  <module>javafx.controls</module>
  <module>javafx.graphics</module>
  <module>javafx.web</module>
  <module>eu.hansolo.Medusa</module>
</modules>
Focusing on Distribution
Finally, we’ll look at the distribution of our new application. I am working in MacOS but it will work for Linux and Windows. The only requirement for Windows is an installation of Inno Setup. I have even begun working on this for my current obsession, Haiku-OS — I encourage you to check it out.
Back into NetBeans, we need to make some more pom.xml changes. In the normal course of things, you would probably not want to create the binary and package during development and test builds. To make things a little cleaner, you would probably set up Maven profiles.
<profiles>
  <profile>
    <id>package</id>
    <build>
      <plugins>
        ...
      </plugins>
    </build>
  </profile>
</profiles>
This would be the most basic implementation and will work fine. However, like me, you'll want to build for multiple platforms — after all, that is the foundation of Java. So we need to create profiles for each platform; for brevity, I have only added Mac and Windows.
Grab the create-runtime-image execution we previously defined and add it complete with plugin definition in the build section of the package profile, not forgetting to remove it from where it was copied. Now the binary will only be created when the package profile is explicitly defined. There is no need to explicitly select a platform profile. If you want to, however, you can separate the profiles with a comma; -Pmac,package. Alternatively, you can create a custom goal from the context menu in NetBeans; much easier, namable, and reusable!
<profiles>
  <profile>
    <id>macos</id>
    <activation>
      <activeByDefault>true</activeByDefault>
      <os>
        <family>mac</family>
      </os>
    </activation>
    <properties>
      <bundle.type>pkg</bundle.type>
      <exec.executable>${java.home}/bin/java</exec.executable>
    </properties>
  </profile>
  <profile>
    <id>win</id>
    <activation>
      <activeByDefault>true</activeByDefault>
      <os>
        <family>windows</family>
      </os>
    </activation>
    <properties>
      <bundle.type>exe</bundle.type>
      <exec.executable>${java.home}\bin\java</exec.executable>
    </properties>
  </profile>
  <profile>
    <id>package</id>
    <build>
      <plugins>
        <plugin>
          <groupId>org.moditect</groupId>
          <artifactId>moditect-maven-plugin</artifactId>
          <executions>
            <execution>
              <id>create-runtime-image</id>
              <phase>package</phase>
              <goals>
                <goal>create-runtime-image</goal>
              </goals>
              <configuration>
                <modulePath>
                  <path>${project.build.directory}/modules</path>
                </modulePath>
                <modules>
                  <module>${moduleName}</module>
                  <module>java.base</module>
                  <module>javafx.base</module>
                  <module>javafx.fxml</module>
                  <module>javafx.swing</module>
                  <module>javafx.controls</module>
                  <module>javafx.graphics</module>
                  <module>javafx.web</module>
                  <module>eu.hansolo.Medusa</module>
                </modules>
                <excludedResources>
                  <pattern>glob:/com.luff/**</pattern>
                </excludedResources>
                <!--<baseJdk>version=11,vendor=openjdk,platform=mac</baseJdk>-->
                <launcher>
                  <name>Test</name>
                  <module>${moduleName}/${mainClass}</module>
                </launcher>
                <stripDebug>true</stripDebug>
                <compression>2</compression>
                <outputDirectory>${project.build.directory}/jlink-image</outputDirectory>
              </configuration>
            </execution>
          </executions>
        </plugin>
Let's add the important bit — the packaging plugin. No such luck! At the time of writing, it does not exist and probably does not need to, as it would really only obfuscate the actual packager. Oracle removed the JavaPackager in JDK11 at the same time as JavaFX and work on a replacement is detailed in JEP 343. OpenJFX has come to the rescue by back porting the work to JDK 11. Download the port for the system you are building on and move it to the bin directory of the JDK. Unfortunately, at the moment it has not been ported to JDK 12, but early access releases are available for JDK 13 if you are feeling brave.
We still want to do this in Maven, however, as part of our packaging phase. To do this, we will simply implement the exec-maven-plugin. As part of the implementation, define the executable for the jpackager that was downloaded.
<plugin>
  <groupId>org.codehaus.mojo</groupId>
  <artifactId>exec-maven-plugin</artifactId>
  <executions>
    <execution>
      <id>create-package</id>
      <phase>package</phase>
      <goals>
        <goal>exec</goal>
      </goals>
      <configuration>
        <executable>${java.home}/bin/jpackager</executable>
        <workingDirectory>${project.build.directory}</workingDirectory>
        <longModulepath>false</longModulepath>
        <environmentVariables>
          <JAVA_HOME>${java.home}</JAVA_HOME>
        </environmentVariables>
        <arguments>
          <argument>create-installer</argument>
          <argument>${bundle.type}</argument>
          <argument>--verbose</argument>
          <argument>--echo-mode</argument>
          <!--<argument>--icon</argument>
          <argument>${icons}</argument>-->
          <argument>--output</argument>
          <argument>package</argument>
          <argument>--version</argument>
          <argument>${project.version}</argument>
          <argument>--copyright</argument>
          <argument>Luff Corp</argument>
          <argument>--name</argument>
          <argument>Test</argument>
          <argument>--runtime-image</argument>
          <argument>${project.build.directory}/jlink-image</argument>
          <argument>--module</argument>
          <argument>${moduleName}/${mainClass}</argument>
        </arguments>
      </configuration>
    </execution>
  </executions>
</plugin>
That really is all that is needed. Run the package profile by changing the dropdown in the toolbar of NetBeans or -Ppackage from the command line. If all has gone to plan, you should have a target/package directory with the pkg or EXE contained within. Go ahead and execute the installer and voila.
Of course, I have generally followed the path of least resistance — the complications are many as the application gets bigger. The one major issue I have is still the size of the bundle. On the command line, you can review the modules in the custom runtime.
/target/jlink-image/bin/java --list-modules
[email protected]
[email protected]
[email protected]
[email protected]
[email protected]
[email protected]
[email protected]
[email protected]
javafx.base
javafx.controls
javafx.fxml
javafx.graphics
javafx.media
javafx.swing
javafx.web
[email protected]
[email protected]
[email protected]
[email protected]
A PR for Moditect will bring support for no-man-pages and no-header-files.
It is not essential that you’ve followed the information in this guide step-by-step — the implementation is transferable. However, if you wish to skip forward, I have another project on this subject published on GitHub.
Opinions expressed by DZone contributors are their own.
Comments