Run AI Agents Safely With Docker Sandboxes: A Complete Walkthrough
A full walkthrough of how to set up Docker sandboxes on a local machine and how to run AI agents safely in YOLO mode without corrupting the host environment.
Join the DZone community and get the full member experience.
Join For FreeThere are days when I want an agent to work on a project, run commands, install packages, and poke around a repo without getting anywhere near the rest of my machine. That is exactly why Docker Sandboxes clicked for me.
The nice part is that the setup is not complicated. You install the CLI, sign in once, choose a network policy, and launch a sandbox from your project folder. After that, you can list it, stop it, reconnect to it, or remove it when you are done.
In this post, I am keeping the focus narrow on purpose: Set up Docker Sandboxes, run one against a local project, understand the few commands that matter, and avoid the mistakes that usually slow people down on day one.
What Are Docker Sandboxes?
Docker Sandboxes give you an isolated environment for coding agents. Each sandbox runs inside its own microVM and gets its own filesystem, network, and Docker daemon.
The simple way to think about it is this: the agent gets a workspace to do real work, but it does not get free access to your whole laptop.
That is the reason this feature is interesting. You can let an agent install packages, edit files, run builds, and even run Docker commands inside the sandbox without turning your host machine into the experiment.
Before You Start
You do not need a big lab setup to try this, but you do need:
- macOS or Windows machine installed
- Windows "HypervisorPlatform" feature enabled
- Docker Sbx CLI installed
- API key or authentication for the agent you want to use
If you start with the built-in shell agent, Docker sign-in is enough for your first walkthrough. If you want to start with claude, copilot, codex, gemini, or another coding agent, make sure you also have that agent's authentication ready.
If you are on Windows, make sure Windows Hypervisor Platform is enabled first.
Enable-WindowsOptionalFeature -Online -FeatureName HypervisorPlatform -AllIf Windows asks for a restart, do that before moving on.
Note: Docker documents the getting-started flow with the sbx CLI. There is also a docker sandbox command family, but sbx is the cleanest way to get started, so that is what I am using in this walkthrough.
Step 1: Install the Docker Sandboxes CLI
On Windows:
winget install -h Docker.sbxOn macOS:
brew install docker/tap/sbxThat is it for installation.
If sbx is not recognized immediately after install, open a new terminal window and try again. I hit that once on Windows after installation, and a fresh terminal fixed it.
Note: Docker Desktop is not required for sbx.
Step 2: Sign In
Now sign in once:
sbx loginThis opens the Docker sign-in flow in your browser. During login, Docker asks you to choose a default network policy for your sandboxes:
- Open – Everything is allowed
- Balanced – Common development traffic is allowed, but it is more controlled
- Locked down – Everything is blocked unless you explicitly allow it
If you are just getting started, pick Balanced.
That is the easiest choice for a first run because it usually works without making the sandbox too open.
Step 3: Pick a Small Project Folder
You can use an existing project folder, or create a tiny test folder just for this walkthrough.
For example:
mkdir hello-sandbox
cd hello-sandbox
If you want, drop a file into it so you have something visible inside the sandbox:
echo "# hello-sandbox" > README.mdNothing fancy is needed here. The goal is just to have a folder you are comfortable letting the agent work in.
Step 4: Run Your First Sandbox
Here is the command that matters most:
sbx run shell .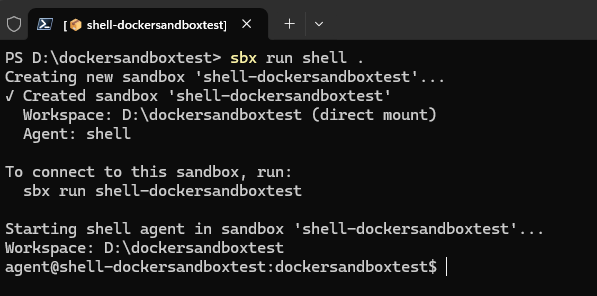
What this does:
- Starts a sandbox for the
shellagent - Mounts your current folder into the sandbox
- Opens an isolated environment where the agent can work on that folder
If you prefer naming your sandbox from the start, use:
sbx run --name my-first-sandbox shell .On the first run, Docker may take a little longer because it needs to pull the agent image. That is normal. Later runs are much faster.
I like starting with shell because it is the easiest way to prove the sandbox is working before you bring an actual coding agent into the mix.
Once that works, replace shell with the agent you actually want to use, such as claude, copilot, codex, gemini, or another supported agent from the Docker docs.
Step 5: See What Is Running
To check your active sandboxes, run:
sbx lsYou should see output with a name, status, and uptime.
This is a handy command because once you start using sandboxes regularly, it becomes the quickest way to see what is still running and what needs cleanup.
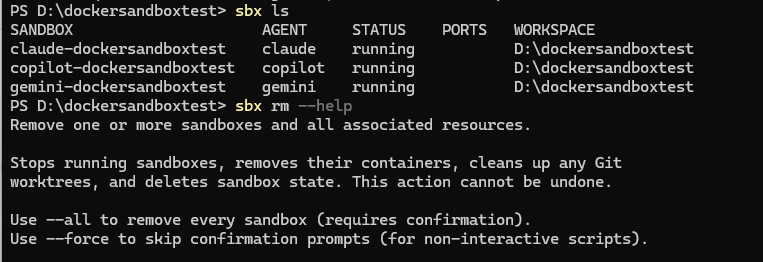
Figure 1.2: Shows how to verify list of all active sandboxes running on the machine
Step 6: Switch to a Real Coding Agent
Once you have proved the sandbox works with shell, move to the coding agent you actually want to use.
For example:
sbx run copilot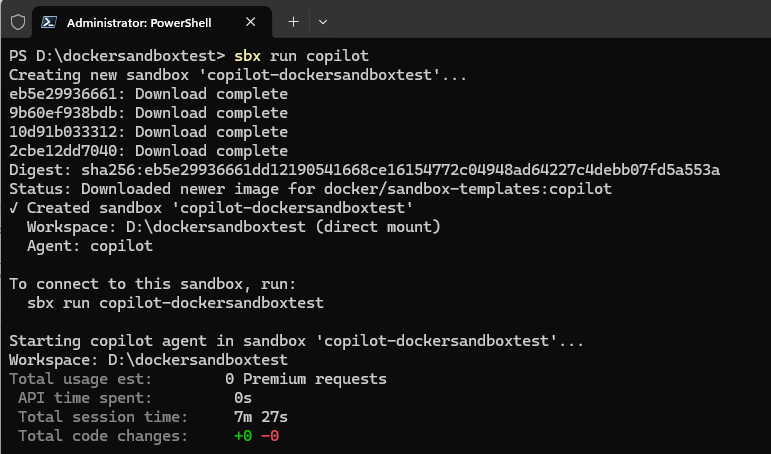
or
sbx run gemini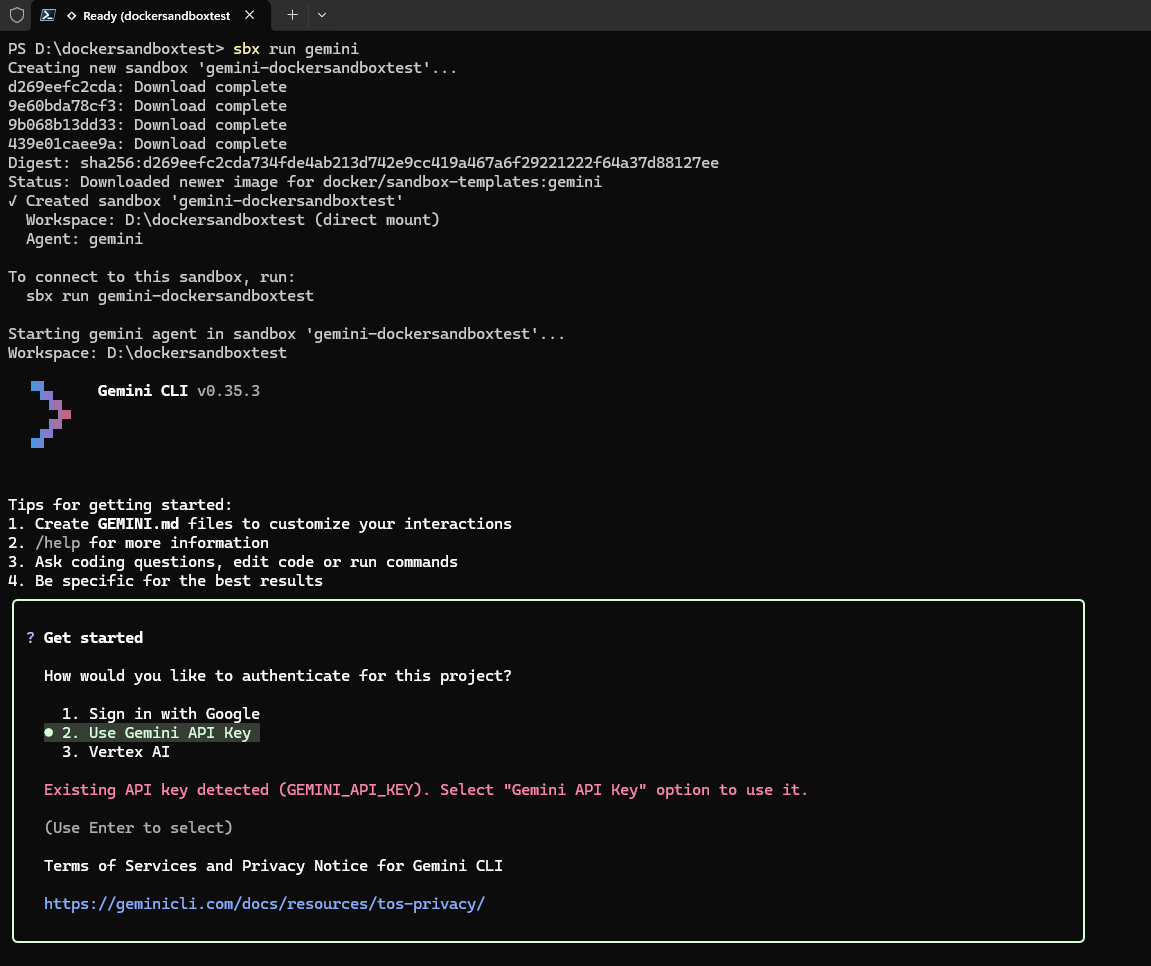
The workflow is the same as shell. The only thing that changes is the agent inside the sandbox.
If the agent needs its own provider login or API key, complete that setup and then continue. The important point is that the agent is still running inside the sandbox, not directly on your host machine.
Step 7: Stop the Sandbox When You Are Done
When you are finished using Sandbox, you can stop it by running the command below:
sbx stop copilot-dockersandboxtestIf you don't remember the name, run sbx ls first to see all the active sandboxes running. Stopping is useful when you want to pause work without removing the sandbox immediately.
Step 8: Remove the Sandbox When You No Longer Need It
When you are done for good, you can remove it by running the command below:
sbx rm copilot-dockersandboxtestOr remove all sandboxes by simply passing --all flag as shown below:
sbx rm --all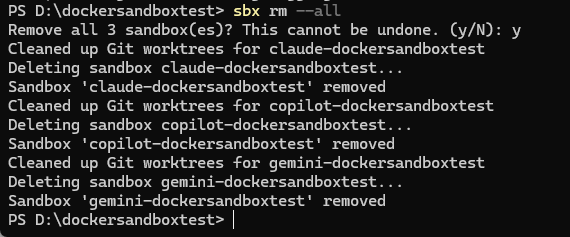
sbx rm --all command
Step 9: Use YOLO Mode Safely
Now for the newer idea Docker has just announced, which is YOLO mode. If you want to read more about it, refer to Docker's recent blog post, which is worth bookmarking: Docker Sandboxes: Run Agents in YOLO Mode, Safely.
In simple terms, YOLO mode means letting a coding agent work with fewer interruptions and fewer approval prompts. That can save time, but it only makes sense when the agent is already inside a sandbox.
Note: I would not start with YOLO mode on day one. I would start with a normal sandbox run, get comfortable with the lifecycle first, and only then try YOLO mode.
Conclusion
This article explains Docker Sandboxes and provides step-by-step instructions for getting started. What I like about Docker Sandboxes is that they remove a lot of friction from a very real problem. Sometimes you want an agent to have freedom, but not too much freedom. You want it to run commands, inspect files, and do useful work, but you also want a clear boundary around that work. That is the sweet spot Docker Sandboxes are aiming for. If you are curious about them, my advice is simple: do not start with a giant repo or a complicated setup. Pick one small folder, use the Balanced policy first, run a single sandbox, and get comfortable with the basic lifecycle first. Once that clicks, the rest feels much easier to work in YOLO mode.
Opinions expressed by DZone contributors are their own.
Comments