An ARM Image With Buildroot
Now that you know the basics of building images with buildroot, let's take a look at one based on a board using an ARM processor.
Join the DZone community and get the full member experience.
Join For FreeIn the last article in this series, we built an i386 image with buildroot that we were able to run via QEMU. Pretty cool, but not worth much right? I mean, it's not like we're going to use an embedded i386 implementation to in something like, say, a smart camera. Or bulb. Or plug.
So let's build an image based on a board, using an ARM processor. A little more realistic, right?
So, a great way to start is to generate presets from a given board profile. We're going to use a QEMU config for a versatile arm board. Run this command from your buildroot home:
$ make qemu_arm_versatile_defconfigLet's take a look at some of the presets to see what we have. From your buildroot home directory, execute:
$ make nconfigThis'll bring up the standard ncurses interface for buildroot. Navigate to Target Options, and you should see this:
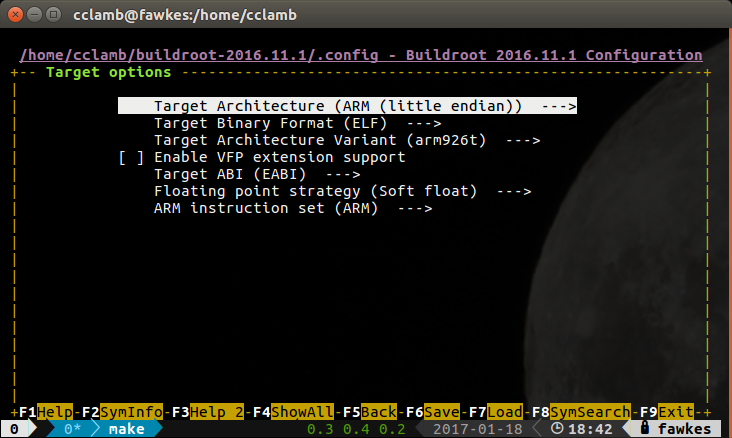
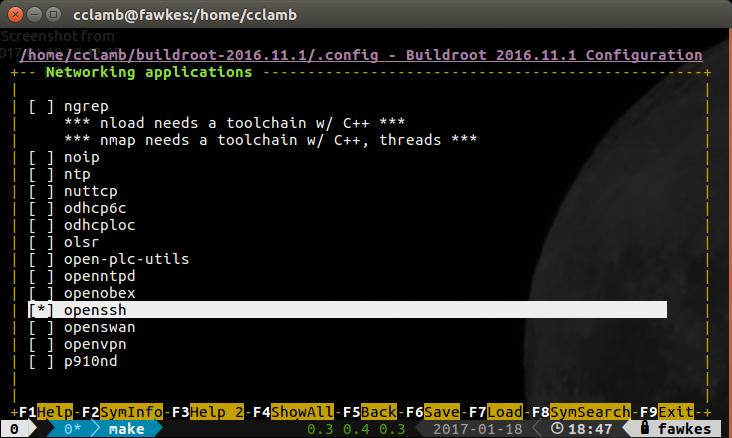
So we're compiling for a little endian ARM processor using ELF formatted libraries and executables. We're using the ARM instruction set, not Thumb. Looks good. Now, let's make sure we have the ability to SSH to the image when running. Add OpenSSL libraries by navigating to Target packages -> Networking applications, and select openssh:
You should be set! Exit, saving the configuration, and make the image.
The make will take a while. After the make is finished, you should have a kernel and a filesystem that you can run with QEMU with this command line:
$ qemu-system-arm \
  -M versatilepb \
  -kernel output/images/zImage \
  -dtb output/images/versatile-pb.dtb \
  -drive file=output/images/rootfs.ext2,if=scsi,format=raw \
  -append "root=/dev/sda console=ttyAMA0,115200" \
  -serial stdio \
  -net nic,model=rtl8139 -net user \
  -redir tcp:2222::22 \
  -name Versatile_ARM_EXT2
I usually put this into a shell script to execute it. Easier than typing the whole thing out.
So, this needs to run from the buildroot home directory, and you need to have installed the QEMU tools (a simple apt install QEMU works for me on Ubuntu). This does a couple of things — first, it uses the Linux kernel you just built, located in the zImage file in the output subdirectory. It also uses the EXT2 filesystem buildroot created. Also, the -redir option redirects the local port 2222 to port 22 on the guest image, allowing you to SSH and SCP to the running image.
The nice thing about this command is that it runs the VM in the shell. You can log in as root — we didn't create a root password for this image (though you should for anything like this you intend to put in production!), so the username is sufficient. Now, in order to use SSH and SCP, to move files into the image filesystem, you'll need to add an account and modify the /etc/shadow file. There's a bug where the new user's password won't change on the first login and you need to put a fix in place to get around this. So first, create your user:
$ adduser -h /<username> -s /bin/sh <username>Then you'll need to edit the /etc/shadow file, changing this:
<username>:$1$UTHPN9qx$Sgd.GOTJlj1gZVvjuYPGh0:0:0:99999:7:::To this:
<username>:$1$UTHPN9qx$Sgd.GOTJlj1gZVvjuYPGh0:10933:0:99999:7:::Note the substitution of 10933 for 0 above. Now you should be able to SSH in:
$ ssh -p 2222 <username>@localhost
<username>@localhost's password:
$ hostname
buildroot
Excellent! You've built an arm image, and you're running it in QEMU. Next time, we'll cross-compile an application and move it over to the image and run it.
Opinions expressed by DZone contributors are their own.
Comments