Login Page Using Angular Material Design
In this post, we'll learn how to better work with Angular and Angular Material Design by using these frameworks to create a login form.
Join the DZone community and get the full member experience.
Join For FreeThis is a simple Angular application with a login module designed using Angular 5 Material design. The application will have a login module with a landing page and, after successfully logging in, the user will be redirected to the user page (User Module). To design this we have used Angular 5 Material components such as buttons, layout, mat-toolbar.
Angular 5 Setup
Let's start with the Angular 5 setup. We will be creating an application using Angular CLI and then will configure the material design with it. We can setup Angular by going through Angular QuickStart.
Here are the commands I have used to set up the application:
npm install -g @angular/cli
ng new my-first-app
cd my-first-app/
ng serve
The above commands will generate the Angular project with the name, "my-first-app," using the default Hero application. The Angular CLI application installs the necessary npm packages, creates the project files, and populates the project with a simple default app. Now we have the Hero app running on http://localhost:4200.
Angular Material Design Configuration
We will configure Material Design in our project. Here is the offical site of Angular Material Design.
Below are the steps to configure Material Design:
- Install Angular Material and its CDK.
npm install --save @angular/material @angular/cdk @angular/animationsThe above command will add the required dependencies such as @angular /animations, @angular/cdk, @angular/material to get started with Material.
2. Install the Angular theme. There are four available themes: deeppurple-amber.css, indigo-pink.css, pink-bluegrey.css, and purple-green.css under node_modules/@angular/material/prebuilt-themes. We will be using the indigo-pink theme. Before using it, we need to install it in our application.
Add the below code to style.css under the src folder.
@import '~@angular/material/prebuilt-themes/indigo-pink.css';Also add the below code to index.html for font support.
<link href="//fonts.googleapis.com/icon?family=Material+Icons" rel="stylesheet">Generate a Component in Angular 5
As we are creating a login page application, we will create two component here, viz. Login and User, using Angular CLI.
ng generate component login
ng generate component user
Project Structure:
Here is the final project structure:

We will create a separate module to configure Material related modules in a single .ts file for a cleaner implementation. Create a file name material.module.ts under src/app/core folder and the below code:
import {NgModule} from "@angular/core";
import { CommonModule } from '@angular/common';

import {
  MatButtonModule, MatCardModule, MatDialogModule, MatInputModule, MatTableModule,
  MatToolbarModule, MatMenuModule,MatIconModule, MatProgressSpinnerModule
} from '@angular/material';

@NgModule({
  imports: [
  CommonModule,
  MatToolbarModule,
  MatButtonModule,
  MatCardModule,
  MatInputModule,
  MatDialogModule,
  MatTableModule,
  MatMenuModule,
  MatIconModule,
  MatProgressSpinnerModule
  ],
  exports: [
  CommonModule,
   MatToolbarModule,
   MatButtonModule,
   MatCardModule,
   MatInputModule,
   MatDialogModule,
   MatTableModule,
   MatMenuModule,
   MatIconModule,
   MatProgressSpinnerModule
   ],
})
export class CustomMaterialModule { }
Now import same to app.module.ts
app.module.ts
import { BrowserModule } from '@angular/platform-browser';
import {BrowserAnimationsModule} from '@angular/platform-browser/animations';

import { NgModule } from '@angular/core';
import { CustomMaterialModule } from './core/material.module';
import { AppRoutingModule } from './core/app.routing.module';
import {FormsModule} from '@angular/forms';

import { AppComponent } from './app.component';
import { LoginComponent } from './login/login.component';
import { UserComponent } from './user/user.component';

@NgModule({
  declarations: [
    AppComponent,
    LoginComponent,
    UserComponent
  ],
  imports: [
    BrowserModule,
    BrowserAnimationsModule,
    CustomMaterialModule,
    FormsModule,
    AppRoutingModule
  ],
  providers: [],
  bootstrap: [AppComponent]
})
export class AppModule { }
Routing Configuration: we have configured the default routing to the login page and the post-login page is redirected to the user page. Below is the routing configuration file.
app.routing.module.ts
import {NgModule}  from '@angular/core';

import { RouterModule, Routes } from '@angular/router';
import {UserComponent} from '../user/user.component';
import {LoginComponent} from '../login/login.component';

const routes: Routes = [
  { path: 'user', component: UserComponent },
  { path: 'login', component: LoginComponent },
  {path : '', component : LoginComponent}
];

@NgModule({
  imports: [
    RouterModule.forRoot(routes)
  ],
  exports: [
    RouterModule
  ],
  declarations: []
})
export class AppRoutingModule { }
Angular Material Toolbar Configuration
In our login page, we have created a toolbar which will have the Application name on the left side and some buttons on the right side. We have imported the Material toolbar in the material.module.ts file. To have Material buttons, we have imported MatToolbarModule, which has been imported above.
Now add the code to login.component.html to create the login page with username and password.
login.component.html
<mat-toolbar color="primary">
<mat-toolbar-row>
<span>My First App</span>
    <span class="example-fill-remaining-space"></span>
    <span class="align-center"></span>
    <span class="example-spacer"></span>
    <button mat-button>About</button>
    <button mat-button>Contact</button>
    <button mat-icon-button [matMenuTriggerFor]="menu">
  <mat-icon>more_vert</mat-icon>
</button>
<mat-menu #menu="matMenu">
  <button mat-menu-item>
    <mat-icon>dialpad</mat-icon>
    <span>Redial</span>
  </button>
  <button mat-menu-item disabled>
    <mat-icon>voicemail</mat-icon>
    <span>Check voicemail</span>
  </button>
  <button mat-menu-item>
    <mat-icon>notifications_off</mat-icon>
    <span>Disable alerts</span>
  </button>
</mat-menu>
 </mat-toolbar-row>
Once this is done, run ng serve in the command line and access http:localhost:4200 in the browser. The application should display the below page:

Create a Login Form With Angular Material
For this, we have imported MatCardModule and MatInputModule in the CustomMaterial.module.ts file. MatCardModule is Material's layout and MatInputModule provides Material input fields. Add the below code to login.componenet.html to create the login form:
<mat-card class="example-card">
   <mat-card-header>
     <mat-card-title>Login</mat-card-title>
   </mat-card-header>
   <mat-card-content>
     <form class="example-form">
       <table class="example-full-width" cellspacing="0">
         <tr>
           <td>
             <mat-form-field class="example-full-width">
             <input matInput placeholder="Username" [(ngModel)]="username" name="username" required>
             </mat-form-field>
           </td>
         </tr>
         <tr>
         <td><mat-form-field class="example-full-width">
           <input matInput placeholder="Password" [(ngModel)]="password"type="password" name="password" required>
         </mat-form-field></td>
       </tr></table>
     </form>
     <mat-spinner [style.display]="showSpinner ? 'block' : 'none'"></mat-spinner>
   </mat-card-content>
   <mat-card-actions>
     <button mat-raised-button (click)="login()" color="primary">Login</button>
   </mat-card-actions>
 </mat-card>
In the above code, upon click of the login button, we have called login() function to validate the user information.
Add login function to login.componenet.ts
import { Component, OnInit } from '@angular/core';

import {Router} from '@angular/router';
import {MatDialog} from '@angular/material'

@Component({
  selector: 'app-login',
  templateUrl: './login.component.html',
  styleUrls: ['./login.component.css']
})
export class LoginComponent implements OnInit {

  constructor(private router: Router) { }

username: string;
password: string;

  ngOnInit() {
  }

  login() : void {
    if(this.username == 'admin' && this.password == 'admin'){
     this.router.navigate(["user"]);
    }else {
      alert("Invalid credentials");
    }
  }
  }
}
Also we have used the form tag in login.component.html, so we need to add formsModule to app.module.ts.
import {FormsModule} from '@angular/forms';
.
.
.
imports: [
FormsModule,
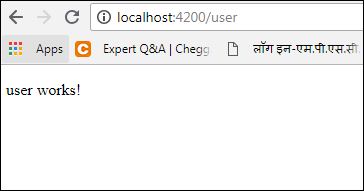
]Now we have completed all the configurations. Let's run this in the browser. Run ng serve in the command line and access http://localhost:4200. You will see the login page.

Once the user enters the correct username and password, they are redirected to the user page.
Conclusion
So, in this article we created a sample login page application using Angular Material Design. If you have anything that you want to add or share then please share it in the below comment section.
Happy learning!
If you enjoyed this article and want to learn more about Angular, check out our compendium of tutorials and articles from JS to 8.
Opinions expressed by DZone contributors are their own.
Comments