Automating Database Operations With Ansible and DbVisualizer
We will cover the installation and configuration of Ansible and DbVisualizer and demonstrate how to automate common database operations using Ansible playbooks.
Join the DZone community and get the full member experience.
Join For FreeIn this tutorial, we will explore how to automate database operations using Ansible and DbVisualizer. Ansible is a powerful automation tool that allows you to define and manage infrastructure as code, while DbVisualizer is a feature-rich database management tool that enables you to interact with various databases. By combining these two tools, Ansible automates repetitive database tasks and streamlines your workflows, while DbVisualizer helps you visualize your database during the process. We will cover the installation and configuration of Ansible and DbVisualizer and demonstrate how to automate common database operations using Ansible playbooks.
Prerequisites
- Basic knowledge of databases and SQL.
- Familiarity with Ansible concepts and syntax.
- Access to a target database server.
- Python 3.7 or later
- PyMySQL installed using
pip install PyMySQL - [DbVisualizer]
We’ll start by telling you a couple of things about Ansible and then tell you how to automate your database operations. Follow along!
How Does Ansible Automate Database Commands?
Ansible makes automating database commands a breeze. It provides special modules designed to interact with different database systems, handling all the complicated stuff behind the scenes. With Ansible, you can effortlessly execute queries, manage users, create tables, and more. Simply define your tasks in Ansible playbooks using these modules, and watch as your database workflows become smooth and automated. Ansible's magical touch ensures that your automation processes are consistent and repeatable, saving you time and sparing you from pesky errors. So sit back, relax, and let Ansible take care of your database tasks with ease!
Getting Started With Ansible
Now that we have our prerequisites out of the way, let’s get started with working with Ansible. Follow the steps below:
Step 1: Installing Ansible
- Install Ansible on your machine by using the
pip install ansiblecommand in your terminal. - Verify the installation by running the
ansible --versioncommand.
Step 2: Configuring Ansible
Once you have successfully installed Ansible, follow the steps below to start automating:
1. Create a new directory where our Ansible magic will happen. Inside this directory, create an inventory file (inventory.ini). This file is like Ansible's map, guiding it to the target database server. For example:
db_server ansible_host=your_server_ip ansible_user=your_username ansible_password=your_passwordReplace the placeholders in the code above with the information for the database you want Ansible to access.
2. Create a playbook file (database.yml) to define your automation tasks. This is Ansible's spellbook where we list all our automation tasks.
- name: Automate Database Operations


hosts: database


tasks:


# list you automation tasks here
Automating Database Operations
With Ansible ready, let's start automating some database operations. [Download DbVisualizer], then follow the steps below:
Step 1:Connect DbVisualizer to the MySQL Server
Open [DbVisualizer] and follow the steps below:
1. Go to the Connection tab. Click the "Create a Connection" button to create a new connection.

Creating a Database Server Connection in DbVisualizer
2. Select your database server type. For this tutorial, we will be choosing MySQL 8(Connector/J) as the driver.

Choosing the Database Driver in DbVisualizer
3. In the Driver Connection tab, select MySQL and enter the following information:
Database server: localhost
Database Port: 3306
Database UserId: root
Database Password: (the password you set in the MySQL deployment YAML file)

Connection Details for the MySQL Database Server in DbVisualizer
Step 2: Create a Database
First, let's create a playbook to automate the creation of a new database. Ansible has a module called mysql_db that we can use to create and manage MySQL databases.
Create a new playbook named create_database.yml and add the following content:
- name: Create database


hosts: your_target_server


become: yes


vars:


db_name: your_db_name


tasks:


- name: Create database


mysql_db:


name: "{{ db_name }}"


state: present
This playbook introduces the vars keyword, which we use to define variables that we can use within our playbook. In this case, we're creating a variable db_name to store the name of the database we want to create. Remember to replace the database information with real ones for your database in the code above.
To execute this playbook, run ansible-playbook create_database.yml in your terminal. This will instruct Ansible to create a new database on the target server.

Running the create_databse.yml Playbook
You should now be able to view your new database on DbVisualizer.
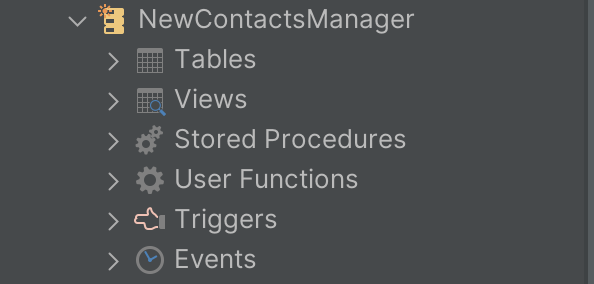 Browsing through our new Database on DbVisualizer
Step 3: Create a Database User
Now, let's create a playbook that creates a new user in our database and gives them all privileges. We'll use the mysql_user module for this.
Create a new playbook named create_user.yml with the following content:
- name: Create MySQL user


hosts: your_target_server


become: yes


vars:


db_name: your_db_name


db_user: your_db_user


db_pass: your_db_password


tasks:


- name: Create MySQL user


mysql_user:


name: "{{ db_user }}"


password: "{{ db_pass }}"


priv: "{{ db_name }}.\*:ALL"


state: present
In this playbook, we're using the mysql_user module to create a new user, assign them a password and give them all privileges to the database we created in the previous step.
To execute this playbook, run ansible-playbook create_user.yml in your terminal.
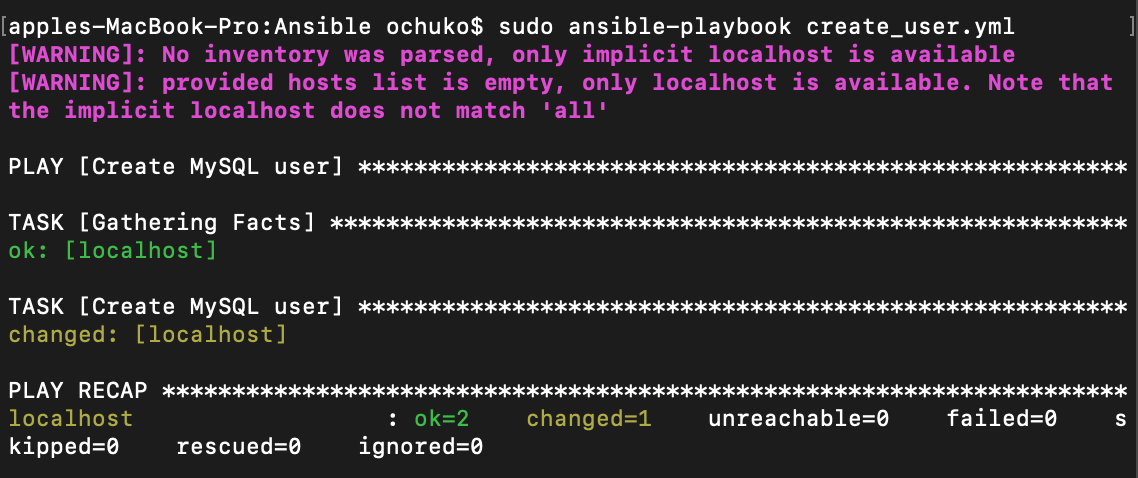 Running the create_user.yml Playbook
You should now be able to access your database using your newly created user.
Step 4: Delete a Database
Finally, let's create a playbook that deletes a database. We'll use the mysql_db module again, but this time, we'll set the state parameter to absent.
Create a new playbook named delete_database.yml and add the following content:
- name: Delete database


hosts: your_target_server


become: yes


vars:


db_name: your_db_name


tasks:


- name: Delete database


mysql_db:


name: "{{ db_name }}"


state: absent
To execute this playbook, run ansible-playbook delete_database.yml in your terminal. This will instruct Ansible to delete the database on the target server.
Remember, always replace your_target_server, your_db_name, your_db_user, and your_db_password with actual values relevant to your setup. And don't forget to make sure your Ansible control node can SSH into your target server.

Running the delete_database.yml Playbook
By following these steps, you've automated the process of creating, managing users, and deleting a MySQL database. But don't stop here. Ansible is highly flexible and powerful, so take the time to explore more complex tasks you can automate.
Handling Variables and Templating
To make your Ansible playbooks more flexible and reusable, you can utilize variables to parameterize your tasks. Variables allow you to store and manage values that can be used throughout your playbook. You can define variables directly in your playbook or create separate variable files.
- Defining variables in your playbook: You can create separate variable files such as
vars.yml, to store and manage your variables. This allows for easier management and reuse of variables across multiple playbooks. Here's an example:
- name: Example playbook


hosts: all


vars:


database_name: mydatabase


database_user: myuser


database_password: mypassword


tasks:


- name: Example task


mysql_db:


name: "{{ database_name }}"


state: present


login_user: "{{ database_user }}"


login_password: "{{ database_password }}"
In this example, we define variables database_name, database_user, and database_password directly in the playbook. These variables are then used within the mysql_db task to create a database with the specified name and credentials.
2. Using separate variable files:
# vars.yml


database_name: mydatabase


database_user: myuser


database_password: mypassword
Then, in your playbook:
- name: Example playbook


hosts: all


vars_files:


- vars.yml


tasks:


- name: Example task


mysql_db:


name: "{{ database_name }}"


state: present


login_user: "{{ database_user }}"


login_password: "{{ database_password }}"
In this case, the variables are stored in a separate vars.yml file, and the vars_files keyword is used to include the variables in the playbook.
Advanced Automation Features
Ansible provides various advanced features that can enhance your automation efforts:
Using Conditionals
You can use conditionals to control the execution of tasks based on specific conditions. For example:
- name: Example conditional task


command: /path/to/command


when: ansible_distribution == 'Ubuntu'
This task will only be executed if the remote host's distribution is Ubuntu.
Using Loops
Utilize loops to iterate over a list of items or dynamically generated data. For example:
- name: Example loop task


yum:


name: "{{ item }}"


state: latest


with_items:


- package1


- package2


- package3
This task will iterate over the list of packages and ensure they are installed.
Using Handlers
Handlers allow you to define tasks that are triggered by specific events. For example:
- name: Example handler task


command: /path/to/restart_service


notify: Restart Service
- name: Restart Service


service:


name: myservice


state: restarted
The handler task will be triggered only if the task notifies it. In this case, it will restart the specified service.
Using Roles
Roles provide a way to organize and reuse common tasks and configurations across different playbooks. You can create a role with its own directory structure and defined tasks, variables, and templates. Here's an example directory structure for a role named webserver:
webserver/


├── tasks/


│ └── main.yml


├── templates/


│ └── nginx.conf.j2


├──


├── vars/


│ └── main.yml


└── meta/


└── main.yml
The tasks/main.yml file would contain the main tasks for the role, while vars/main.yml would contain any role-specific variables. The templates/nginx.conf.j2 file would contain a Jinja2 template for an Nginx configuration file, which could be used by a task in the role. The meta/main.ymlfile would contain metadata about the role, such as its name and dependencies.
Once you've created a role, you can include it in your playbook like this:
- name: Example playbook


hosts: webservers


roles:


- webserver
This will execute all of the tasks defined in the tasks/main.yml file of the webserver role on the webservers group of hosts.
With these advanced features, you can customize your automation further and create more complex and powerful playbooks and roles.
Conclusion
This tutorial has showcased the remarkable synergy between Ansible and DbVisualizer in automating database operations. By following the step-by-step instructions, you successfully installed, configured, and utilized both Ansible and DbVisualizer to automate tasks and visualize results. Leveraging Ansible's flexibility and DbVisualizer's intuitive interface, you can now save significant time and effort while ensuring the consistency and reliability of your database workflows.
DbVisualizer proved to be an indispensable companion, providing powerful data analysis and interpretation capabilities. By combining the automation prowess of Ansible with the visualization capabilities of DbVisualizer, you can unlock a new level of efficiency and effectiveness in your database automation journey. Don't hesitate to try DbVisualizer and experience firsthand the immense benefits it brings to automating and managing your databases.
FAQs (Frequently Asked Questions)
1. What Is Ansible?
Ansible is a powerful automation tool that allows you to define and manage infrastructure as code. It simplifies the process of automating repetitive tasks, such as provisioning servers, configuring software, and deploying applications. Ansible uses a simple and human-readable language called YAML to define its automation playbooks.
2. How Does Ansible Automate Database Operations?
Ansible provides specialized modules for interacting with various database systems. These modules handle the complexities of executing database commands, managing users, creating tables, and more. By defining tasks in Ansible playbooks using these modules, you can automate common database operations and streamline your workflows.
3. What Are the Benefits of Automating Database Operations With Ansible and DbVisualizer?
Automating database operations with Ansible and DbVisualizer offers several benefits:
- Time and effort savings: Automation eliminates the need for manual execution of repetitive tasks, saving time and effort.
- Consistency and reliability: Ansible ensures consistent and repeatable execution of database operations, reducing the risk of errors.
- Streamlined workflows: Automation allows for smoother and more efficient database workflows.
- Visual data analysis: DbVisualizer provides powerful visualization capabilities, making it easier to analyze and interpret database results.
- Scalability: Automation enables you to handle larger databases and scale your operations more effectively.
Opinions expressed by DZone contributors are their own.
Comments