A Beginner’s Guide to JUnit 5
This tutorial blog is a beginner's guide to start using JUnit 5. It provides details about setup, configuration and basic JUnit 5 methods.
Join the DZone community and get the full member experience.
Join For FreeJUnit 5 is a software testing framework used by developers to unit test their code. It is a Java-based framework that allows writing and running tests on the Java platform, including an integrated reporter that displays the test results.
JUnit can be used for automation testing for two main purposes:
- Test that the software is working as it is expected to work
- Find and report errors in the code and fix them as quickly as possible
In this blog, we will be focusing on and learning about the setup, configuration, and basic methods used in JUnit 5.
What Is JUnit 5?
JUnit 5 is the latest version of the JUnit testing framework. It supports Java 8 and above newer versions, accommodates different testing styles, and offers a modern foundation for developer-side testing on the JVM.
The main benefit of using JUnit is its modularity, as it contains multiple modules that allow the developers to test different components of the software easily. It can also be used to test individual classes of the application instead of the entire application.
Features of JUnit 5
The following are some of the popular and important features of JUnit 5 that distinguish it from other unit testing frameworks.
| Feature | Description | Annotations/Method |
|---|---|---|
| Test Suites |
Test suites are basically a group of tests, such as Smoke, Sanity, or a group of tests related to a particular feature. JUnit 5 allows the creation of test suites that could be run together. |
To use Test Suites, we need to add a JUnit Platform Suite dependency and use the following annotations.@SelectPackages,@SelectClasses, @Suite |
| Assertions | Assertions are used to verify the software's expected behavior. JUnit 5 provides inbuilt assertion methods that can help in easily performing the assertions. | There are multiple assertion methods available in the import org.junit.jupiter.api.Assertions; class.Some of the methods are listed below: assertTrue(), assertFalse(),assertEquals(), assertAll(), assertNotEquals() |
| Test Execution Order | Customizes the test execution order. It allows the developer to take control of the test execution and run the tests in specific order as required. | @TestMethodOrder, @Order,@TestClassOrder |
| Exception Testing | Performs exception testing that verifies that the required exception is thrown into the test. | Following method from theimport org.junit.jupiter.api.Assertions;class is used: assertThrows() |
| Test Dependencies | Test dependencies allow sequential testing by providing the facility to allow test methods to depend on each other. This means that the next test method, which is dependent on the previous test method, will not be executed unless the previous one passes. This is a helpful feature while writing integration tests. | @TestInstance |
| Disable Tests | Disables tests or test classes. | @Disabled |
| Timeouts | Fails a test if its execution time exceeds a specified duration. | @Timeout |
| Reports | Provides a built-in reporter to analyze test results and displays detailed information. Generates a .html file with test execution results. |
N/A |
JUnit 4 vs. JUnit 5
With the release of the latest version of JUnit, i.e., JUnit 5, multiple changes and new features have been added to the framework. The differences between the two versions are listed in the table below:
| criteria | JUNIT4 | JUNIT5 |
|---|---|---|
| Architecture | Everything was packaged together in a single JAR file. | Divided into 3 sub-projects: - JUnit Platform - JUnit Jupiter - JUnit Vintage |
| JDK Version Requirement | Requires Java 5 or higher | Requires Java 8 or higher |
| 3rd Party Integration | No 3rd party integration support for plugins and IDEs | Dedicated sub-project (JUnit Platform) for 3rd party integrations |
| Support for Nested Tests | No annotation provided for writing Nested tests | Provides @Nested annotation to write Nested tests |
| Support for Registering Custom Extensions | No support for custom extensions | Provides @ExtendWith annotation to register custom extensions |
| Changes Made to Commonly Used Annotations | - @BeforeClass- @AfterClass- @Before- @After- @Ignore |
- @BeforeAll- @AfterAll- @BeforeEach- @AfterEach- @Disabled |
| Annotation Changes for Tagging and Filtering | @Category annotation is used |
@Tag annotation is used |
| Test Suites | @RunWith and @Suite annotations were used |
@Suite, @SelectPackages, and @SelectClasses annotations are used |
Getting Started With JUnit 5
In this section, we will learn how to write the JUnit 5 test cases using IntelliJ IDE. As it already comes bundled with JUnit 5, we don’t have to additionally perform any installation to use it.
We need to create a new Maven project, add the JUnit 5 dependencies, and start writing the tests immediately.
Adding the JUnit Dependencies in the Maven project
The following JUnit 5 dependencies need to be added in the pom.xml file:
- JUnit Jupiter Engine
- JUnit Jupiter API
- JUnit Platform Suite(Aggregator)
- JUnit Jupiter Params
<dependency>
    <groupId>org.junit.jupiter</groupId>
    <artifactId>junit-jupiter-engine</artifactId>
    <version>5.11.4</version>
    <scope>test</scope>
</dependency>
<dependency>
    <groupId>org.junit.jupiter</groupId>
    <artifactId>junit-jupiter-api</artifactId>
    <version>5.11.4</version>
    <scope>test</scope>
</dependency>
<dependency>
    <groupId>org.junit.platform</groupId>
    <artifactId>junit-platform-suite</artifactId>
    <version>1.11.4</version>
    <scope>test</scope>
</dependency>
<dependency>
    <groupId>org.junit.jupiter</groupId>
    <artifactId>junit-jupiter-params</artifactId>
    <version>5.11.4</version>
    <scope>test</scope>
</dependency>
Here is the full pom.xml file
<project xmlns="http://maven.apache.org/POM/4.0.0" xmlns:xsi="http://www.w3.org/2001/XMLSchema-instance"
         xsi:schemaLocation="http://maven.apache.org/POM/4.0.0 http://maven.apache.org/xsd/maven-4.0.0.xsd">
    <modelVersion>4.0.0</modelVersion>

    <groupId>io.github.mfaisalkhatri</groupId>
    <artifactId>junit-basic</artifactId>
    <version>1.0-SNAPSHOT</version>
    <packaging>jar</packaging>

    <name>junit-basic</name>
    <url>http://maven.apache.org</url>

    <properties>
        <project.build.sourceEncoding>UTF-8</project.build.sourceEncoding>
    </properties>

    <dependencies>
        <dependency>
            <groupId>org.junit.jupiter</groupId>
            <artifactId>junit-jupiter-engine</artifactId>
            <version>5.11.4</version>
            <scope>test</scope>
        </dependency>
        <dependency>
            <groupId>org.junit.jupiter</groupId>
            <artifactId>junit-jupiter-api</artifactId>
            <version>5.11.4</version>
            <scope>test</scope>
        </dependency>
        <dependency>
            <groupId>org.junit.platform</groupId>
            <artifactId>junit-platform-suite</artifactId>
            <version>1.11.4</version>
            <scope>test</scope>
        </dependency>
        <dependency>
            <groupId>org.junit.jupiter</groupId>
            <artifactId>junit-jupiter-params</artifactId>
            <version>5.11.4</version>
            <scope>test</scope>
        </dependency>
    </dependencies>
</project>
After adding the dependencies, we are all set to write the test. But, before we move on to writing the tests using JUnit 5, let's first understand the basic annotations that could help us efficiently set up the test suite and run tests as desired.
Basic Annotations Used in JUnit 5
The following are basic annotations that are most popularly used by developers while writing the tests using JUnit 5.
@BeforeAll Annotation
The @BeforeAll annotation indicates that the annotated method should be executed before any @Test, @RepeatedTest, @ParameterizedTest, or @TestFactory methods in the current class. It must be a static method in the test class.
@BeforeAll serves as the replacement for the @BeforeClass annotation used in JUnit 4.x
Syntax:
public class BasicTest {

   @BeforeAll
   public static void beforeAllTest() {

       System.out.println("Before All method called!!");
   }

//..
}
@BeforeEach Annotation
The @BeforeEach annotation indicates that the annotated method should be executed before each invocation of @Test, @RepeatedTest, @ParameterizedTest, or @TestFactory methods in the current class.
It is part of the test lifecycle methods and replaces the @Before annotation used in JUnit 4.
Syntax:
public class BasicTest {

   @BeforeEach
   public void beforeEachTest() {
       System.out.println("Before Each method called!!");
   }
//...
}
@AfterAll Annotation
The @AfterAll annotation indicates that the annotated method should be called after all the tests in the current class have been executed. It must be a static method and is used as a tear-down method in the test class.
@AfterAll annotation is the replacement of @AfterClass annotation in JUnit 4.
Syntax:
public class BasicTest {

//...

@AfterAll
public static void afterAllMethod() {
   System.out.println("After All method called!!");
   }
}
@AfterEach Annotation
The @AfterEach annotation indicates that the annotated method should be executed after each @Test, @RepeatedTest, @ParameterizedTest, or @TestFactory method in the current class.
It serves as the JUnit 5 replacement for the @After annotation used in JUnit 4.
Syntax:
public class BasicTest {

//...

@AfterEach
public void afterEachMethod() {
   System.out.println("After Each method called!!");
   }
}
@Test Annotation
The @Test annotation indicates that the annotated method is a test method. The test method must not be a private or static method and must not return a value.
Syntax:
public class BasicTest {

//..
@Test
public void testMethod() {
   System.out.println("Test Method Called!!");
  }
}
@DisplayName Annotation
The @DisplayName annotation is used to specify a custom name for the annotated test class or method. These custom names can include spaces, special characters, and even emojis and are typically utilized in the test reports generated by IDEs and build tools.
Syntax:
@DisplayName("Demo Test class")
public class BasicTest {

//...

@DisplayName("This is a demo test")
@Test
public void testMethod() {
   System.out.println("Test Method Called!!");
   }
}
@Disabled Annotation
The @Disabled annotation in JUnit 5 is used to exclude the test method or test class from the test suite for execution.
When applied to a test class, all the methods inside the test class are automatically considered disabled. This annotation has an optional parameter that allows the reason for disabling the test to be specified.
Syntax:
public class BasicTest {

@Disabled("Test method disabled")
public void testMethod() {
   System.out.println("Test Method Called!!");
 }
//...
}
How to Write Automated Test Cases Using JUnit 5
It’s time to get into the code and get our hands dirty with JUnit 5. We will be creating a new Java class, BasicTest.
public class BasicTest {
//..
}
All the basic annotations that we discussed will be covered as a part of the demonstration.
Let’s add methods in the BasicTest class to demonstrate the usage of @BeforeAll, @BeforeEach, @AfterAll, @AfterEach, @Test, @DisplayName and @Disabled annotations available in JUnit 5.
@DisplayName("Demo Test class")
public class BasicTest {

   @BeforeAll
   public static void beforeAllTest() {

       System.out.println("Before All method called!!");
   }

   @BeforeEach
   public void beforeEachTest() {
       System.out.println("Before Each method called!!");
   }

   @DisplayName("This is a demo test")
   @Test
   public void testMethodOne() {
       System.out.println("Test Method One Called!!");
   }

   @Test
   @Disabled("This test is disabled to demo disable annotation")
   public void disabledTest() {
       System.out.println("This is a disabled test!!");
   }

   @Test
   public void testMethodTwo() {
       System.out.println("Test Method Two Called!!");

   }

   @AfterEach
   public void afterEachMethod() {
       System.out.println("After Each method called!!");
   }

   @AfterAll
   public static void afterAllMethod() {
       System.out.println("After All method called!!");
   }
}
Code Walkthrough
The @DisplayName annotation over the test class will display the test name as “Demo test class” in the results when the test is executed.
The beforeAllTest() method will get executed before any of the test runs and will print the text “Before All method Called!!”. Next, the beforeEachTest() method will get executed before every test and print the text “Before Each Method called!!”.
There are three test methods in this class, namely, testMethodOne(), testMethodTwo() and disabledTest(). All three test methods have the @Test annotation over it, which indicates that these are test methods.
The disabledTest() method will not be executed as it has the @Disabled annotation placed over it.
After every test execution is complete, the afterEachTestMethod() will be executed as it has the @AfterEach annotation placed above it.
Finally, after all the tests are run, the afterAllMethod() will be executed as it has the @AfterAll annotation placed over it.
Test Execution
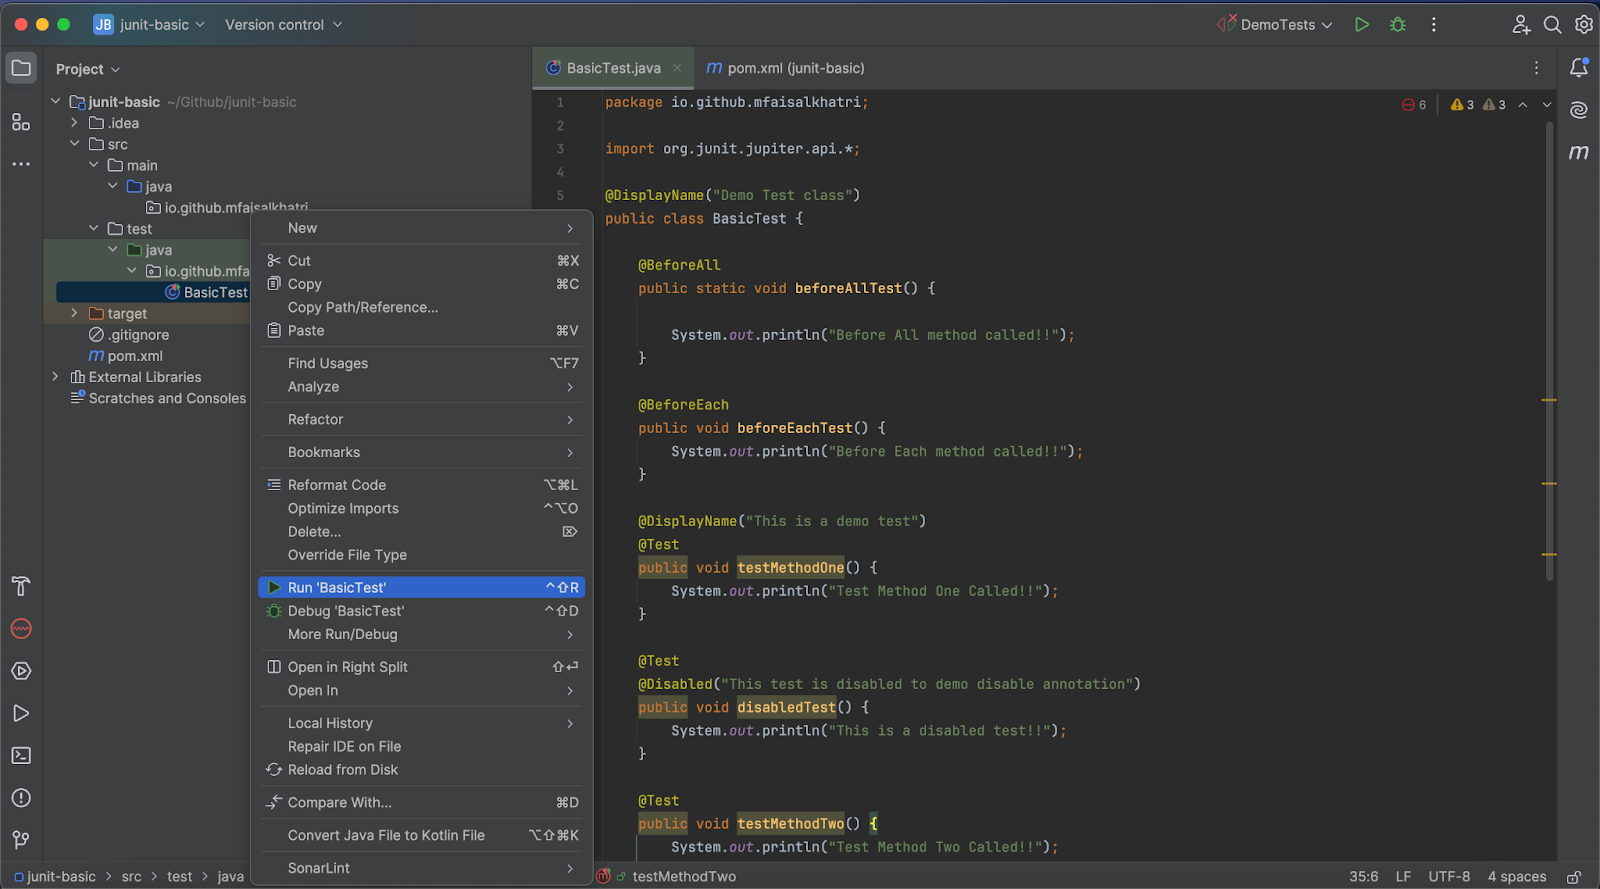
The tests can be executed by right-clicking on the test class and selecting Run ‘<Test class Name>’(“BasicTest” in our case).
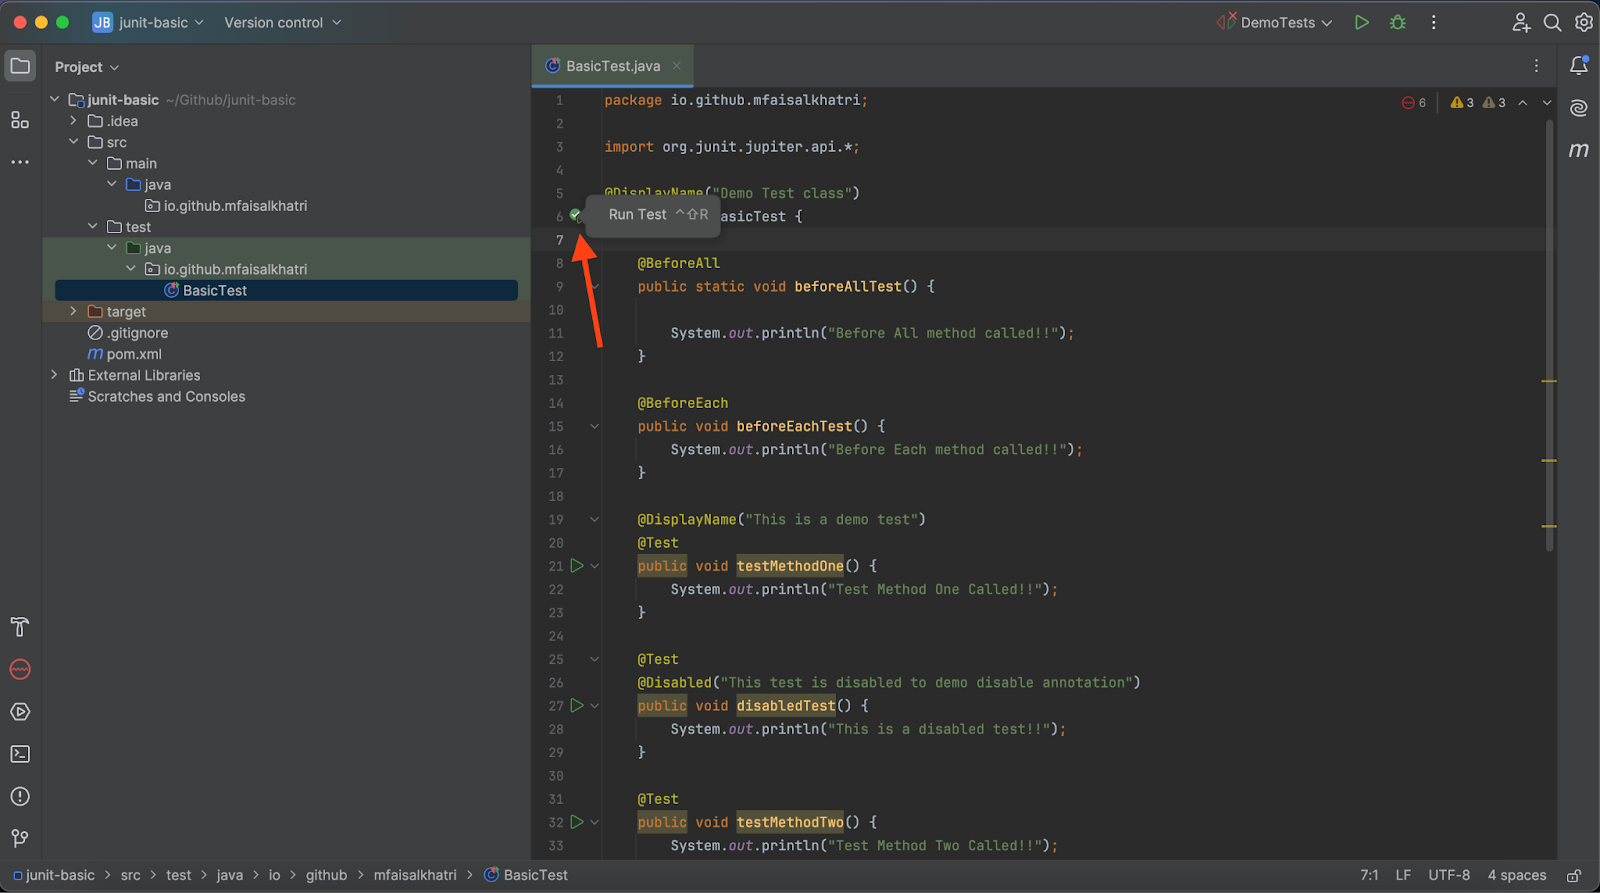
Another way is to click on the green-colored Play icon beside the test class declaration, as shown in the screenshot below:
The following screenshot from IntelliJ IDE shows that the tests were executed successfully.
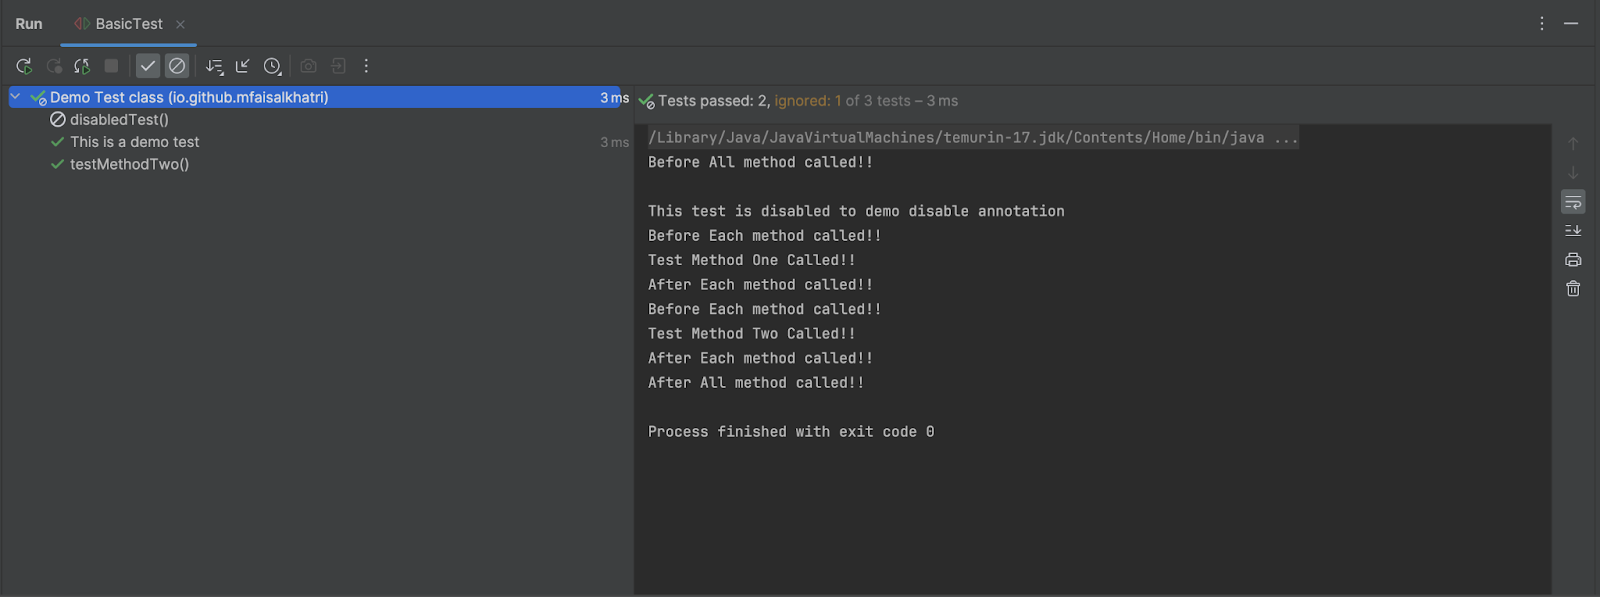
It can be seen in the above screenshot that the display name of the test class has been printed, also the disabled test can be seen as well and the reason for the disabled test is printed in the console.
Rest all the test methods, including the beforetest and aftertest ones, were executed successfully, and the respective results were printed on the console.
Summary
JUnit 5 is a powerful testing framework used by developers to perform unit testing of the code. It is also used by test automation engineers to write and run test automation scripts. It has rich features that allow developers and testers to write the test scripts and perform unit testing of the code.
It also provides multiple methods to perform assertions and verification that come in handy while writing automated tests. Along with writing and running the test scripts, it also provides a test report that can be used to demo the test execution results to the stakeholders to showcase the test coverage.
Happy testing!
Published at DZone with permission of Faisal Khatri. See the original article here.
Opinions expressed by DZone contributors are their own.
Comments