Beginners Guide to SwiftUI State Management
Delve into the intricacies of state management in SwiftUI, exploring different strategies you can employ to utilize Apple’s powerful state management APIs.
Join the DZone community and get the full member experience.
Join For FreeState management is a fundamental concept in app development that involves tracking and updating data that influences the user interface. In SwiftUI, this is particularly crucial due to its declarative nature. To effectively leverage SwiftUI’s capabilities, it’s essential to grasp the various approaches to state management and why they are necessary.
This article will delve into the intricacies of state management in SwiftUI. We’ll explore different strategies that programmers can employ to utilize Apple’s powerful state management APIs. Before diving into SwiftUI-specific techniques, let’s examine the broader context of UI programming and understand why state management is indispensable.
Imperative Programming: UIKit, AppKit, and WatchKit
Before SwiftUI, iOS and tvOS developers relied on UIKit, macOS developers used AppKit, and watchOS developers worked with WatchKit. These frameworks, all based on the imperative programming paradigm, offered event-driven UI development.
Key Improvements
- Clarity: The sentence explicitly states which frameworks were used for each platform.
- Context: It mentions that these frameworks were based on the imperative programming paradigm.
- Conciseness: The sentence is streamlined while maintaining essential information.
Declarative Programming: SwiftUI
SwiftUI leverages the declarative programming approach, allowing developers to define the desired outcome, and the framework handles the underlying implementation details.
In the example below, if we instruct SwiftUI to display a welcome message when logged in and a login button when logged out, it will automatically update the view to reflect changes in authentication state.
A major advantage of learning and using SwiftUI is that it allows for cross-platform development for the different operating systems within the Apple ecosystem — no more having to learn four different frameworks if you want to build an app that has components on Apple Watch, Apple TV, MacBook Pro, and finally your iPhone.
It is important to know that SwiftUI does not replace UIKit. Instead, it is built on top of providing and an additional layer of abstractions for us.
State in SwiftUI
State refers to the current data that a view or a group of views relies on to present the UI. In SwiftUI, when the state changes, the UI automatically reflects these changes. This is because SwiftUI is declarative, meaning you describe what the UI should look like based on the current data, and SwiftUI handles updating the UI when the data changes.
There are several ways to handle state in SwiftUI:
@State, used to manage readonly local state@Binding, used to manage read/write state@ObservableObject, used to manage external data models@StateObject, used to manage object lifecycle within a view
Let’s explore these types in detail one by one.
First, let's create an example iOS project that we will change to explore different state types.
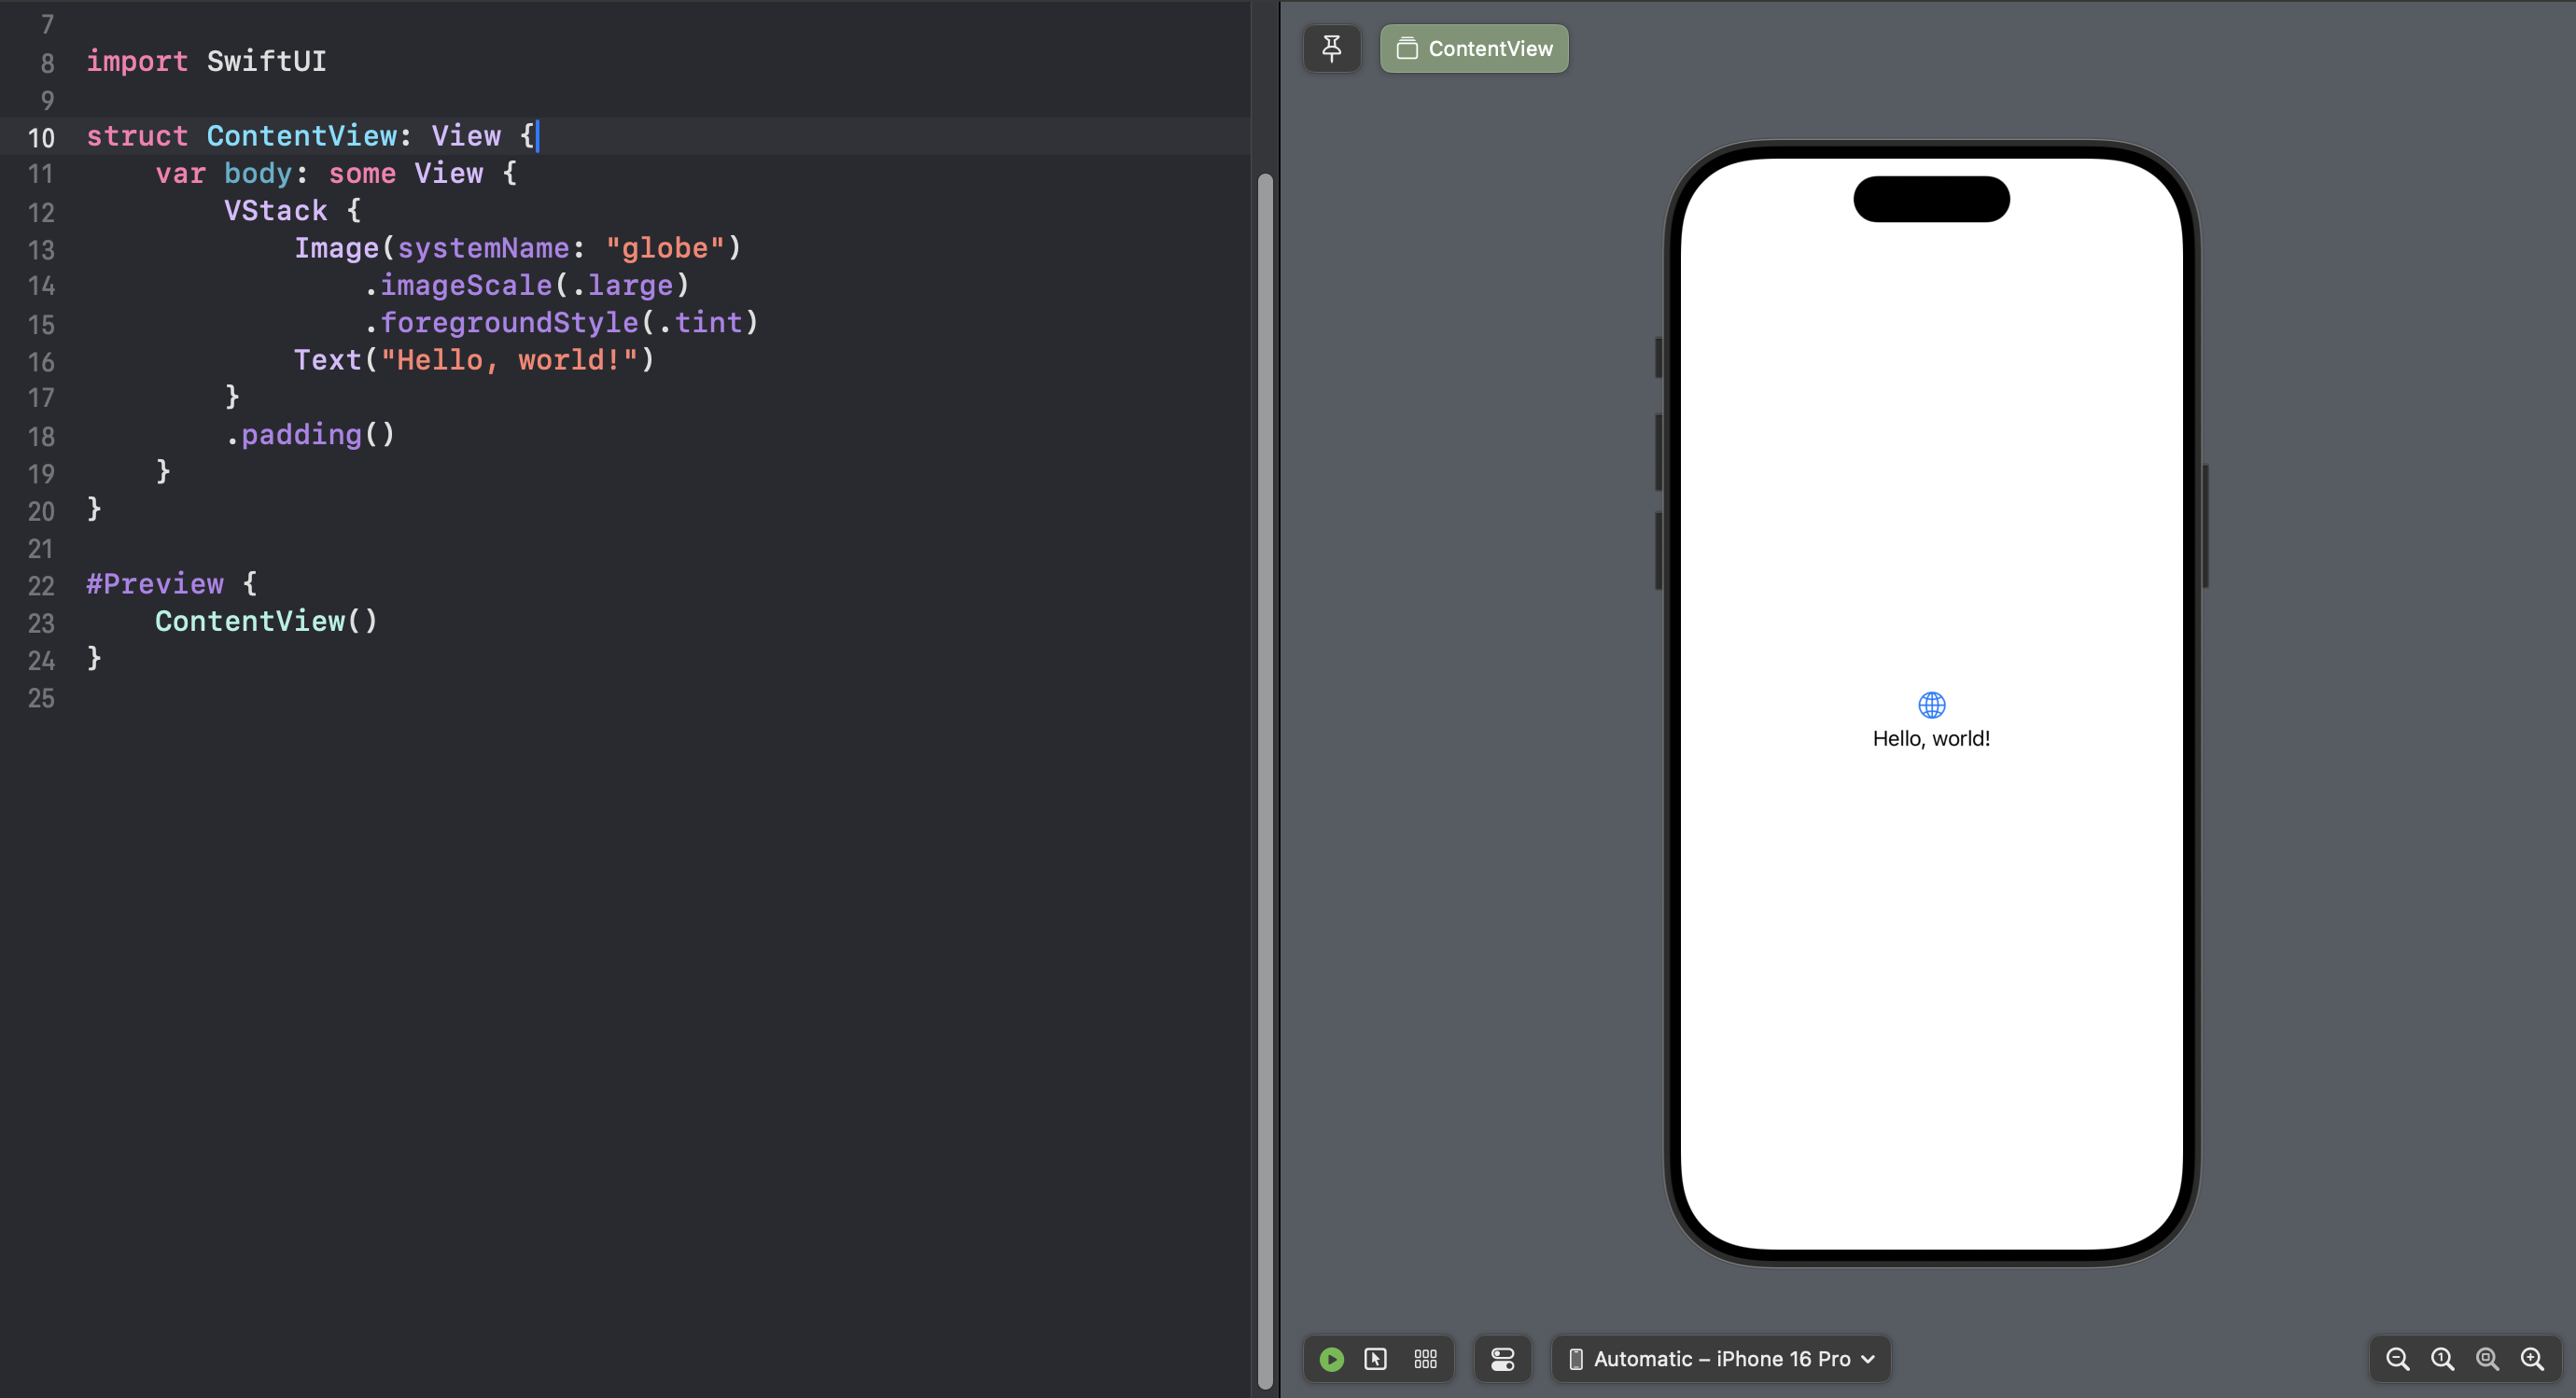
By default, you will get the following view:
@State
@State is used to manage local state within a single view. It is the simplest and most frequently used state management tool in SwiftUI. When you mark a property with @State, SwiftUI takes ownership of that data and ensures the view re-renders when the state changes.
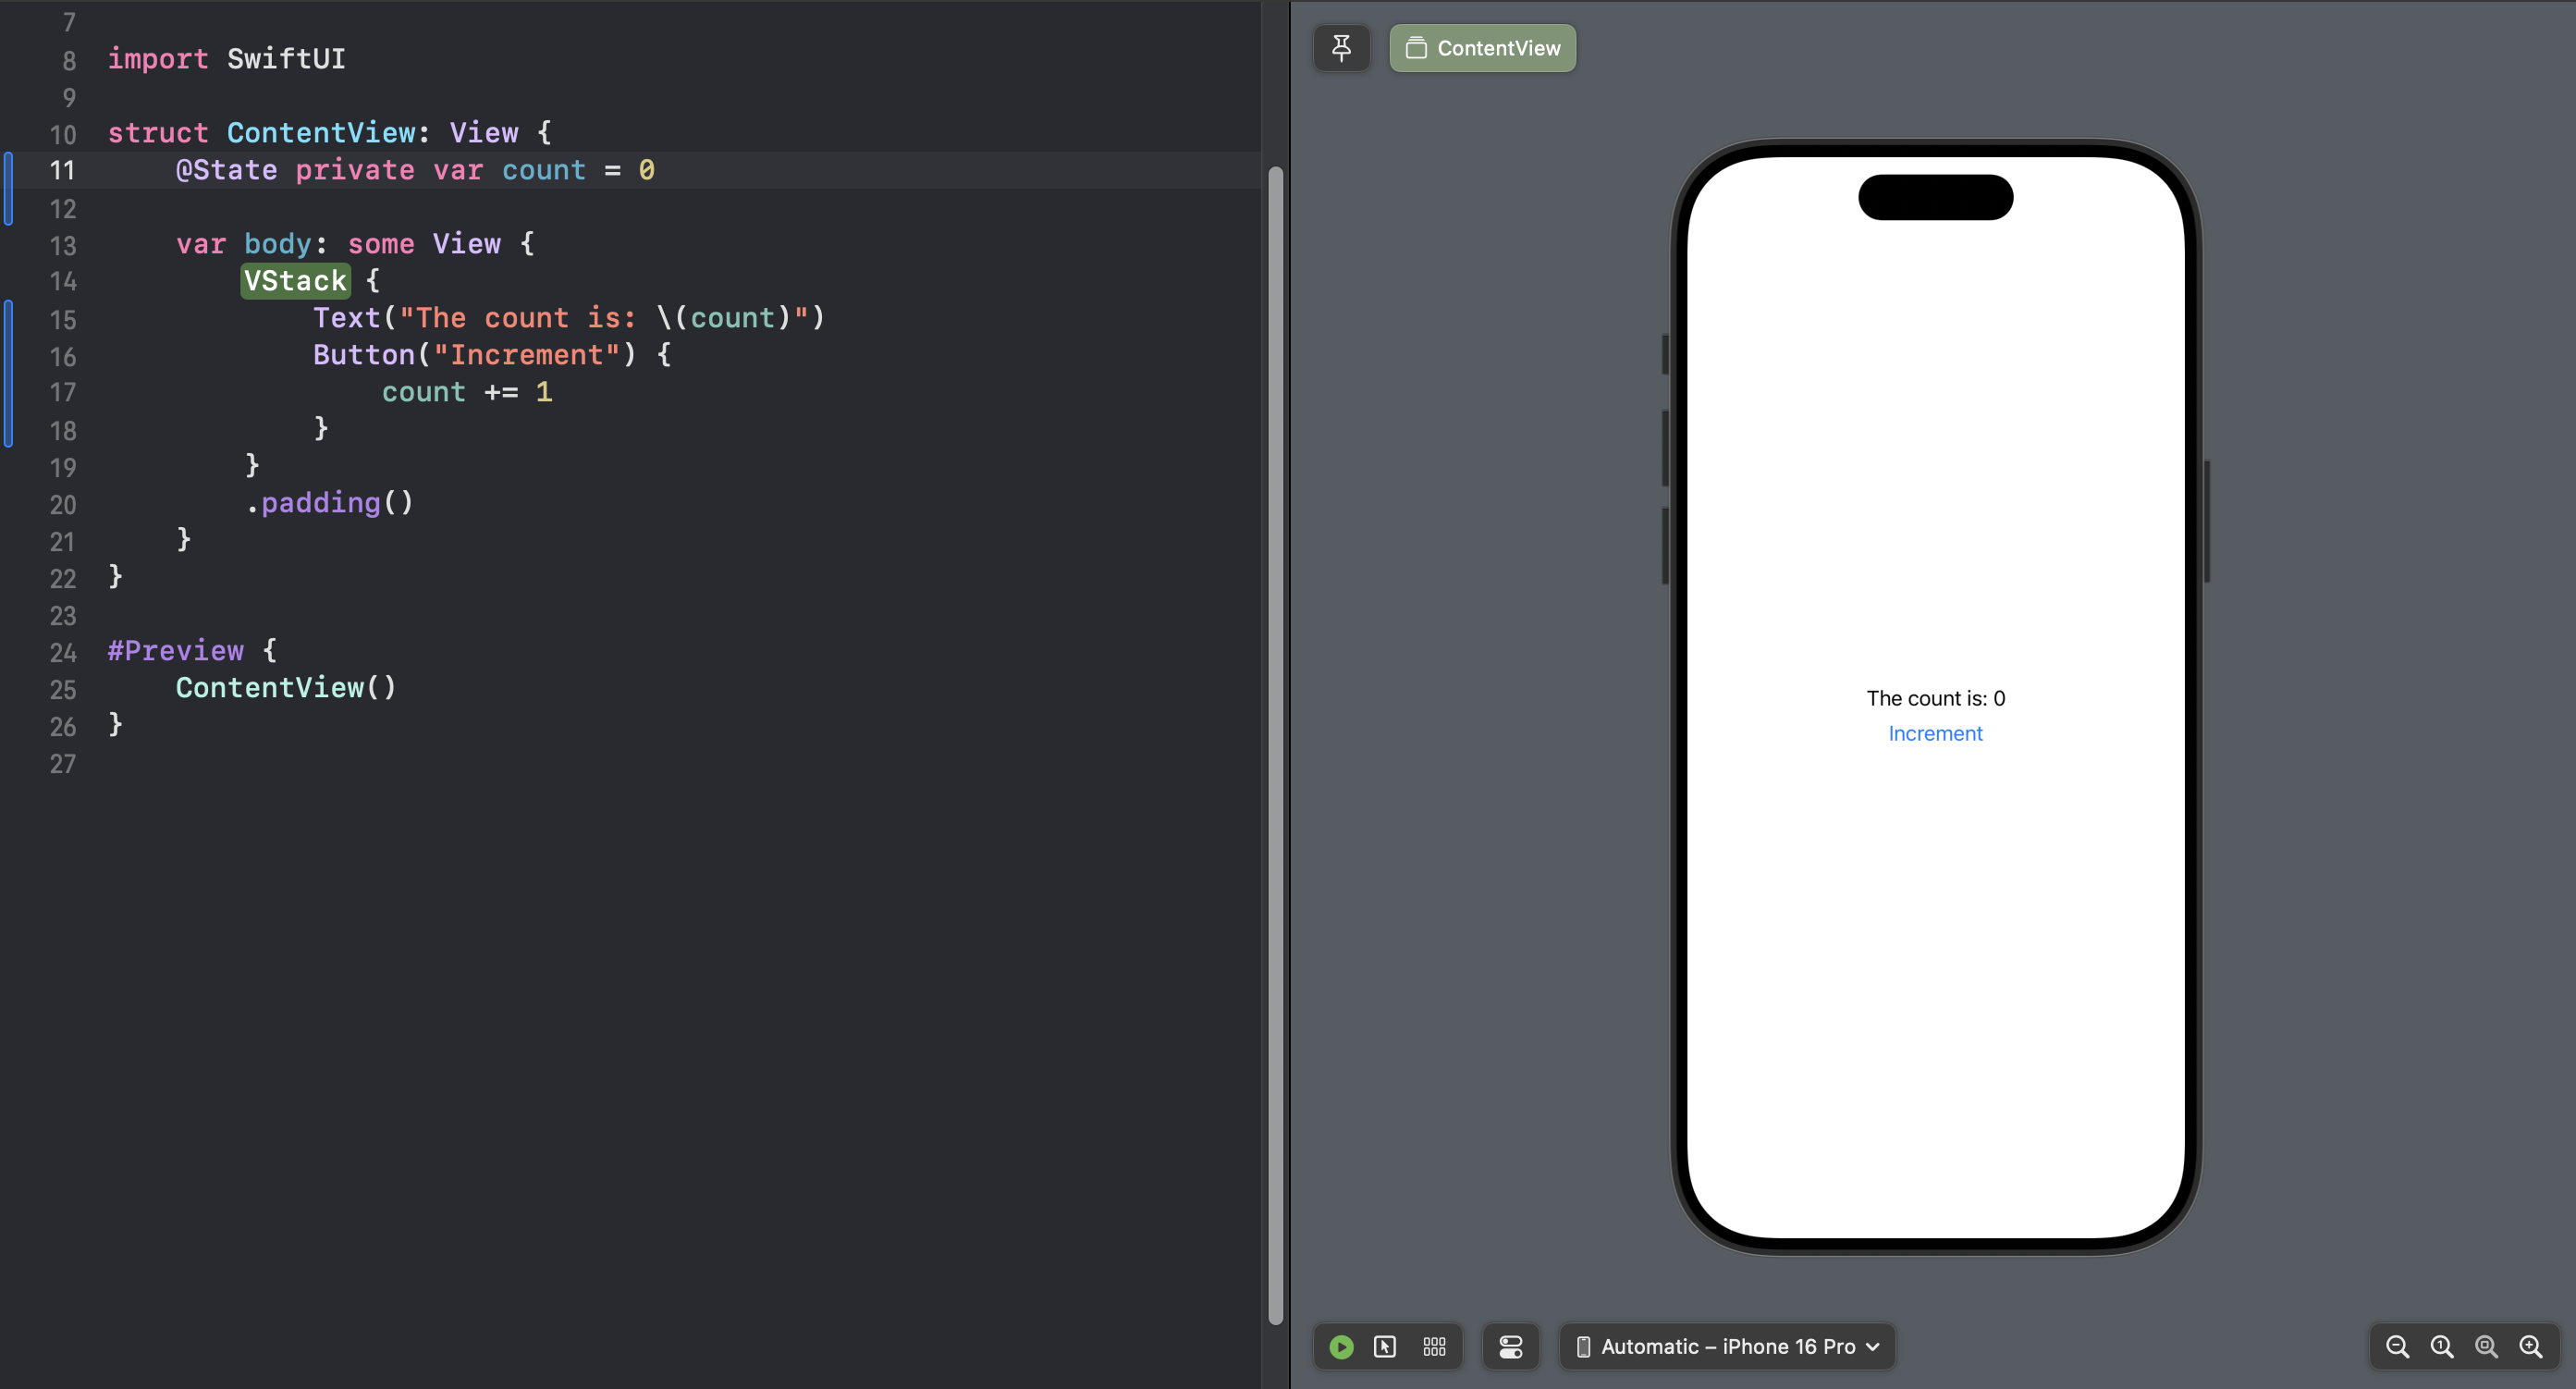
Change the ContentView as follows:
Let’s explore the code:
- We declared a private count variable initializing it to
0. - We annotated the variable with
@State, telling SwiftUI to observe the changes to this variable and update the view accordingly. - In the body, we created a
Textlabel that displays the count. - Below the label, we added a button, and in the action, we incremented the variable.
You don’t have to run the project to see it working: you can tap the increment button in the preview and it will work.
As button is pressed, count is incremented and Text label is updated with the current value.
So, @State annotation is declaring the count variable as an state. Whenever count is updated, SwiftUI checks if any UI element is using it and updates the view accordingly.
As an experiment, try to remove @State from the count variable. You will encounter an error.

The error says: “Left side of mutating operator isn’t mutable: ‘self’ is immutable”.
What does this mean? count is variable, so it should have no problems updating. But if you look closely, the error says "self is immutable," which means that our SwiftUI’s view is immutable and cannot be changed like this. @State makes our SwiftUI views mutable.
Two-Way Binding via @State
In the previous example, our Text element was reading the count value, but the increment was not done via some UI element. Instead, it was done via our own implementation we provided to button action.
There are SwiftUI elements that directly change the data, e.g., Toggle or TextField. In such a case, we can provide our @State variable following with $. This is called binding.
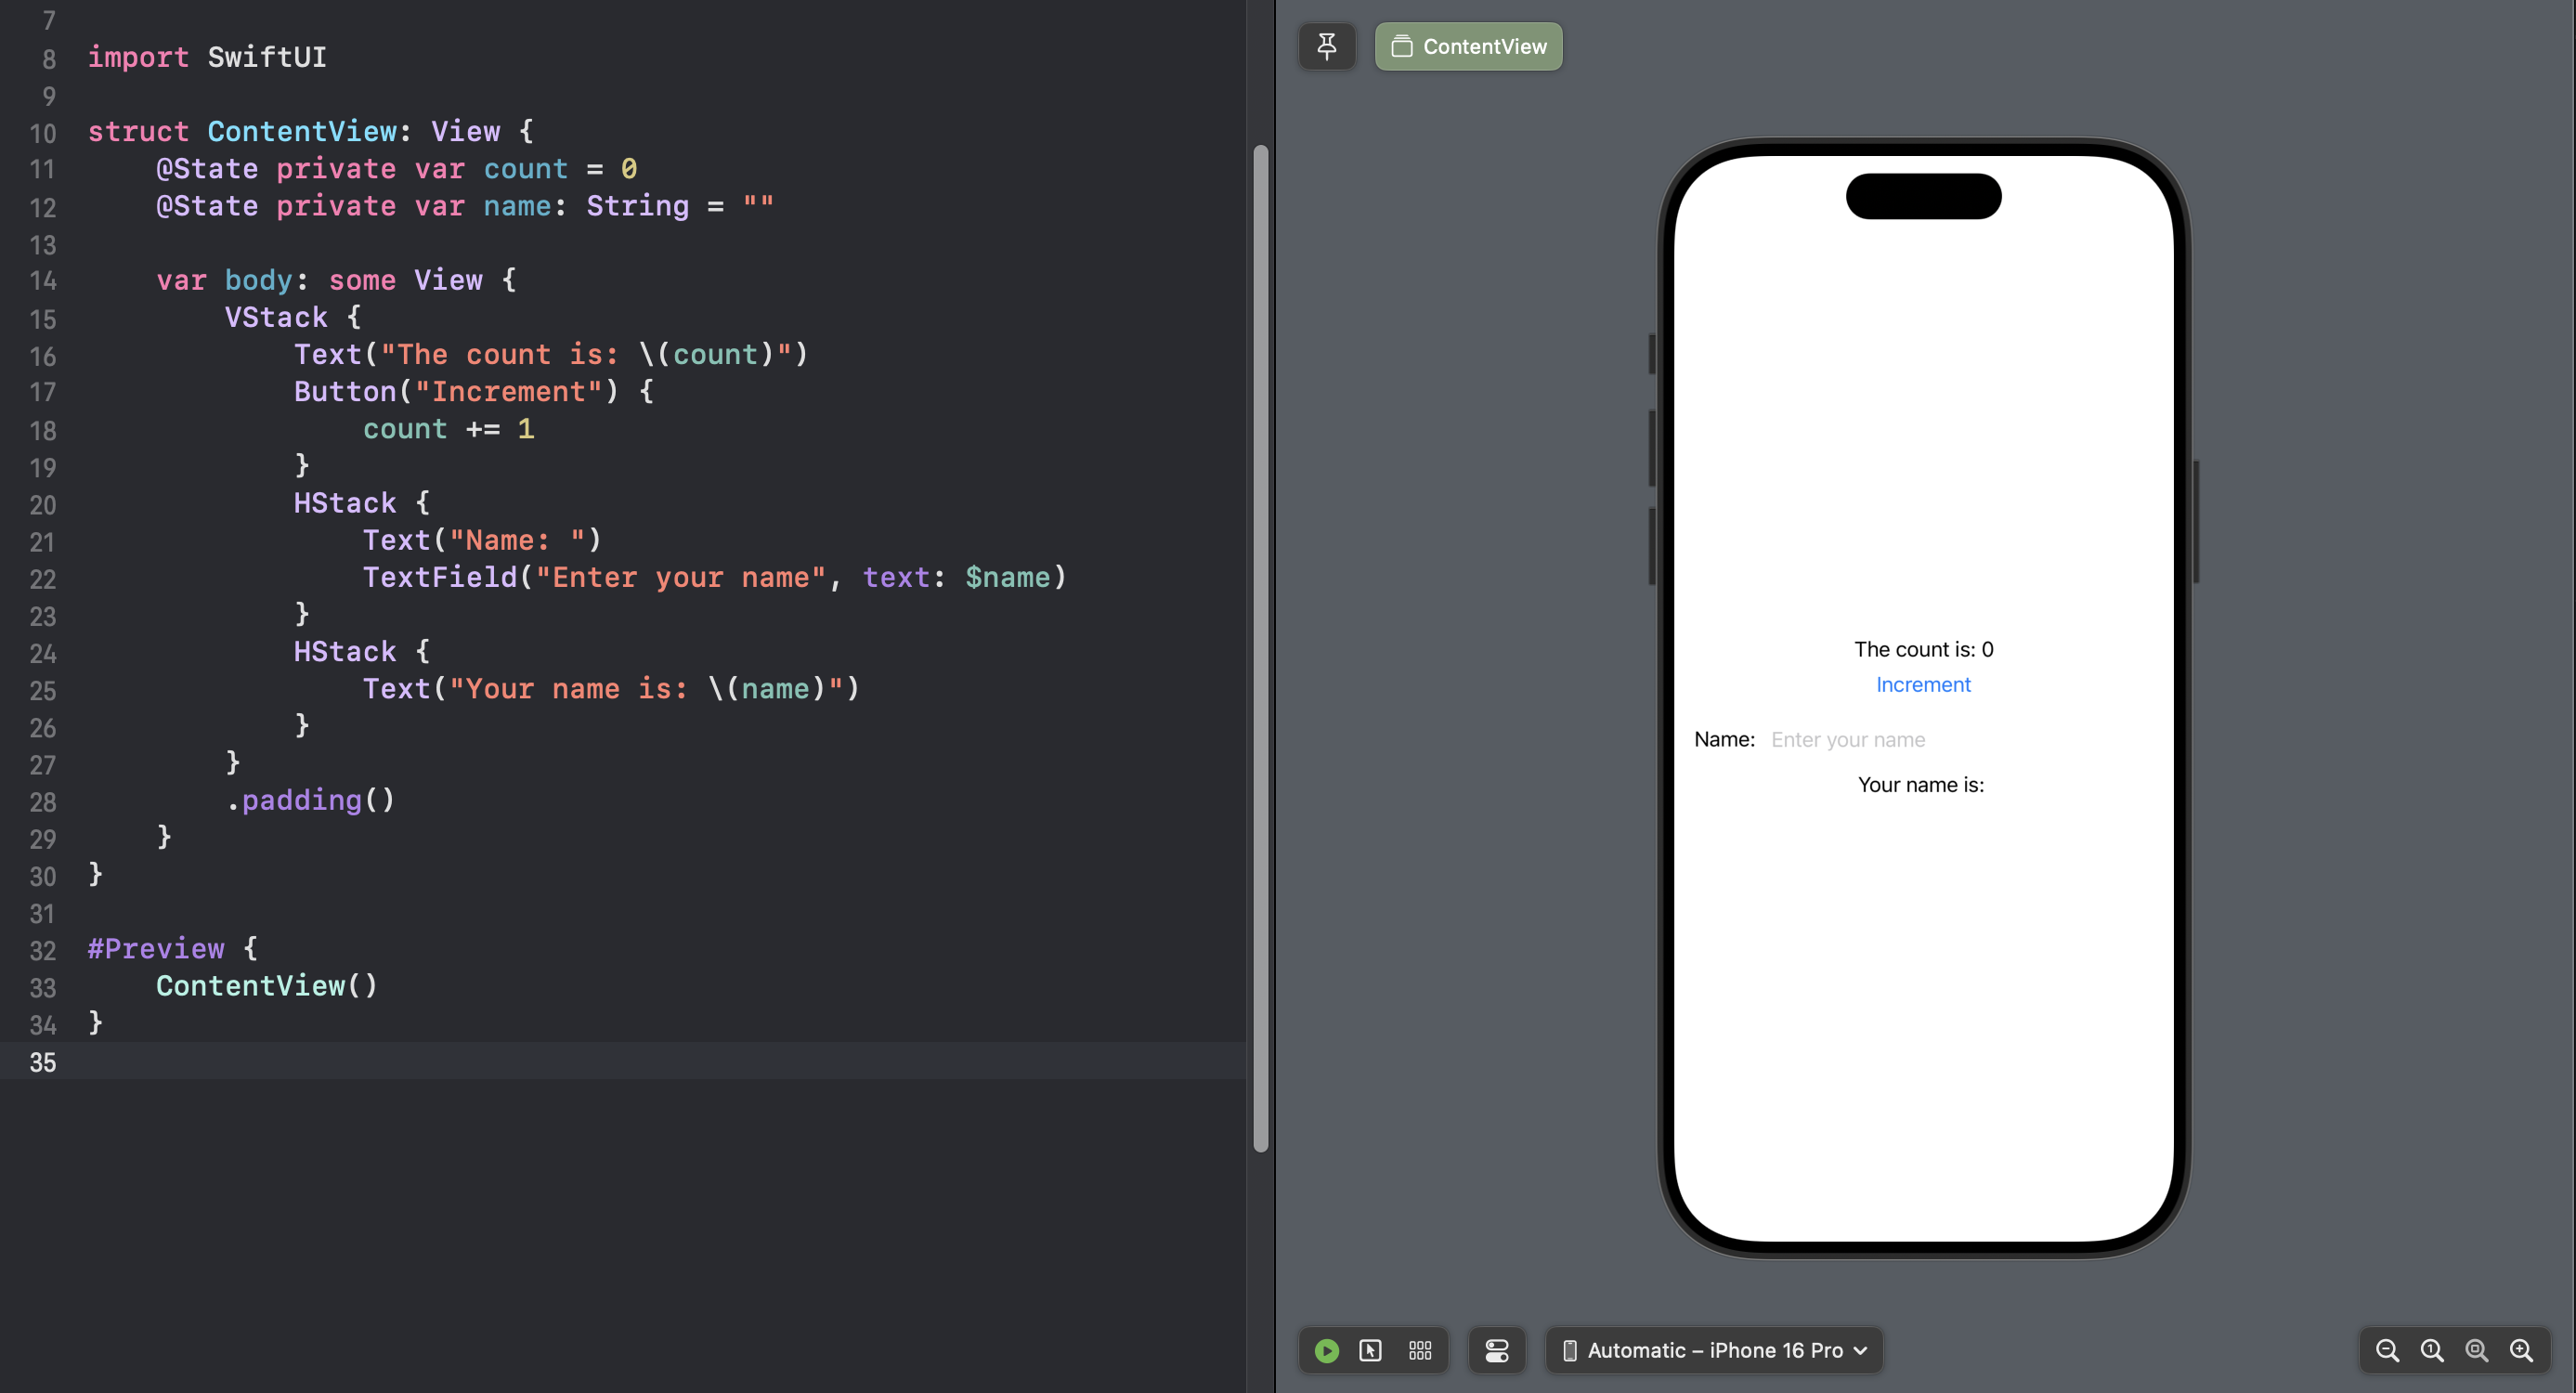
Change the view to add two HStacks: one with Text and TextField, the other with Text.
In the code above,
- We added a new state variable
nameof type String. - We created two
HStacks, one withTextFieldand another one displaying entered text. - The display
Textuses the same format to displaynameas we used for displaying counter. - Notice how
TextFieldis taking$name. This is called binding. - If you type a name in the
TextField, the updated name will be reflected instantly in theText.
If you Option+Click the TextField element, a declaration popup comes up with TextField details. Notice the type of text Binding<String>. We will explore the binding further in the next section.
@Binding
In the previous example, we used TextField’s text binding to update the state of our view ContentView. So, if we look closely, what is happening here is that the child element (i.e., TextField) is updating the state of the parent (ContentView). So, @Binding is used mainly in a scenario where a child element wants to update the state of its parent element.
@Binding creates a connection with the parent’s state without owning the state itself.
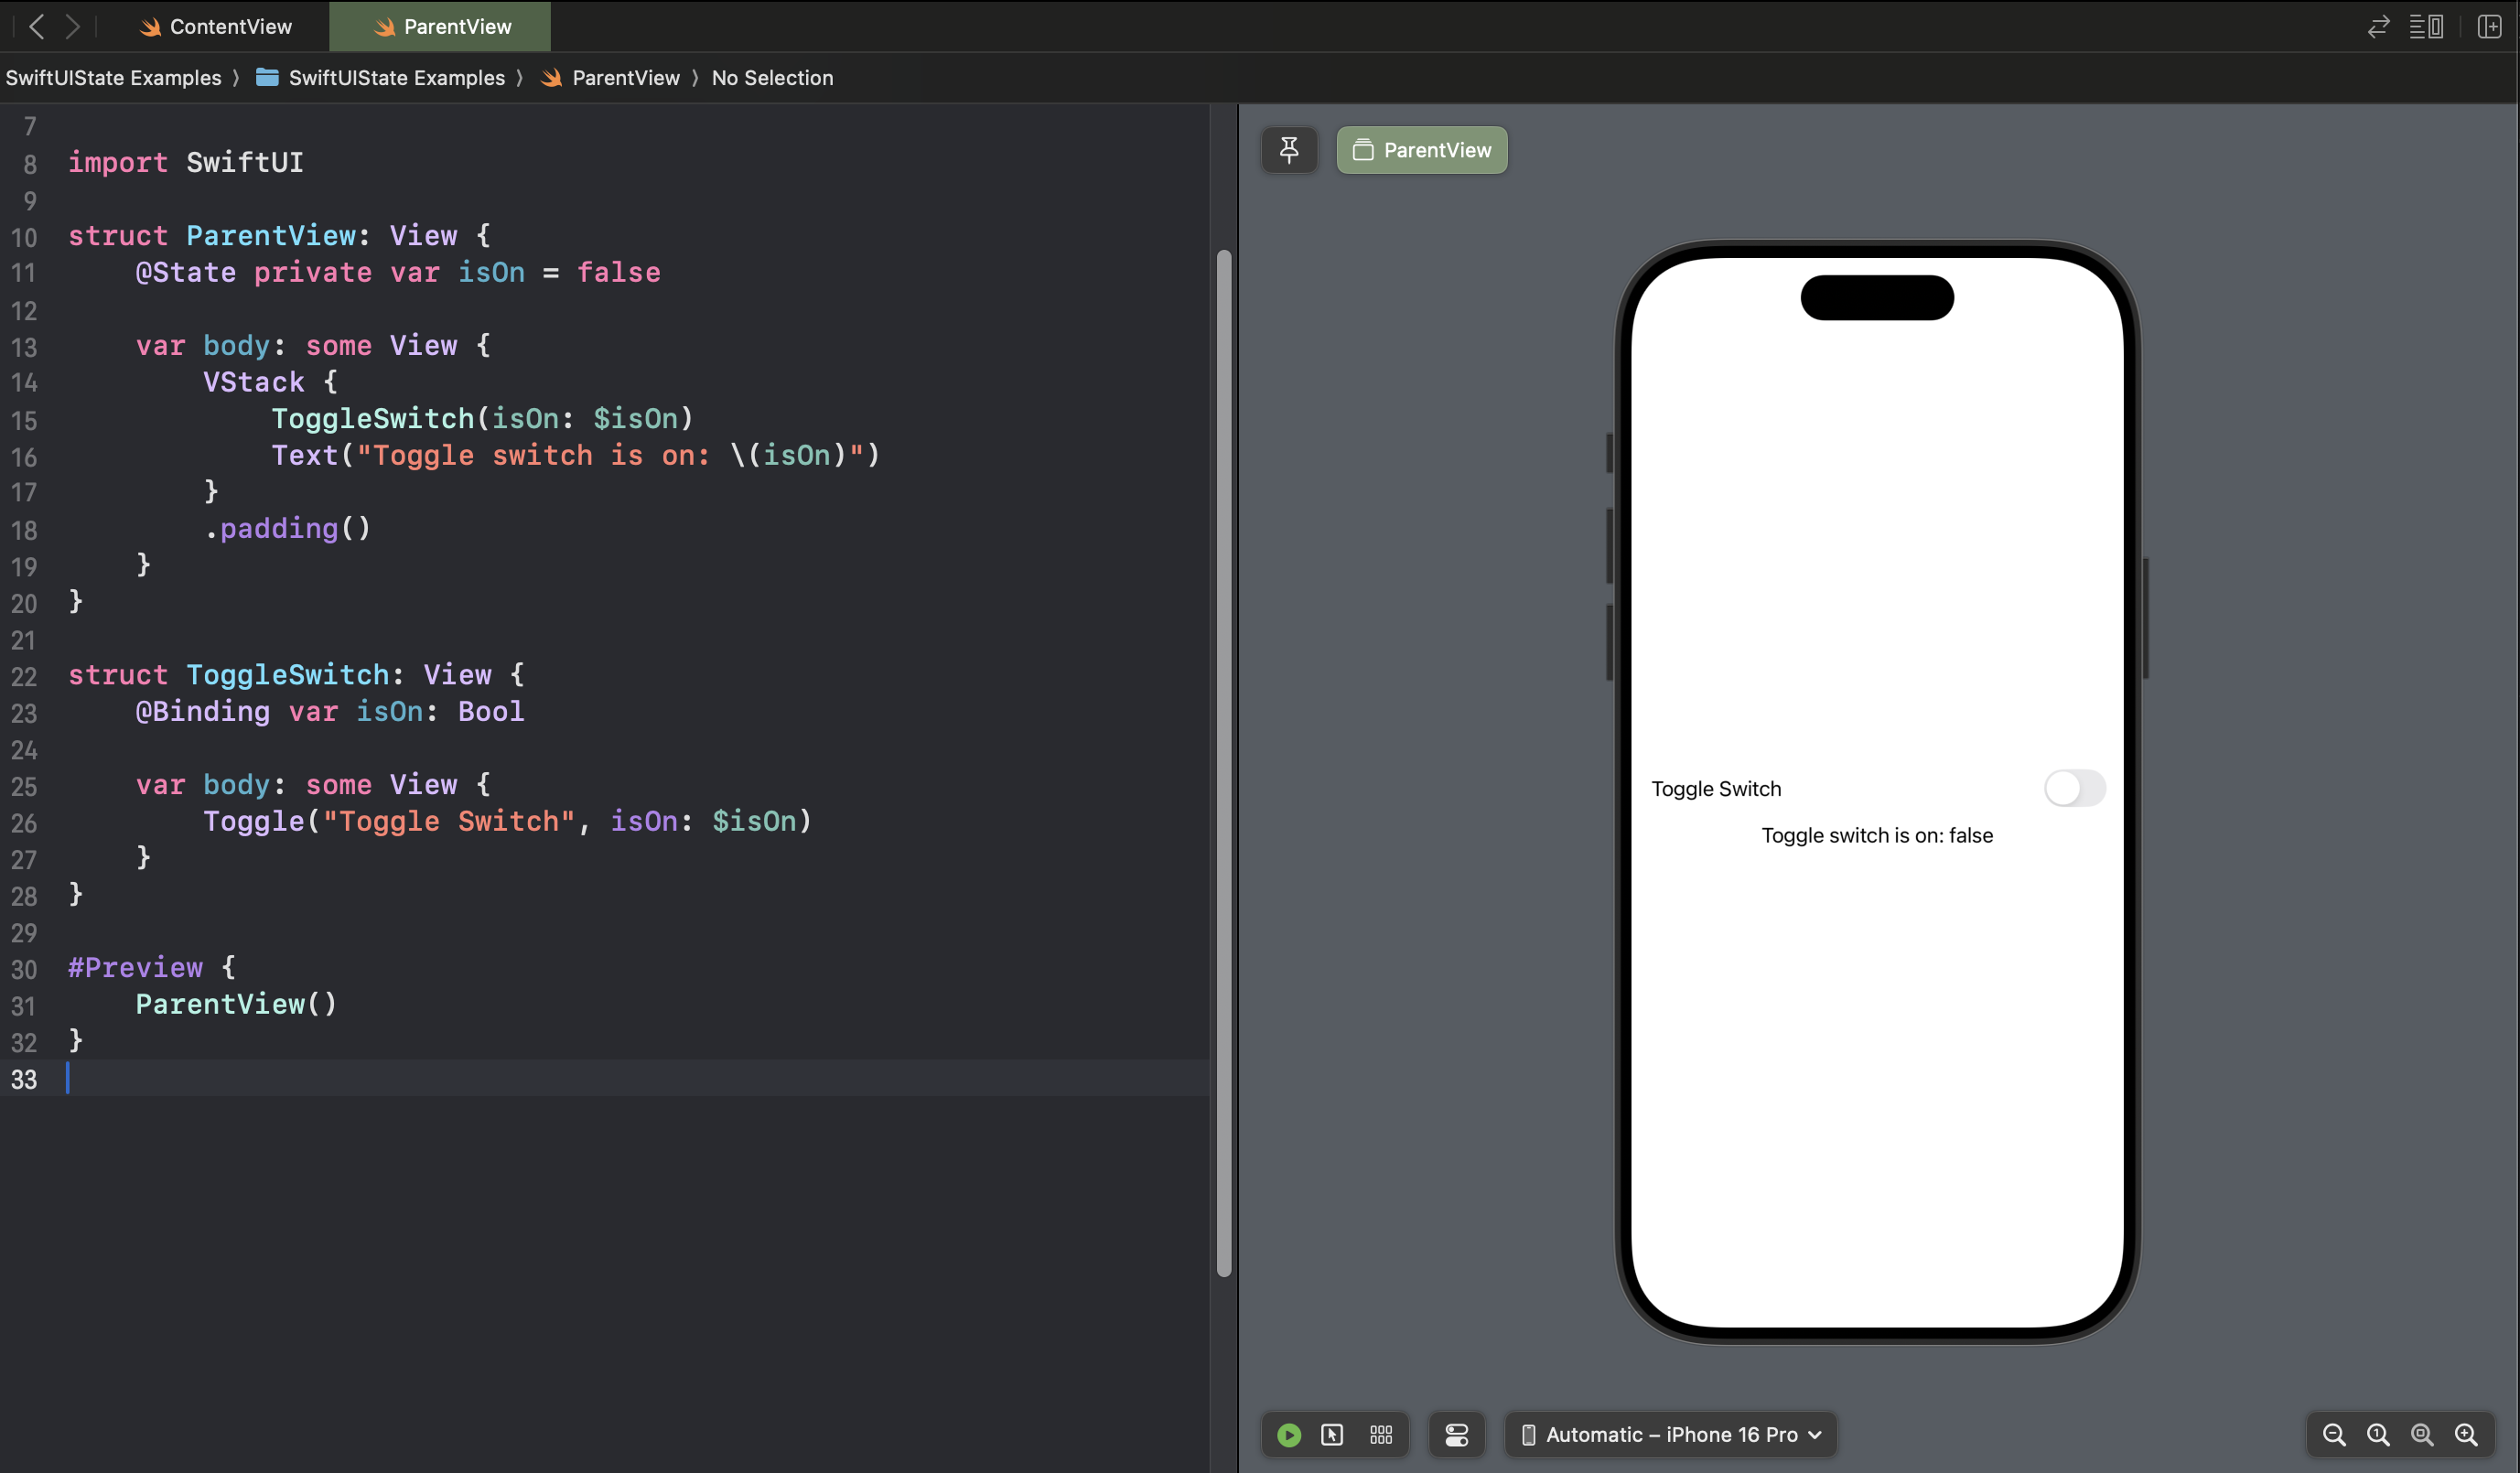
As an example, let’s create parent/child views and update the state of parent from child view.
Let’s dissect the code:
- We created our custom view named
ToggleSwitch. ToggleSwitchhas anisOnboolean variable marked with@Binding.@Bindingtells the SwiftUI that theisOnvariable is an external state that can be updated by the view.- In the
ParentView, we declared theisOnboolean variable just like we did before. - We passed the
isOnvariable inToggleSwitchpreceded with$, informing that it is a two-way binding; i.e., state can be changed by the child view.
@ObservableObject
While @State is great for simple and local state, more complex data models often need to be shared across multiple views. In this case, SwiftUI introduces the ObservableObject protocol combined with the @ObservedObject property wrapper. This allows you to create external data models that viewers can observe for changes.
To use the observable object, we need to know the following:
- A class that conforms to the
ObservableObjectprotocol can hold data that is shared between views. - It uses the
@Publishedproperty wrapper to notify views when the data changes.
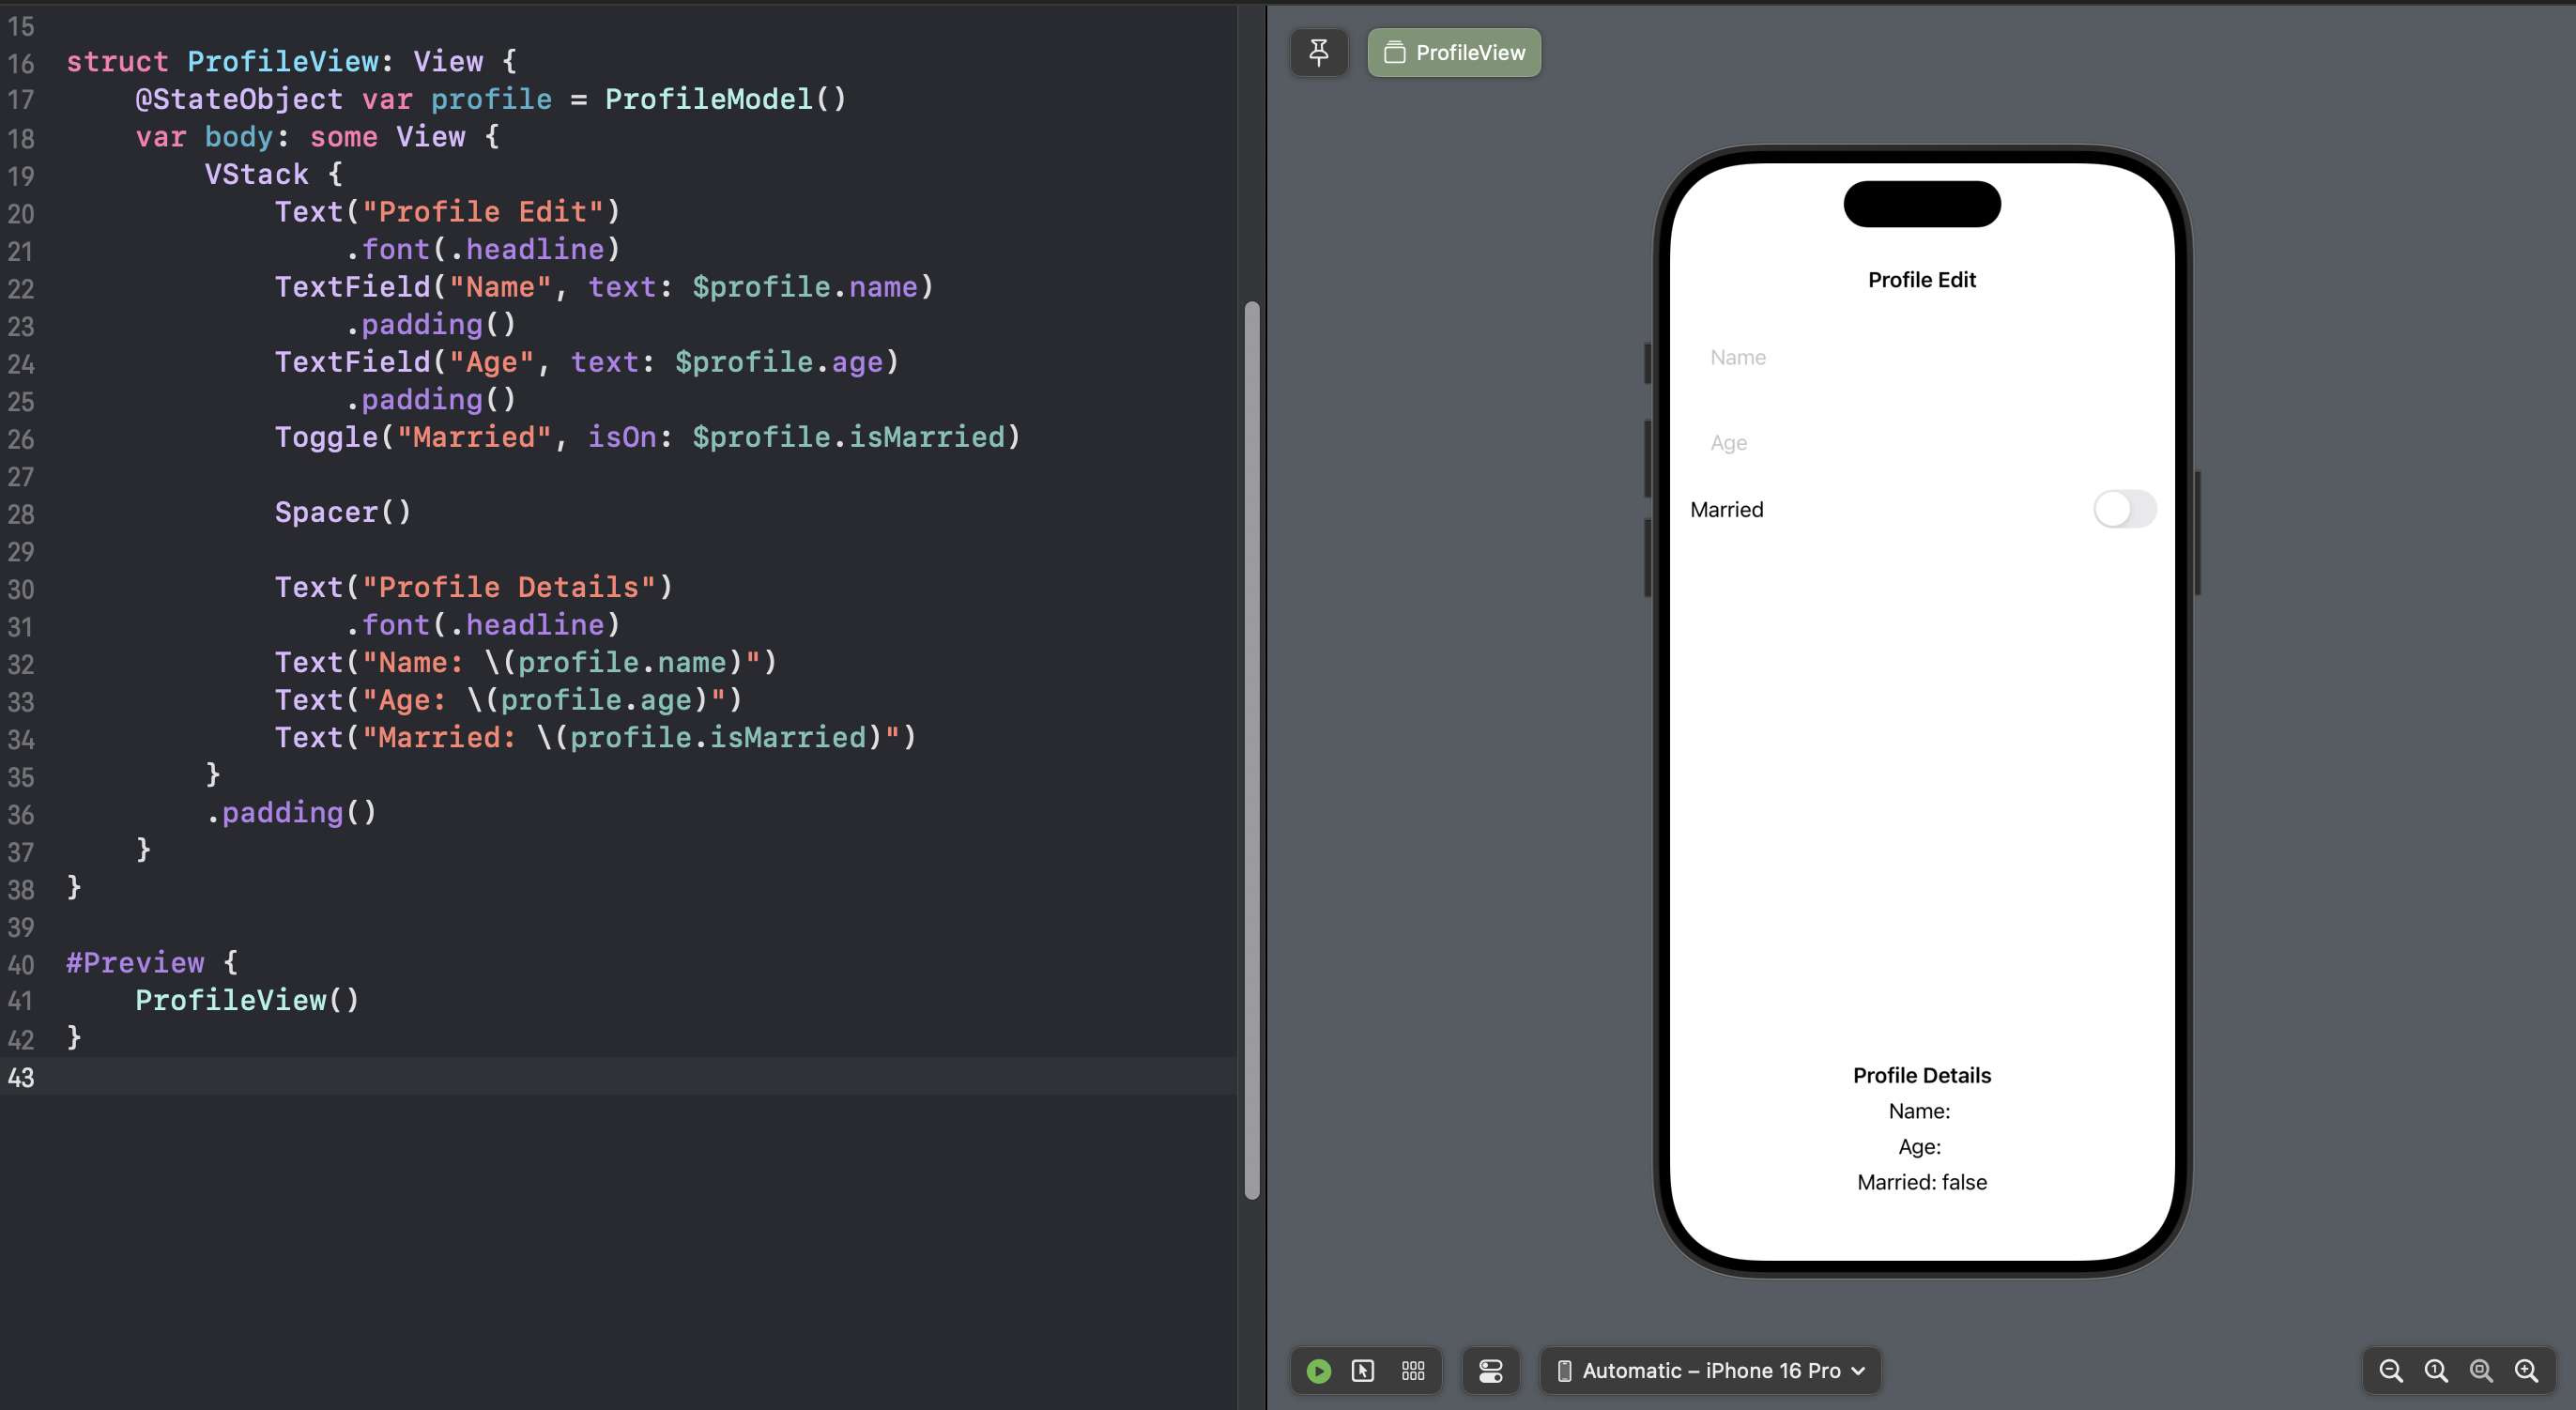
Lets create a model class named ProfileModel that holds the data and a corresponding view class named ProfileView.

Let’s go through the details:
ProfileModelis a simple class holding profile data.- The class conforms to the
ObservableObjectprotocol. - All the properties are marked with
@Published. ProfileViewclass contains a variable ofProfileModelclass marked with@ObservableObject.@Publishedproperties ofProfileModelare used as state and binding.- Any change to properties via UI elements is reflected in the detail section as well.
We kept editing and displaying data on the same screen for simplicity’s sake, but in real world applications, these can be two different screens and the ProfileModel can be owned by a central (possibly a singleton) object external to the view.
@StateObject
Introduced in SwiftUI 2.0, @StateObject is used to create and manage the lifecycle of an ObservableObject within a view. It ensures that the object is only created once and is not re-created unnecessarily during re-renders.
The main difference between @StateObject and @ObservedObject is that @StateObject is responsible for creating the object, while @ObservedObject is used when the object is created elsewhere (like in a parent view).
Implementation-wise, it’s quite similar to @ObservableObject.
Use @StateObject when a view is responsible for creating and owning the ObservableObject.
It ensures the object is only created once, even when the view is re-rendered.
@Environment
For data that should be shared with many views in your app, SwiftUI gives us the @EnvironmentObject property wrapper. This lets us share model data anywhere it’s needed, while also ensuring that our views automatically stay updated when that data changes.
Just like @ObservedObject, you never assign a value to an @EnvironmentObject property. Instead, it should be passed in from elsewhere, and ultimately you’re probably going to want to use @StateObject to create it somewhere.
However, unlike @ObservedObject, we don’t pass our objects into other views by hand. Instead, we send the data into a modifier called environmentObject(), which makes the object available in SwiftUI’s environment for that view plus any others inside it.
- Note: Environment objects must be supplied by an ancestor view — if SwiftUI can’t find an environment object of the correct type you’ll get a crash. This applies for previews too, so be careful.
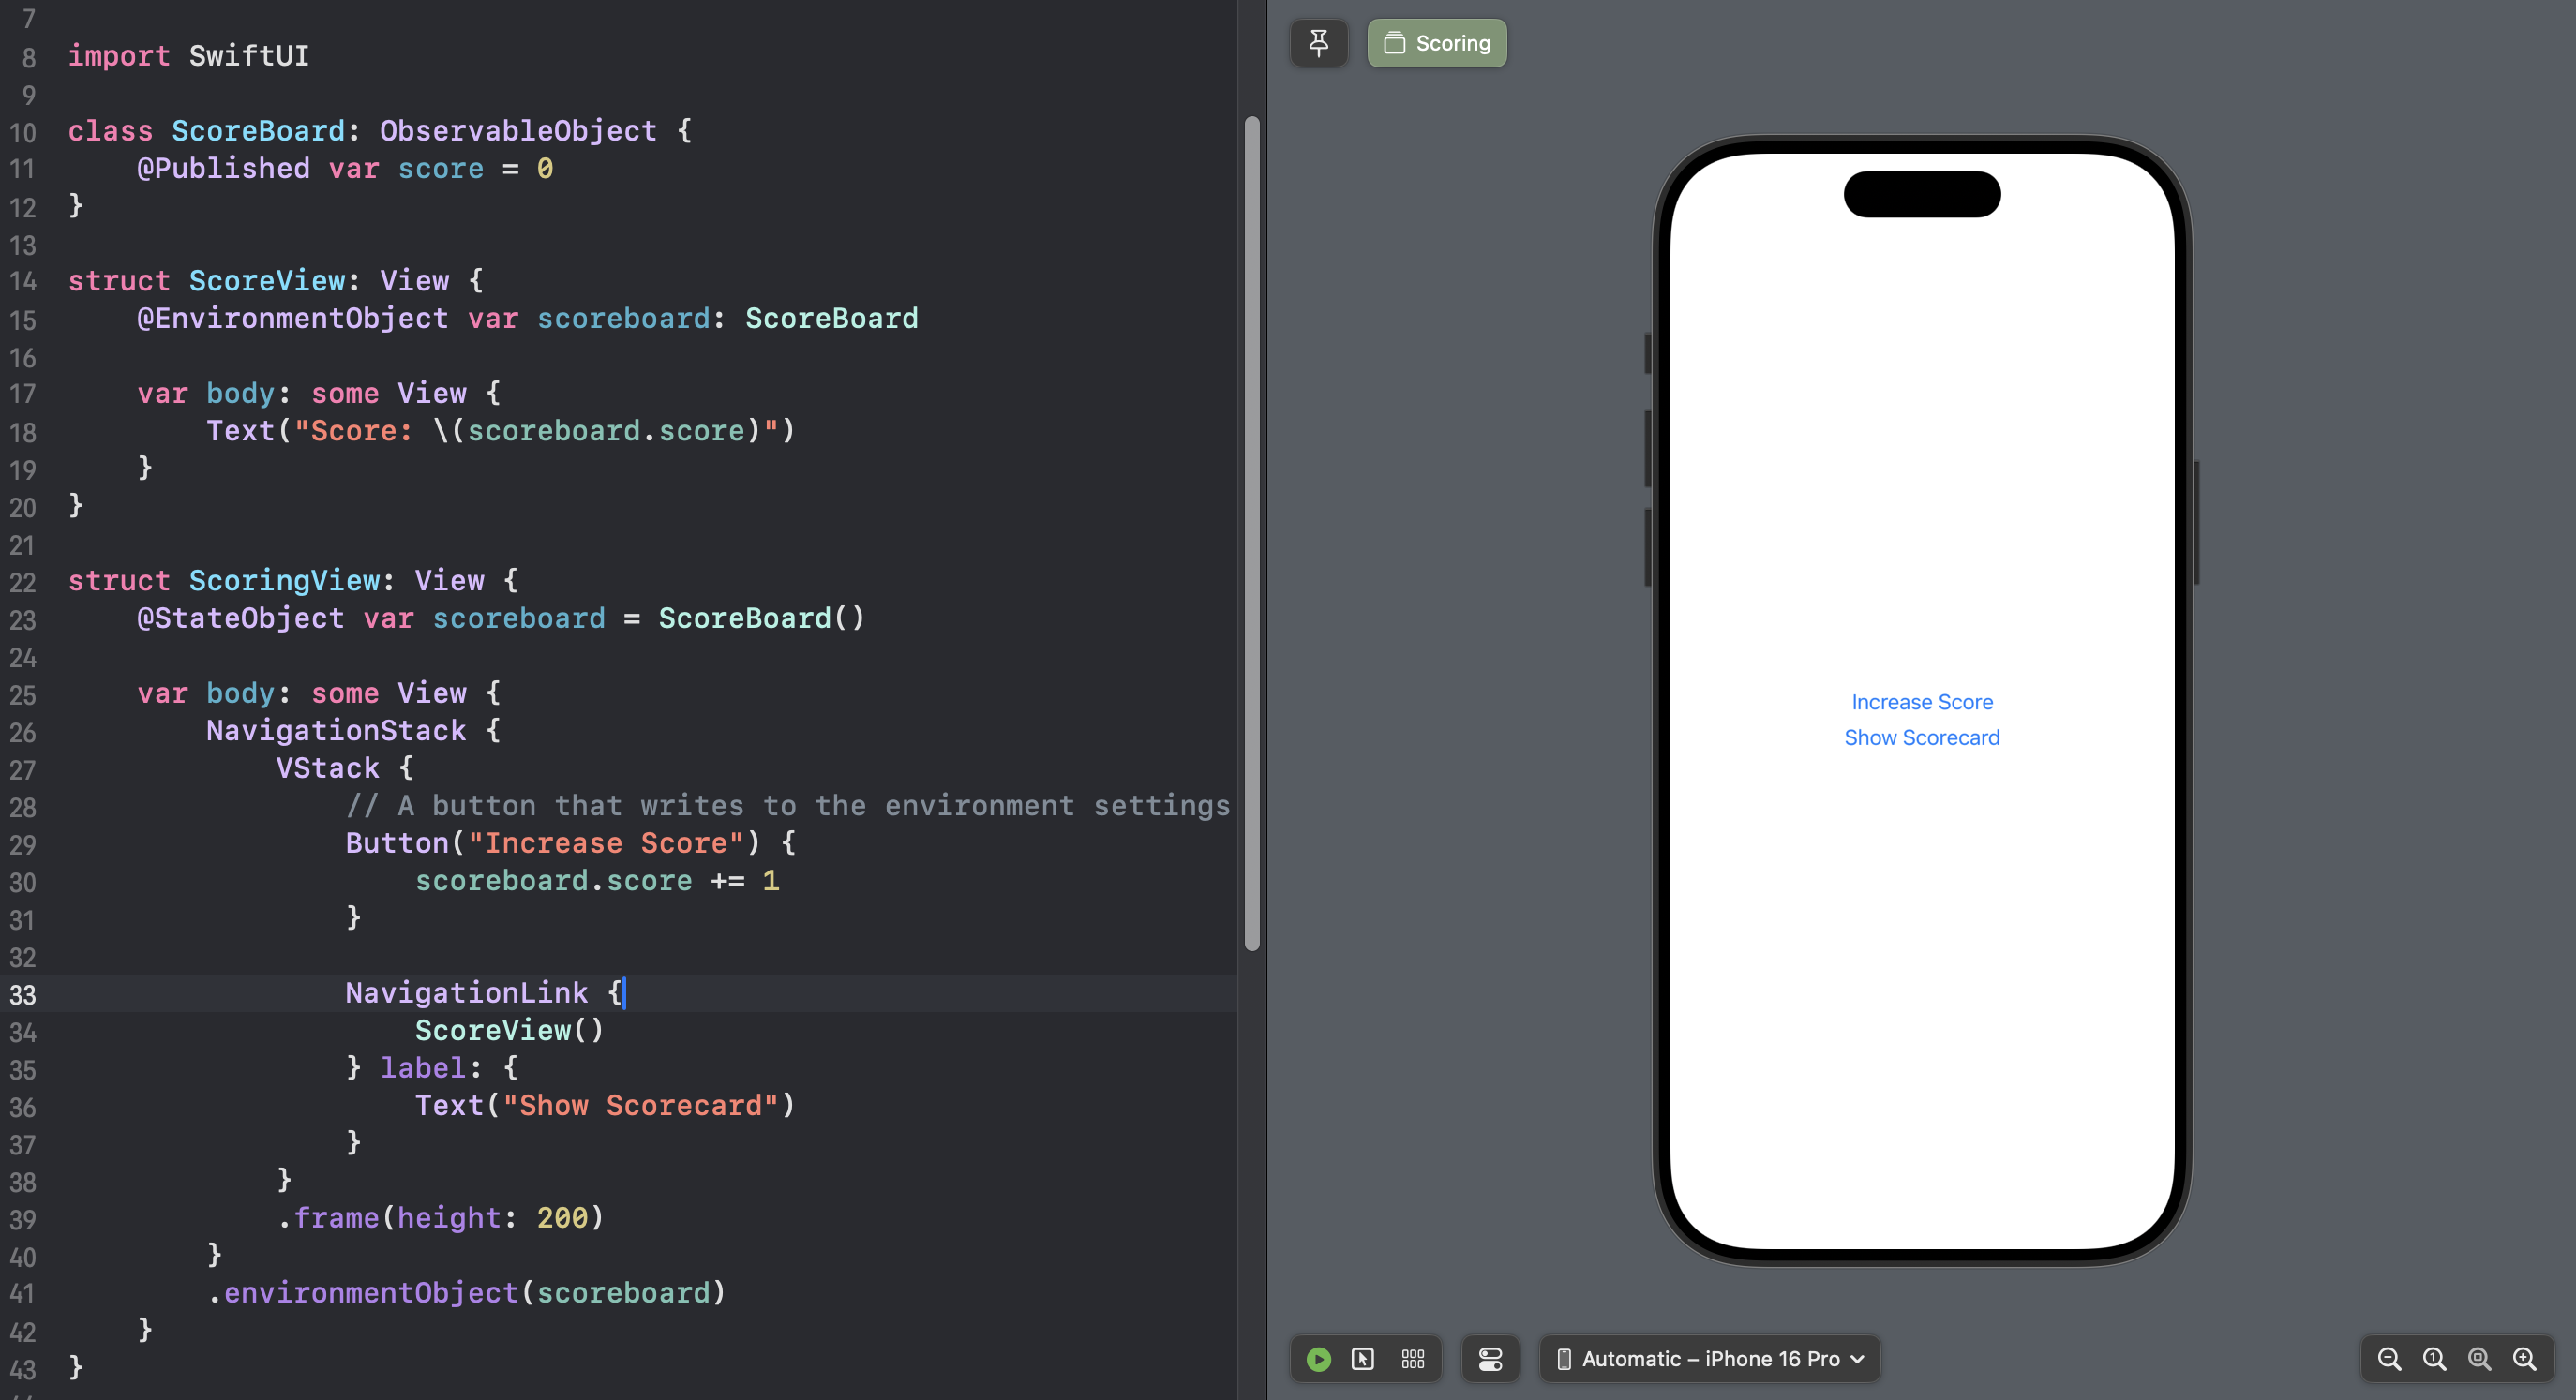
As an example of environment object:
In the above code:
- We created an
ObservableObjectclass namedScoreBoardthat holds our score. ScoreViewclass displays our score.- Note how
ScoreViewis extracting theScoreBoardvariable from the environment automatically by just declaring the property wrapper@EnvironmentObject. ScoringViewis the main view that createsScoreBoardobject, update its values, and also passes it to the SwiftUI environment so that it is available to other views.
Best Practices and Common Pitfalls
- Use the right tool:
@Statefor simple, view-local state@Bindingfor parent-child communication@ObservedObjector@StateObjectfor managing more complex, shared data models@EnvironmentObjectfor global or shared app-wide state
- Avoid overusing
@StateObjector@ObservedObject: Only recreate objects when necessary to avoid performance issues or unnecessary re-renders. - Avoid unnecessary UI re-renders: When possible, isolate state updates to the smallest view hierarchy possible.
Conclusion
In SwiftUI, state management is a fundamental aspect of building dynamic and interactive apps. By using the correct tools (@State, @Binding, @ObservedObject, @StateObject, and @EnvironmentObject), you can efficiently manage your app’s state, ensuring a smooth and scalable user experience.
Published at DZone with permission of Sridhar Rao Muthineni. See the original article here.
Opinions expressed by DZone contributors are their own.
Comments