Build a REST API with XML Payload
Creating REST APIs with XML payloads.
Join the DZone community and get the full member experience.
Join For FreeThere is hardly any argument on the fact that APIs are increasingly becoming an important part of how companies do business. API has become the de facto standard to unlock one of their most valuable resources, data.
And as organizations are publishing more APIs, the observed trend is that REST is replacing SOAP as the data transfer protocol of choice. When it comes to the data that APIs serve up, XML is still the most used format. Although JSON is hot on its heels, we still need to address plenty of use cases with XML payload.
In this post, we will go step by step through an example to build out a RESTful web service with XML request and response payload. Check out the complete project on Anypoint Exchange.
Pre-requisites:
- Sign up for an Anypoint Platform Account.
- Download Anypoint Platform Design Tool – MuleSoft Anypoint Studio. In this post, we are using version 5.4 of Anypoint Studio with the new “Studio Light Theme”. You can always revert to the old theme in Preferences.
- A database where we can create and load a sample table required for this project. In this example, we will use an instance of the MySQL database.
- To follow the example in this guide, run the SQL script customer.sql to set up the table and load it with some sample data.
Steps:
- Since we are working with an XML payload, we will either have an existing schema for the request and response message or create one from scratch. In this example, we will consider the latter. Since the foundation for Anypoint Studio is the Eclipse IDE, we can leverage the XML schema design tool which comes included with Anypoint Studio.
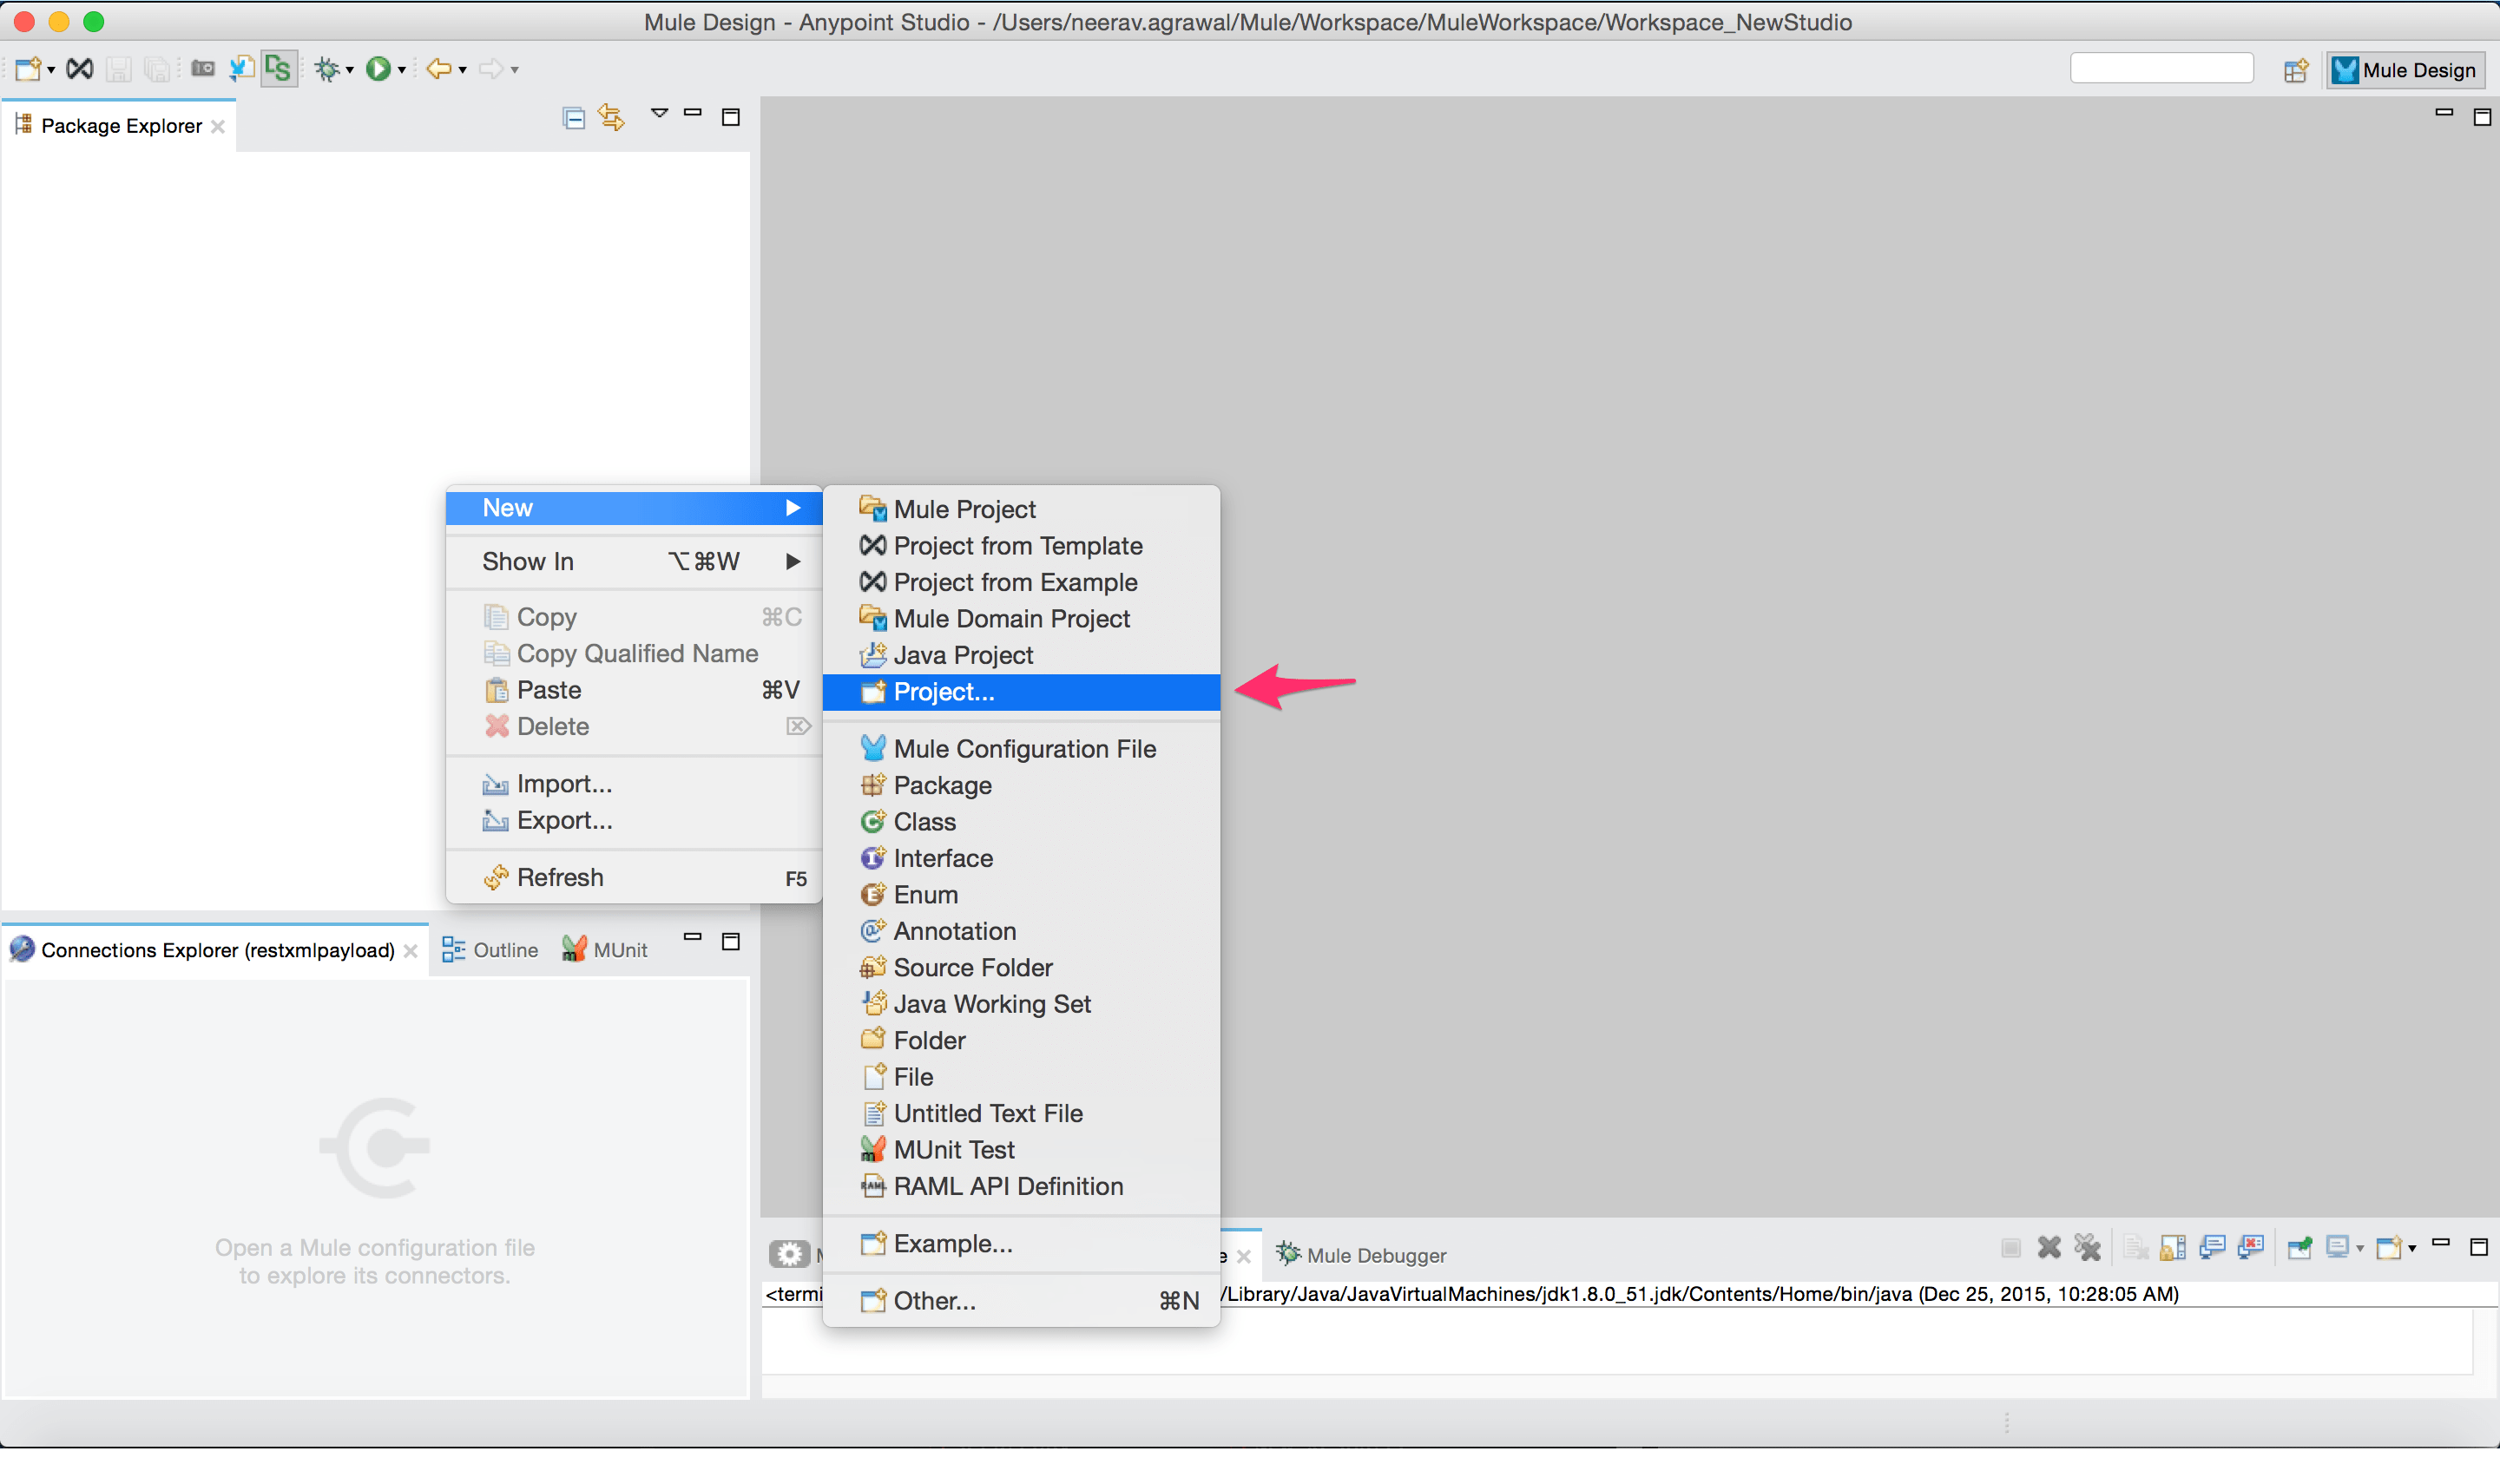
Open Anypoint Studio and create a “General Project”.
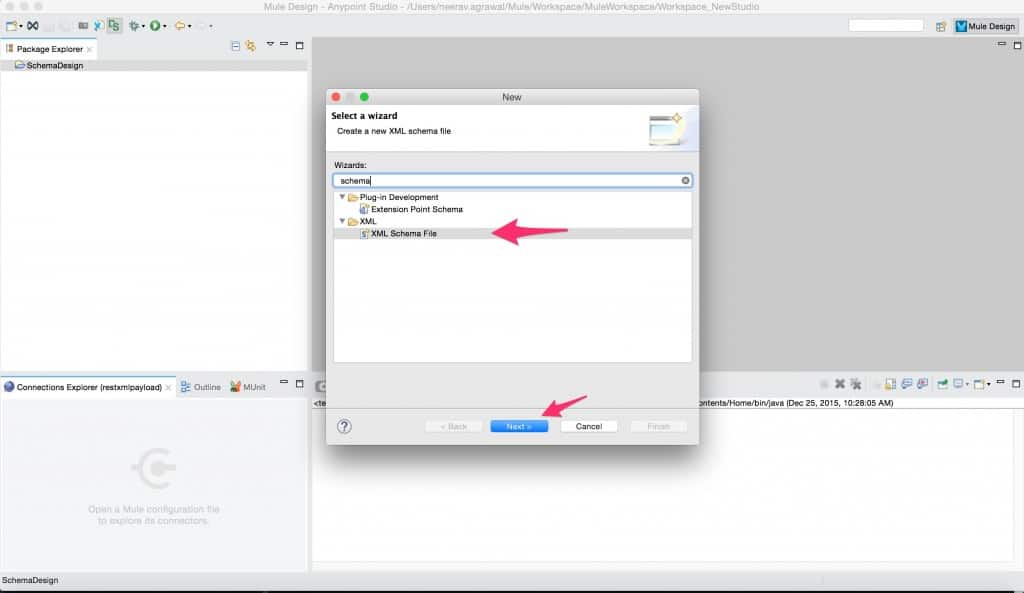
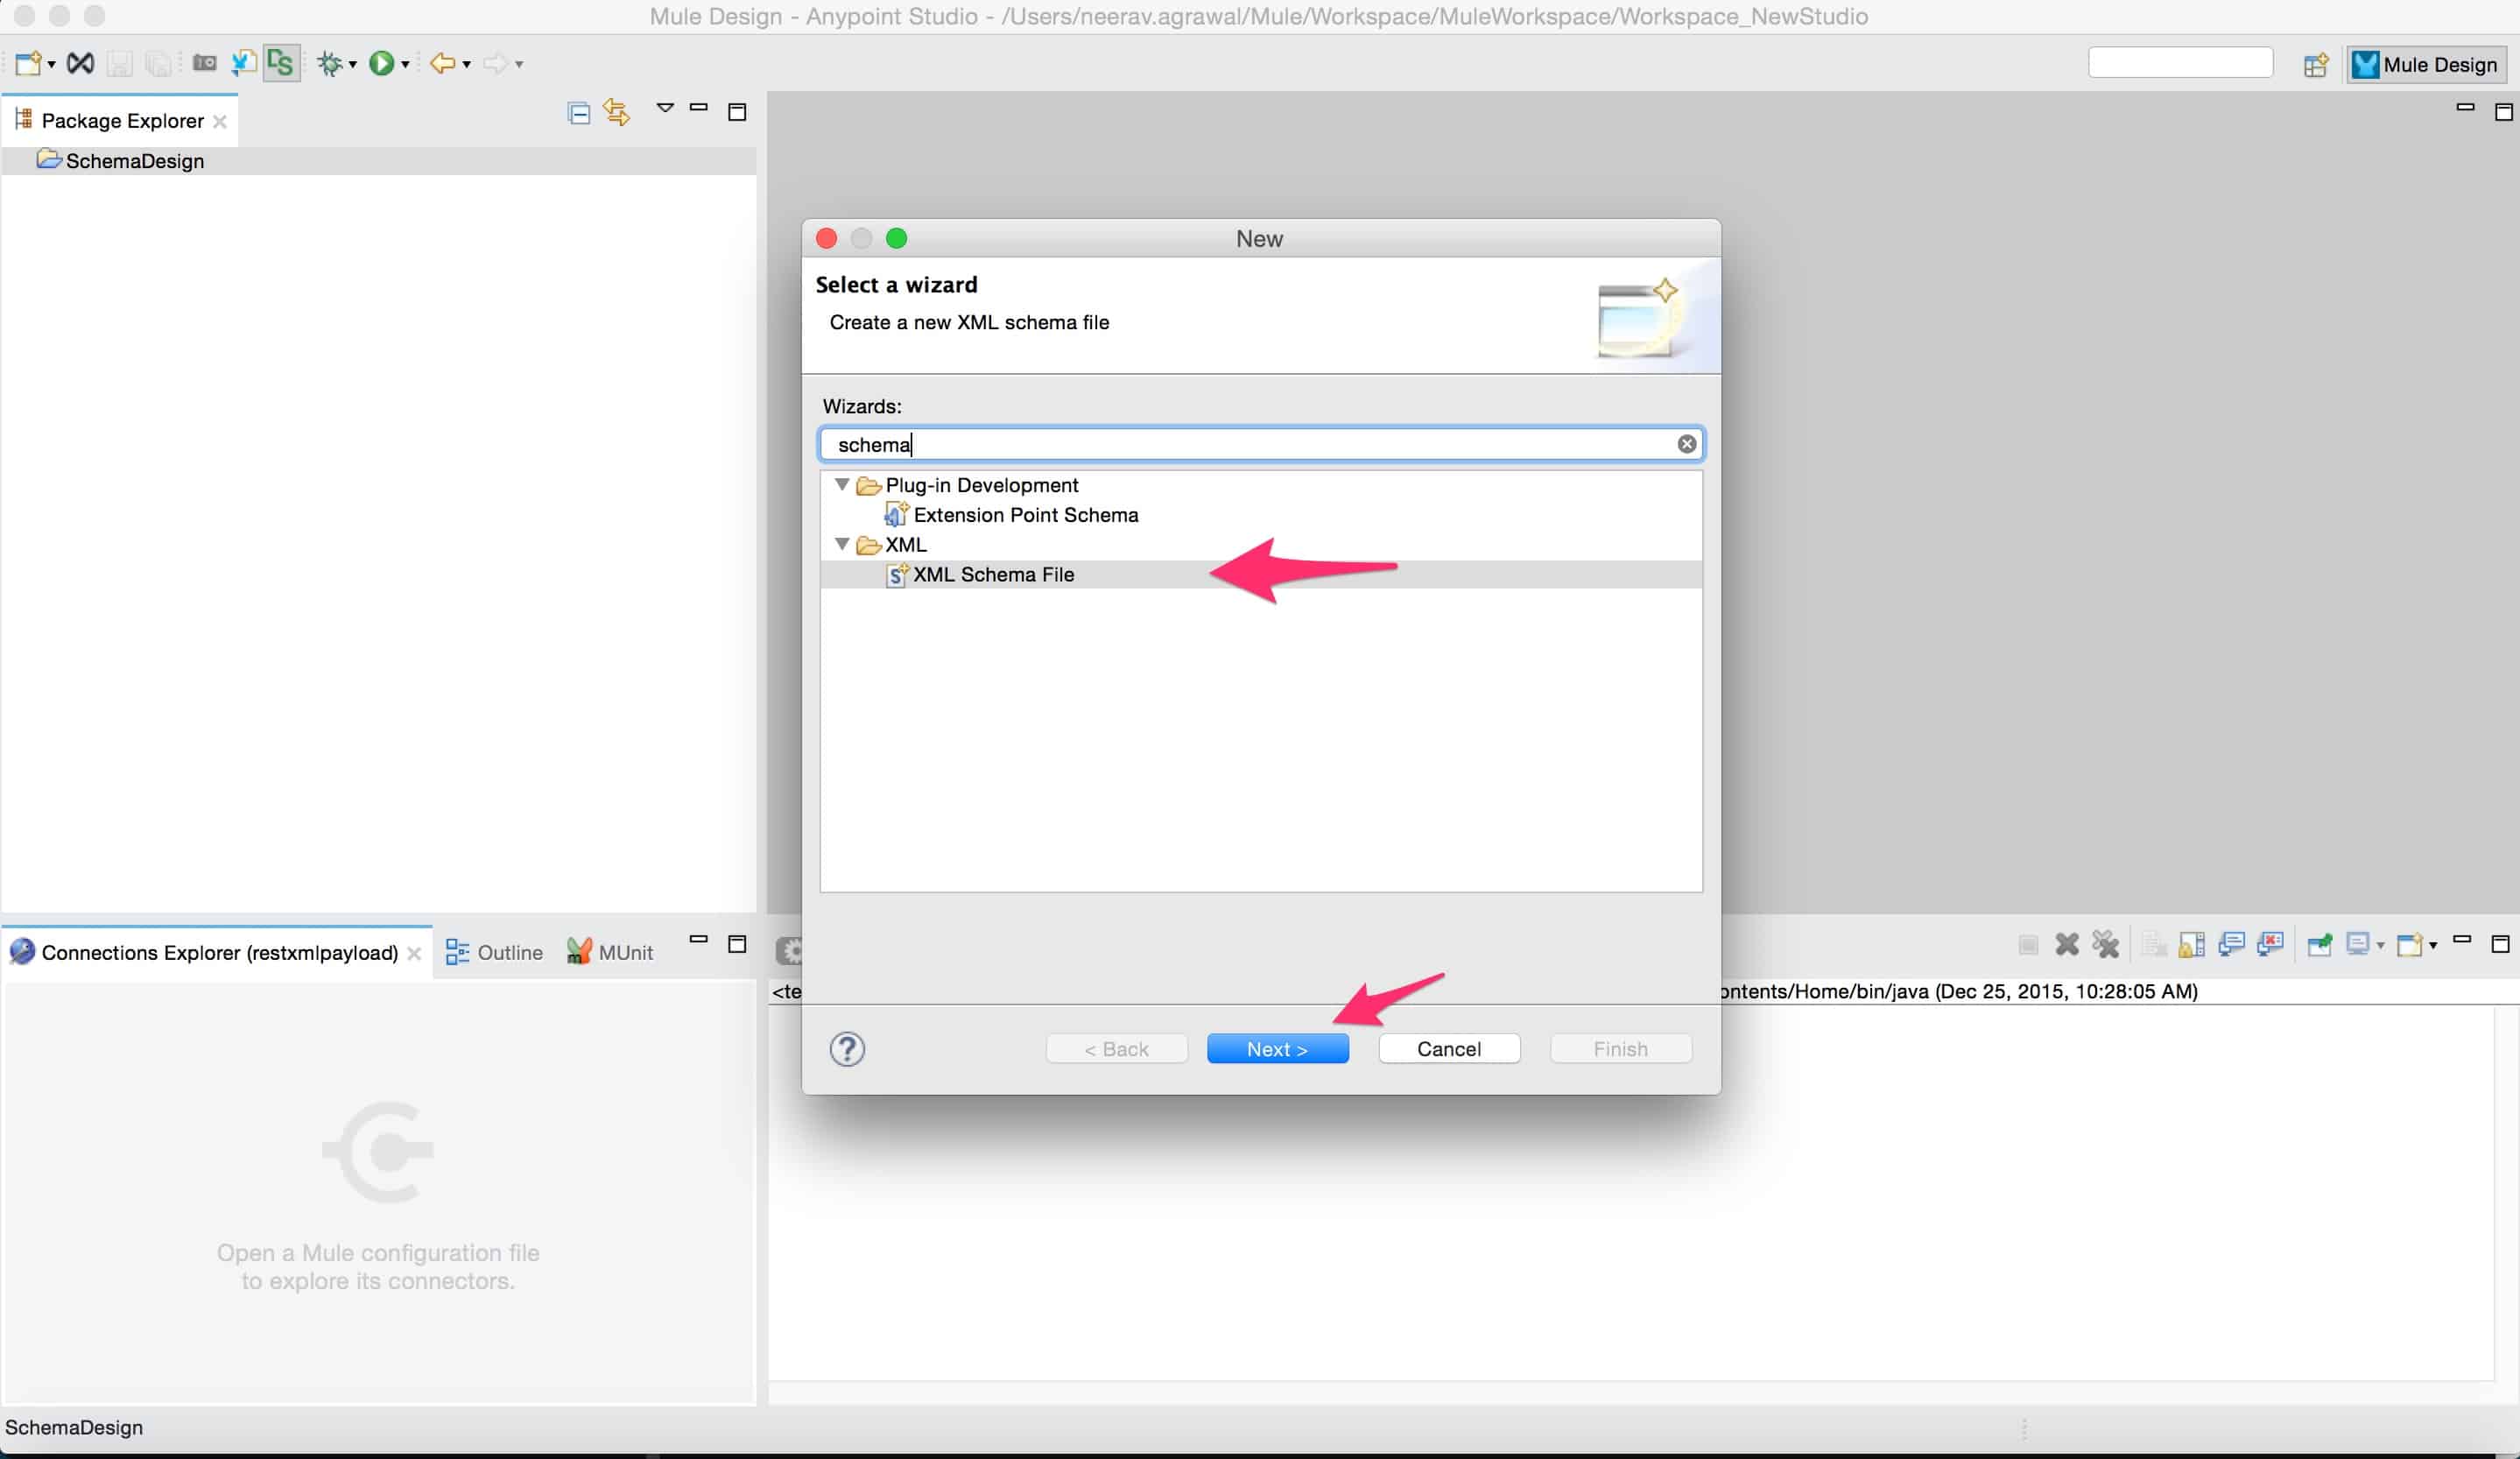
- Create a new file in the project of type “XML Schema File”. Refer link to get step by step instructions in designing the XML Schema using the Eclipse-based schema editor. For the scope of this example, download the schema for request and response XML payload.
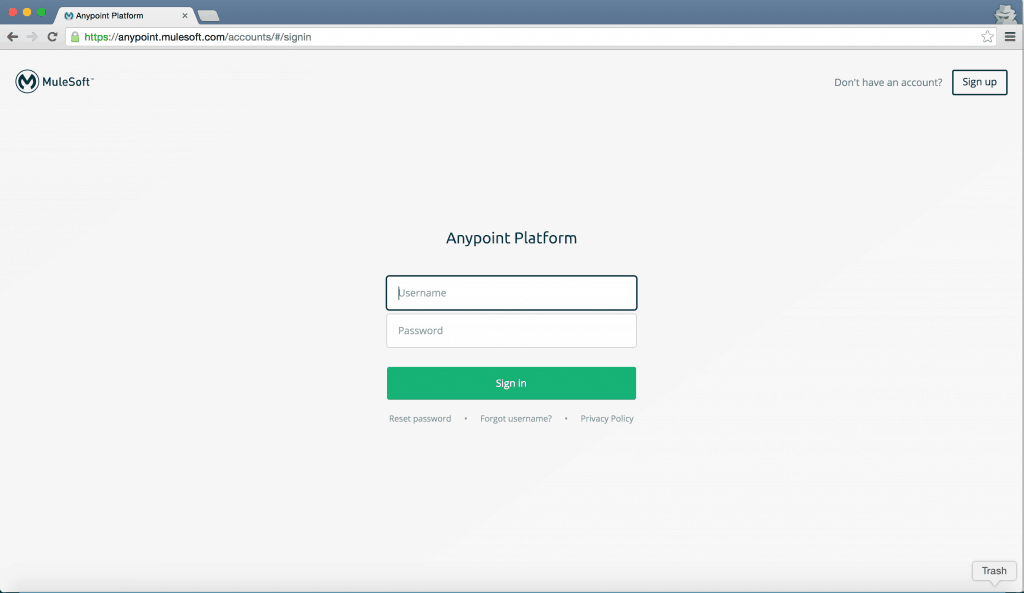
Now that we have the schema definitions ready we can start defining the API specification. We do this with the help of RESTful API Modeling Language (RAML). RAML is central to the design first approach to implementing an API that we have discussed in out previous blog posts(link here). - To start defining an API specification, first, sign up for an Anypoint account if you don’t already have one.
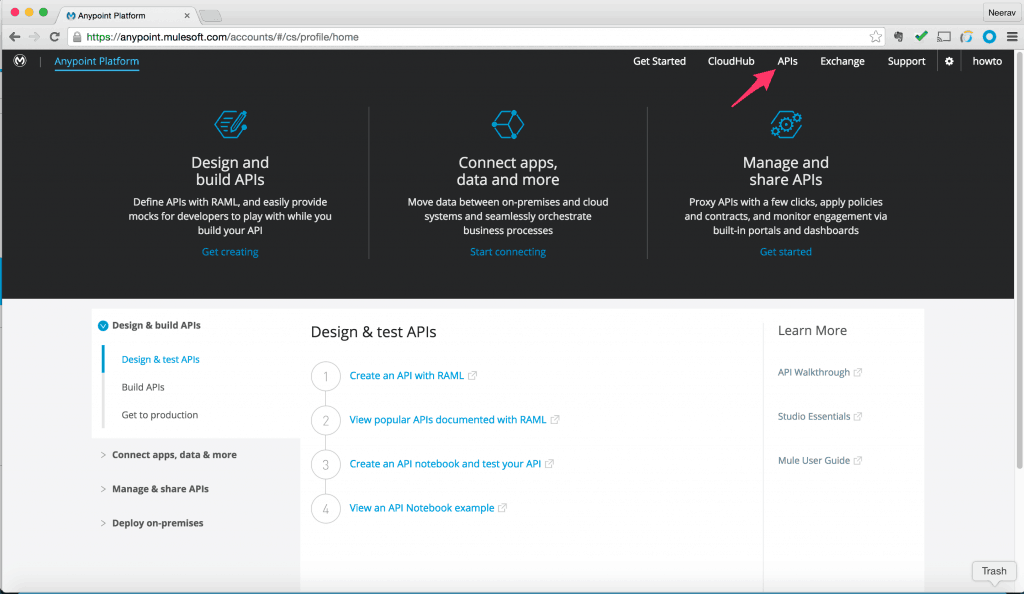
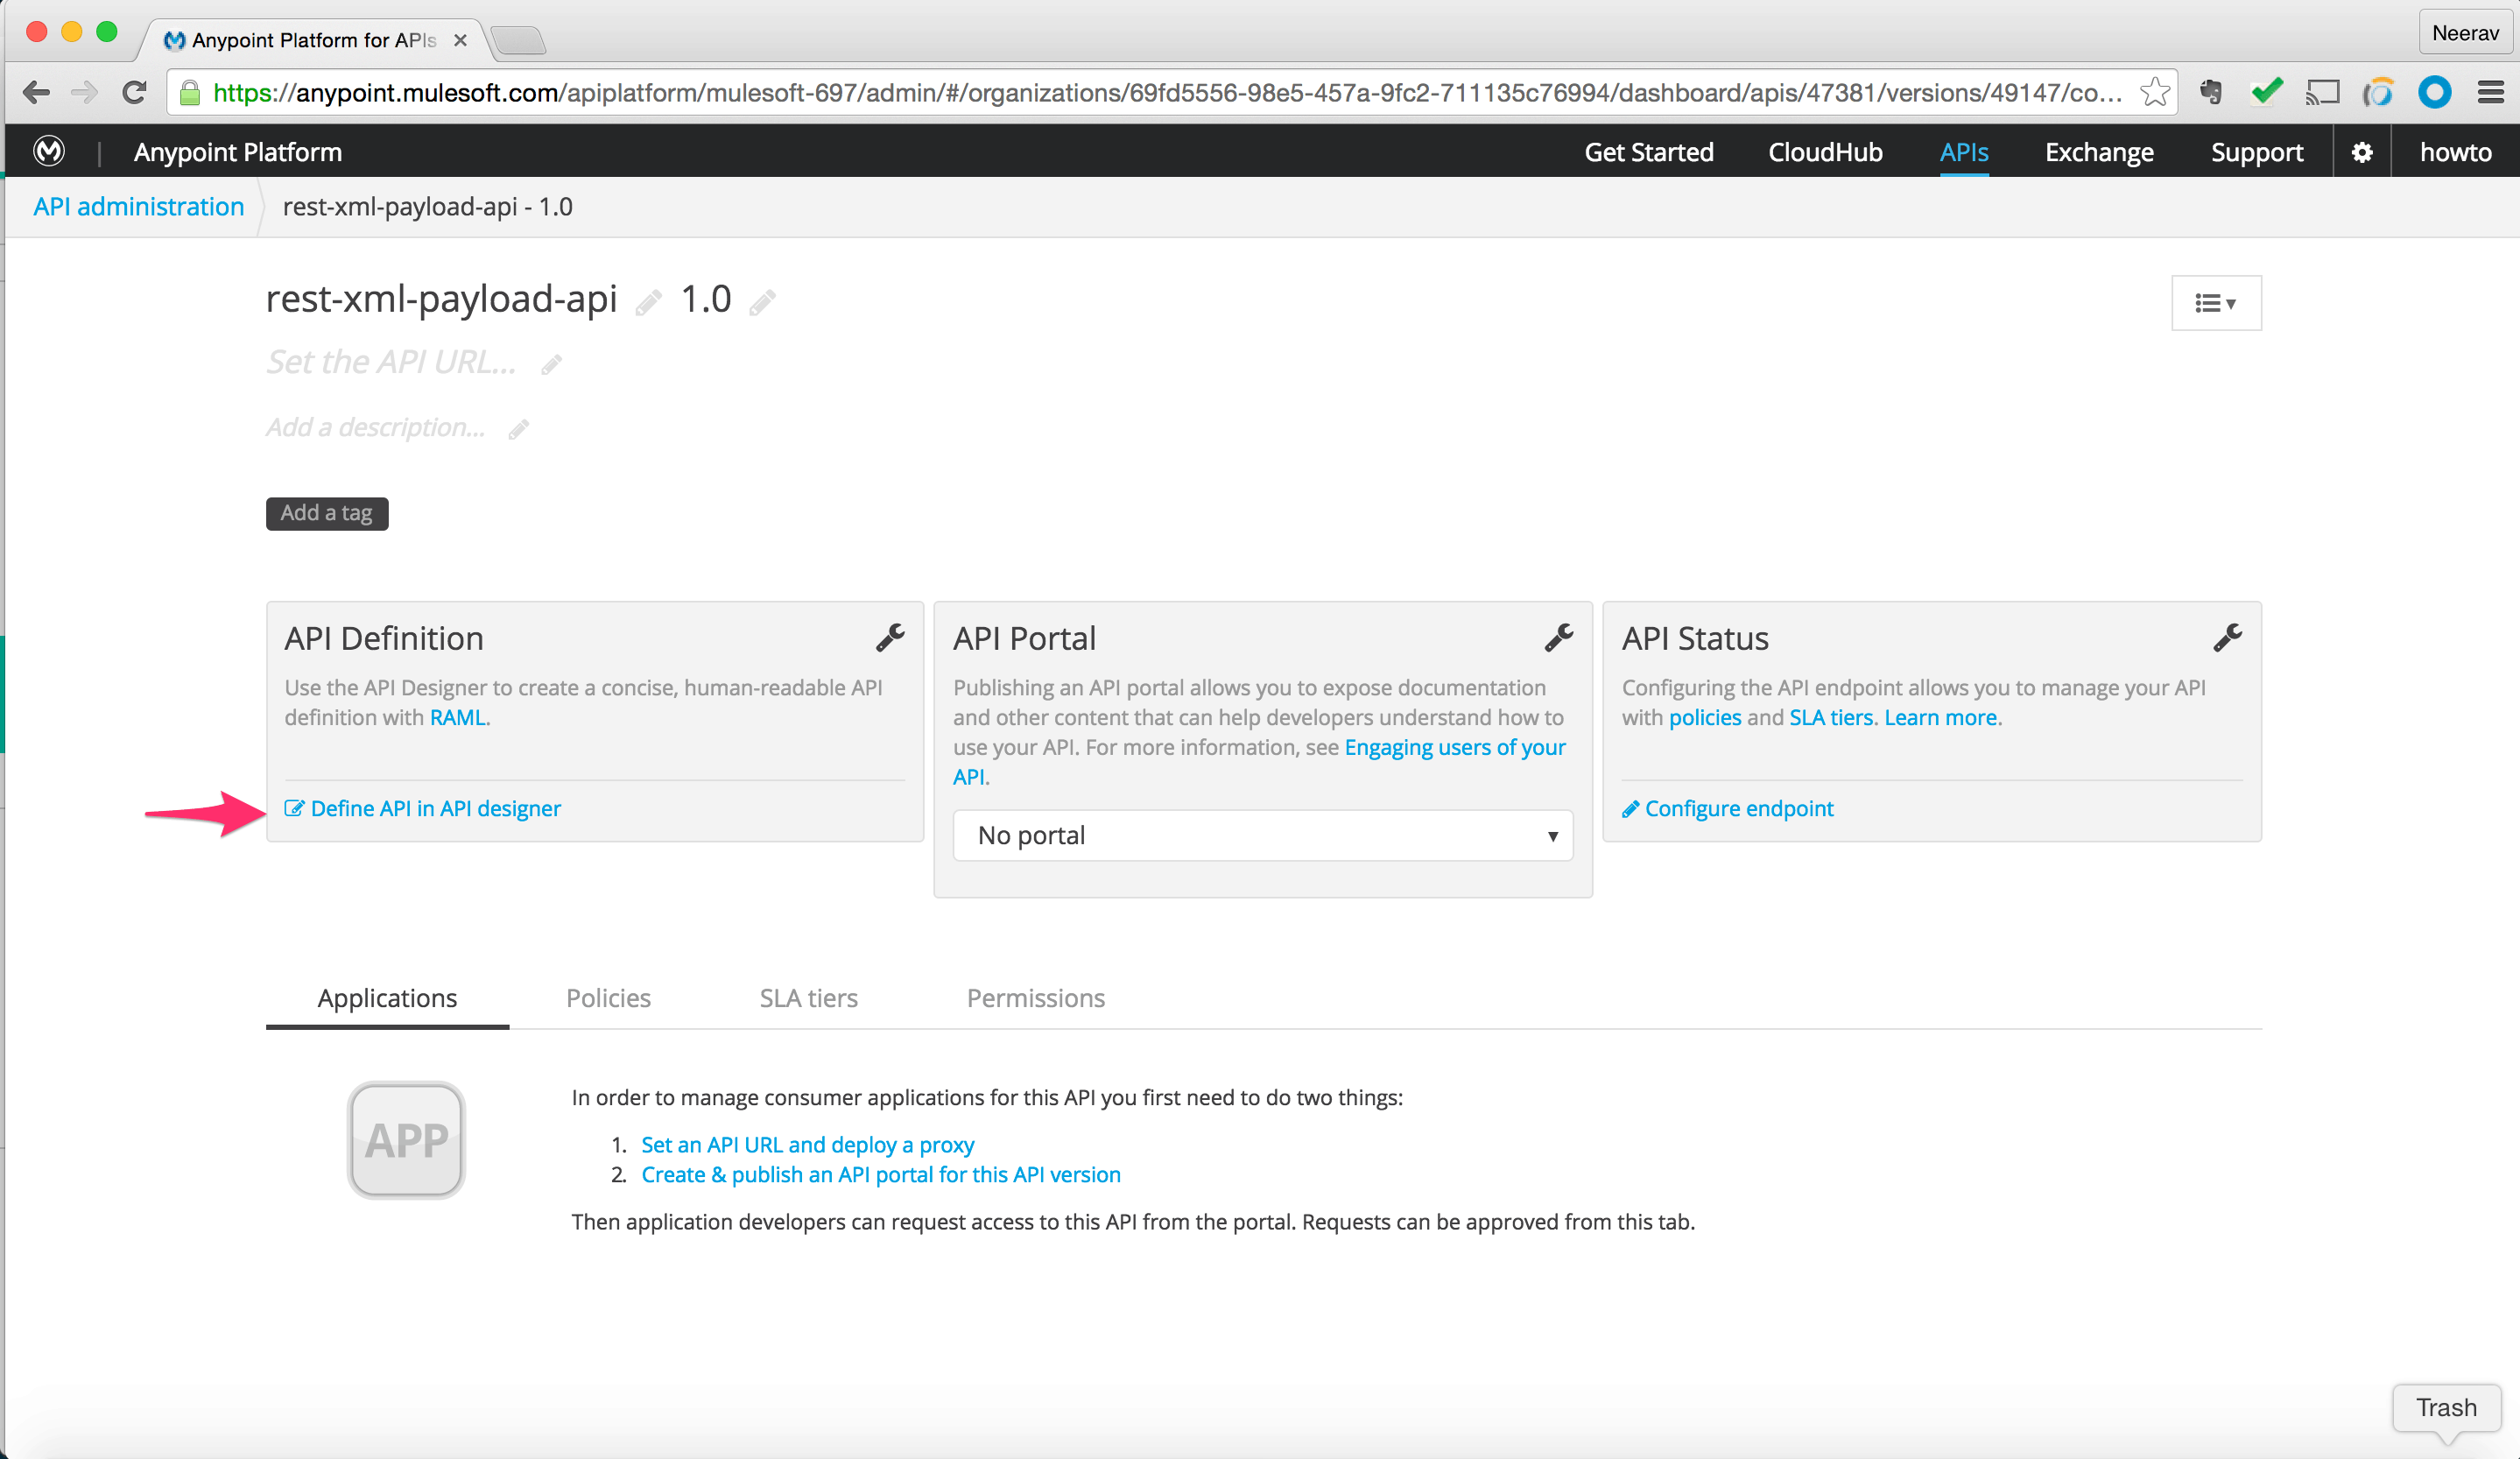
- After logging into the account click on “API” on the top which will bring up the page listing any existing APIs. If this is the first API, then the list will be blank.
- Click on “Add new API” which brings up the API detail page where on the left side we click on “Define API in API Designer.” which brings up the API Designer tool.

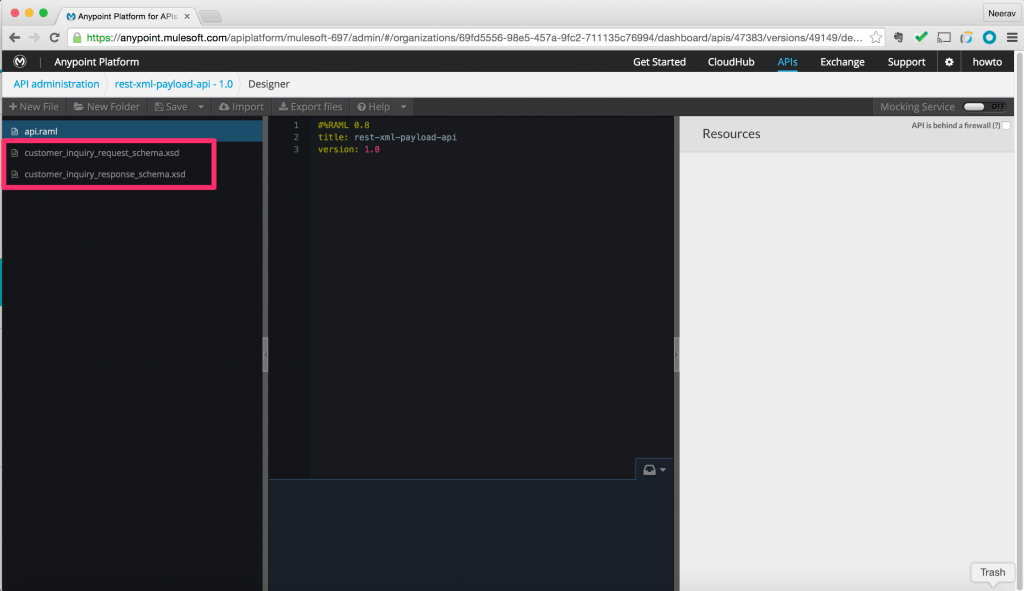
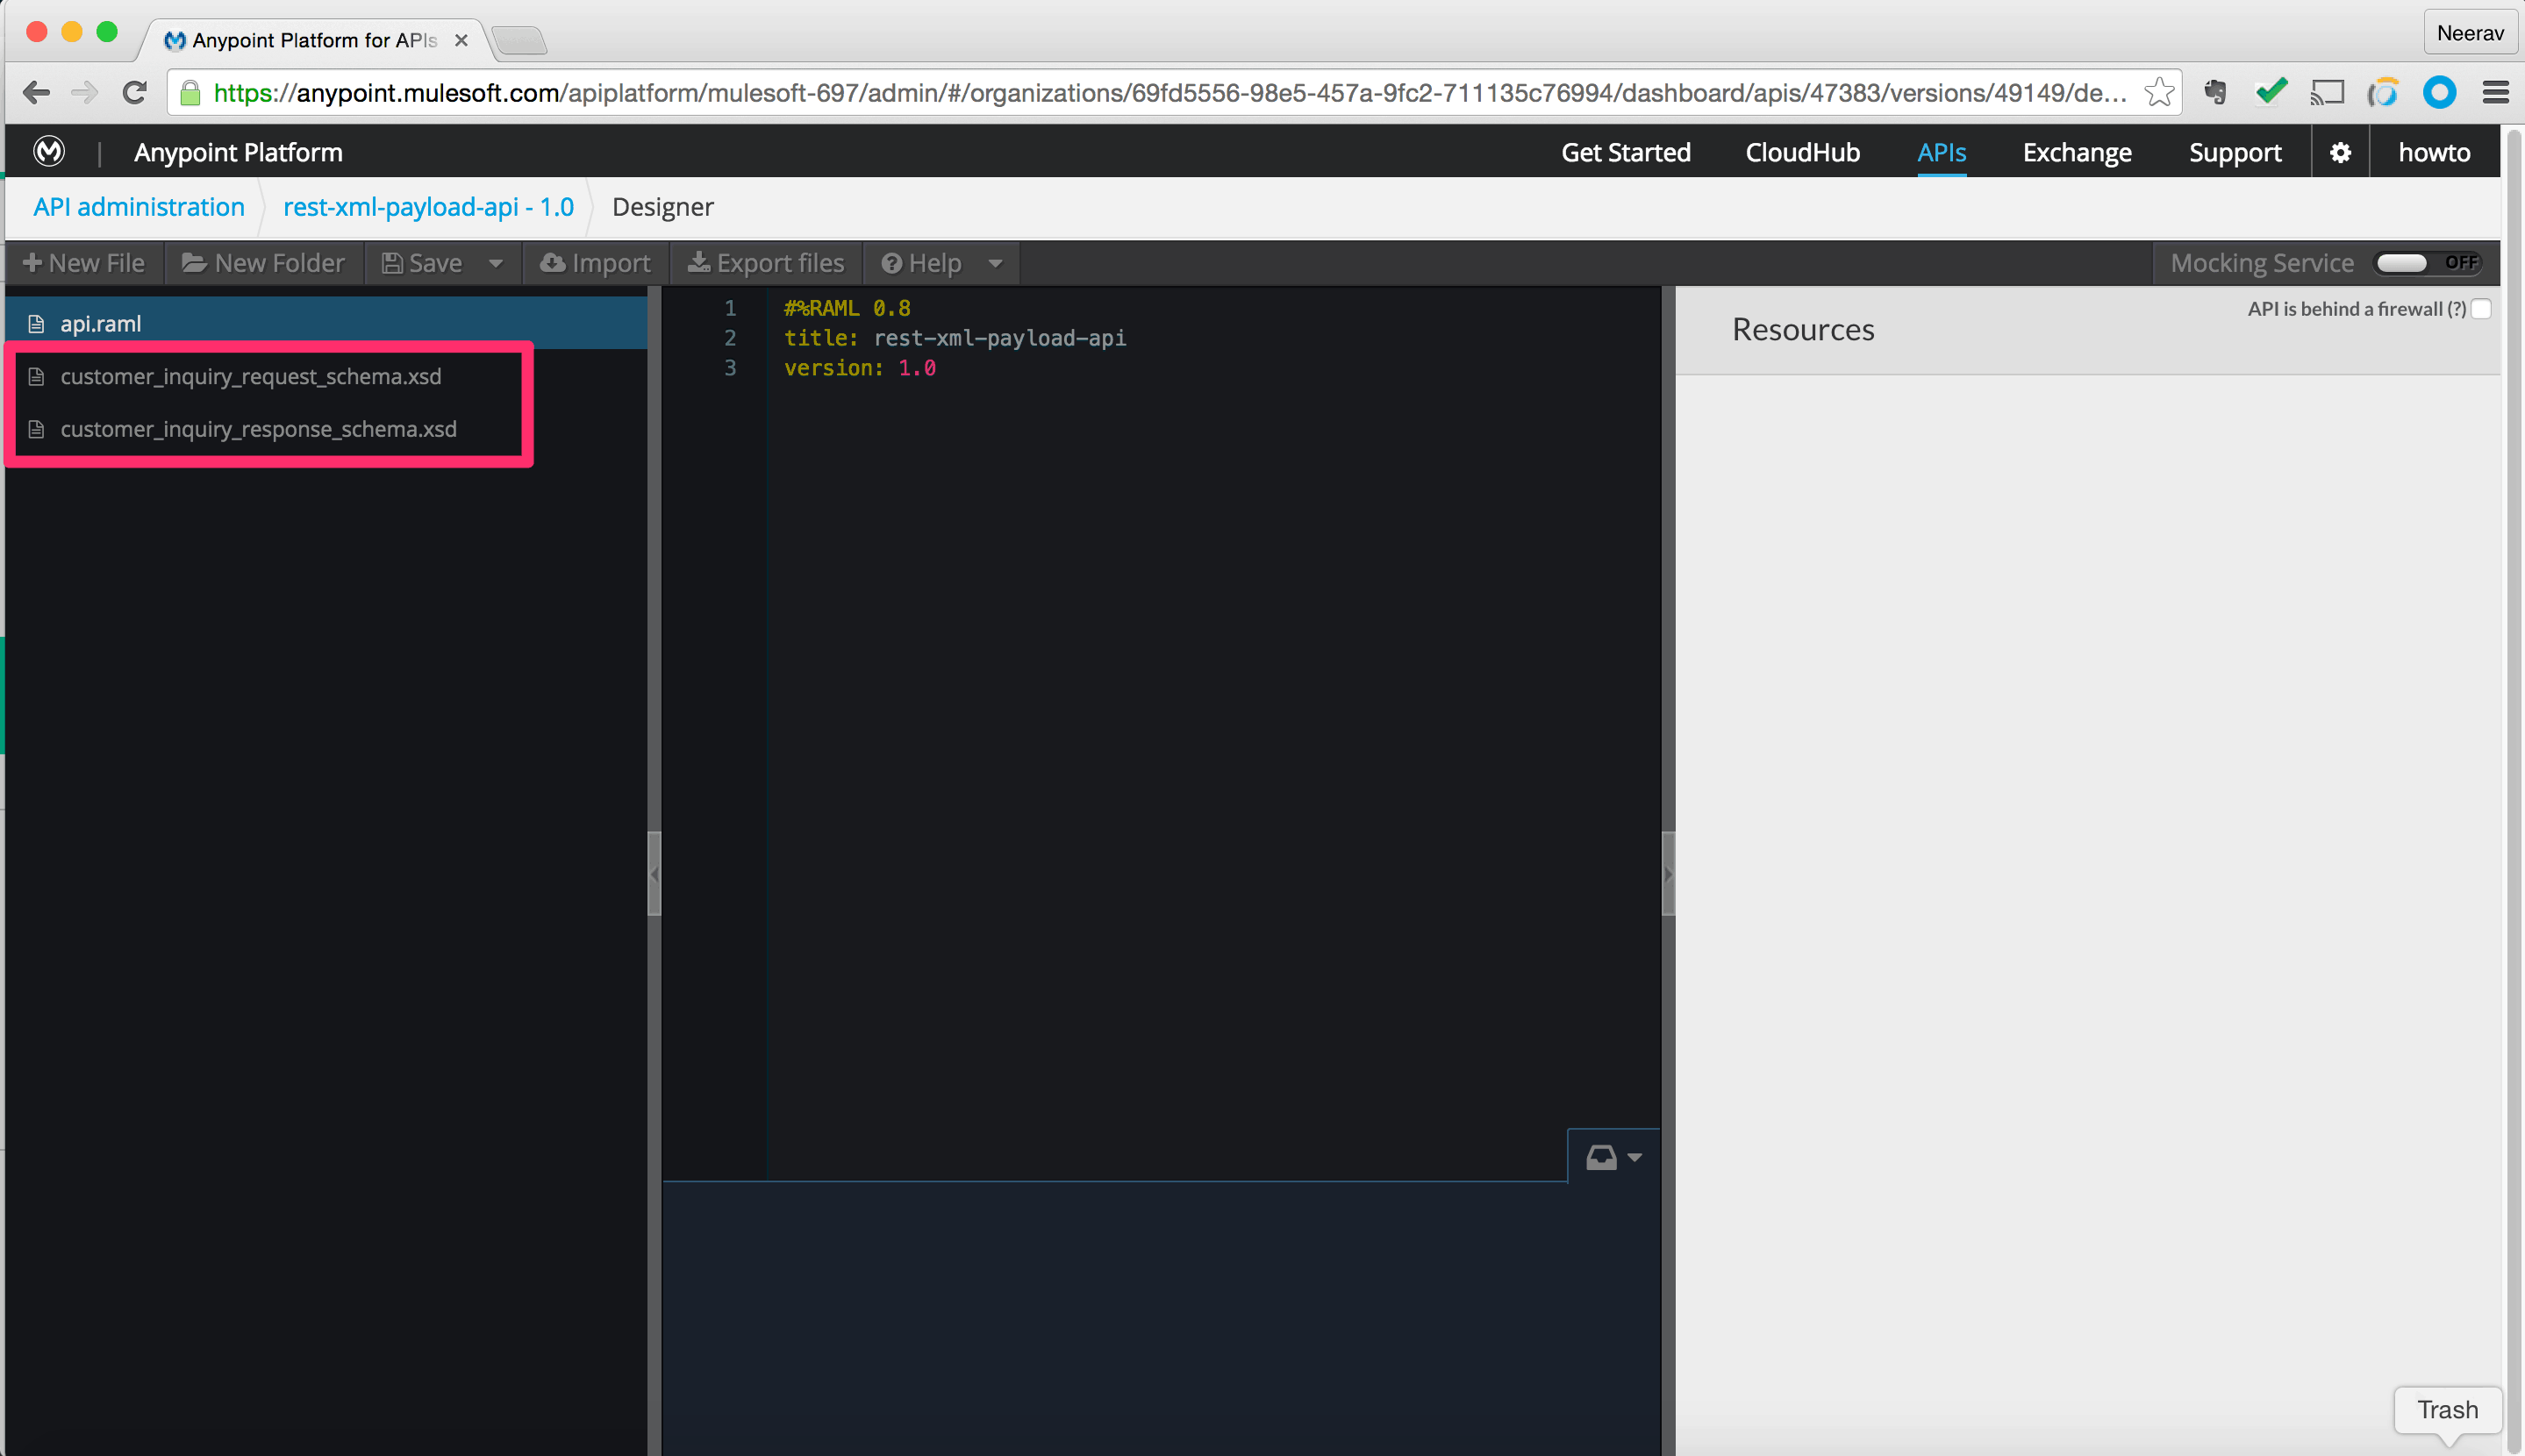
- Using the API Designer tool where we will start creating our API specification using RAML. Import the schema files we created earlier into API designer by clicking on “Import”.
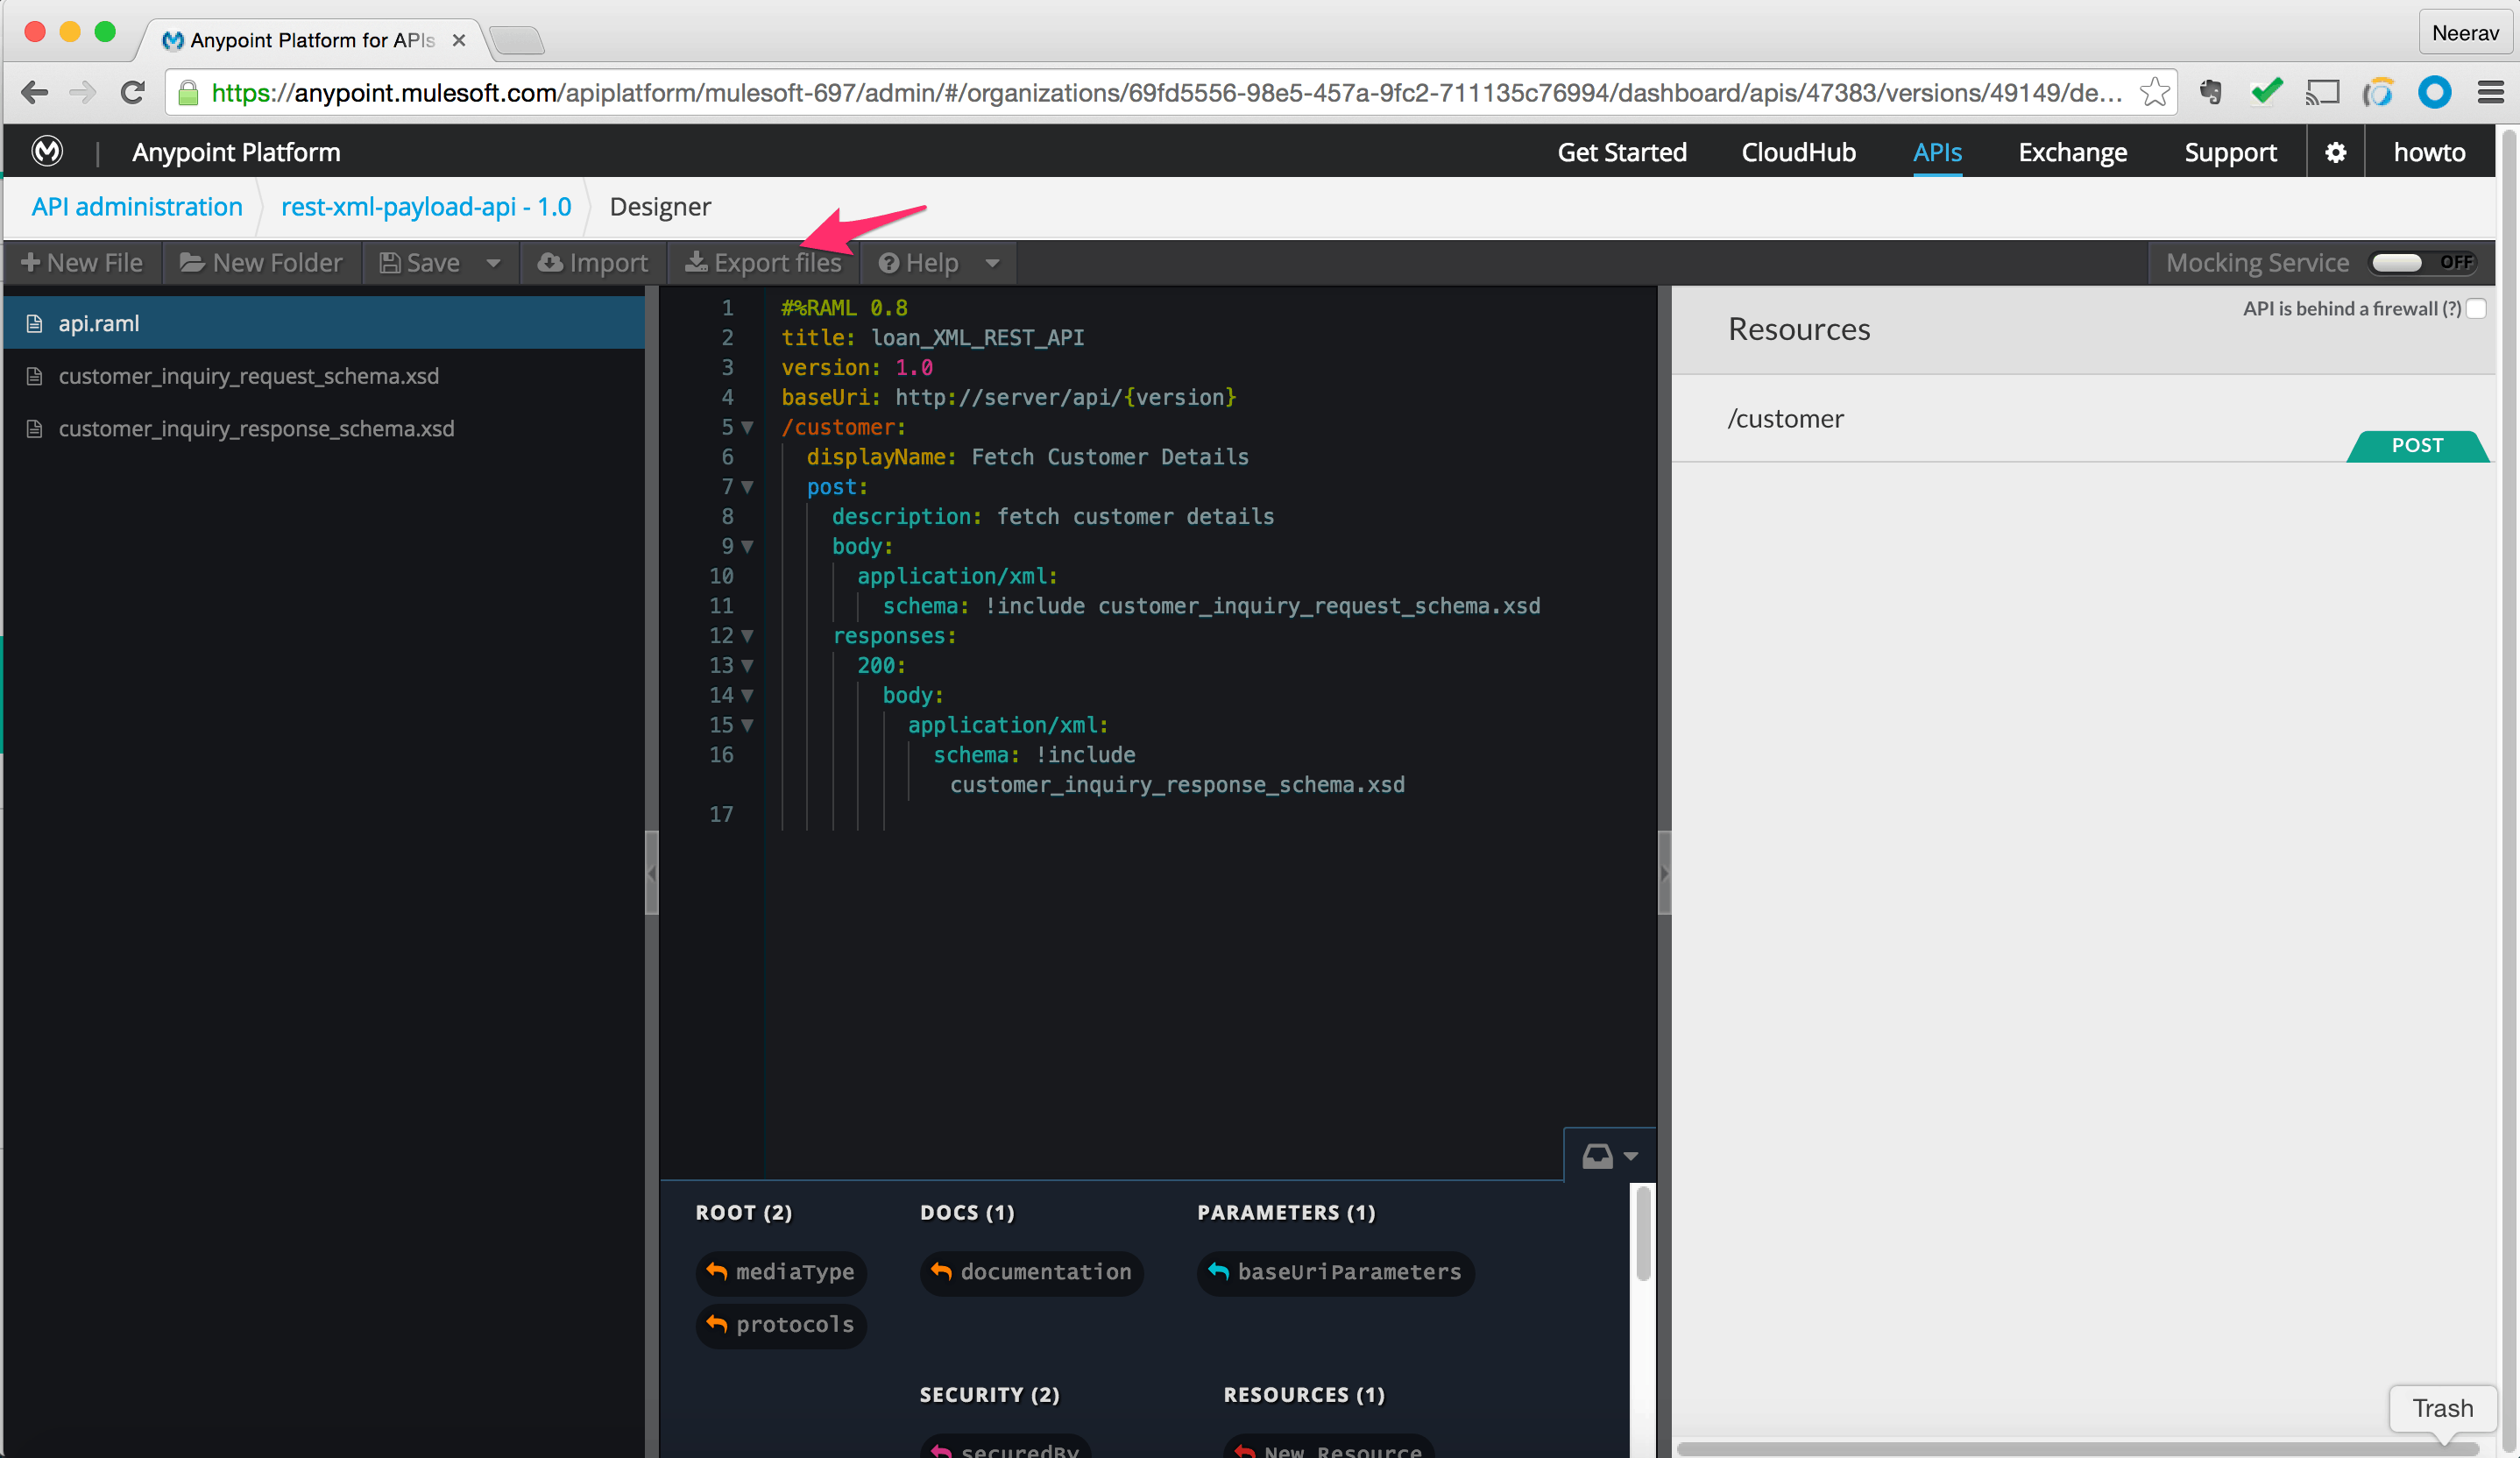
- Using simple descriptive language, we will document the requirements for our API to query customer details. For more information, please refer to the RAML tutorial here.
For this example download the RAML spec here.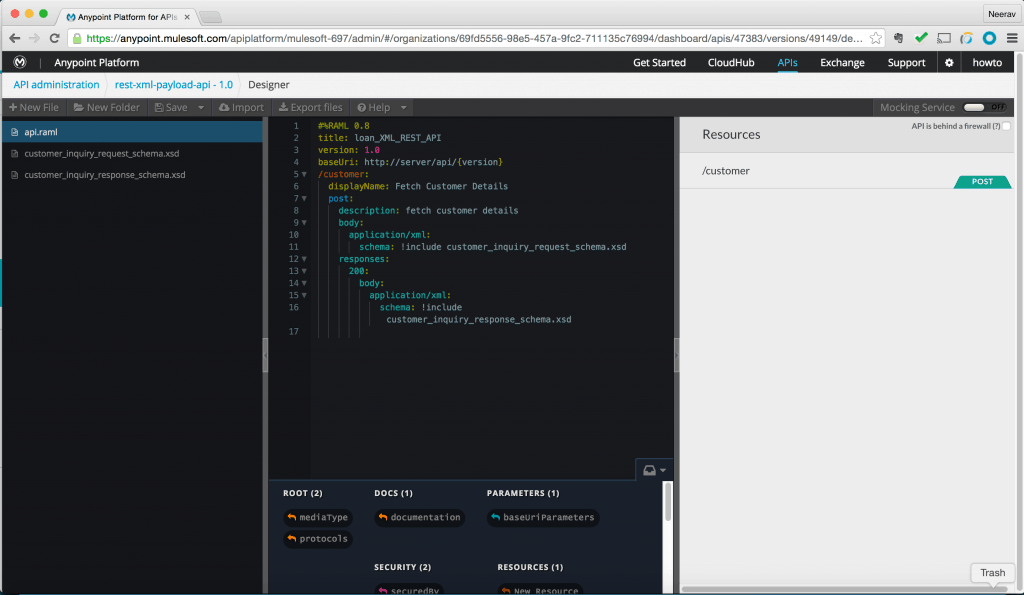
- Once we have confirmed and documented the API requirements, we will export the resulting RAML file along with the referenced XSD.
Using the API specification we just exported we will now configure the actual implementation of the operations defined in the RAML file. For this purpose, we will use Mulesoft Anypoint Studio.
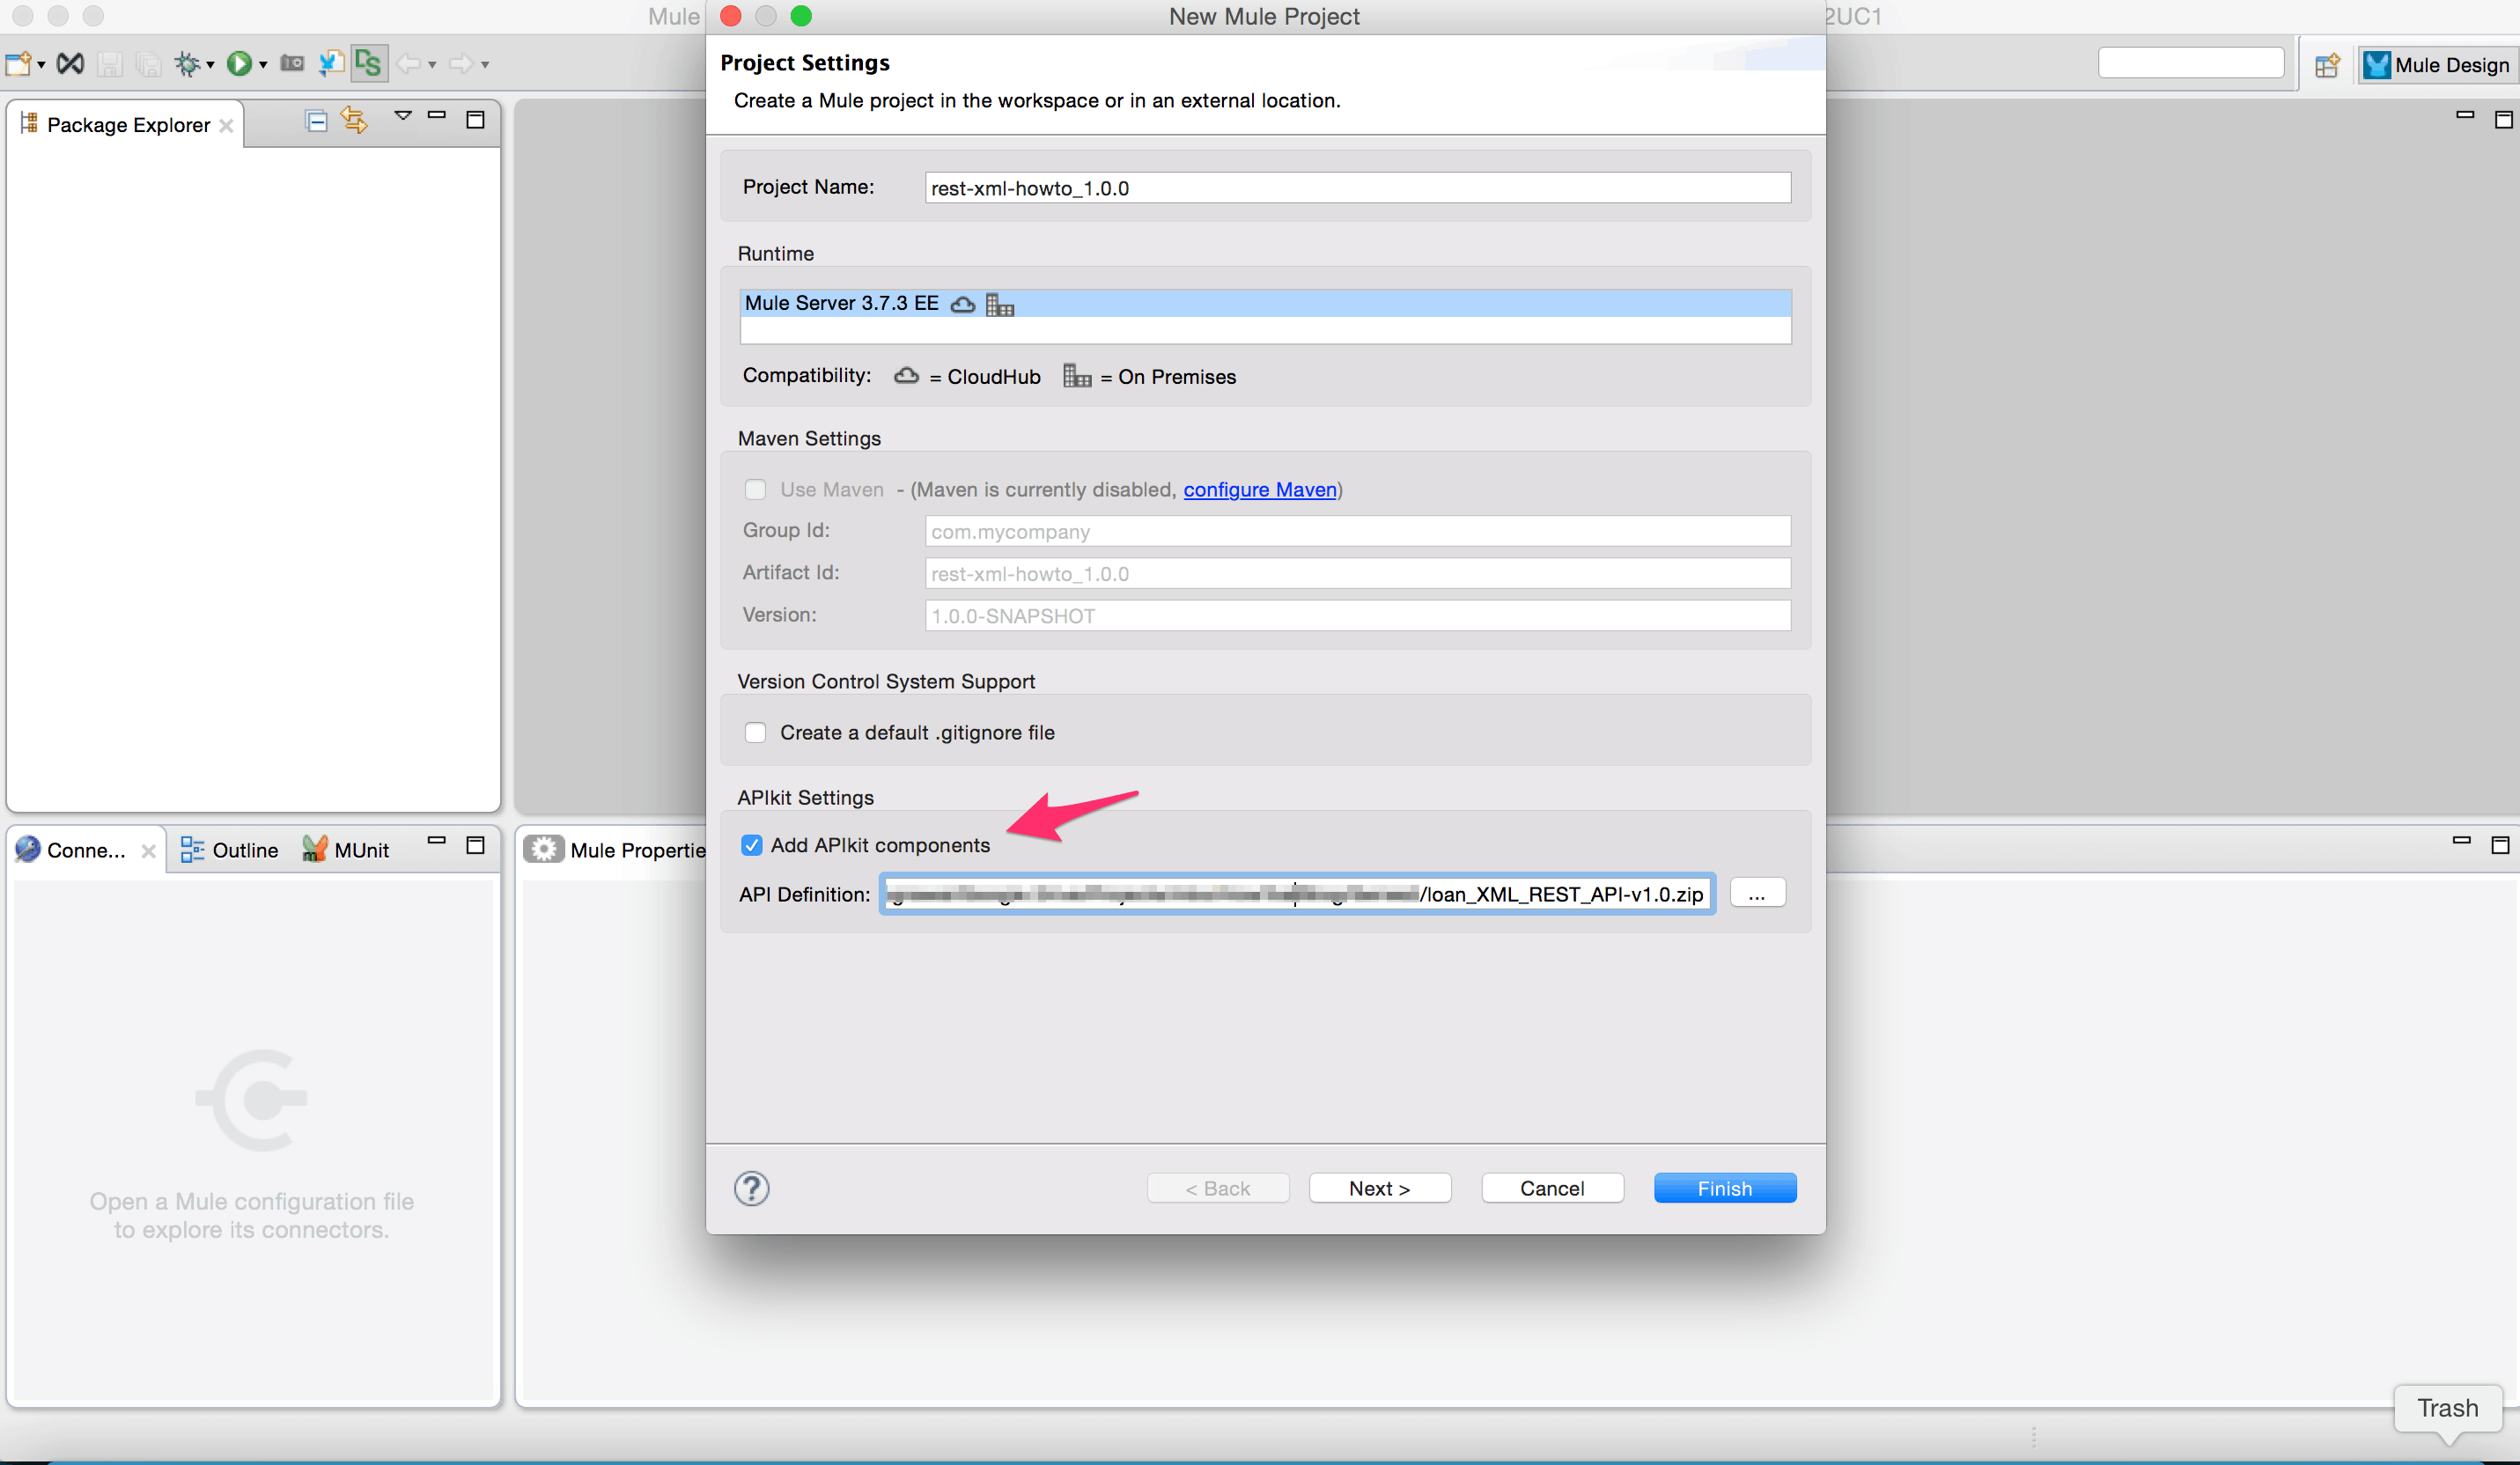
- Open up Studio. Create a new “Mule Project”. Give a name to the project. Since we are implementing the operations defined in the RAML file, we will reference the exported RAML archive at the bottom. Click Finish.
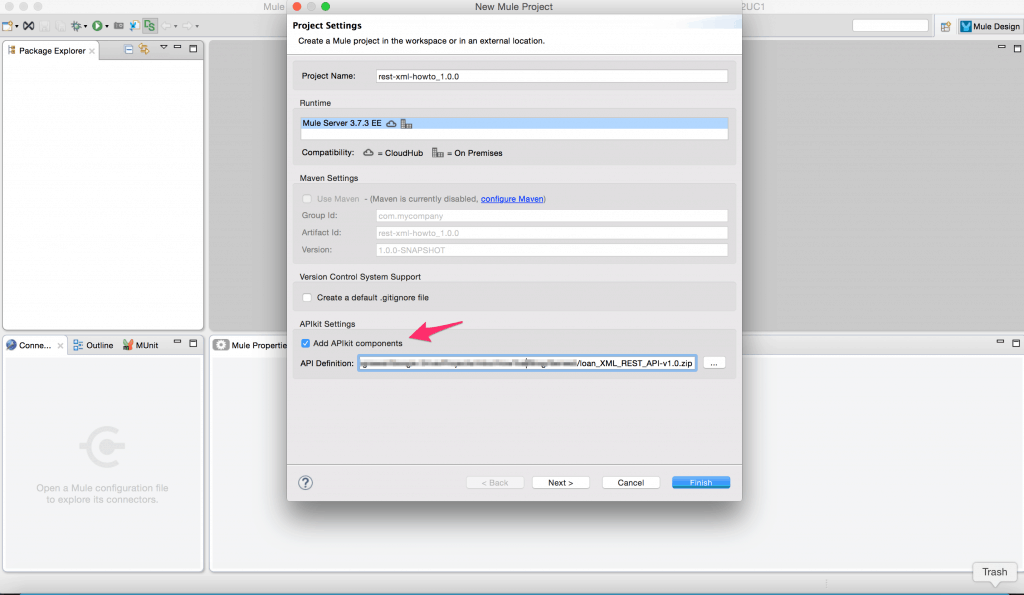
- Referencing the RAML file will preconfigure the application with the flows and exception handling.
We will configure the “Post” operation and add components to query the database and map the result set to the required XML payload.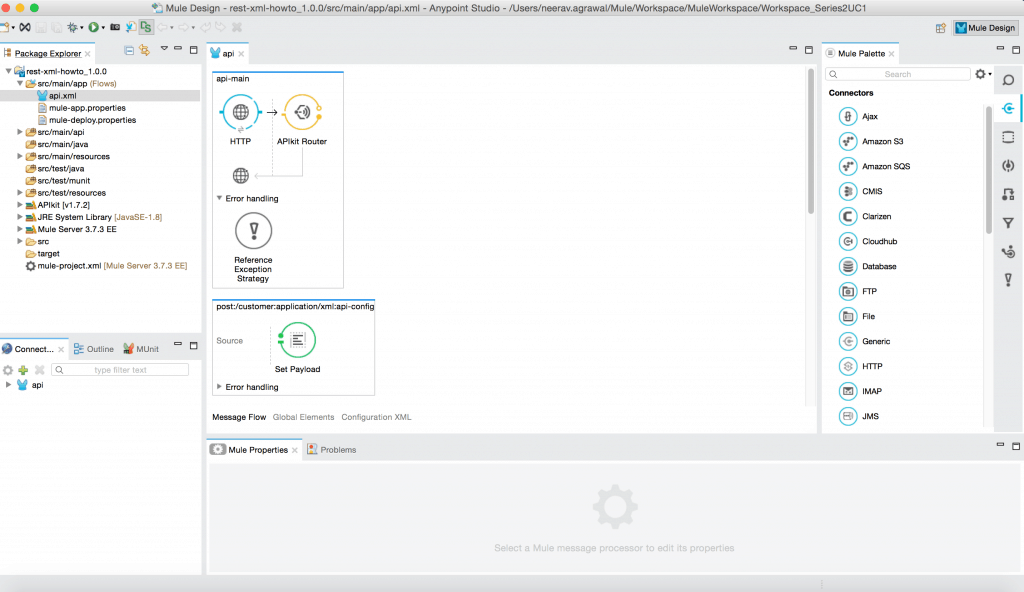
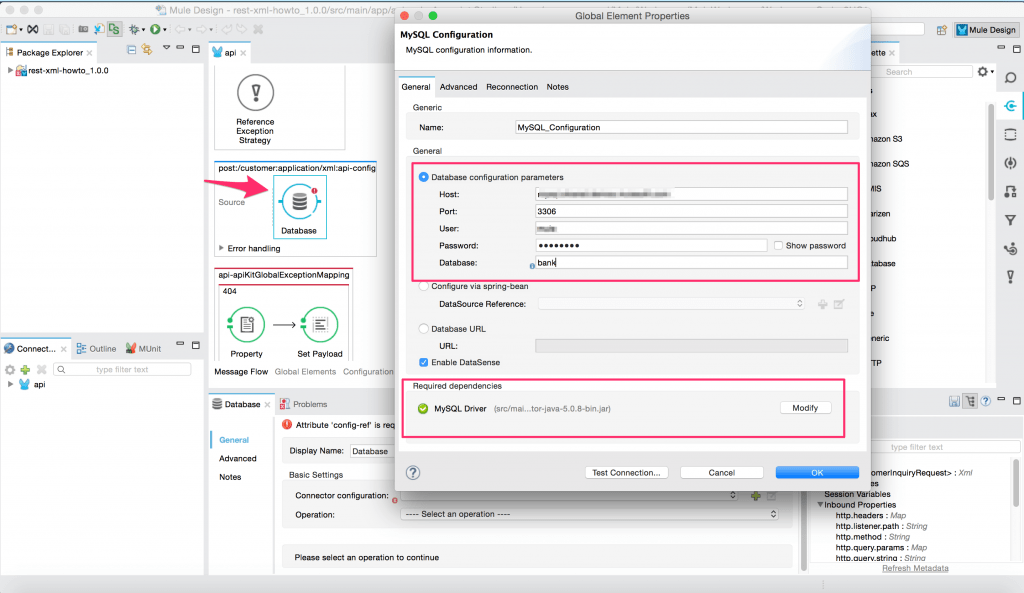
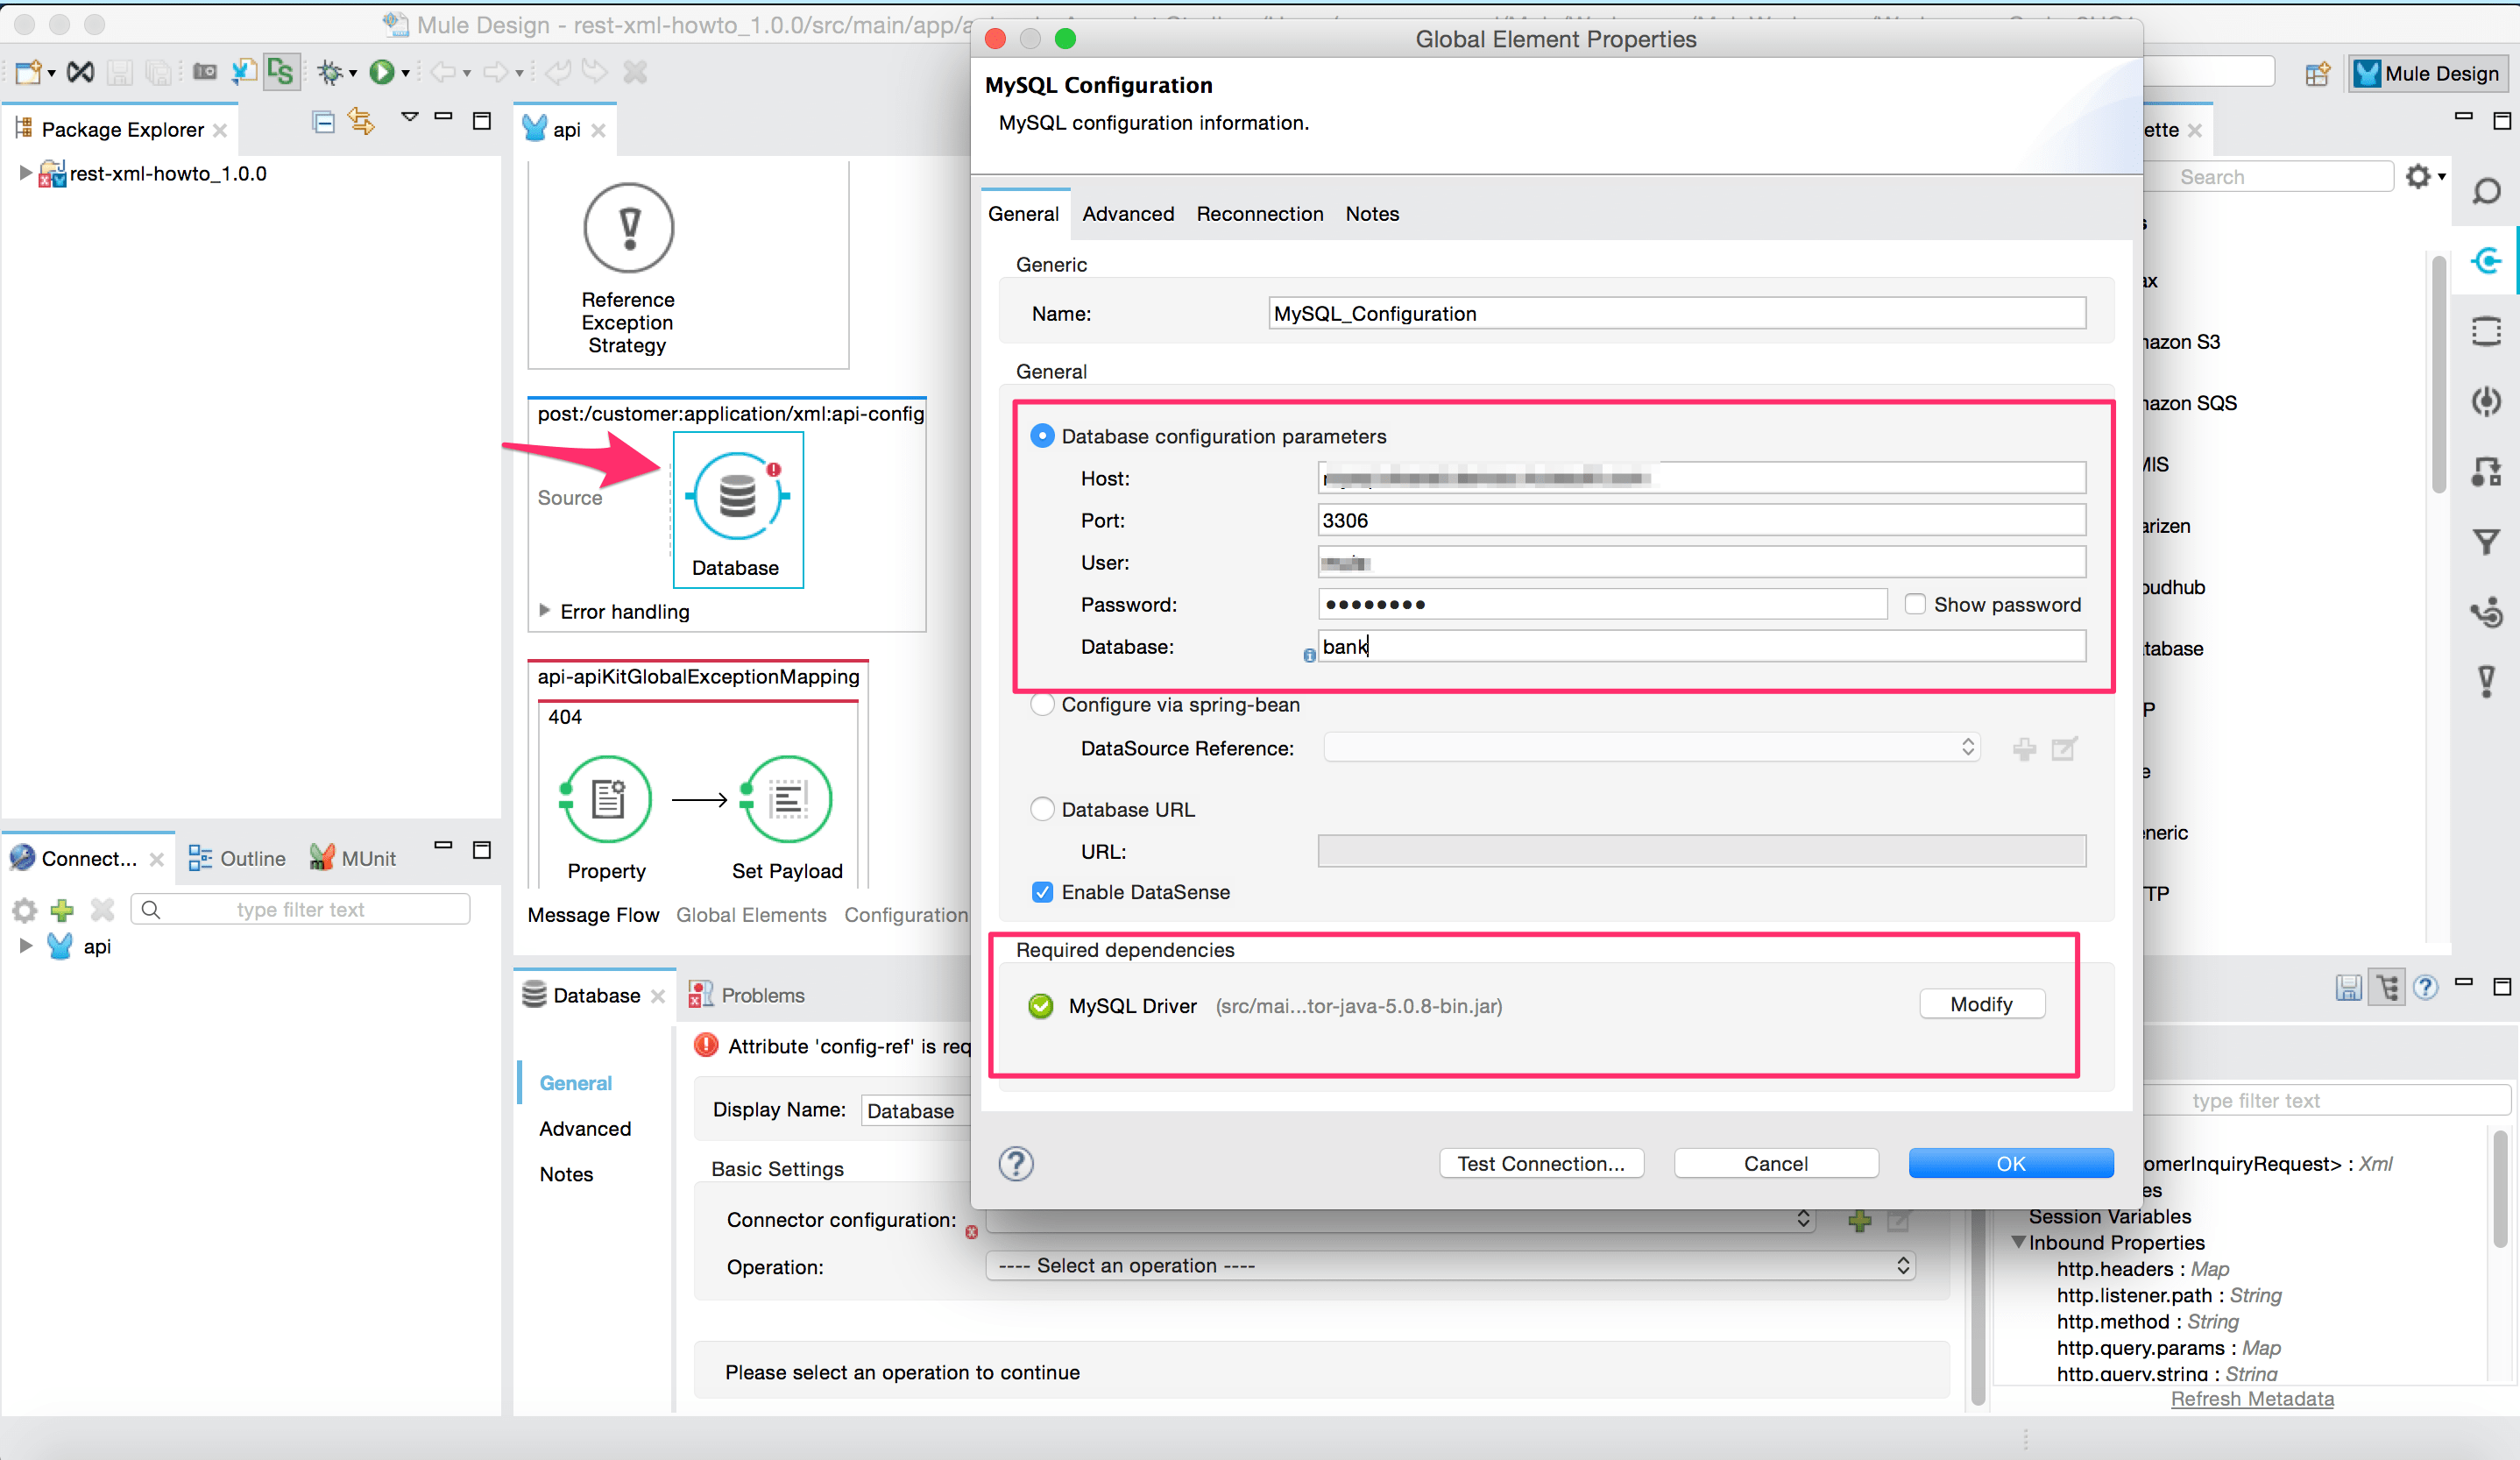
- Add the database connector. In this example, we are using a MYSQL database. So configure the connector with MySQLvers. You can configure any other JDBC database drivers here. Add in the relevant connection parameters and click “Finish”.
- Pick the “Select” operation and configure the select query. In this example, we are fetching the customerID from the XML input request. We will use this customerID in the select query to fetch the relevant customer record from the database table. We use an XPATH3 function to parse through the incoming XML payload. We use wildcard “*” to escape the namespace. If there is a need to incorporate the namespace, then refer to the documentation.

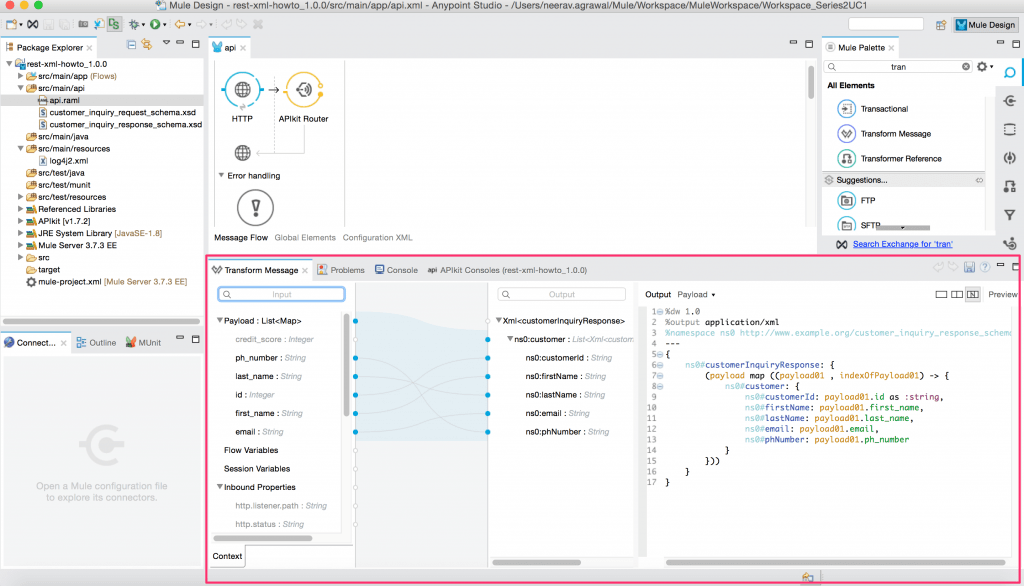
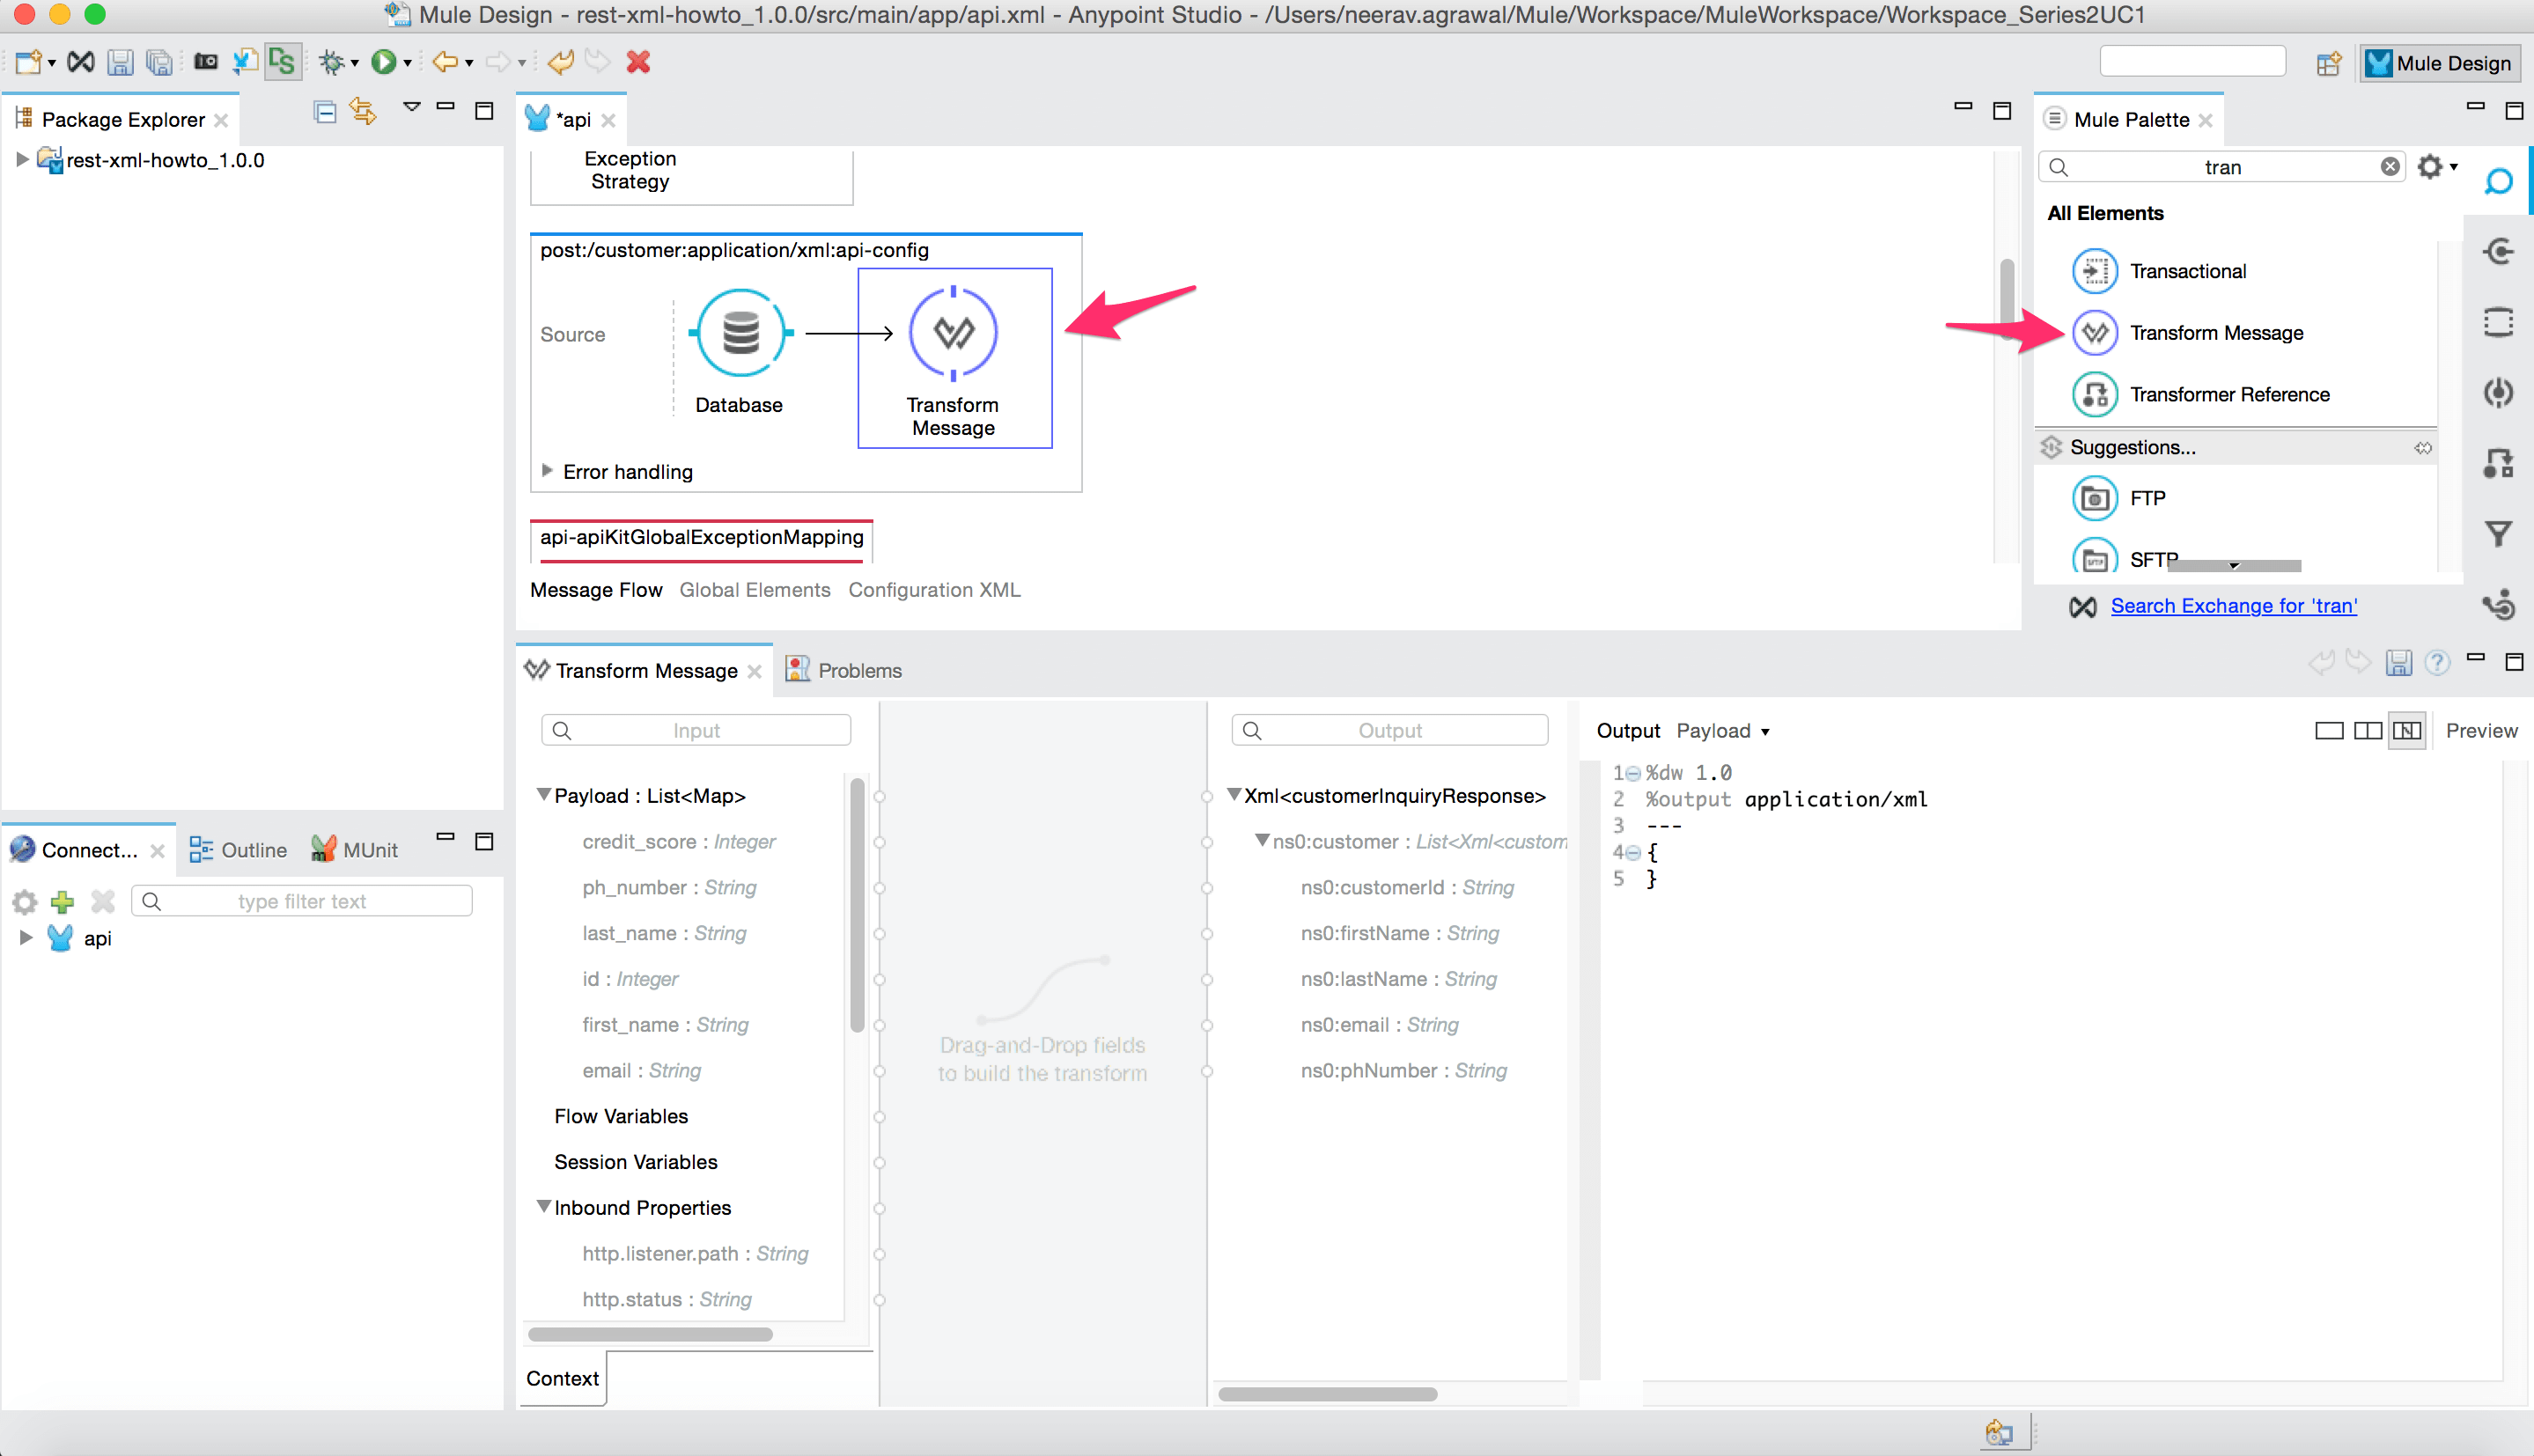
- Now that we have configured the database connector, we need to map the result set returned from the connector to the XML response payload. For this purpose, we will use the DataWeave transform component. Because of DataSense, metadata on the left and right side are automatically fetched making it very easy to map the data.
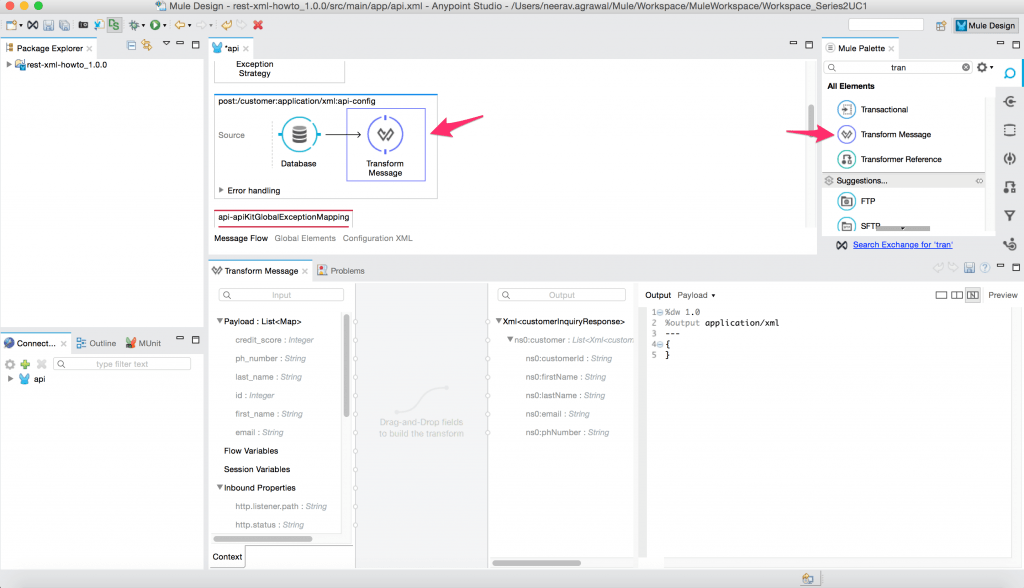
- Using the mapper, drag and drop the result set from left to right side. After which we map each relevant data element from left to right side.
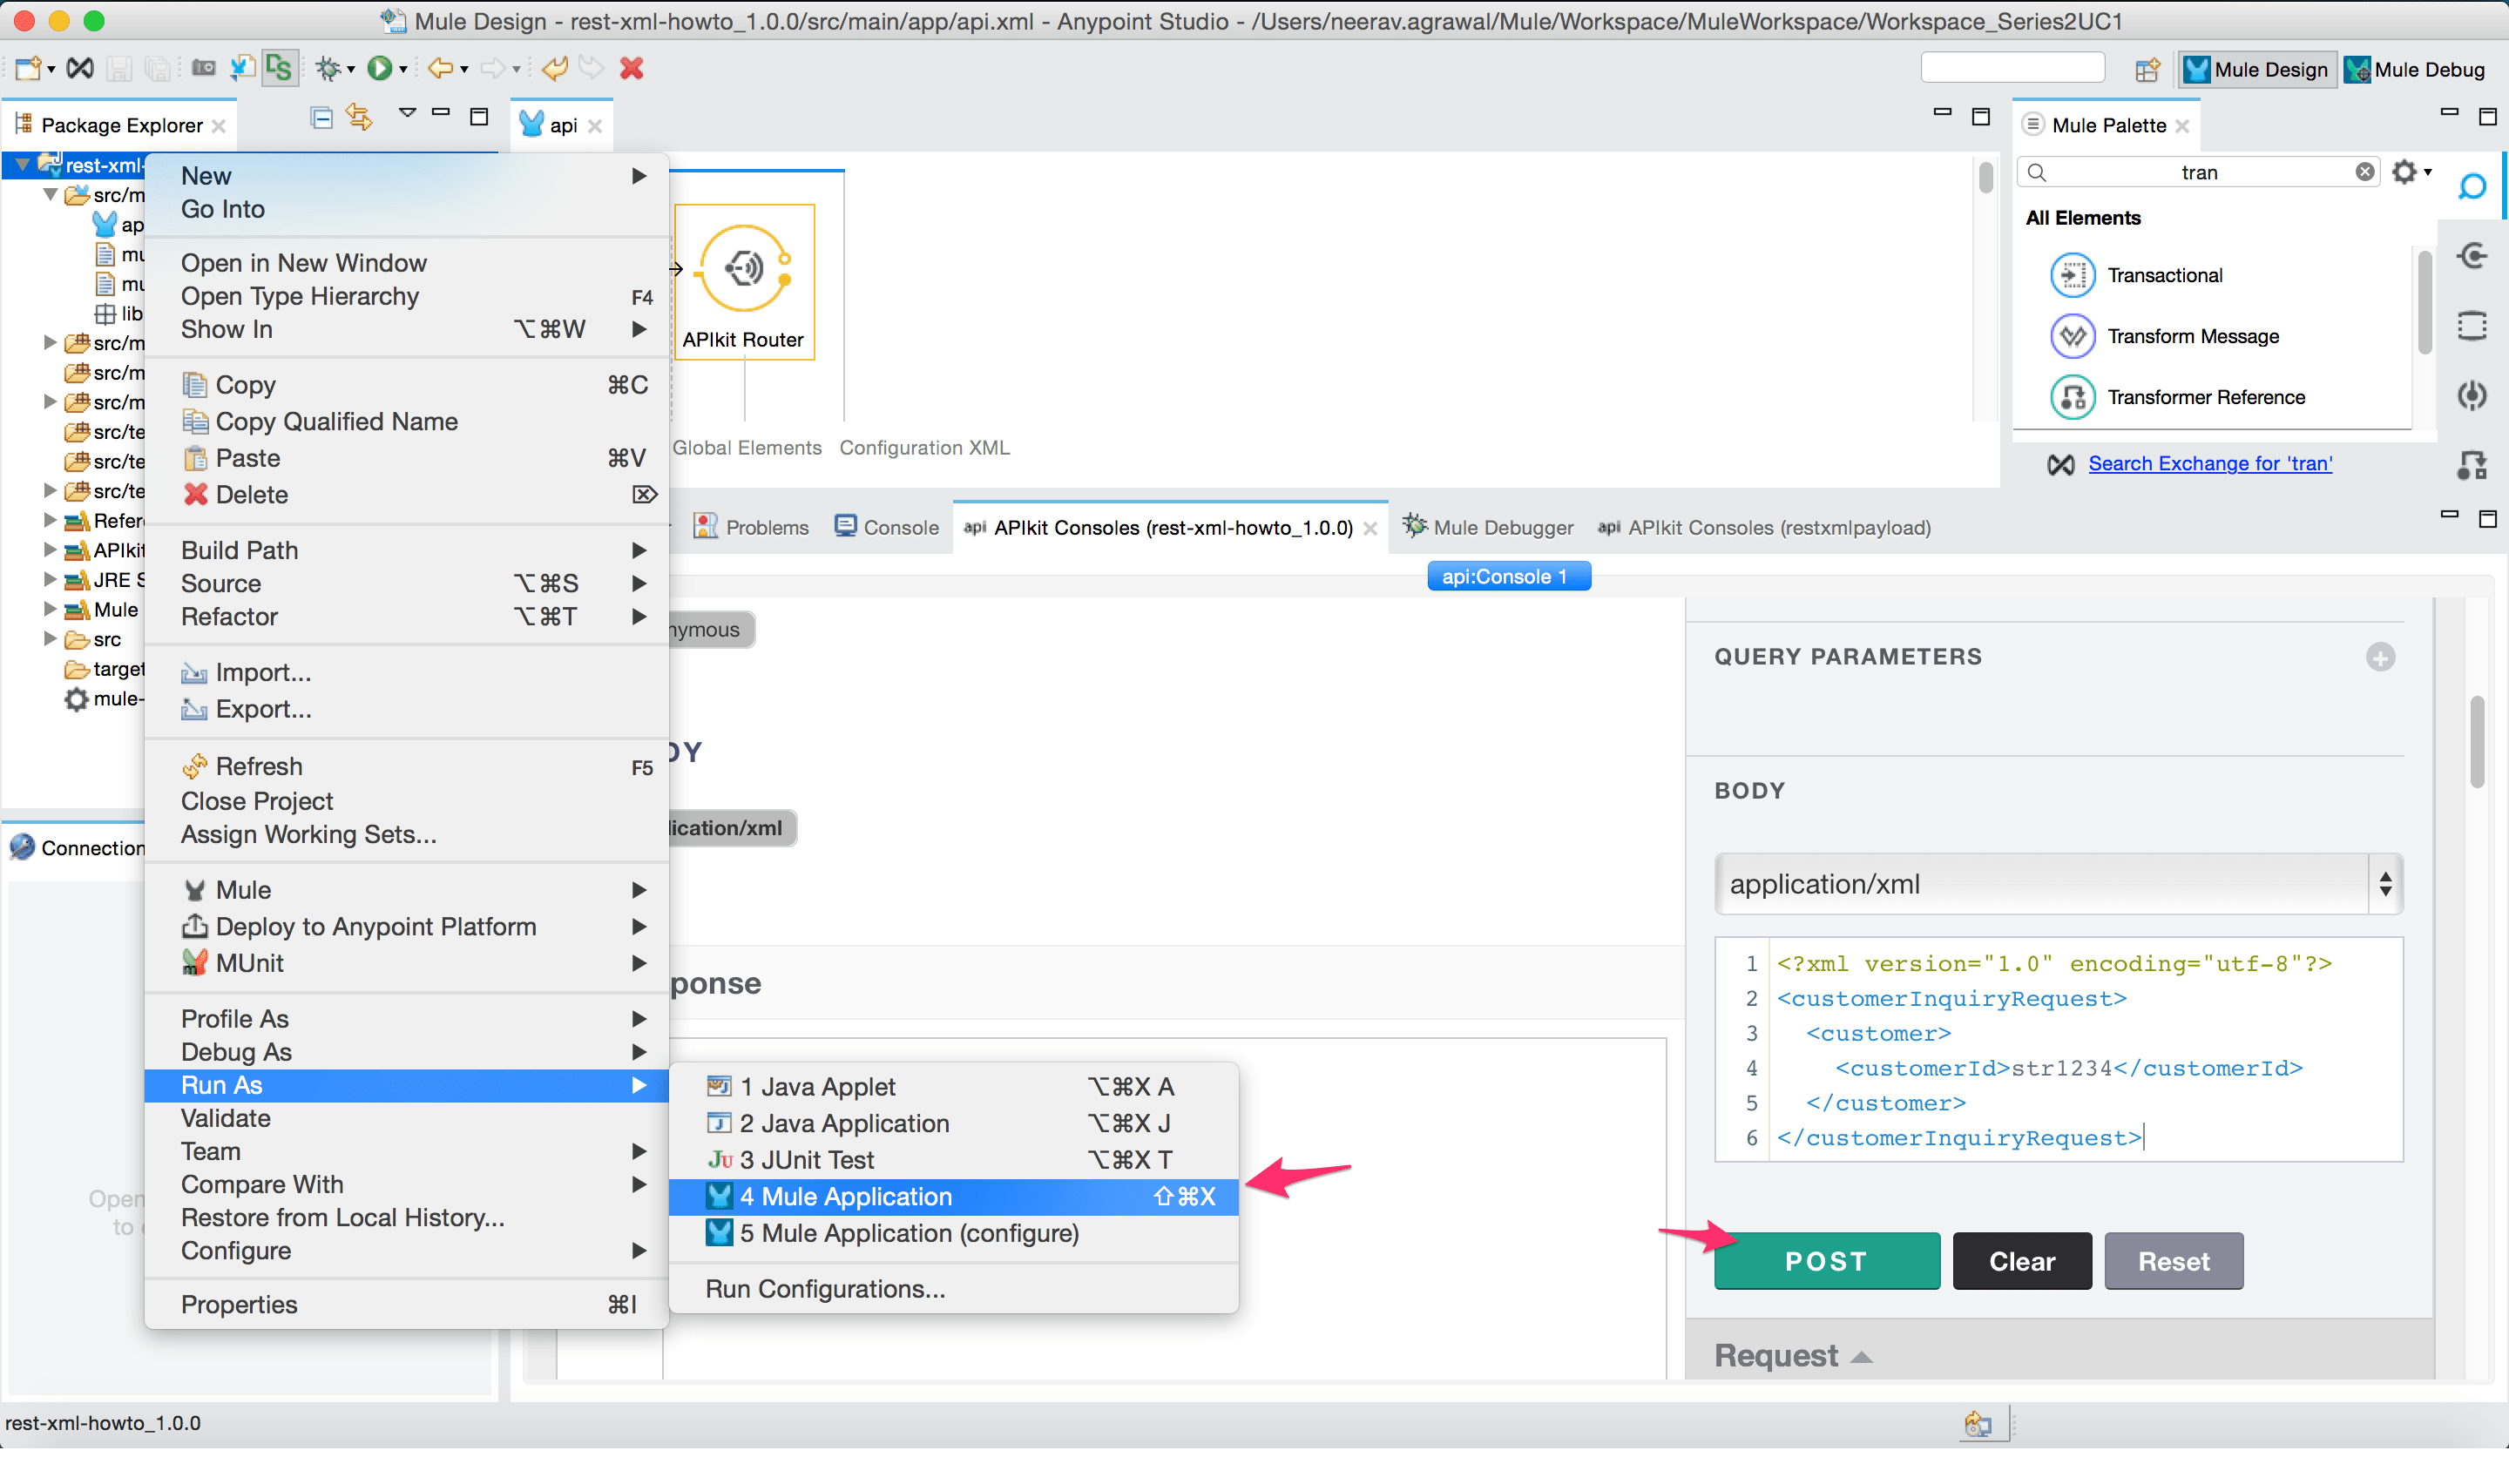
- Right-click on the project and run it in Anypoint Studio as a mule application which will open up the API console in Studio. We can test the API here by adding a sample request XML with a customer id. Press Send, which executes the flow we just configured and to fetch the customer details from the database table.


You can download this complete project from Anypoint Exchange.
In this post and from our previous post we have understood how easy it is to create an API with the end user in mind.
The trends suggest the shift towards RESTful APIs but the decision of the data format between JSON or XML is still fifty-fifty. In any case, we can have either or both data formats in our API repository.
In the next post, we will see how we can configure composite processes by utilizing multiple APIs with both JSON and XML data formats.
Published at DZone with permission of Neerav Aggarwal. See the original article here.
Opinions expressed by DZone contributors are their own.
Comments