Build a Stateless Microservice With GitHub Copilot in VSCode
In this guide, we will build a stateless Flask Microservice using GitHub Copilot, with its benefits, speed, and where to be cautious when using it.
Join the DZone community and get the full member experience.
Join For FreeMicrosoft CEO Satya Nadella recently announced that GitHub Copilot is now free for all developers in VSCode. This is a game-changer in the software development industry. Github Copilot is an AI code assistant that helps developers finish their coding tasks easily and quickly. It also helps suggest code snippets and autocomplete functions.
In this article, we will learn how to use GitHub Copilot using VSCode in a step-by-step manner for creating the first stateless flask microservice. This is a beginner-friendly guide showcasing how Copilot helps reduce the development time and simplify the process.
Setting Up the Environment Locally
As our primary focus will be on GitHub Copilot, I will write a high level on the software installation needed. If any installation issues are seen, it is expected that readers would have to solve them locally or comment in this article, where I can try to help.
1. Install Visual Studio Code on Mac or Windows from VSCode (In my examples, I used Mac).
2. Install GitHub Copilot extension in VSCode:
- Open VSCode and navigate to the Extensions view on the left, as per the below screenshot.

- Search for "copilot," and GitHub Copilot will appear. Click install. With this step, the Copilot extension is added to VSCode.
3. Activate the Copilot:
- If you do not have a GitHub account, please create one in GitHub.
- Back to VSCode, after installing Copilot, we can see in the Welcome tab that it will ask to sign up. Sign up using a GitHub account.
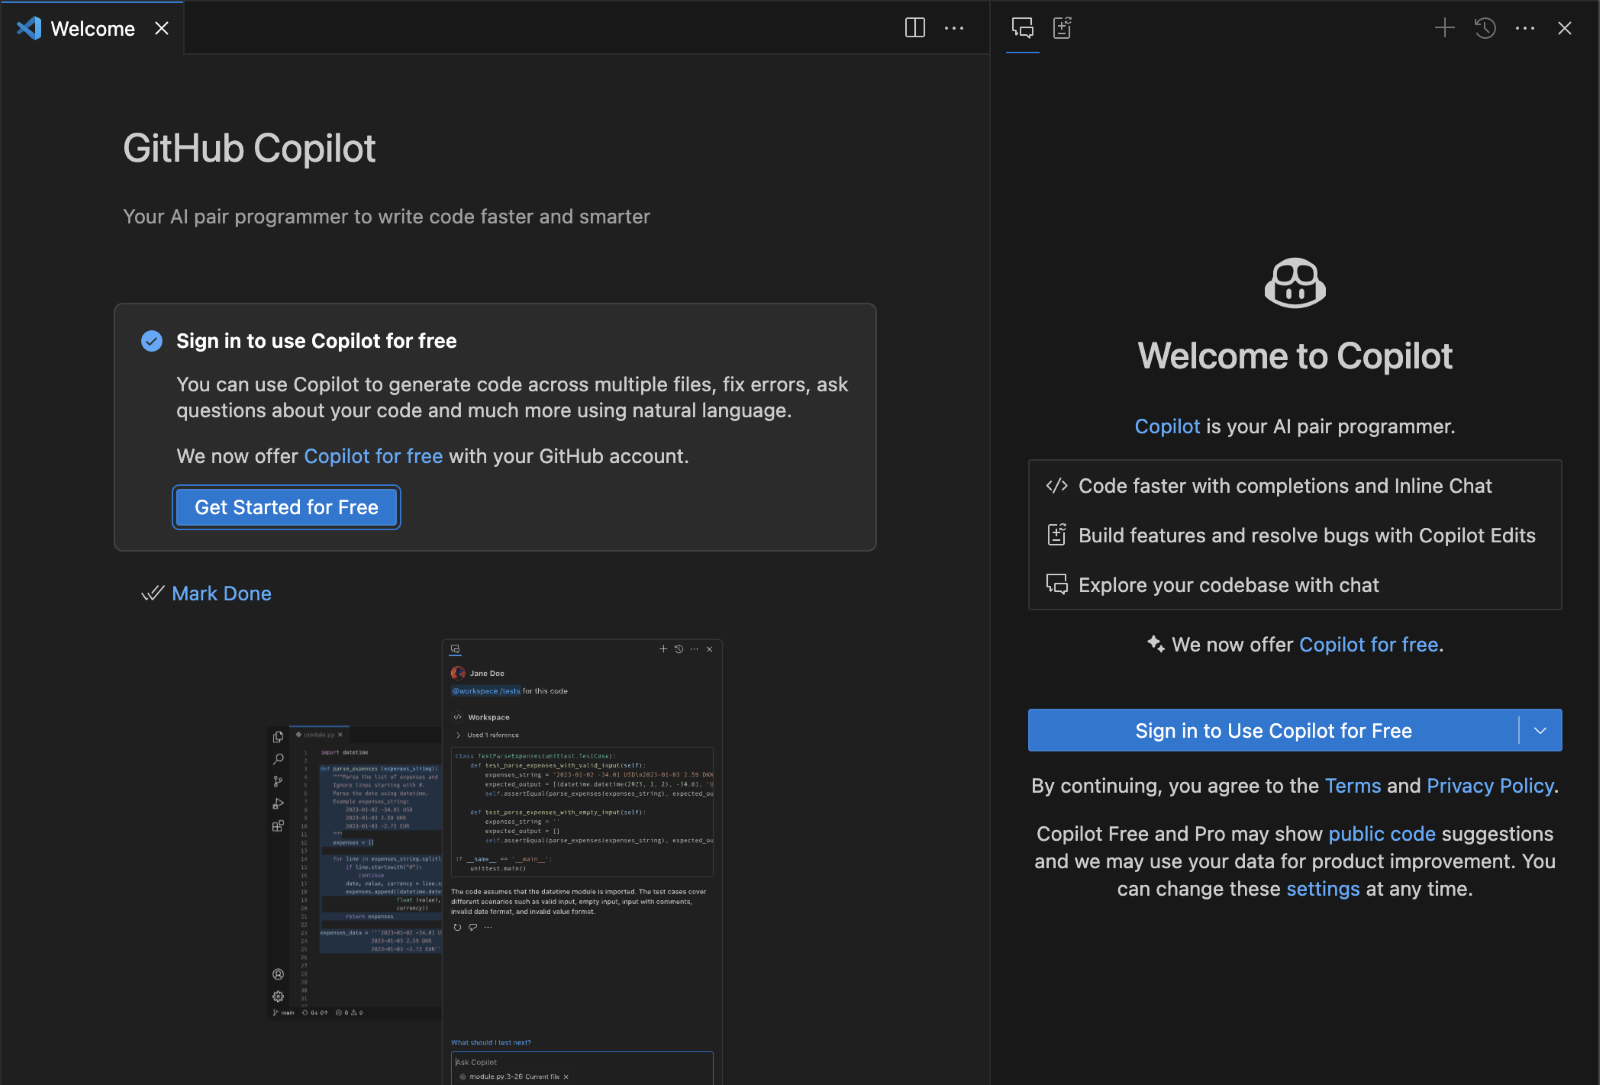
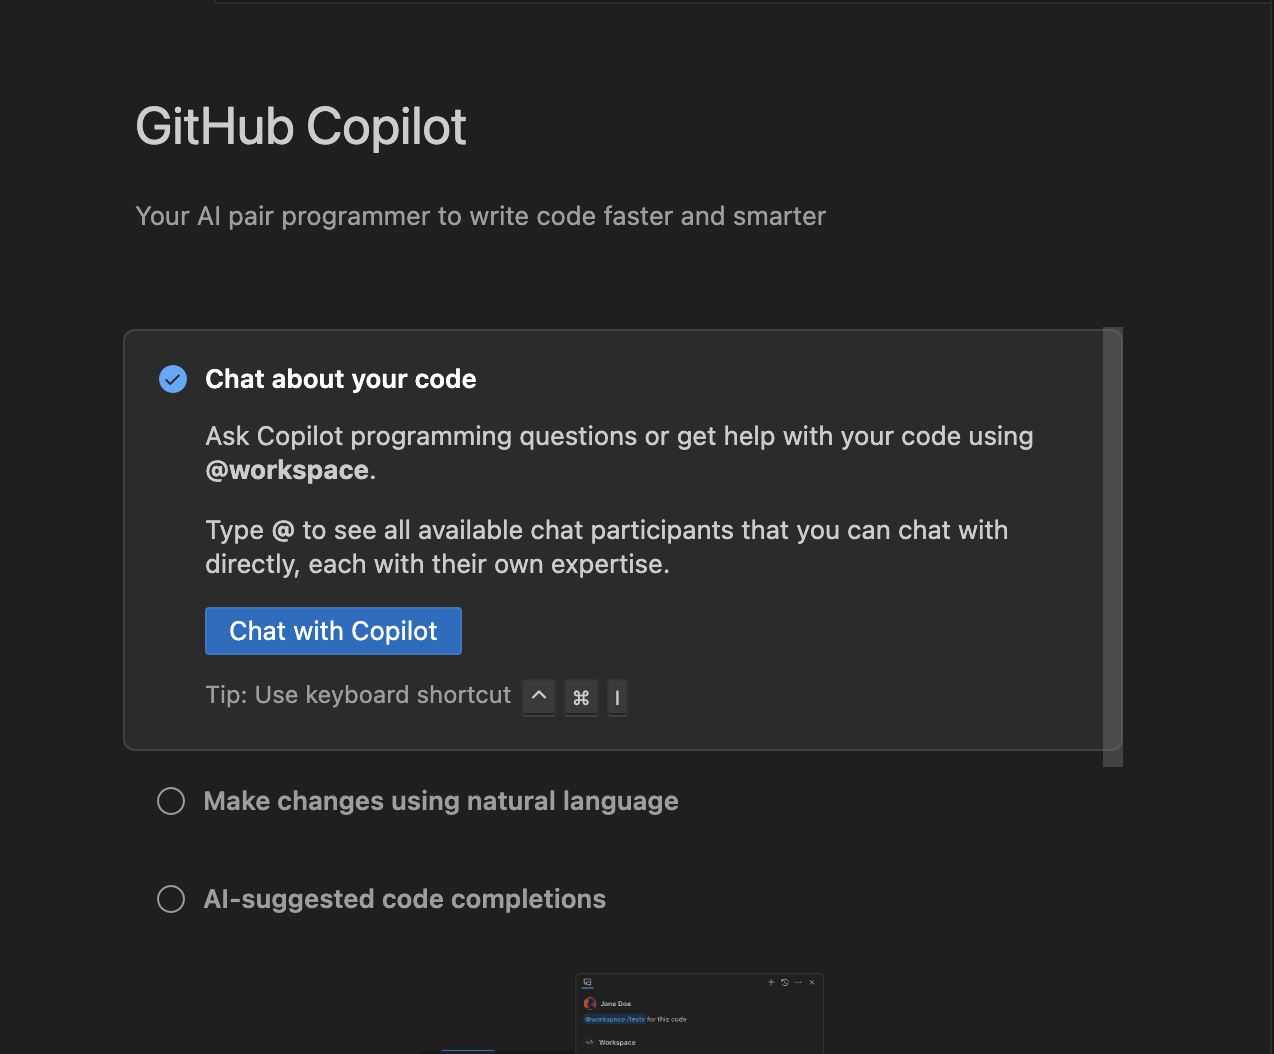
- Click "Chat with Copilot," and you will see the right side of VSCode, Copilot appears. Click "Chat with Copilot." We will see that the Copilot chat appears on the right-hand side of the VSCode palate.
4. Install Python in your system from Python based on Windows/Mac. Note that we are not installing Flask now; we will do it in a later step while installing the application to run.
Writing the Microservice Using CoPilot
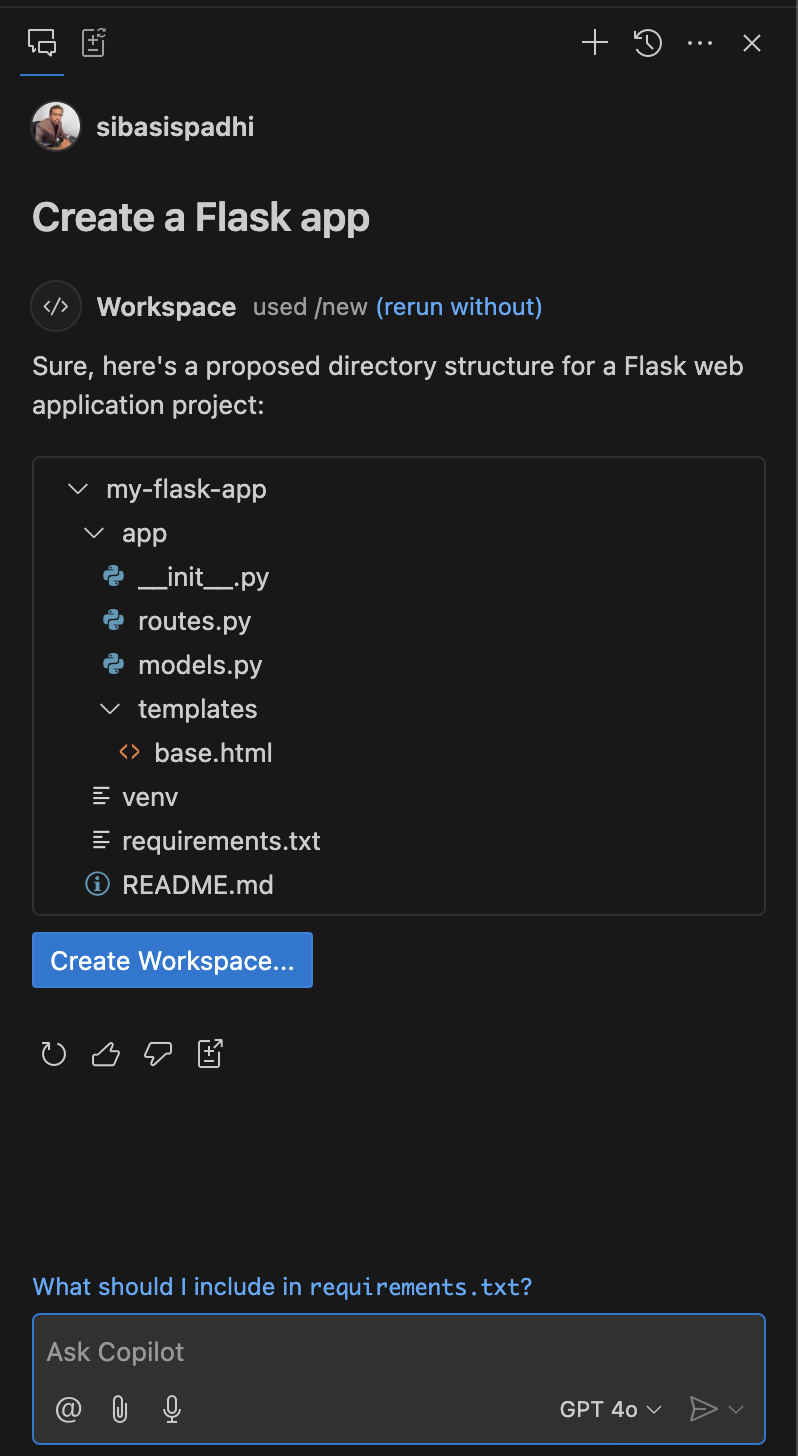
1. In VSCode, on the right side with the Copilot pallet, under "Ask Copilot," type: Create a Flask app.
There are two ways we can ask Copilot. One is to create the Flask project folder with files and ask Copilot to add the code. Or, start from nothing and ask to create a Flask app.
We notice that it will create a workspace for us along with all file creation, which is awesome, and the project gets created with the required files within a few seconds. Click -> Create Workspace -> give the location to save the project. The project will appear in VSCode.
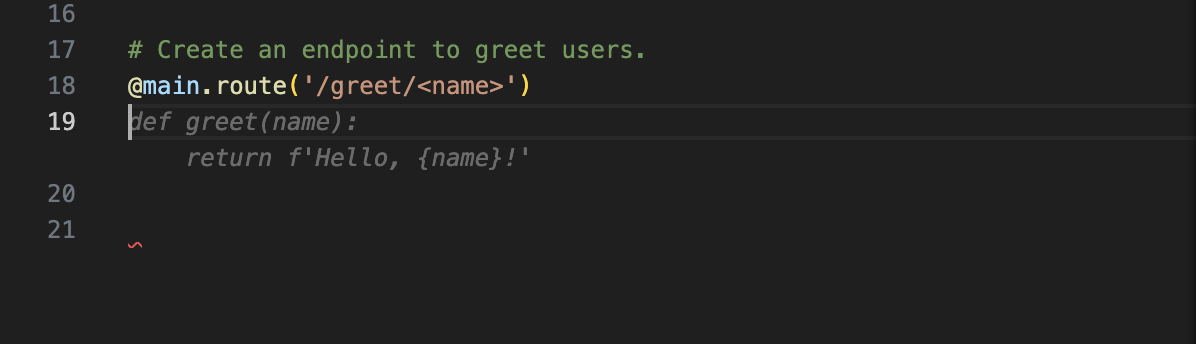
2. We see that the project-created files will have routes.py, where a few default APIs are already generated. Now, we will create 2 APIs using Copilot. The first API is simple and used to greet a person. It takes the name of the person as input and out as "Hello, {name}."
- Open the routes.py file and add a comment as below:

- As soon as we hit enter, we see the code generated. Now press the tab, and we will see that the API code is generated. That's the advantage of using Copilot.
- Similarly, let's create another simple API that takes two integer values as input and returns the multiplication by using Copilot. This time we will try it in the right pallet of VSCode rather than in the routes.py file.
# Create an endpoint to multiply two numbers.
@main.route('/multiply')
def multiply():
    try:
        num1 = float(request.args.get('num1'))
        num2 = float(request.args.get('num2'))
        result = num1 * num2
        return f'The result of {num1} * {num2} is {result}'
    except (TypeError, ValueError):
        return 'Invalid input. Please provide two numbers as query parameters.'
However, I see a different code was generated when I asked Copilot to write the API inside the routes.py file. See below:
# Create an endpoint to multiply two numbers.
@main.route('/multiply/<int:num1>/<int:num2>')
def multiply(num1, num2):
    return f'{num1} * {num2} = {num1 * num2}'
The reason here is based on the previous context it generates the code. When we were on the routes.py file and asked the Copilot to generate the API code, it generated based on the context that the API should have two inputs and return the output. But when we requested to generate in the right palate, it generated based on the previous question with the context that it's a flak app, and input will come from the request param. So here, we can safely conclude that based on previous context, it will generate the next output.
Now, both our APIs are ready, so let's deploy the app and test it. But we have not installed Flask yet. So, let's do that.
1. Activate the virtual environment and install Flask.
source venv/bin/activate # On Linux/Mac
venv\Scripts\activate # On Windows
pip install flask
When we run the application, we see an issue in the startup due to the generated code. Below is the error:
  File "/Users/sibasispadhi/Documents/coding/my-flask-app/venv/lib/python3.12/site-packages/flask/cli.py", line 72, in find_best_app
    app = app_factory()
          ^^^^^^^^^^^^^
  File "/Users/sibasispadhi/Documents/coding/my-flask-app/app/__init__.py", line 14, in create_app
    app.register_blueprint(routes.bp)
                           ^^^^^^^^^
AttributeError: module 'app.routes' has no attribute 'bp'
(venv) sibasispadhi@Sibasiss-Air my-flask-app %
The create_app function in our project's app/__init__.py file is calling app.register_blueprint(routes.bp), but the routes.py file doesn’t have bp (Blueprint object) defined.
Below are the changes done to fix the problem. (See the code commented is the one autogenerated).
    # Register blueprints
    from . import routes
    # app.register_blueprint(routes.bp)
    app.register_blueprint(routes.main)
Re-running the application will successfully deploy the application, and we are ready to test the functionality. The APIs can be tested using Postman.
2. Testing through Postman gives the results successfully.

Conclusion
GitHub Copilot generates the project and the boilerplate code seamlessly and it saves development time and effort. It's always advised to review the generated code so that it matches developers' expectations. Whenever there is an error, we must debug or request Copilot further suggestions to solve the problem.
In this project, Copilot helped us create and run a stateless Flask microservice in no time. We faced some initial hiccups, which were solved after debugging, but overall, the development time was faster. I would suggest all readers start exploring Copilot today and enhance their day-to-day productivity.
Stay tuned for my next set of articles on Copilot, where we will dive deep into more real-world scenarios and see how it solves our day-to-day tasks in a smooth manner.
Opinions expressed by DZone contributors are their own.
Comments