How to Build a Custom Mule Connector in Java
Want to learn how to build a custom mule connector in Java? Check out this tutorial to learn how with the ConnectorConfig and SampleDynamicsConnector classes.
Join the DZone community and get the full member experience.
Join For FreeBefore we get started, here are some helpful links from Mule Documentation to get you introduced to building mule connectors.
What is Anypoint Connector DevKit?
Creating an Anypoint Connector Project
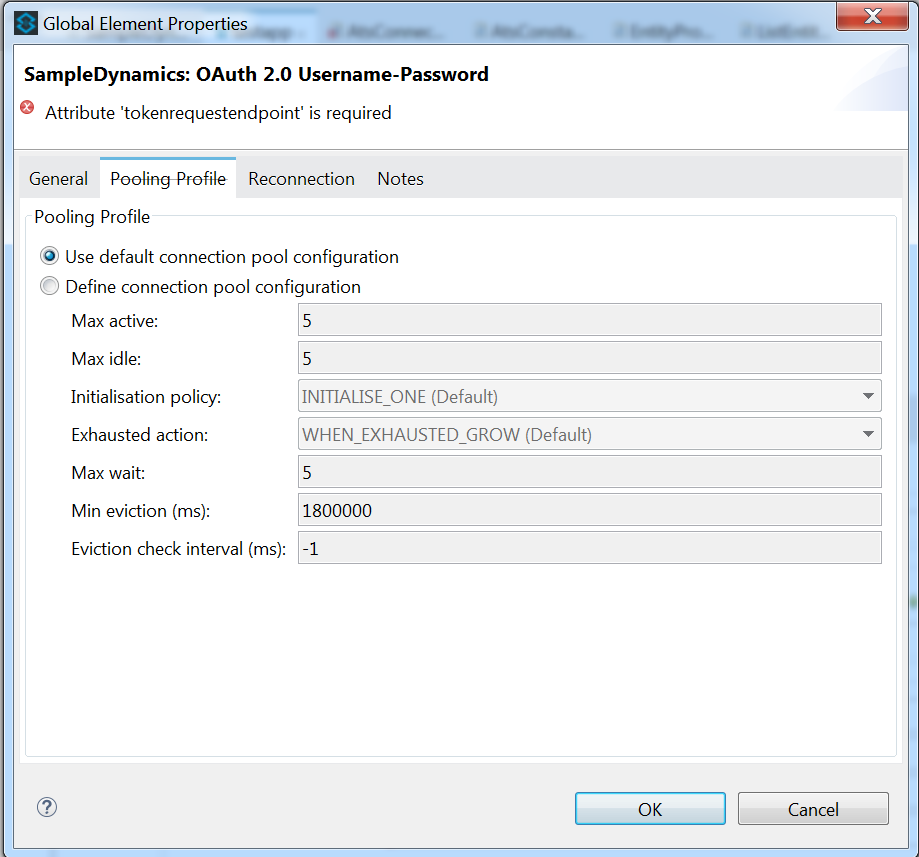
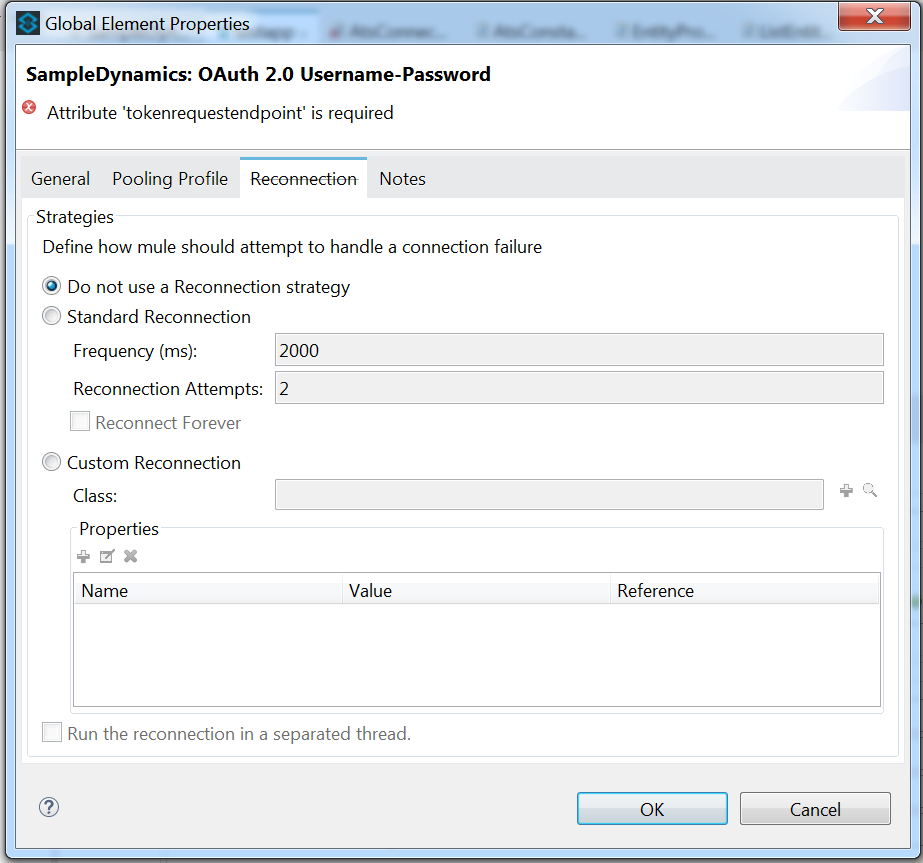
In this article, we will take a deep dive into how to add additional functionality (tabs), like pooling profile, reconnection in connector configuration, operations (drop-down), and general tab in connector settings.
Building a custom connector involves two things. First, it involves understanding the underlying connectivity logic and operations (CRUD Operations are nothing but our connector functionality listed in the drop-down). If we are building a public cloud connector like Azure Storage services - Blob/Table/Queue, then all of the connectivity and operation functionality is ready offered by Microsoft. Anypoint Connector Devkit provides various annotations to make developer life easier to build and publish connectors faster and wraps the underlying connectivity logic into an intuitive, simple to use, drag and drop connector available in Anypoint Studio that anyone can use without the need to know all the underlying complexity written in Java. This improves user experience with seamless access to rich functionality offered by the connector.
I am going to use Dynamics365 for Operation as a reference to build this new connector. Building a full-fledged Mulesoft Connector is simple and straightforward by leveraging the annotations offered by Anypoint Connector DevKit. Primarily, there is only two classes that we need to focus on — (1) ConnectorConfig java class (2) <<Name of the Connector>>Connector java class.
Part One
Let’s start with the ConnectorConfig Java class. This class is all about setting up the connection with the target system and managing the connection. It can be a SAAS product or cloud service, such as Azure Storage service (Blob, File, Queue) or any system for that matter.
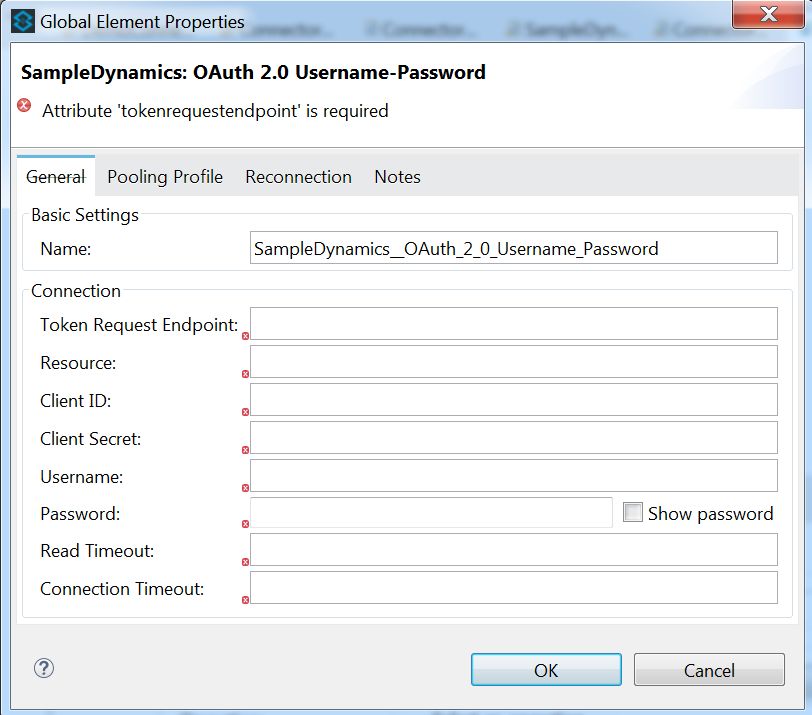
The value we provide in the friendlyName attribute in @ConnectionManagement annotation gets displayed at the top of the connector configuration.
@ConnectionManagement(friendlyName = "OAuth 2.0 Username-Password")
public class ConnectorConfig {

/** The Constant CONNECTION_ID. */
private final static String CONNECTION_ID = "001";
Any point DevKit makes it easy to add Connection Management functionality to connectors by creating a new @ConnectionStrategy. You will need to create a new class and annotate it with @ConnectionManagement.
Connection Management DevKit Annotations
To use Connection Management in a connector, define and annotate the following methods in the @ConnectionManagement annotated class:
@Connect — Creates a connection
@Disconnect — Explicitly closes a connection
@ValidateConnection — Returns true if a connection is still valid, false otherwise
@ConnectionIdentifier — Returns a prefix used in generating unique identifiers for connector instances in the connection pool
Please refer to Mulesoft Documentation for connection management details.
Refer this link for connector code.
@Connect
@TestConnectivity(active=false)
public void getAccessToken(
@Placement(group = "Connection") @FriendlyName("Token Request Endpoint") @ConnectionKey String tokenrequestendpoint,
@Placement(group = "Connection") @FriendlyName("Resource") String resource,
@Placement(group = "Connection") @FriendlyName("Client ID") String clientId,
@Placement(group = "Connection") @FriendlyName("Client Secret") String clientsecret,
@Placement(group = "Connection") @FriendlyName("Username") String userName,
@Placement(group = "Connection") @FriendlyName("Password") @Password String password,
@Placement(group = "Connection") @FriendlyName("Read Timeout") String readtimeout,
@Placement(group = "Connection") @FriendlyName("Connection Timeout") String connectiontimeout
) throws ConnectionException {

<< Write required logic to establish the connection using above parameters >>

}
@Placement — “Connection” is the group (table) name inside the General tab.
@FriendlyName — Is the textbox heading.
@ConnectionKey — Marks a parameter inside the connects method as part of the key for the connector lookup. This can only be used as part of the @Connect method.
@Disconnect
public void disconnect() {
    DynamicsClient = null;
}

@ValidateConnection
public boolean isConnected() {
    return DynamicsClient != null;
}

@ConnectionIdentifier
    public String connectionId() {
    return CONNECTION_ID;
}
Part Two
Now, let’s take a look at the SampleDynamicsConnector Java class. In this class, we define operations and write logic to perform those operations. Depending on the connector functionality, it could be anything from a CRUD operation to a more sophisticated functionality offering.
@Connector(name = "Dynamics365", friendlyName = "SampleDynamics", description = "Dynamics 365 for Operation Connector")
public class SampleDynamicsConnector {

@Config
ConnectorConfig config;
Here, friendlyName attribute value gets displayed in the connector details section,

@Processor(friendlyName = "import dynamic message")
public void ImportMessage(@Placement(group = "General", order = 1) @FriendlyName("Uri Path") String uripath,
@Placement(group = "General", order = 2) @FriendlyName("Activity ID") String activityid,
@Placement(group = "General", order = 3) @FriendlyName("Entity Name") String entityname,
@Placement(group = "General", order = 4) @FriendlyName("File Input (String)") String fileinput)
throws Exception {

<< Write required logic to perform the defined Operation (drop-down) using above parameters >
}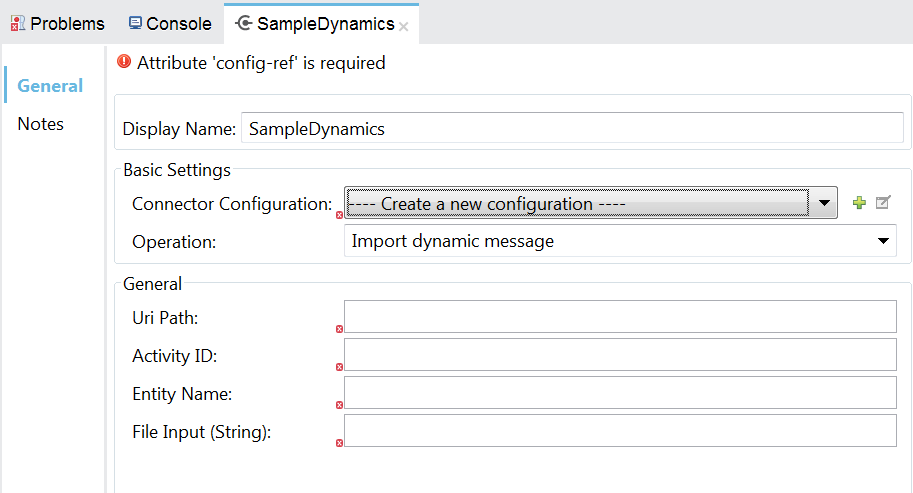
@Processor annotation — Marks a method as an operation in a connector.
@Placement annotation helps to create a group (table) with attributes to specify the order and the group name.
Example 2: How to Create a Tooltip (Descriptive Pop-up Message)
In the example shown below, we have used both annotations @FriendlyName and @Summary . Here, @FriendlyName is used to define the name of the field that is displayed, and @Summary is used for a descriptive pop-up message.
@Processor(friendlyName = "import dynamic message")
public void ImportMessage(@Placement(group = "General", order = 1) @FriendlyName("Uri Path") String uripath,
@Placement(group = "General", order = 2) @FriendlyName("Activity ID") @Summary("Activity ID from Dynamics 365") String activityid,
@Placement(group = "General", order = 3) @FriendlyName("Entity Name") String entityname,
@Placement(group = "General", order = 4) @FriendlyName("File Input (String)") String fileinput)
throws Exception {
Example 3
Now, let’s take a look at creating a sophisticated operation:
@Processor(friendlyName = "export dynamic message")
public void ExportMessage(
@Placement(group = "Export Parameters", order = 1) @FriendlyName("Entity Name") String tableName,
@Placement(group = "Export Parameters", order = 2) @FriendlyName("Create Entity If Not Exist") @Default("false") boolean createTableIfNotExist,
@Placement(group = "Export Parameters", order = 3) @FriendlyName("Encrypt Entity While Export(Supports Only String DataType)") @Default("false") boolean encryptEntityWhileInsertion,
@Placement(group = "Export Parameters", order = 4) @FriendlyName("POJO Entity(Define anyone value from below two options)") TestradioButton testradioButton) throws Exception {
@Summary annotation — Use this annotation to instance variables and method parameters to provide a way to override the default inferred description for a @Configurable variable or a @Processor, @Source , @Transformer method parameter.
@FriendlyName annotation — Use this annotation to instance variables and method parameters to provide a way to override the default inferred nickname for a @Configurable variable or a @Processor , @Source , @Transformer method parameter.
public class TestradioButton {

/** The Constant SUMMARY_JSON_ENTITY_PROPERTIES_AS_STRING. */
public static final String SUMMARY_JSON_ENTITY_PROPERTIES_AS_STRING = "JSON entity properties as String.";

/** The Constant SUMMARY_JSON_ENTITY_PROPERTIES_AS_JSON_OBJECT. */
public static final String SUMMARY_JSON_ENTITY_PROPERTIES_AS_JSON_OBJECT = "JSON entity properties as org.codehaus.jettison.json.JSONObject.";


@Configurable
@Optional
@FriendlyName(value = "JSON Entity Properties As String")
@Summary(SUMMARY_JSON_ENTITY_PROPERTIES_AS_STRING)
private String jsonEntityPropertiesAsString;

/** The json entity properties as json object. */
@Configurable
@Optional
@FriendlyName(value = "JSON Entity Properties As org.codehaus.jettison.json.JSONObject")
@Summary(SUMMARY_JSON_ENTITY_PROPERTIES_AS_JSON_OBJECT)
private Object jsonEntityPropertiesAsJsonObject;
Here, in the TestradioButton class, the @Summary annotation is used to provide a descriptive pop-up message.
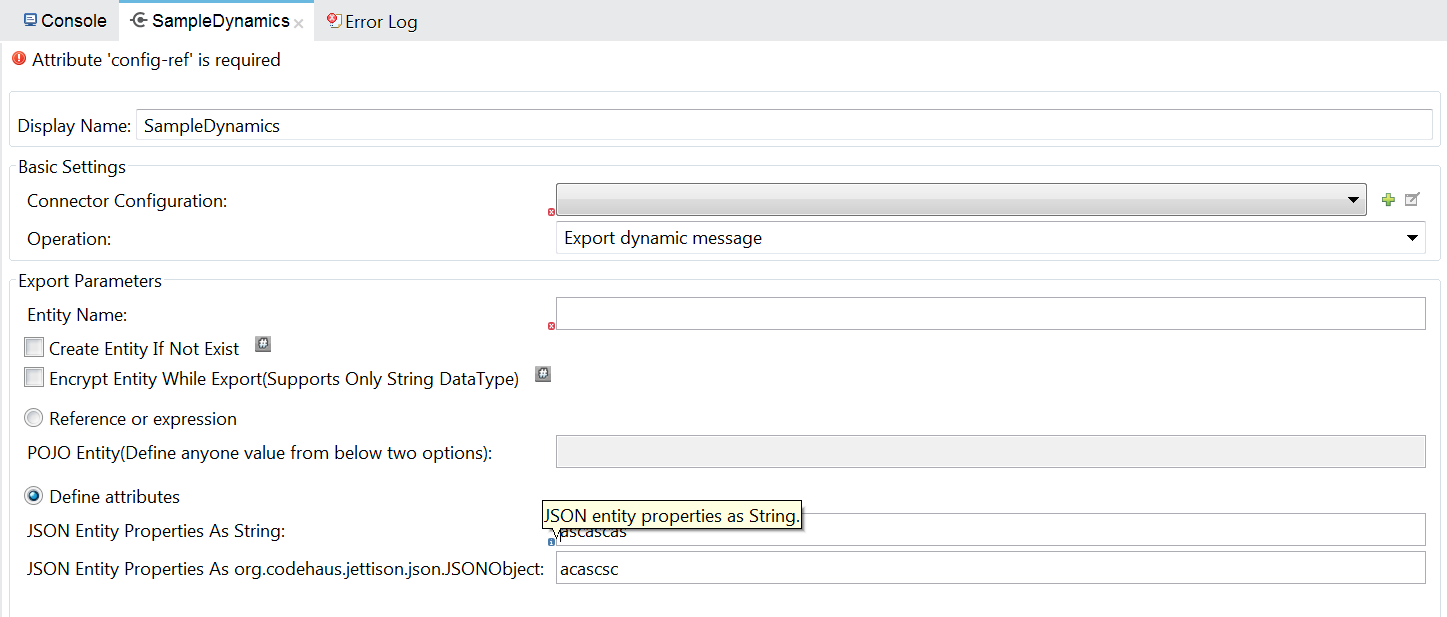
You might wonder why we have two radio buttons, (1) Reference or expression (2) Define attributes. Here, the second radio button has two values that are coming from “TestradioButton” POJO class. First radio button means, we can give a reference to a relevant bean. In this case, we need to define TestradioButton as a bean and reference it in first radio button.
Connector Development Resources
Opinions expressed by DZone contributors are their own.

Comments