Code Analysis With SonarQube, Part 1: Setup
In the introduction to this series, we show you how to set up SonarQube, so you can get to easily testing your code quality.
Join the DZone community and get the full member experience.
Join For FreeIntroduction
SonarQube is a code quality management tool that allows developers to manage, track, and improve the quality of their code. It’s a web based application that keeps historical data of different metrics and gives the detailed analysis of different issues in the code. SonarQube is one of the most popular code analysis tools out there, which supports a wide variety of programming languages such as Java, C/C++, JavaScript, C#, PHP, etc. SonarQube follows the rules provided by coding standards such as MISRA, CWE, etc.
Setup
Setting up SonarQube is very easy. You can find the documentation on their website, the links to which are given below. The latest version of SonarQube provided on their website is 6.5. However, the long term supported version (LTS) is 5.6.6, which is also widely used. LTS is the more stable version. If you are confused on what version to use, you can refer to this blog. SonarQube typically requires Java 8 to run. First, install Java 8 and then follow the below process.
URLs:
https://www.sonarqube.org/downloads/
https://docs.sonarqube.org/display/SONAR/Documentation
After downloading and installing SonarQube, find the file “StartSonar.bat” in the installed folder. Append the file path to the ‘path’ environment variable. Normally the path would be:
<install_Dir>\bin\windows-x86-64 (If it is a 64-bit system) or
<install_Dir>\bin\windows-x86-32 (If it is a 32-bit system)
Now you will need the Sonar code analyzer to analyze your code. You may use one of the analyzers mentioned here, depending on your requirements. Sonar-scanner is the go-to analyzer if you have no real preference. After installing sonar-scanner, add the <install_directory>/bin to the path environment variable.
Now you are ready to analyze your code/project.
Getting Things Ready
First, you have to create a configuration file in your project directory. The name of the configuration file should be sonar-project.properties. The content of the file will be as below:
# must be unique in a given SonarQube instance

sonar.projectKey=my:project

# this is the name and version displayed in the SonarQube UI.

sonar.projectName=My  project

sonar.projectVersion=1.0

# Path is relative to the sonar-project.properties file. Replace "\" by "/" on Windows.

# This property is optional if sonar.modules is set.

sonar.sources=.

# Encoding of the source code. Default is default system encoding

#sonar.sourceEncoding=UTF-8
For starters, you just need to provide the fields sonar.projectKey (which is a unique identifier of your project) and sonar.projectName (your project name). You can leave the rest with their default values. If your project has modules, you can set an additional value, sonar.modules, with your module names which need to be analyzed. Or the field sonar.sources will take the entire project as an input if ‘.’ is given as a value.
Starting Sonar
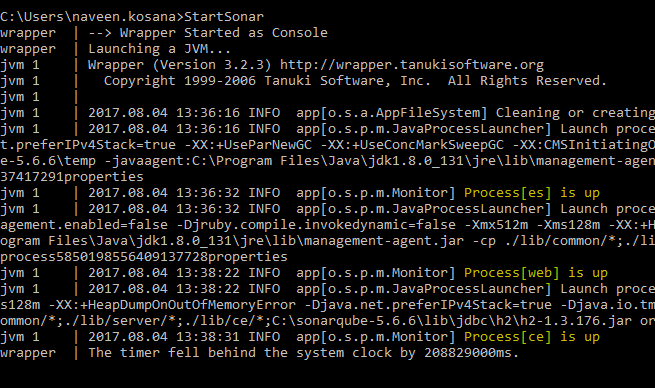
Now start the Sonar services by giving the command ‘StartSonar’ in the command prompt. The display will be as below when the services start.

Now open another console (cmd) and locate your project directory and give the command ‘sonar-scanner.’ Sonar will now scan the entire project and start analyzing it. After the analysis is complete, you should see the below message:

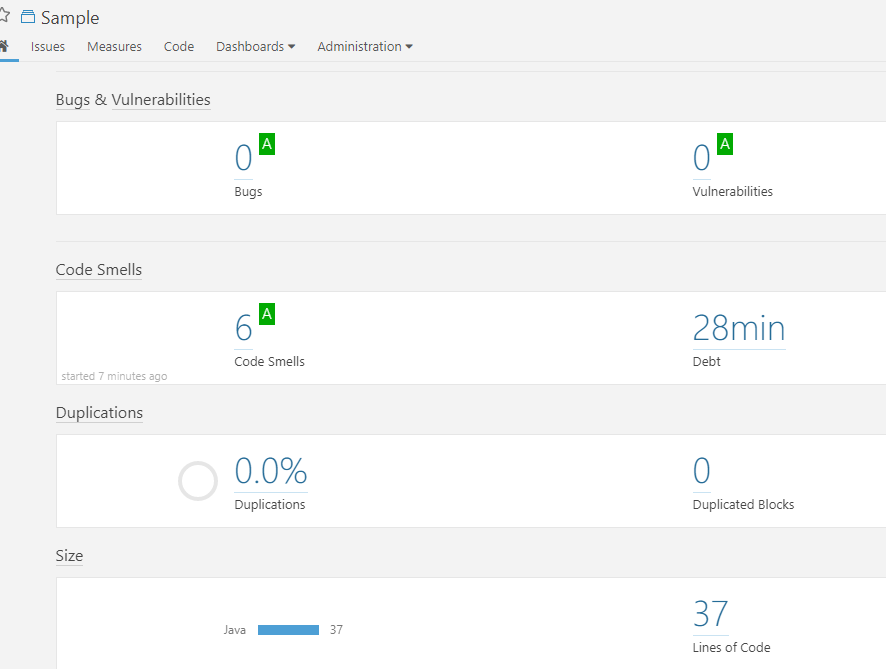
Now open your browser and got to http://localhost:9000/ which is the web page for Sonar analysis. You will find your project analyzed and ready.

Conclusion
Sonar analyzes each and every line of your code and digs out the issues present in it. It classifies every issue as either Bug, Vulnerability, or a code smell and gives a detailed analysis of the code, like Duplications or Comments or Lines Of Code and much more. We will deep dive into the Sonar analysis and explore the issues and the reasons behind it in the next part.
Opinions expressed by DZone contributors are their own.

Comments