Codify Your Cloud and Kubernetes With Crossplane and IaC
Crossplane enables Kubernetes-native IaC, letting platform engineers define custom APIs for provisioning, enforcing governance, and providing self-service infrastructure.
Join the DZone community and get the full member experience.
Join For FreeAs organizations embrace Kubernetes for cloud-native applications, managing infrastructure efficiently becomes challenging. Traditional Infrastructure as Code (IaC) tools like Terraform, Pulumi, and others provide declarative configurations but lack seamless integration into the Kubernetes-native workflows.
Crossplane effectively bridges the gap between Kubernetes and cloud infrastructure in this situation. In this blog, we’ll explore how Crossplane enables IaC for Kubernetes and beyond.
What Is Crossplane?
Crossplane is an open-source Kubernetes add-on that enables you to provision and manage cloud infrastructure using Kubernetes Custom Resource Definitions (CRDs) and the Kubernetes API. Unlike traditional IaC tools that require external execution, like Terraform scripts being run externally, Crossplane embeds the infrastructure management into Kubernetes. This makes it truly declarative and GitOps-friendly.
Use Cases: Terraform vs. Crossplane
When to Use Terraform?
- Best for managing infrastructure outside Kubernetes
- Ideal for traditional multi-cloud deployments and VMs
- Strong ecosystem with extensive modules and providers
- Works well with tools like Ansible, Packer, and Vault for automation
When to Use Crossplane?
- Best for Kubernetes-centric environments
- Ideal for GitOps workflows (ArgoCD, Flux)
- Enables self-service provisioning via Kubernetes CRDs
- Good for multi-cloud Kubernetes control (managing cloud services via K8s API)
Getting Started With Crossplane
For this sample, we will use a minikube. But the same steps can be applied to any Kubernetes.
Step 1: Deploy MySQL in Kubernetes
1. Deploy MySQL as a Deployment with a Service for configuring using Crossplane. You can also use MySQL deployed from another location.
2. Define a mysql-deployment.yaml, which creates the secret, deployment, and service required to run MySQL.
apiVersion: v1
kind: Secret
metadata:
  name: mysql-root-password
type: Opaque
data:
  password: cGFzc3dvcmQ=  # Base64 encoded "password"
---
apiVersion: v1
kind: Service
metadata:
  name: mysql-service
spec:
  selector:
    app: mysql
  ports:
    - protocol: TCP
      port: 3306
      targetPort: 3306
---
apiVersion: apps/v1
kind: Deployment
metadata:
  name: mysql
spec:
  selector:
    matchLabels:
      app: mysql
  strategy:
    type: Recreate
  template:
    metadata:
      labels:
        app: mysql
    spec:
      containers:
        - image: mysql:8.0
          name: mysql
          env:
            - name: MYSQL_ROOT_PASSWORD
              valueFrom:
                secretKeyRef:
                  name: mysql-root-password
                  key: password
          ports:
            - containerPort: 3306
              name: mysql
3. Apply the YAML using the command kubectl apply -f mysql-deployment.yaml.
4. Verify the pods are up using the command kubectl get pods.
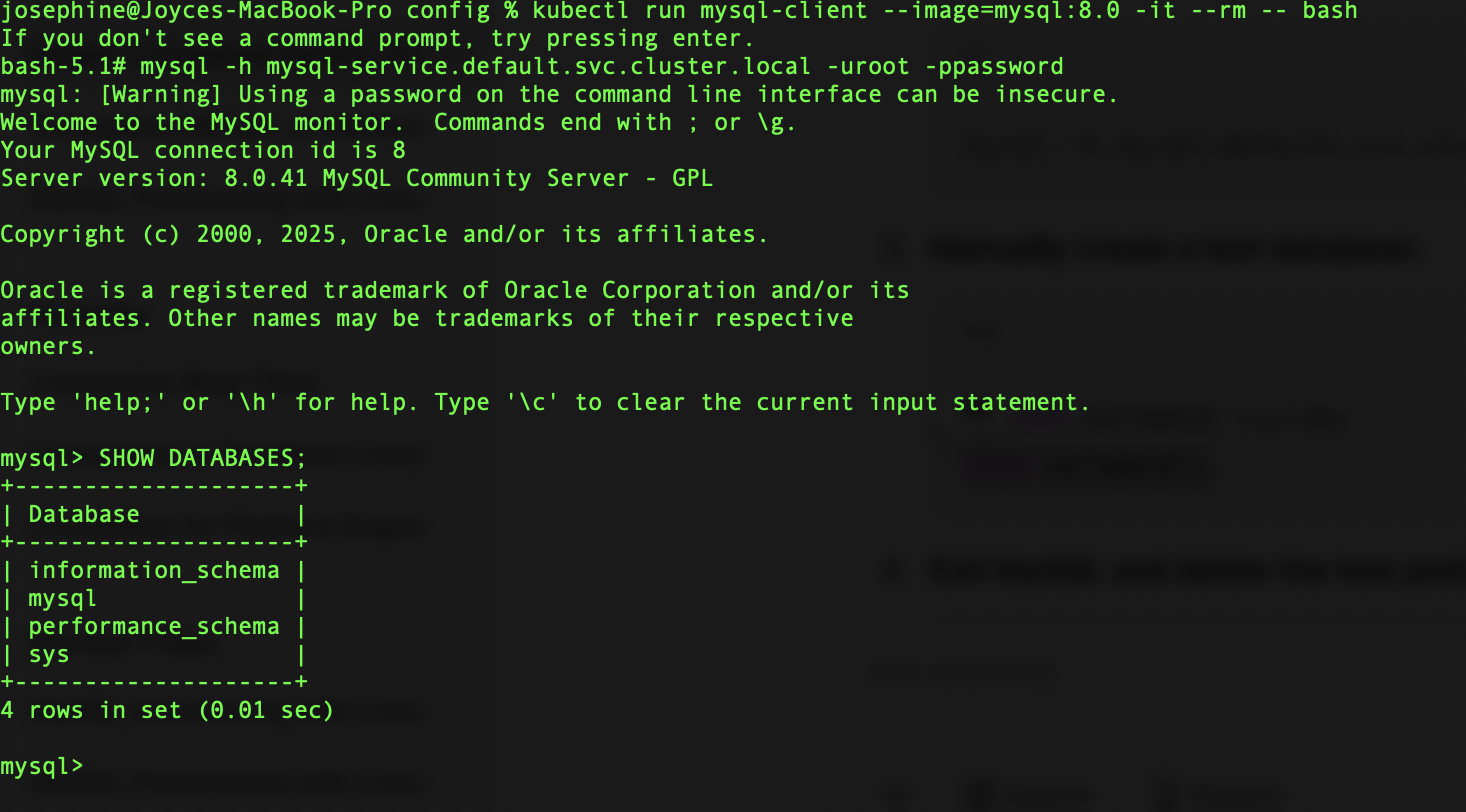
5. Verify the MySQL connection by starting a temporary SQL pod to check the MySQL deployment. Create the client by using the command kubectl run mysql-client --image=mysql:8.0 -it --rm -- bash.
6. Connect to MySQL inside the pod by using the command mysql -h mysql-service.default.svc.cluster.local -uroot -ppassword.
Step 2: Install Crossplane on Kubernetes
1. Install Crossplane using Helm:
kubectl create namespace crossplane-system
helm repo add crossplane-stable https://charts.crossplane.io/stable
helm repo update
helm install crossplane crossplane-stable/crossplane --namespace crossplane-systemNote: Crossplane takes a few minutes to come up.
2. Verify Crossplane installation using the command kubectl get pods -n crossplane-system.

Step 3: Install the Crossplane Provider for SQL
1. Define a MySQL provider using the below YAML content.
apiVersion: pkg.crossplane.io/v1
kind: Provider
metadata:
  name: provider-sql
spec:
  package: xpkg.upbound.io/crossplane-contrib/provider-sql:v0.9.0
2. Create the provider using the command kubectl apply -f provider.yaml.
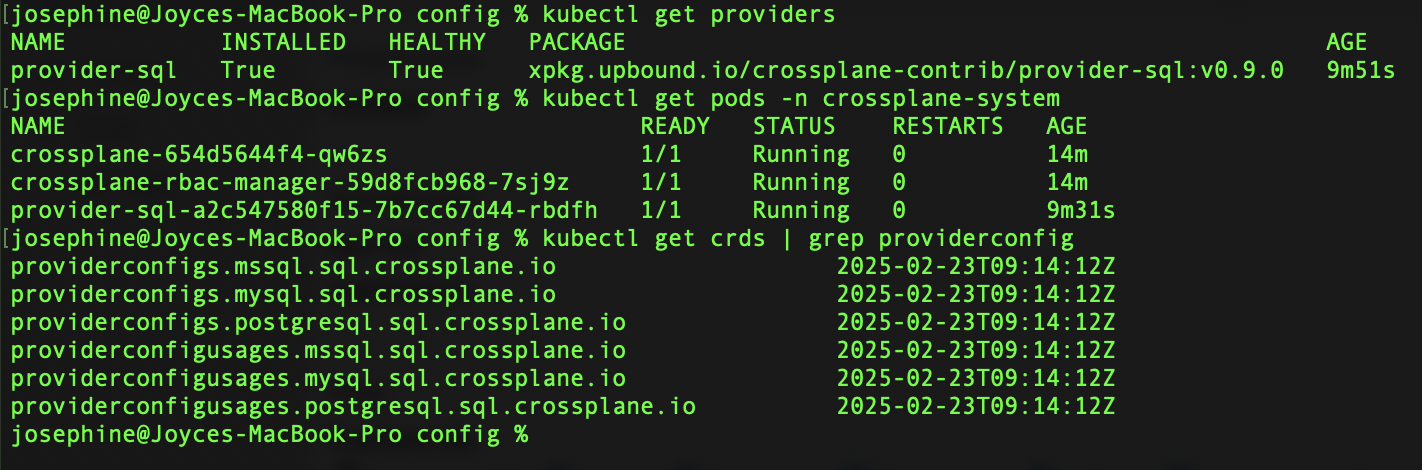
3. Verify the provider using the following commands: kubectl get pods -n crossplane-system and kubectl get providers.
Note: SQL providers take a few minutes to come up.
Step 4: Configure the Crossplane MySQL Provider
The provider configuration tells Crossplane how to authenticate with MySQL. Define the secrets to be created for provider usage. Update the stringData accordingly in the below YAML. Apply the YAML using kubectl apply -f mysql-secret.yaml.
apiVersion: v1
kind: Secret
metadata:
name: mysql-conn-secret
namespace: default
type: Opaque
stringData:
credentials: "root:password@tcp(mysql-service.default.svc.cluster.local:3306)"
username: "root"
password: "password"
endpoint: "mysql-service.default.svc.cluster.local"
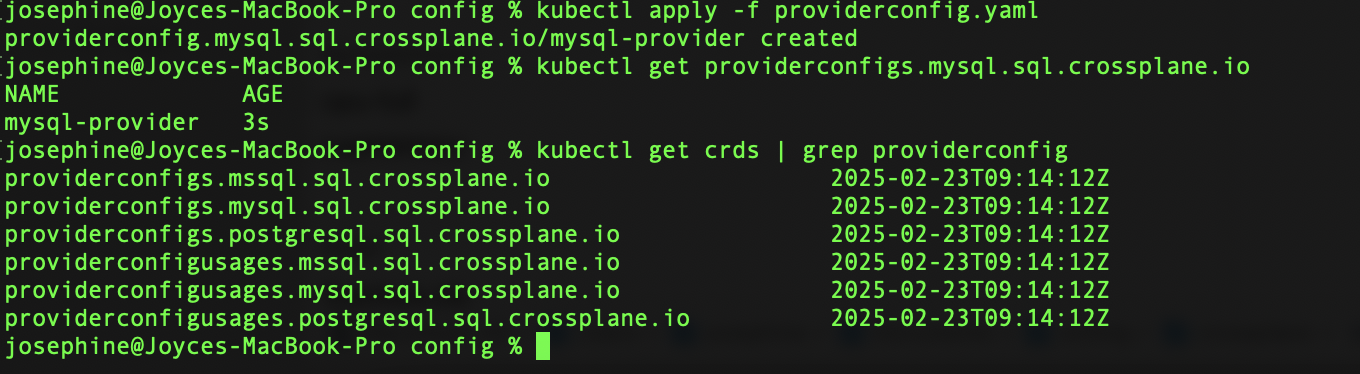
port: "3306"Apply the below provider configuration for Crossplane, which uses the above secrets. Apply it using the command kubectl apply -f providerconfig.yaml.
apiVersion: mysql.sql.crossplane.io/v1alpha1
kind: ProviderConfig
metadata:
  name: mysql-provider
spec:
  credentials:
    source: MySQLConnectionSecret
    connectionSecretRef:
      name: mysql-conn-secret
      namespace: default
Verify the provider config creation using the commands — kubectl get providerconfigs.mysql.sql.crossplane.io and kubectl get crds | grep providerconfig.
Step 5. Create a MySQL Database Using Crossplane
Now, use Crossplane to provision a new database. Use the below YAML and apply using kubectl apply -f mysqlinstance.yaml.
apiVersion: mysql.sql.crossplane.io/v1alpha1
kind: Database
metadata:
  name: my-database
spec:
  providerConfigRef:
    name: mysql-provider
  forProvider:
    binlog: true
  writeConnectionSecretToRef:
    name: db-conn
    namespace: default
Step 6: Verify the Database Creation
Verify the database creation using the command kubectl get database.mysql.sql.crossplane.io/my-database.

Use the same verification steps mentioned in Step 1 to connect to MySQL to verify the creation of the database.
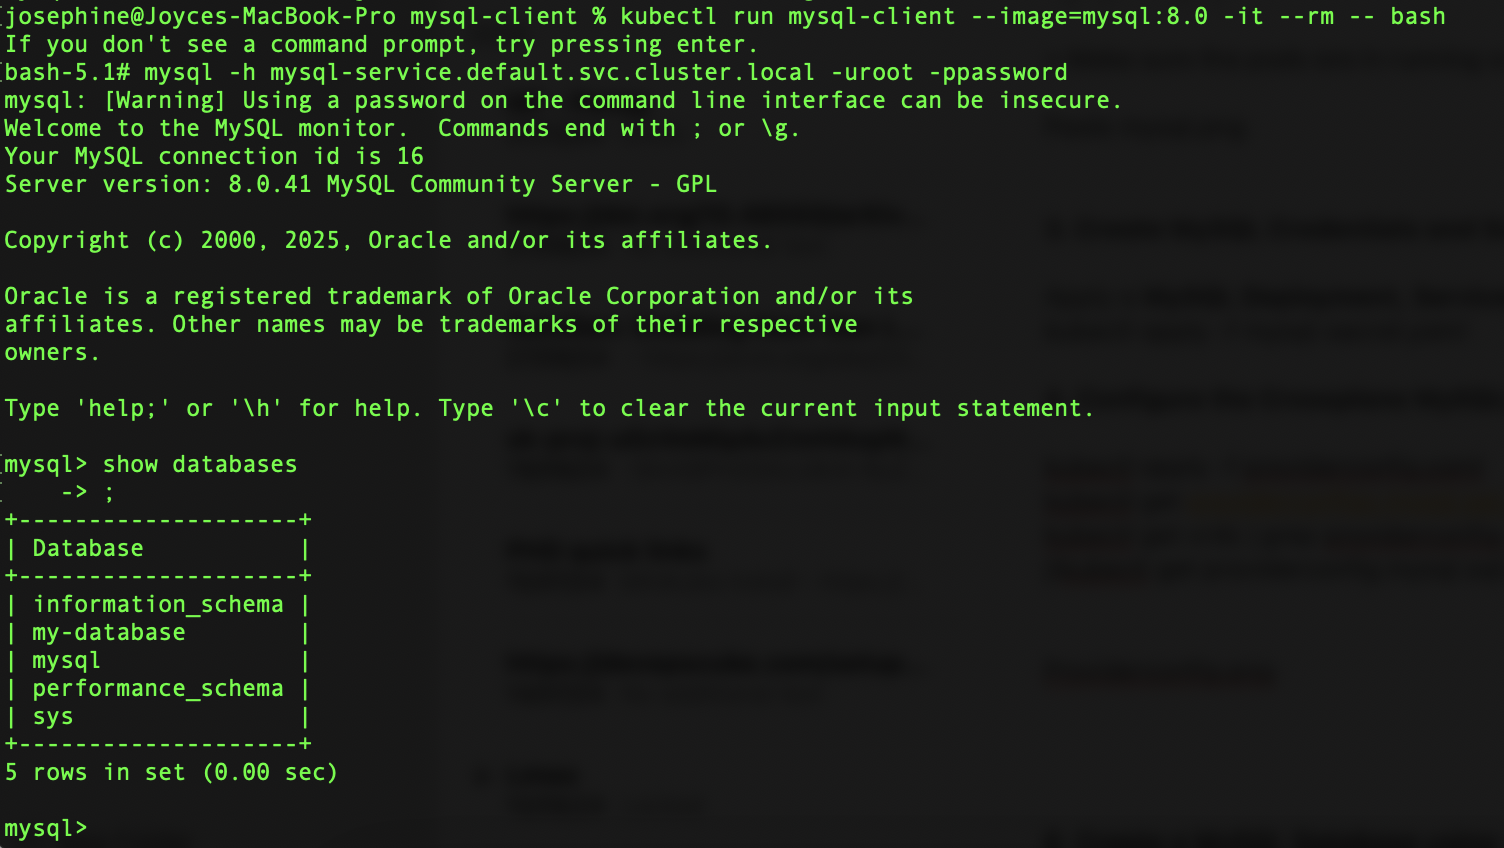
With the above steps, you have installed Crossplane, configured the MySQL provider, and used Crossplane to provision a database.
Can Terraform and Crossplane Work Together?
Terraform and Crossplane can be used together for many scenarios.
Scenario 1
In a complete IaC scenario, Terraform can be used to bootstrap Kubernetes clusters, and then Crossplane can be used to manage cloud resources from within Kubernetes. Terraform can also deploy Crossplane itself. This Hybrid Workflow Example can be
- Terraform provisions the Kubernetes cluster in any cloud provider.
- Crossplane manages cloud services (databases, storage, and networking) using Kubernetes CRDs.
Scenario 2
Crossplane also supports a Terraform provider, which can be used to run Terraform scripts as part of Crossplane’s IaC model. Running a Terraform provider for Crossplane can be useful in several scenarios where Crossplane's native providers do not yet support certain cloud resources or functionalities. Following are the reasons to run a Terraform provider for Crossplane:
- Terraform has a vast ecosystem of providers, supporting many cloud services that Crossplane may not yet have native providers for.
- When an organization already uses Terraform for infrastructure management, there is no need to rewrite everything in Crossplane CRDs.
- Crossplane supports multi-cloud management, but its native providers may not cover every on-premise or SaaS integration.
- For organizations looking to gradually transition from Terraform to Crossplane, using Terraform providers within Crossplane can act as a hybrid solution before full migration.
- Running Terraform inside Crossplane brings Terraform under Kubernetes’ declarative GitOps model.
Steps to Create IBM Cloud Cloudant DB Using Crossplane
Step 1. Define the Terraform provider.
apiVersion: pkg.crossplane.io/v1
kind: Provider
metadata:
  name: provider-terraform
spec:
  package: xpkg.upbound.io/upbound/provider-terraform:v0.19.0
Step 2. Configure the provider.
apiVersion: tf.upbound.io/v1beta1
kind: ProviderConfig
metadata:
  name: terraform-provider-ibm
spec: {}
Step 3. Provision a Cloudant DB in IBM Cloud by using Terraform scripts as part of the Crossplane.
apiVersion: tf.upbound.io/v1beta1
kind: Workspace
metadata:
  name: ibm-cloudant-db
spec:
  providerConfigRef:
    name: terraform-provider-ibm
  writeConnectionSecretToRef:
    name: ibmcloud-terraform-secret
    namespace: crossplane-system
  forProvider:
    source: Inline
    module: |
      terraform {
        required_providers {
          ibm = {
            source  = "IBM-Cloud/ibm"
          }
        }
        backend "kubernetes" {
          secret_suffix = "ibmcloud-terraform-secret"
          namespace     = "crossplane-system"
        }
      }

      provider "ibm" {
        ibmcloud_api_key = var.ibmcloud_api_key
      }

      resource "ibm_cloudant" "cloudant_instance" {
        name     = "crossplanecloudant"
        location = "us-south"
        plan     = "lite"
      }

      variable "ibmcloud_api_key" {
        type = string
      }

    vars:
      - key: ibmcloud_api_key
        value: "<Your IBM Cloud API Key>"
This provisions a Cloudant DB named crossplanecloudant in IBM Cloud.

How Crossplane Fits Into Platform Engineering
Platform engineering focuses on building and maintaining internal developer platforms (IDPs) that simplify infrastructure management and application deployment. Crossplane plays a significant role in this by enabling a Kubernetes-native approach.
Crossplane ensures declarative, self-service, and policy-driven provisioning of cloud resources. Crossplane features like declarative infrastructure with K8s APIs, custom abstractions for infra and apps, security and compliance guardrails, version-controlled and automated deployments, and continuous drift correction help platform engineering.
Conclusion
Crossplane transforms how we manage cloud infrastructure by bringing IaC into the Kubernetes ecosystem. Kubernetes APIs enable a truly declarative and GitOps-driven approach to provisioning and managing cloud resources. If you're already using Kubernetes and looking to modernize your IaC strategy, Crossplane is definitely worth exploring.
Opinions expressed by DZone contributors are their own.
Comments