Auto-Scaling a Spring Boot Native App With Nomad
In this tutorial, we will use Terraform to spin up a minimal Nomad/Consul cluster on GCP and then deploy a Spring Boot native app to test-drive Nomad's Horizontal Application Autoscaling capabilities.
Join the DZone community and get the full member experience.
Join For FreeHorizontal scaling, and, in particular, auto-scaling is a common challenge for many applications no matter their architectural approach (monolithic or microservices) and the deployment environment (cloud or on-premises). Today's cloud providers provide a rich variety of options and tools to accommodate this critical requirement, which is to be able to scale services instances up or down, based on specified rules, in an efficient manner in order to:
- Avoid unavailability
- Ensure the quality of service
- Optimize resources utilization
- Avoid unnecessary charges
Many of the out-of-the-box solutions rely on Kubernetes and offer various levels of abstraction to make this process as smooth as possible. However, there are many cases where we don't really need or cannot afford all these cloud offerings as-a-service or we need to operate our own data center on-premises. As presented in a previous article "Look, Ma! No Pods!", HashiCorp Nomad is a simple and flexible deployment tool, able to manage both containers and non-containerized applications running on-prem, cloud, or hybrid environments. Lately, Nomad provides auto-scaling functionality via the Nomad Autoscaler Agent. As described in the Nomad Autoscaler Overview, the following strategies are supported:
Horizontal Application Autoscaling: This is the process of automatically controlling the number of instances of an application to have sufficient work throughput to meet service-level agreements (SLA).
Horizontal Cluster Autoscaling: The process of adding or removing Nomad clients from a cluster to ensure there is an appropriate amount of cluster resource for the scheduled applications
Dynamic Application Sizing: Enterprise feature which enables organizations to optimize the resource consumption of applications using sizing recommendations from Nomad
In this article, we will delve into a Horizontal Application Autoscaling use-case. More specifically we will:
- Spin up a minimal Nomad/Consul cluster on Google Cloud's Compute Engine VMs, using HashiCorp's IaC tool Terraform.
- Deploy via Nomad the following components: the Autoscaler Agent, an HAProxy Load Balancer, a Prometheus server, a Spring Native application, and a Redis standalone server which is used by the application as an in-memory data store.
- Generate some load against the Spring application in order to trigger the auto-scaling process and observe the overall system's behavior.
Pre-Requisites
In order to be able to run everything you need to:
- Create a new Google Cloud account or sign in to an existing one
- Create a new Google Cloud project (guide here)
- Download and install Google Cloud Command Line Interface (gcloud CLI) to your development machine
- Download and install HashiCorp Packer
- Download and install Terraform
You then need to clone the following GitHub repositories:
- Terraform Google Nomad: contains the Terraform scripts used to provision the Nomad/Consul cluster on GCP. This is actually a fork from HashiCorp* with the following tweaks applied:
- Updated Ubuntu, Nomad, and Consul versions
- Additions to install Docker daemon on each provisioned VM
- Nomad configuration changes for enabling Telemetry and exporting metrics to Prometheus
- Minimal changes to Terraform .tf files to avoid errors with the latest versions of Terraform CLI
- Spring Boot Yaus contains the source code of the sample Spring Boot native app used for the demo, a Nomad job file for its deployment, and a JMeter Test Plan for the load testing
*Side-note: The particular fork is selected due to familiarity with it at the time of writing. You are encouraged to also check the more recent nomad/terraform GitHub repo especially if you need to run the Nomad/Consul cluster localhost or use another Cloud Provider. Another alternative is to use the Caravan Open Source tool. Keep in mind that if you are interested in running the cluster on a local Windows machine using Vagrant, you need to disable the Hyper-V capability and this may cause side effects to your Docker Desktop.
Spin Up a Nomad/Consul Co-Located Cluster
Build a Google Image
Open your gcloud CLI and authenticate to your account by executing:
gcloud auth application-default loginFrom within gcloud CLI, change the directory to the `terraform-google-nomad/examples/nomad-consul-image` folder. Then execute:
packer build nomad-consul.jsonThis will take some time and when the build finishes, it will output the name of a produced new Google Image, e.g., "nomad-consul-ubuntu18-2022-11-11-110511". This is actually an Ubuntu image, with Nomad & Consul client/server binaries plus Docker installed. Keep the image name at hand for the next step.
Customize Terraform Input Variables
From within gcloud CLI, go back to the `terraform-google-nomad` root directory and edit the variables.tf file in order to specify:
- The name of the GCP Project where all resources will be launched
- The GCP Region and Zone you wish the VMs to be provisioned
- The size of the Cluster (number of servers and clients)
- The machine type of the Compute Instance to run for each node type
- The namespace of the Nomad/Consul Server cluster
- The namespace of the Nomad client cluster
- The Google Image used to launch each node in the Nomad/Consul Server cluster
- The Google Image used to launch each node in the Nomad client cluster
Use the same Google Image identifier for both nomad_consul_server_source_image and nomad_client_source_image. Based on the existing setup, Terraform configuration will take care of executing Nomad and Consul on either client or server mode automatically. Once you finish, save and exit the editor.
Plan and Deploy the Infrastructure
Now, from the same, root folder of the cloned project you may execute:
terraform initAnd then you may run:
terraform planIf the plan looks good, run:
terraform applyOnce the procedure finishes, you can have a look at the VM instances provisioned from your Google Cloud Console. It should look like the one below:
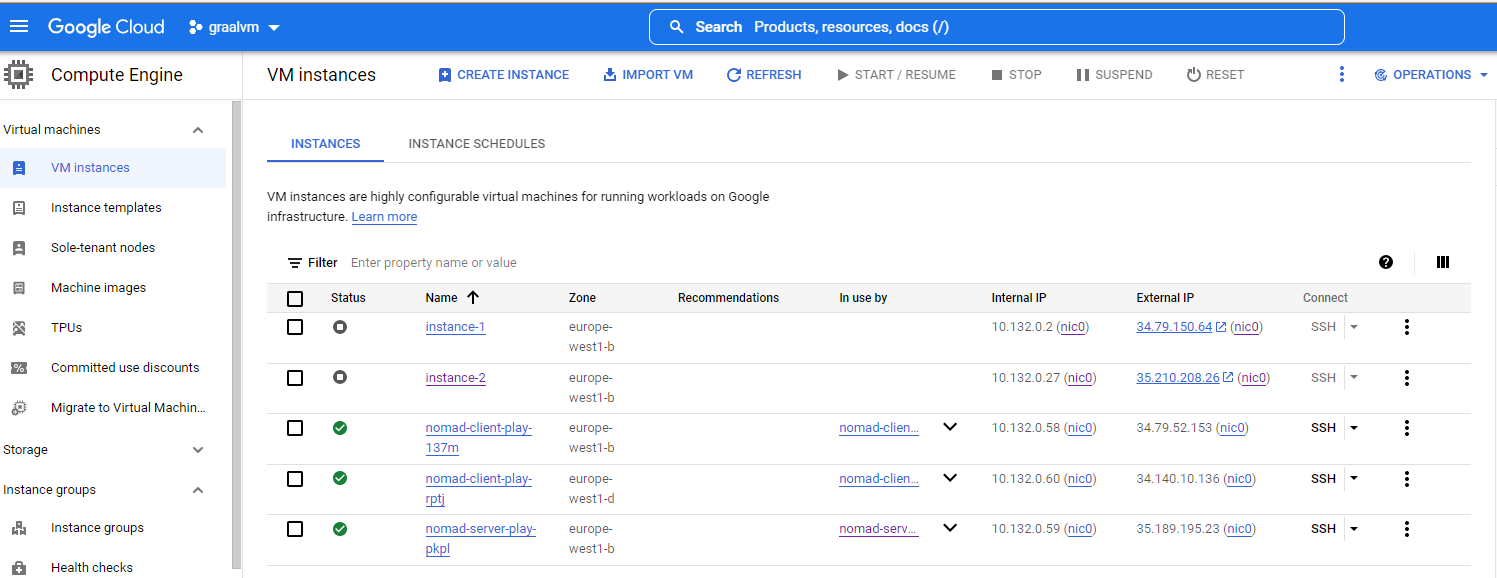 Note that with the External IP of the nomad-server-* machine, you should be able to access Nomad and Consul admin UIs at
 HTTP://<nomad-server-external-ip>:4646 and HTTP://<nomad-server-external-ip>:8500 respectively. Terraform has taken care of all the internal and external network and firewall plumbing in order for the cluster to be functional and easily accessible, solely for testing purposes of course.
Deploy Servers and Applications
Now that we have our Nomad and Consul cluster up and running we can proceed with deploying Nomad Autoscaler Agent, Prometheus, HAProxy, and the sample microservice along with the Redis server it needs.
Navigate to your Nomad admin UI, select "Run Job" and paste in the Job Definition area, the contents of the autoscaler.nomad job. Select "Plan" and if it looks OK, press "Run". Repeat the process for haproxy.nomad and prometheus.nomad.
Notice that in our Nomad Job files we make use of the so-called template Stanza. This is a powerful method of generating configuration files on-the-fly, which are populated from environment variables, Consul Service discovery metadata, HashiCorp Vault secrets, etc. Let's see how this is useful, particularly with HAProxy's configuration. Check out the following excerpt from haproxy.nomad file:
backend http_back
    balance roundrobin
    server-template mywebapp 10 _demo-webapp._tcp.service.consul resolvers consul resolve-opts allow-dup-ip resolve-prefer ipv4 check
With the above configuration, HAProxy will be able to discover dynamically via the Consul Service Registry, the instances (IPs and ports) of the application it will load balance. No need for a static or manually updated configuration, everything is referred to by service name! Cool, right?
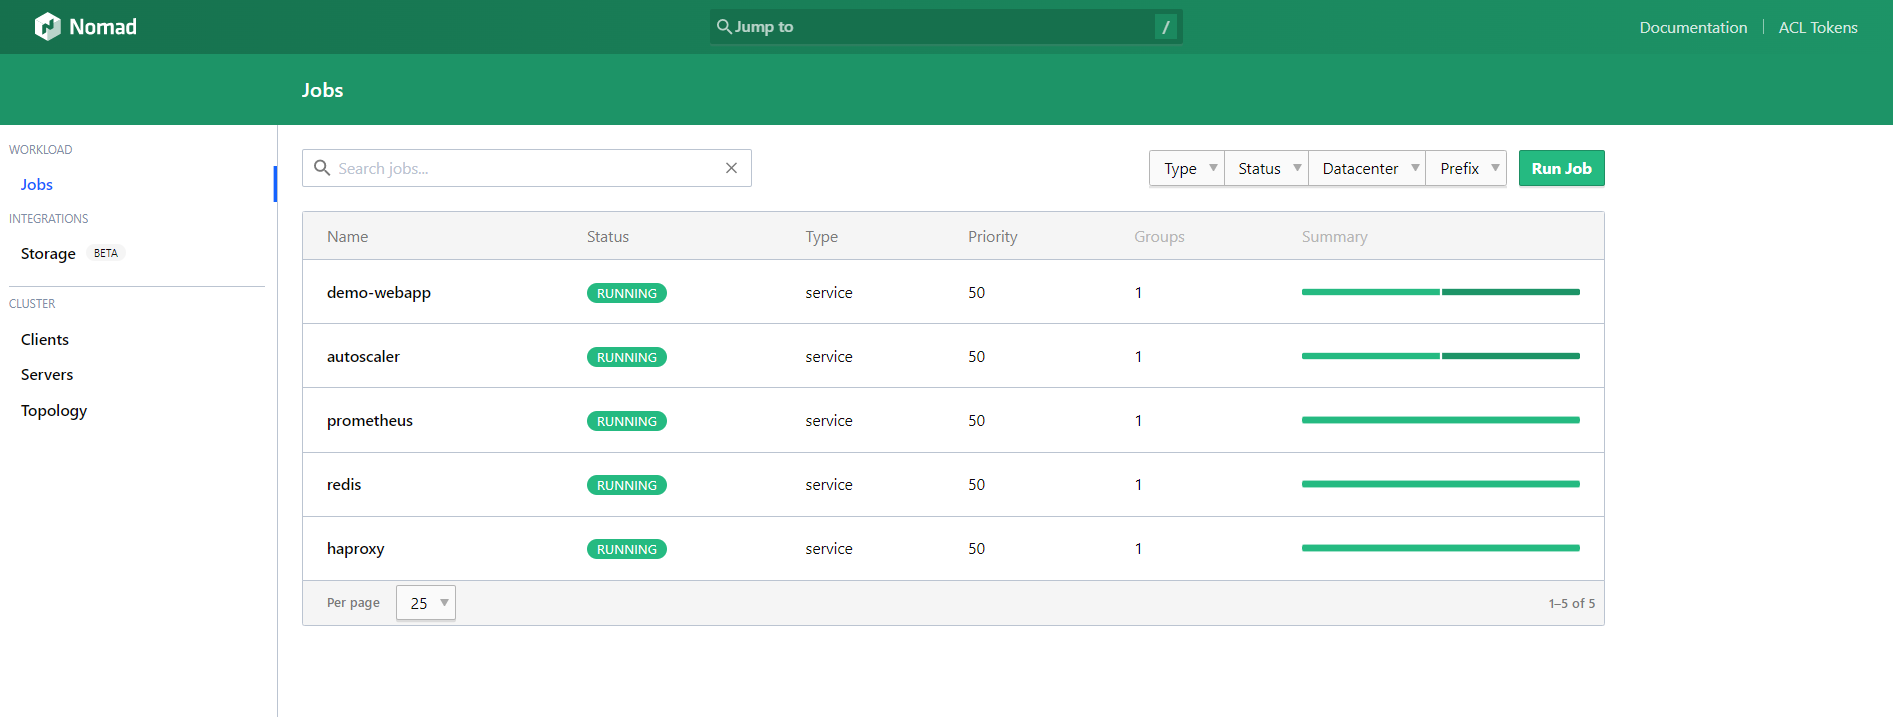
You may finish up the deployments by running redis.nomad and demo-webapp.nomad.
By now, theoretically, you should have everything up and running, so we have an overview from the Nomad UI Jobs listing view:
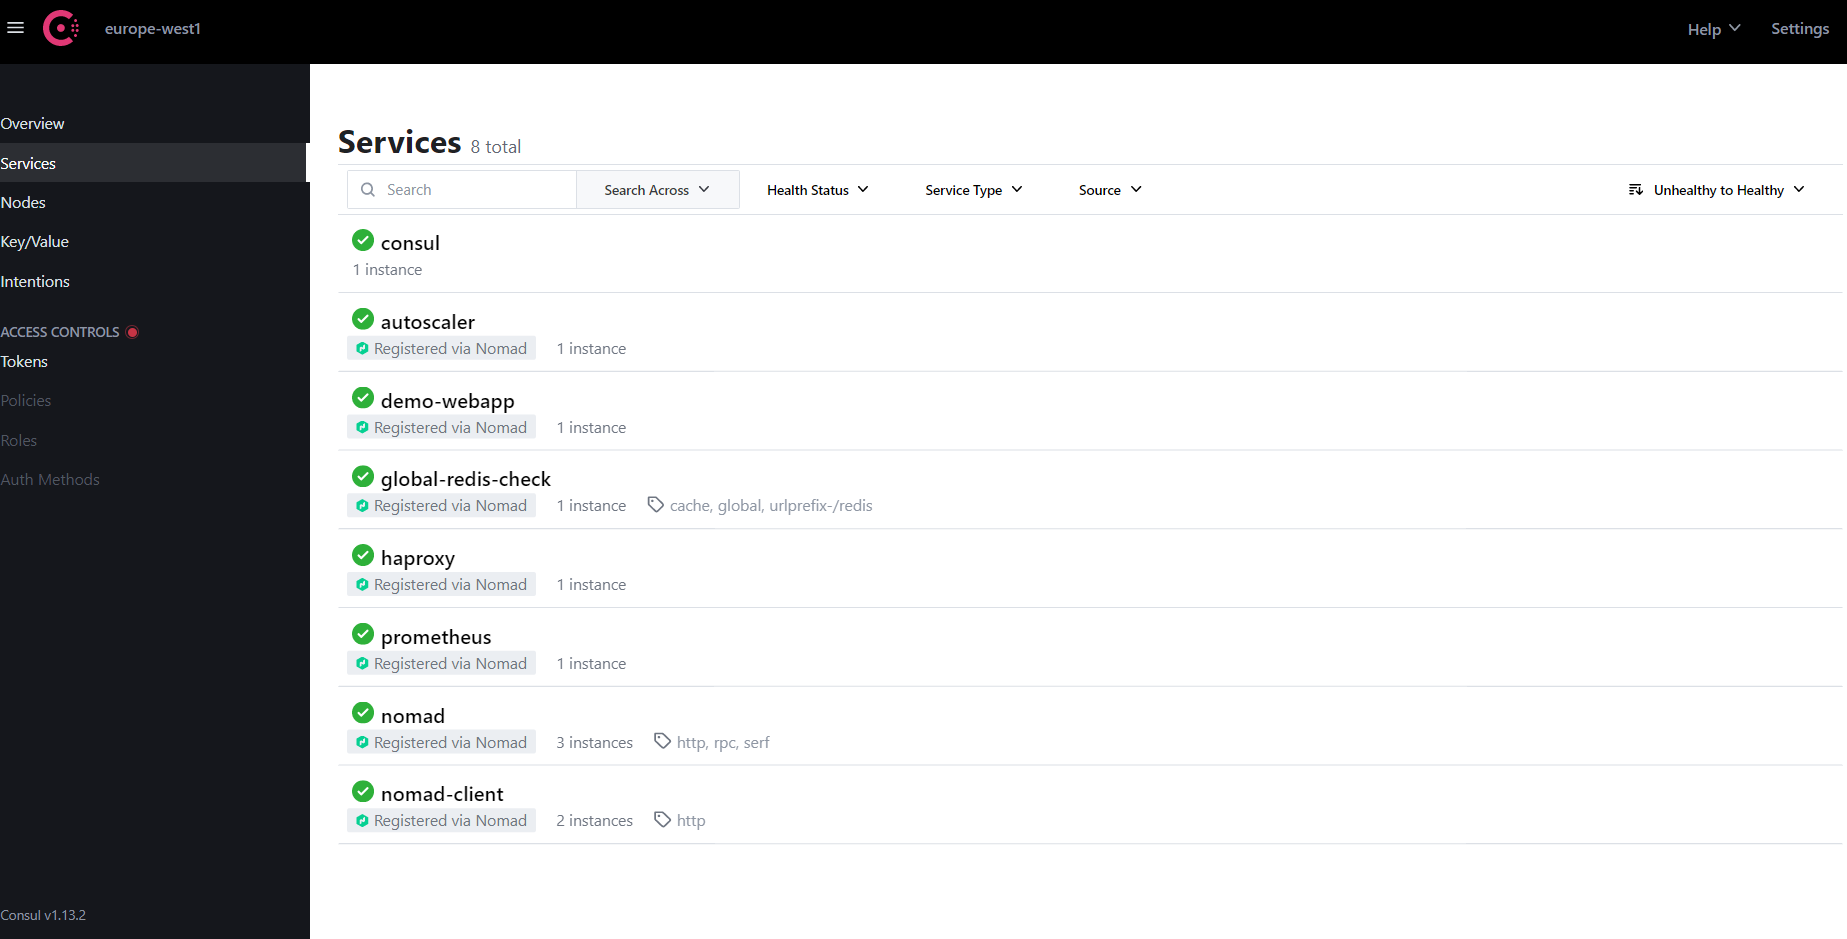
And the Consul UI Services listing view:
Nomad Autoscaler Basics
The following diagram depicts the Nomad Autoscaler architecture as initially described in HashiCorp Nomad Autoscaling Tech Preview, focusing on horizontal application scaling:
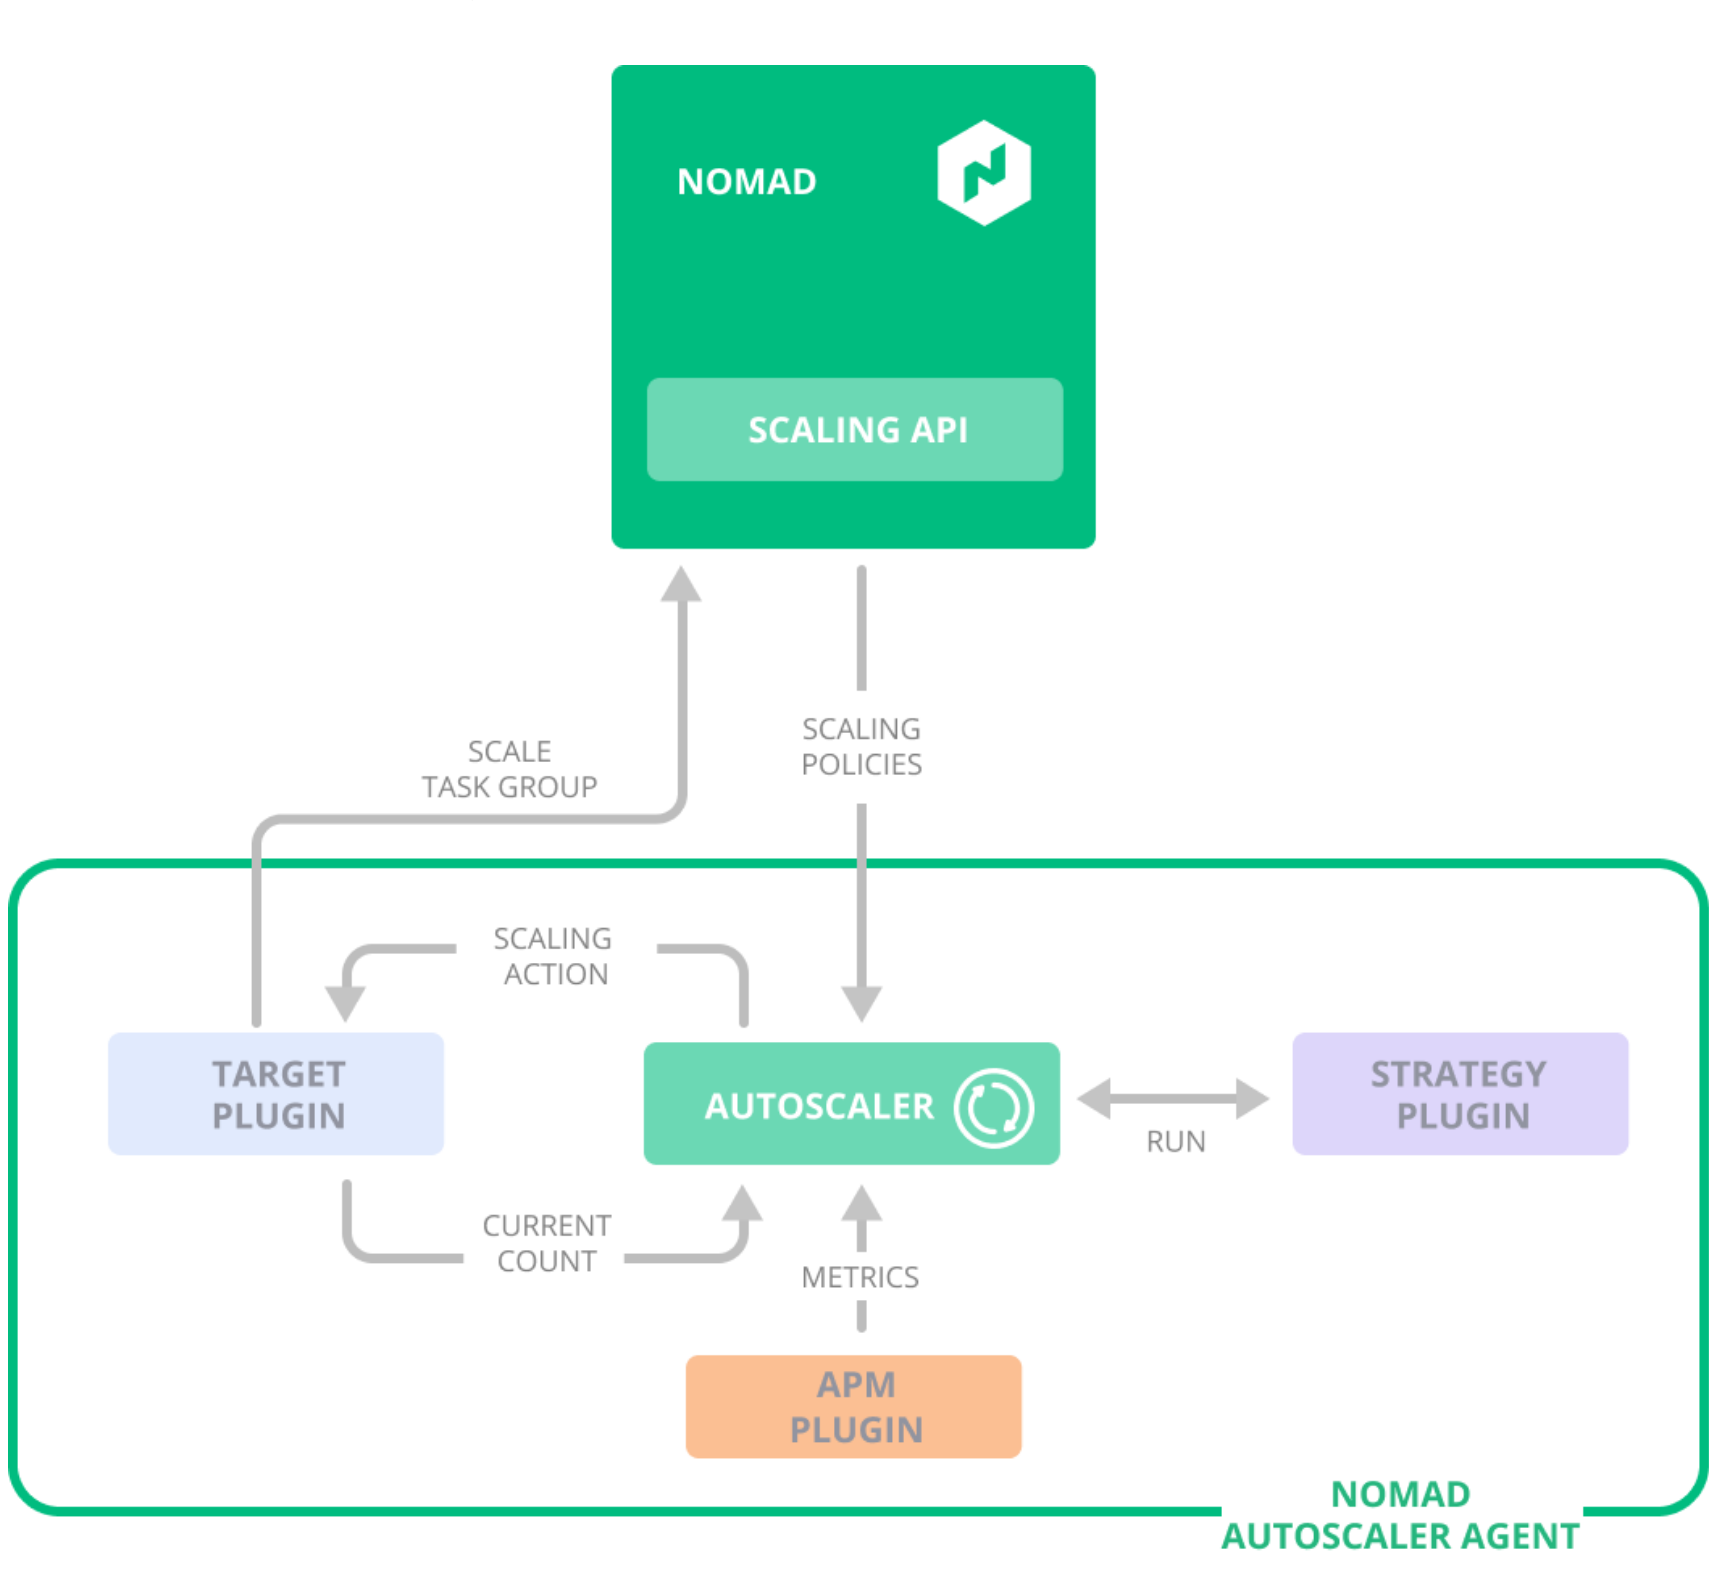
For auto-scaling applications, Nomad provides a plugin interface through which we can connect multiple data stores for metrics. For example, if using Prometheus for monitoring, we can easily integrate it with the Prometheus plugin and define the scaling policies using the PromQL expressions.
Let's have a look at the scaling Stanza, from the Spring microservice Nomad Job:
scaling {
      enabled = true
      min     = 1
      max     = 4

      policy {
        evaluation_interval = "2s"
        cooldown            = "5s"

        check "cpu_usage" {
          source = "prometheus"
          query  = "avg(nomad_client_allocs_cpu_total_percent{task='server'})"
          strategy "target-value" {
            target = 25
          }
        }
      }
    }
In simple words, we declare that we want Nomad to scale up to 4 instances of our app, if the average CPU load of the nodes running this task reaches 25%. There are many alternatives to try out, as long as there is a metric you are interested in, existing in Prometheus!
Generate Load and Observe
Time to generate some traffic using a sample JMeter Test Plan provided here. You need to open it with JMeter and modify the Server IP Address in the "HTTP Request" section:
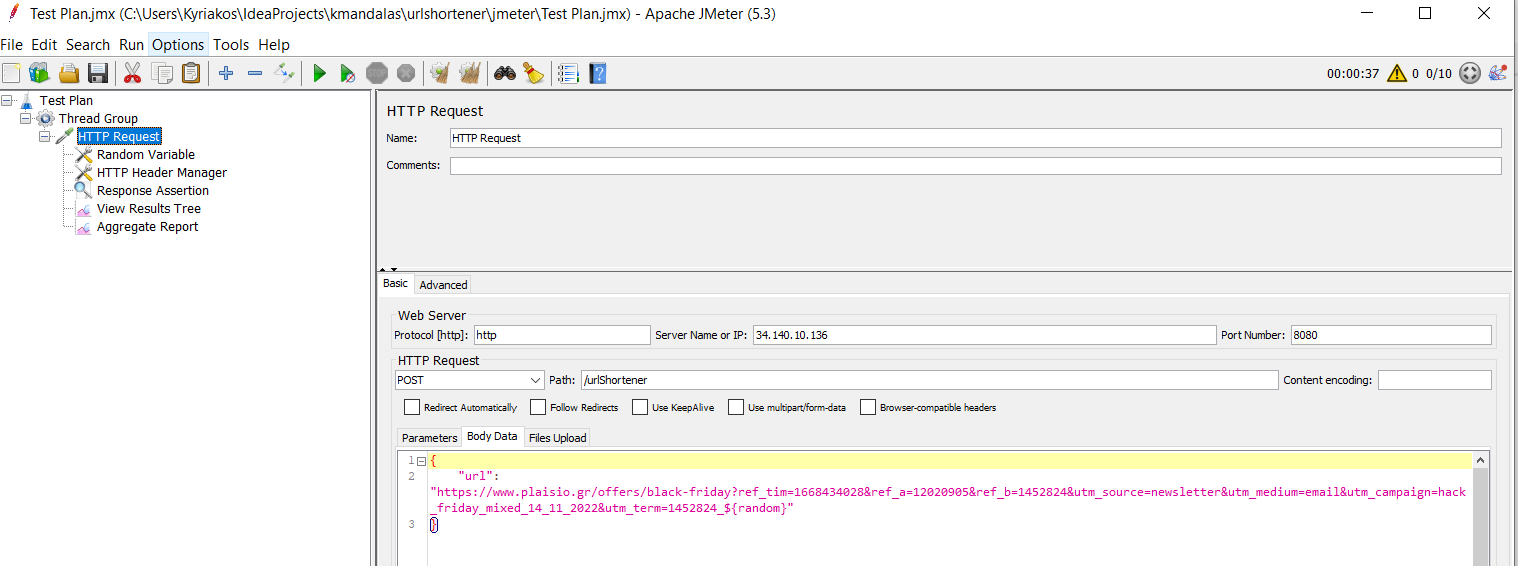
The Sample Spring Boot Native App
The sample app is a simplified "URL Shortener" and exposes 2 endpoints that can be accessed via the HA_Proxy's External IP and port.
The particular app is a Spring Boot native application built using Cloud Native Buildpacks in a Docker image. Spring Native provides support for compiling Spring applications to native executables using the GraalVM native-image compiler. Compared to the Java Virtual Machine, using native images provides key advantages, such as instant startup, instant peak performance, and reduced memory consumption. So, as far as auto-scaling is concerned we can surely benefit from all these advantages!
The complete source code plus Nomad job files are available at the Spring Boot native app demo on GitHub (linked earlier in this post).
Prometheus UI
Once the traffic starts to spike and the CPU load increases, you can observe and confirm it from Prometheus UI:
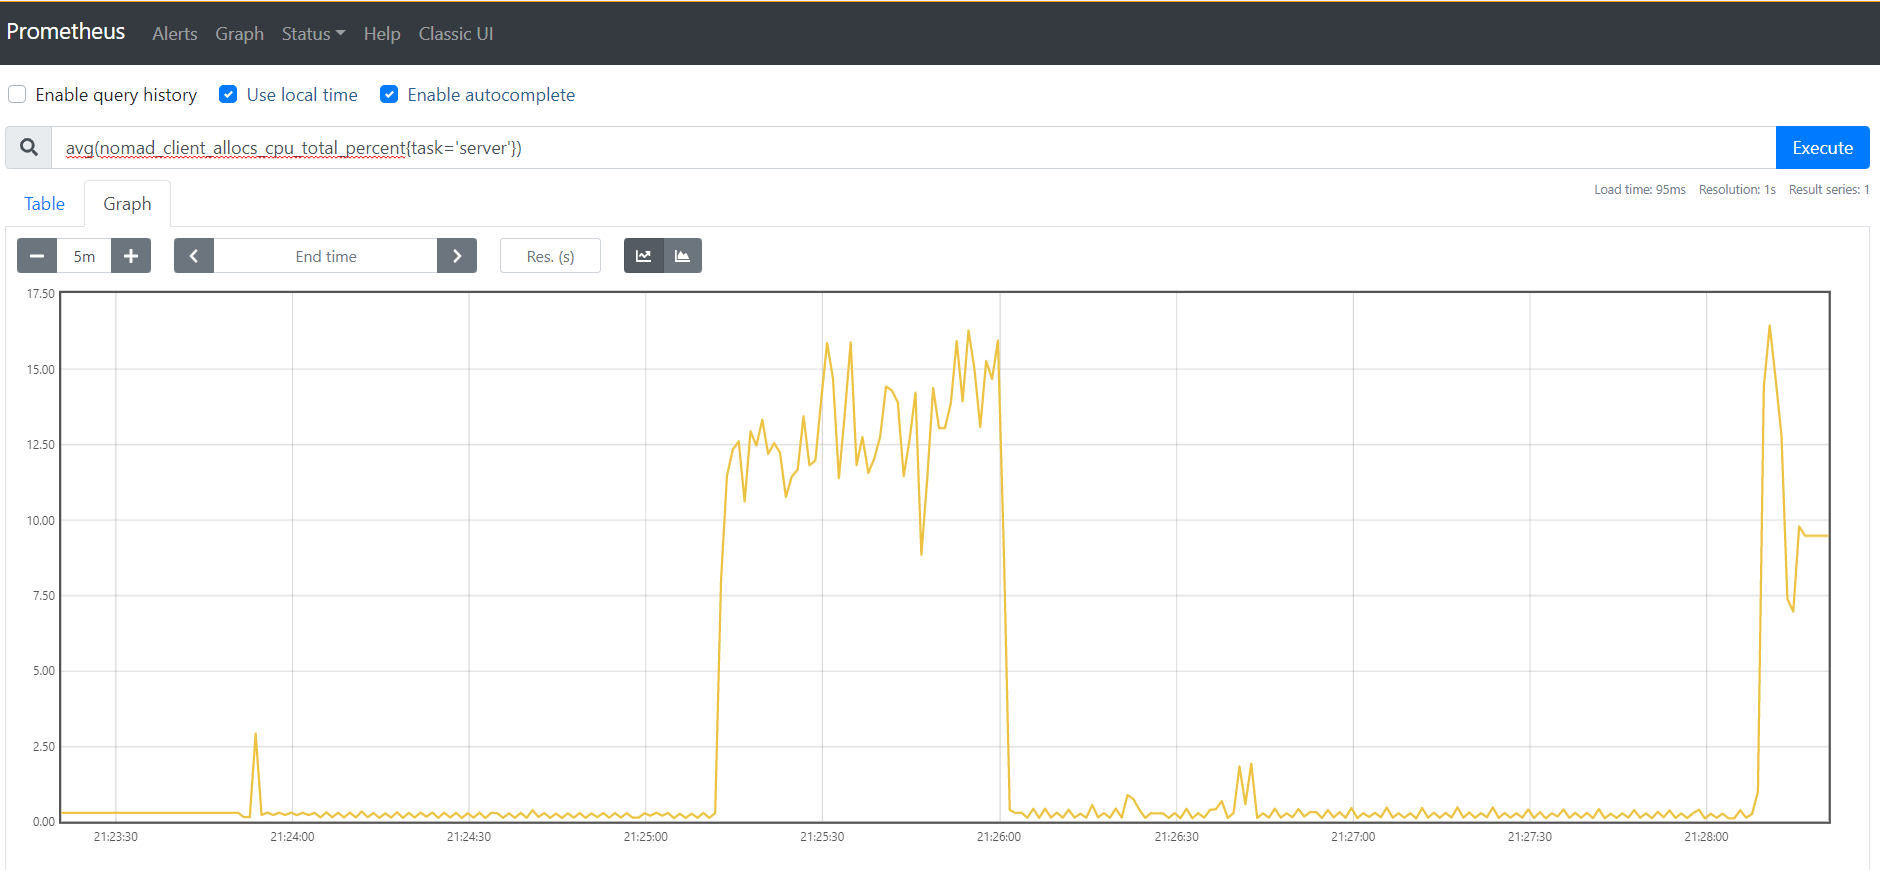
Nomad and Consul Observability
At the same time, from the Nomad UI you can also tail the Nomad Autoscaler Agents LOGs:

Confirm that Nomad begins to spin up more instances of the app, respecting our scaling policy. Look for lines like target=nomad-target from=1 to=2 reason="scaling up because the factor is XXX", target=nomad-target from=2 to=1 reason="scaling down because the factor is YYY", and possible errors or warnings that may be a sign that you need to apply a more sophisticated tuning.
The additional instances are discovered dynamically by the HAProxy load balancer and start to take their share of the load. The number of service instances, their IPs, and ports are also visible in the Consul admin UI.
Tearing It Down
Once you stop the JMeter load test, eventually the application will scale down and remain with a single instance running.
Finally, you may proceed to "destroy" the ephemeral GCP testbed, by executing from within your gcloud CLI the command:
terraform destroyClosing Thoughts
Horizontal scaling is a key characteristic of almost every solution; therefore, its architecture must be able to support it if and when needed. Auto-scaling is not always mandatory, especially if we are dealing with very predictable workloads. In this guide, we presented HashiCorp Nomad's way with a Spring Boot native microservice as the scaling target.
Opinions expressed by DZone contributors are their own.
Comments