How to Configure Apache ActiveMQ on AWS
This article walks you through what Apache ActiveMQ is and includes a detailed process of configuring Apache ActiveMQ on Amazon MQ.
Join the DZone community and get the full member experience.
Join For FreeApache ActiveMQ is an open-source message broker. It is one of the most popular Apache open source products and supports multiple industry-standard connectivity protocols. Clients can choose among multiple different languages and platforms for connectivity to ActiveMQ. Apache ActiveMQ provides client libraries in C++, Python, Java, C, etc. for developing applications. Some of the most popular protocols supported by ActiveMQ are AMQP, STOMP, MQTT, and JMS. ActiveMQ supports a wide variety of messaging use cases to meet almost all the needs of a production-grade messaging system.
Amazon MQ
AWS provided Amazon MQ is a managed service that can be used for Apache ActiveMQ or RabbitMQ. Amazon MQ service makes the management, configuration, deployment, and usage of these two message brokers easy on AWS. Amazon MQ makes the lifecycle management and operation of these services easy for an IT organization as this is a fully managed service provided by AWS. Code written to connect to on-prem Apache ActiveMQ can be transparently migrated to use ActiveMQ using AWS.
Benefits of Using Amazon MQ
Easy Migration
Migrating your existing application to Amazon MQ is easy as it provides support for a wide variety of APIs and protocols such as JMS, MQTT, AMQP, WebSocket. If you have an existing application or code that uses an on-prem Apache ActiveMQ connectivity, you can easily connect to Amazon MQ using minor configuration changes.
Lessen Operational Overhead
The tasks of maintaining servers, applying patches, upgrading the OS, networking, etc. are all managed by AWS. So from an operational perspective, your organization doesn't have to deal with all the complexity and operational overhead. Security updates, software upgrades, and server and application health maintenance are all taken care of by AWS, making the development and maintenance of applications easy for the app developer.
Quality of Service
Amazon MQ provides a high throughput service that is provisioned for high availability, fault tolerance, and message durability by replicating the messages across multiple AZs (Availability Zones). This ensures the service availability even if an AZ goes offline or fails.
Configuring Apache ActiveMQ on AWS
- Log in to the AWS console and select Amazon MQ from the list of services.
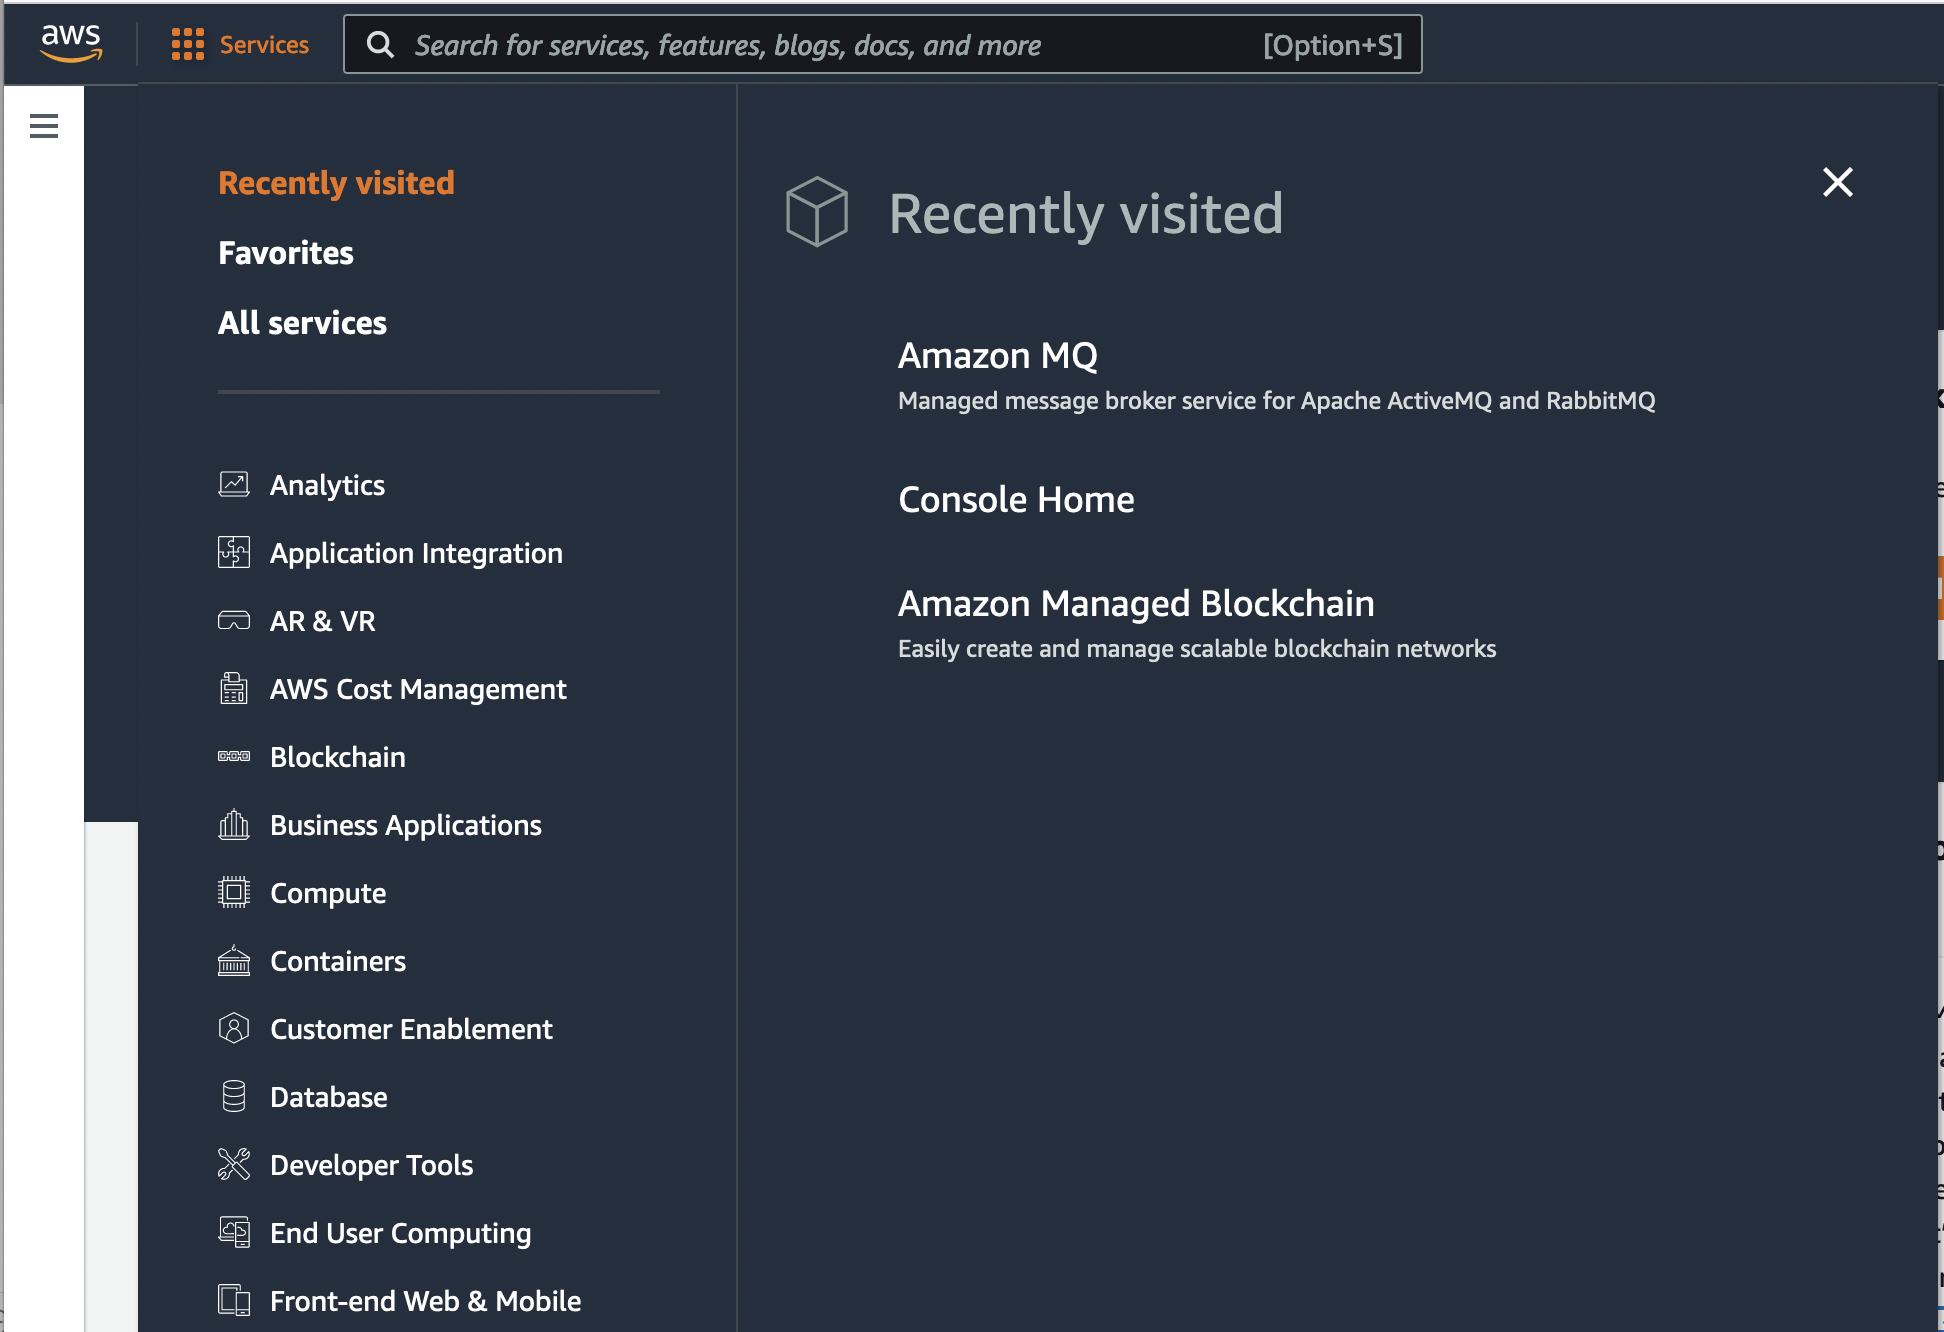
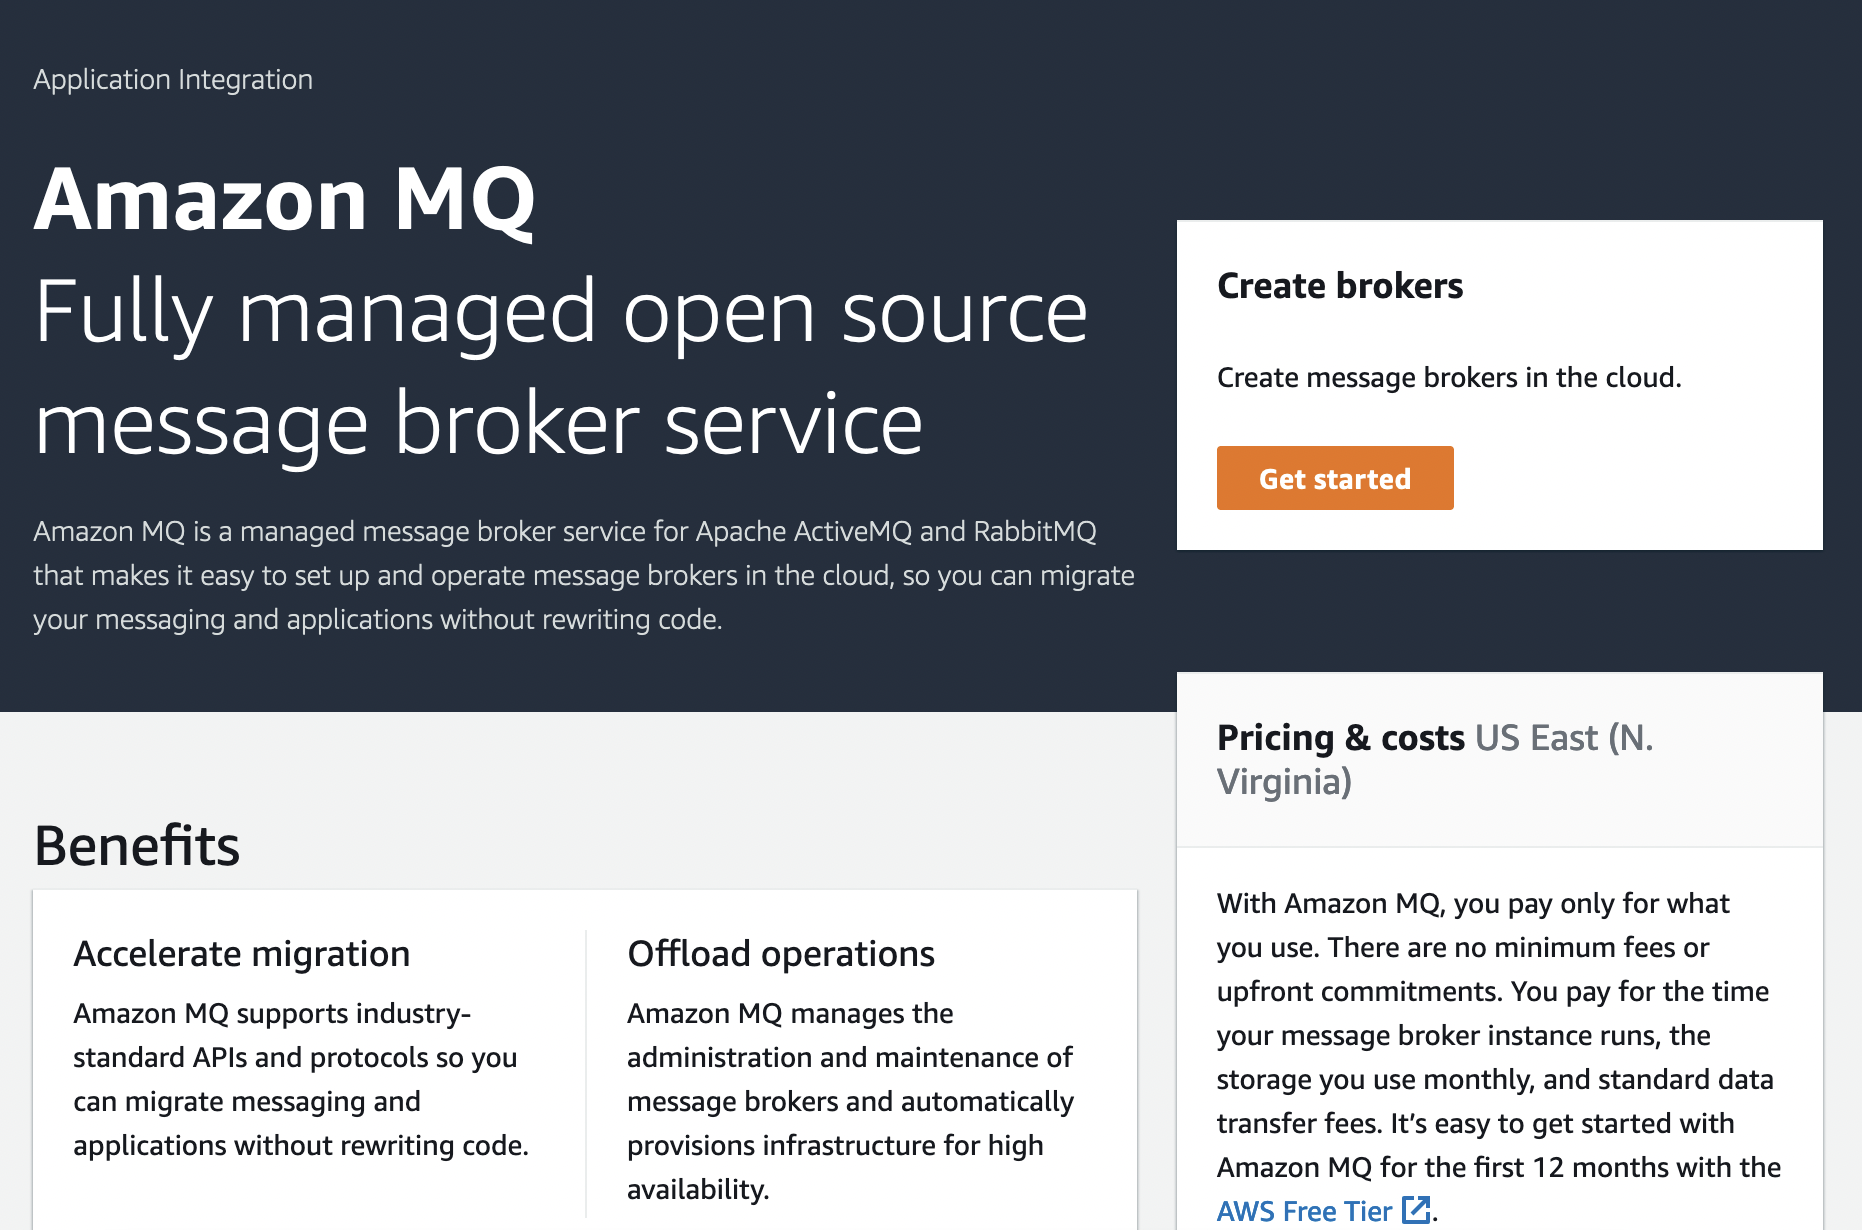
- On clicking on the Amazon MQ service, a new page opens with the link to create brokers. Click on the "Get Started" icon for creating the service.
- On the select broker engine page, select Apache ActiveMQ and click next. Amazon MQ provides support for Apache ActiveMQ and RabbitMQ.

- On the next page, select the deployment and storage type. In our case, we will select the "deployment mode" as a single instance broker.
- Deployment mode- You can select broker type to be either:
- Single instance broker - this type of broker is available in a single AZ and is usually used for testing and development.
- Active/standby broker - this is a configuration type that provides automatic failover and high availability. You can configure the brokers to be in separate AZs for DR scenarios and high availability.
- Storage type
- Durability optimized - Use this option if you want higher durability. This uses the Amazon Elastic File System for the storage of messages. In this case, messages are stored in a redundant fashion across multiple AZs. This configuration also allows for sharing the data between active and standby servers.
- Throughput optimized - Use this option for high throughput and low latency. Data, in this case, is stored in Amazon Elastic Block Store. This configuration cannot be used with Active/Standby broker mode as it doesn't allow data accessibility from multiple servers at a time.
- Durability optimized - Use this option if you want higher durability. This uses the Amazon Elastic File System for the storage of messages. In this case, messages are stored in a redundant fashion across multiple AZs. This configuration also allows for sharing the data between active and standby servers.
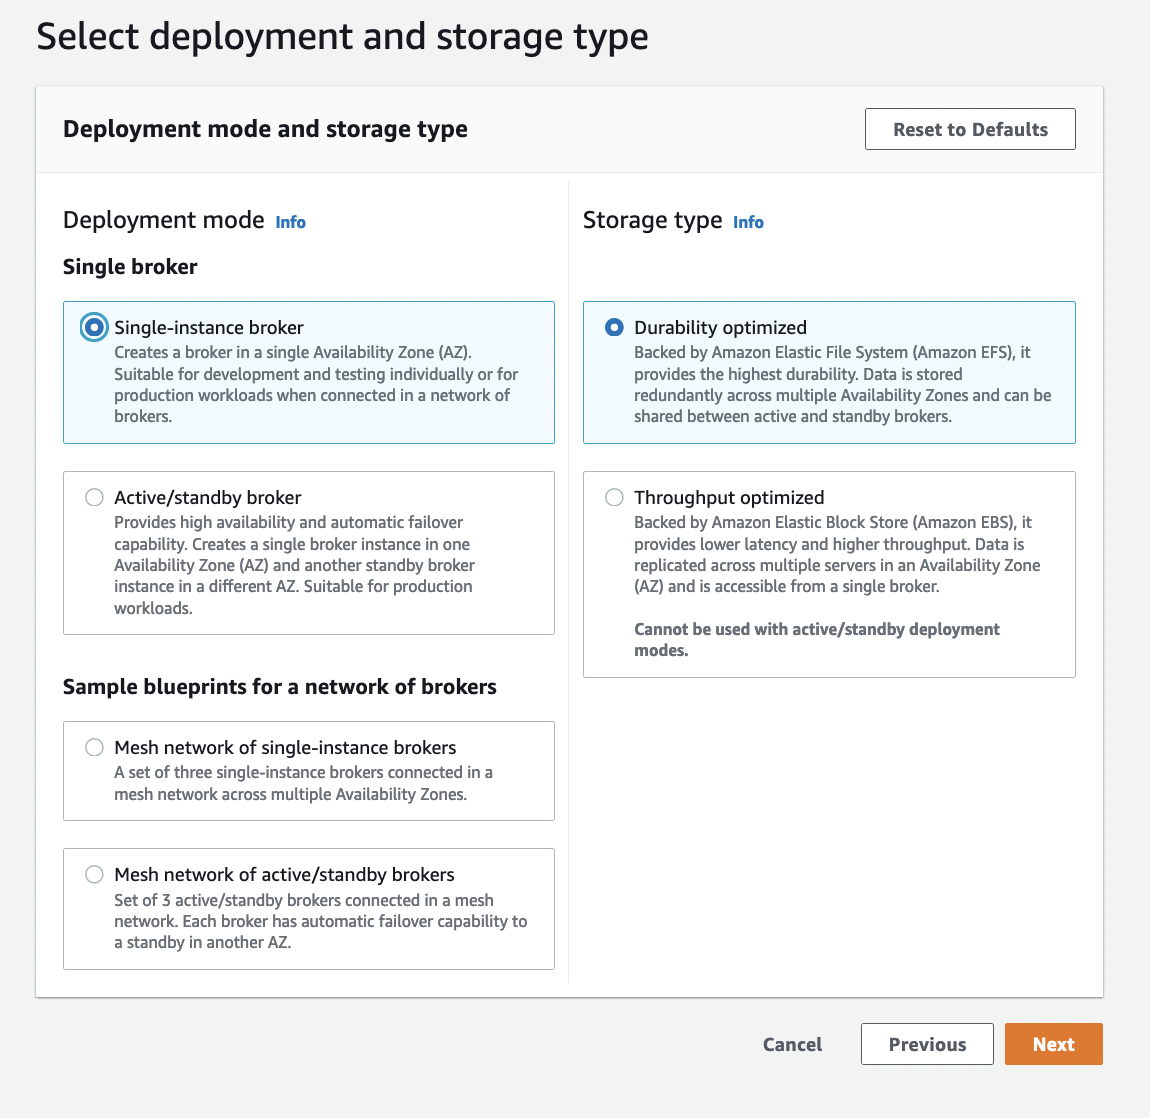
- We will select a single-instance broker type and durability optimized storage type. Click next.
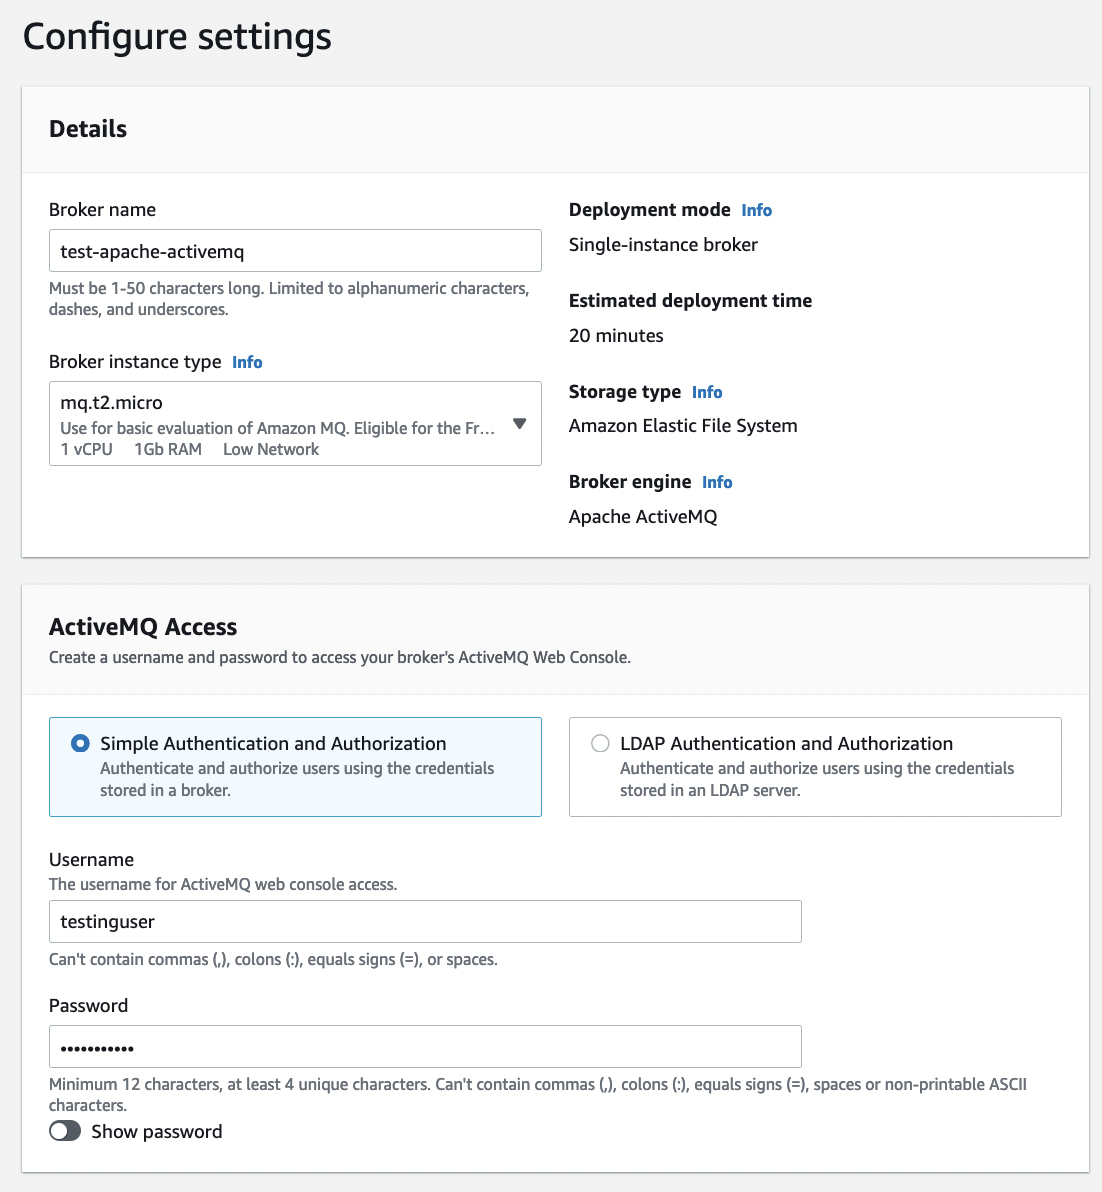
On the next page, you can input the broker name and the broker instance type. Broker instances is a list of available machine types that can be used to deploy the message broker. Depending upon the type of instance type you selected, your broker will have different configurations for network capacity, vCPUs, and memory. In this case, we will select the free tier instance type, mq.t2.micro. For authentication, you can either select simple authentication and authorization or LDAP-based authentication and authorization. Under the access tab, enter the user name and password for console access.
Other properties
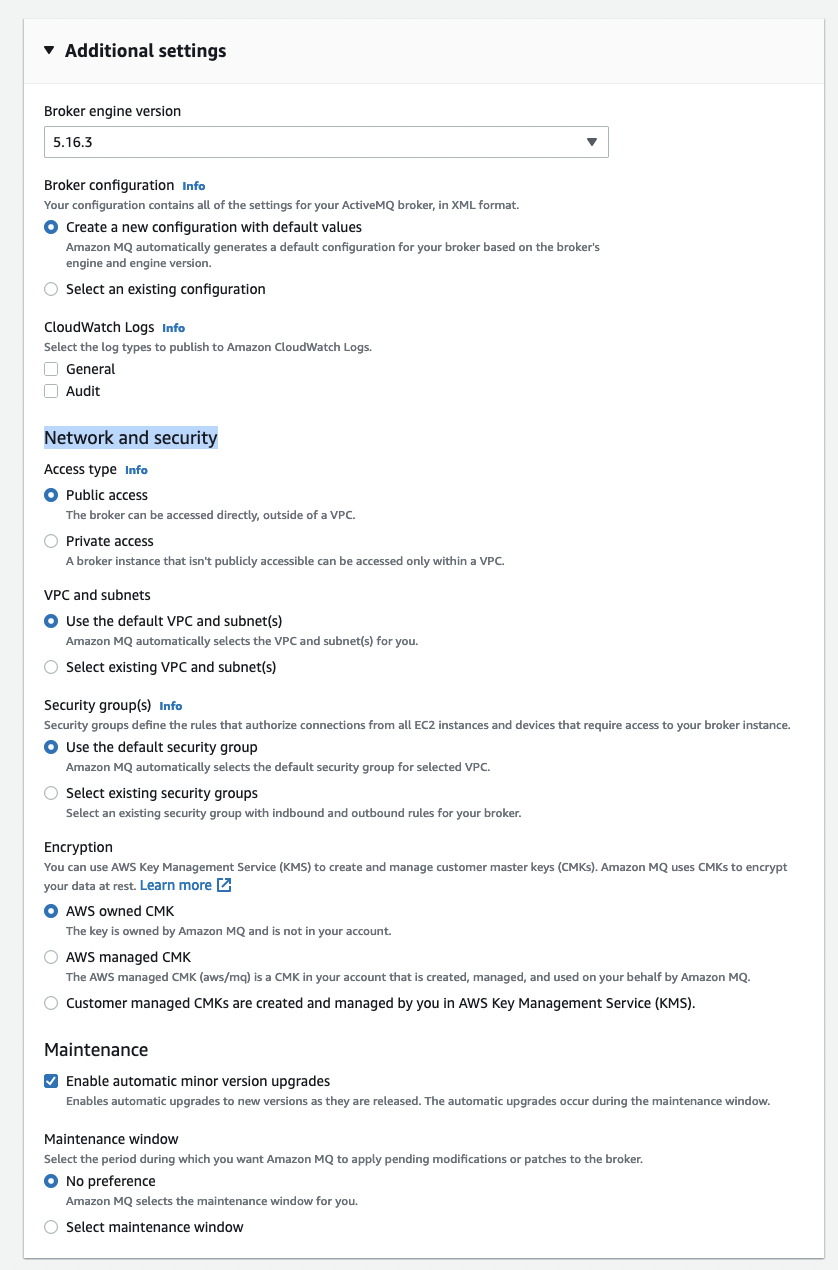
Broker Engine version - select the broker version you want to use. We selected the latest version available at this time, 5.16.3.
Broker configuration - You can either create a new configuration or reuse an existing configuration. We will create a new configuration.
CloudWatch logs - We will leave this option unselected.
Network and security - you can configure the broker to be available through a public URL or make it accessible only within the VPC.
We will use the defaults for the rest of the options such as VPC, security groups, encryption, and maintenance.
Once done, click next. On the next page, you can review and edit the selections you already made. Click "create broker" once you are ready to create the broker.

Congratulation! Your broker is getting provisioned by AWS in the background after this step. It takes approximately 20 minutes for the provisioning step to complete. Once this step is completed, you are ready to use the Apache ActiveMQ service on Amazon.
Opinions expressed by DZone contributors are their own.
Comments