

Configuring Okta as a Client Provider in MuleSoft Anypoint Platform
This article explains how you can add Okta as a client provider in the MuleSoft Anypoint Platform and the impact on other applications that were deployed.
Join the DZone community and get the full member experience.
Join For FreeTo follow this tutorial, if you already have an Okta account, you can use that. Otherwise, you need to create a trial account on Okta and Anypoint Platform.
Note: If we do not configure any external client provider, MuleSoft Anypoint Platform itself acts as a client provider. Once some other external client provider is configured, we cannot use MuleSoft as a client provider.
Please use the following links:
Okta: https://www.okta.com/free-trial/
Anypoint platform: https://anypoint.mulesoft.com/login/signup
Steps to Configure the Okta Account
Step 1:
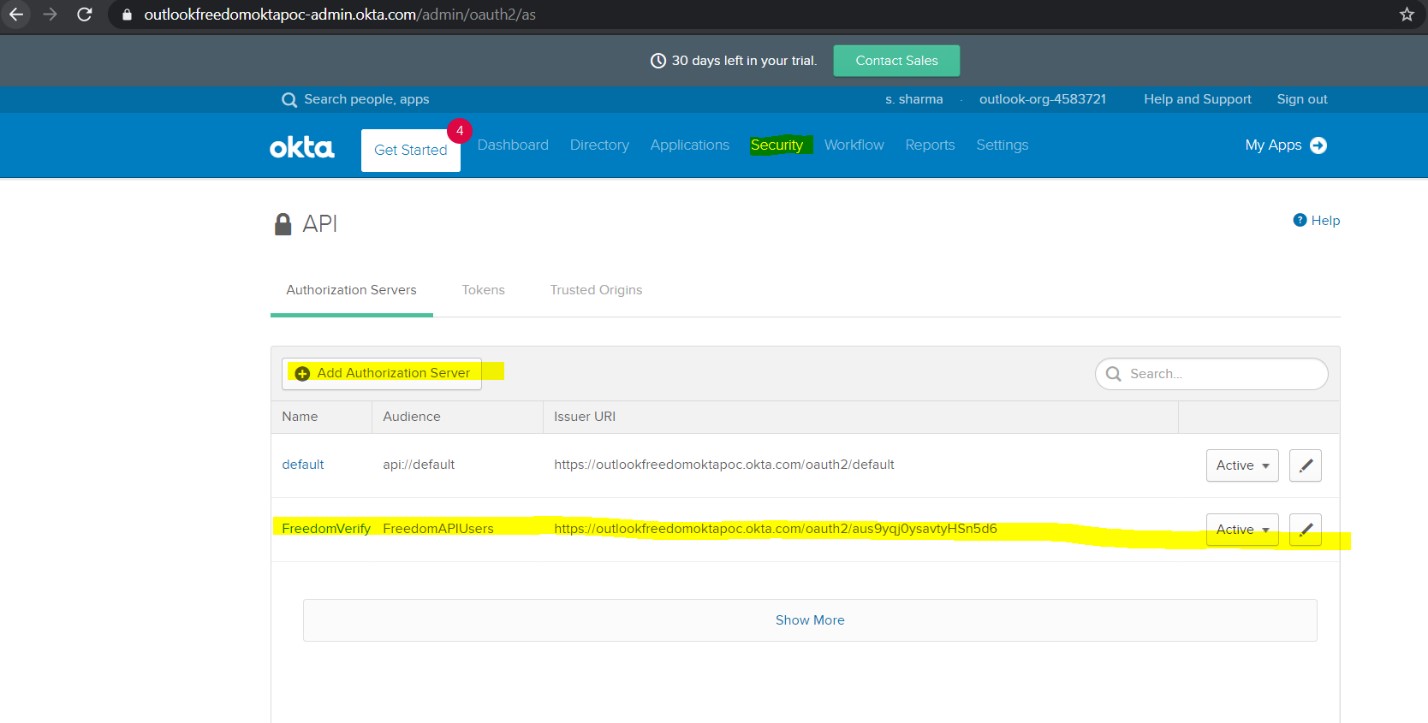
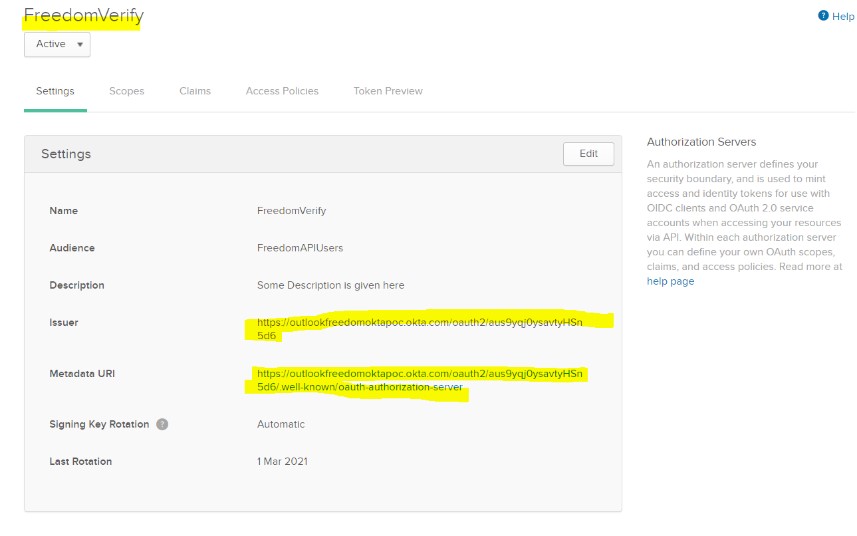
Login as admin in Okta. Go to Security -> API -> Click on Add Authorization Server.
Step 2:
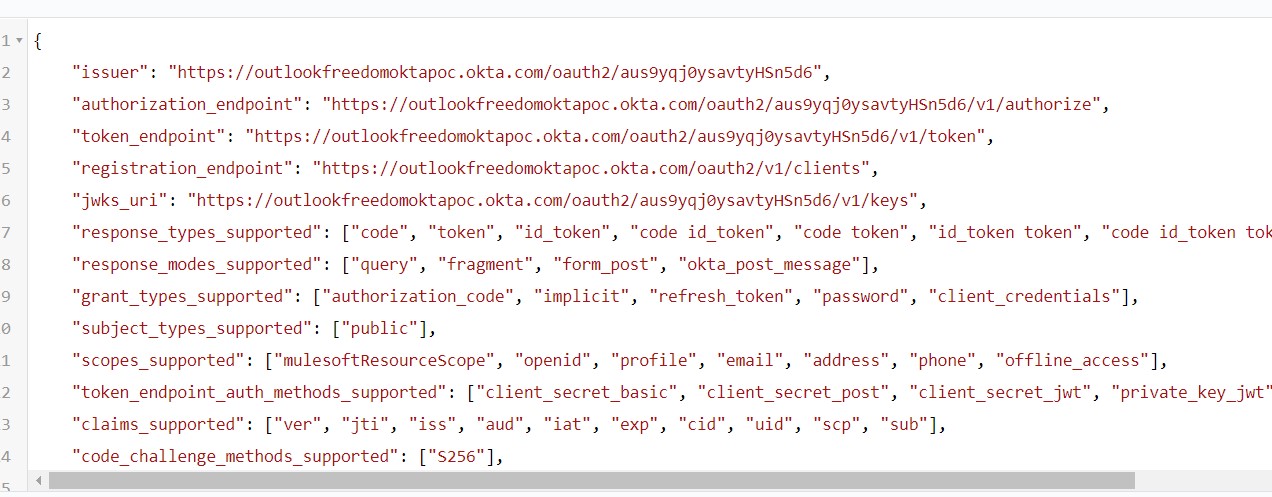
From Step 1, you will get one Metadata URL. Keep it handy, as we will be using that while configuring Okta in Anypoint Platform. The information in that URL looks like this:
Step 3:
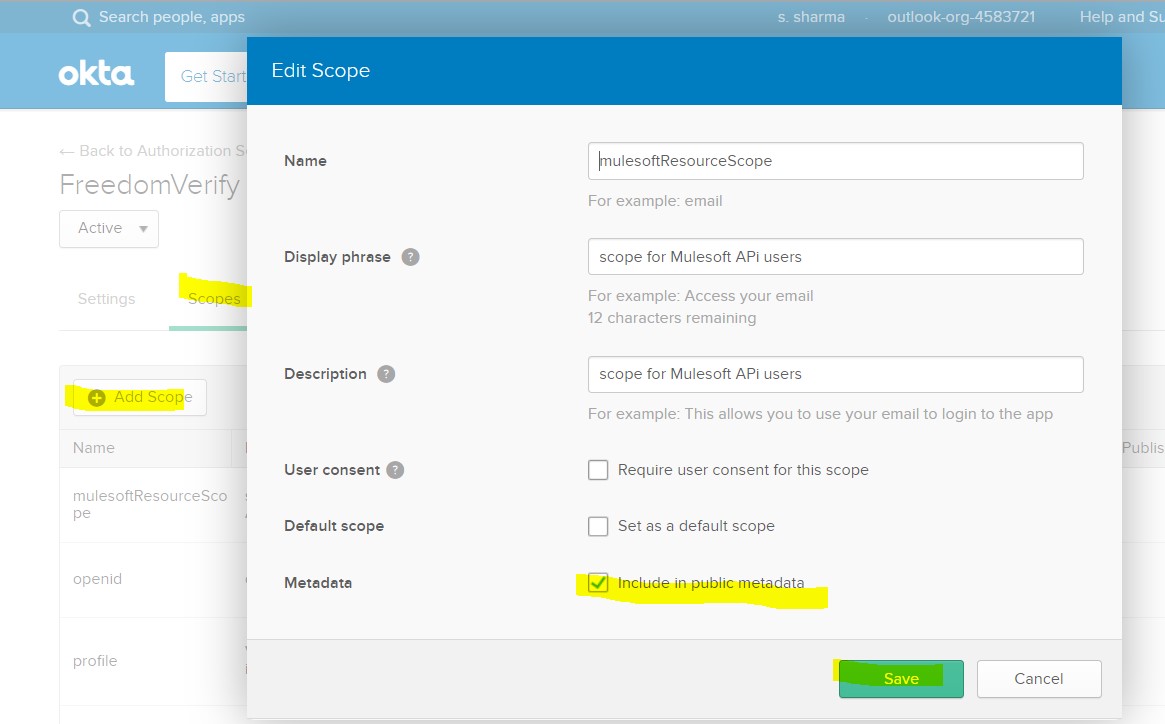
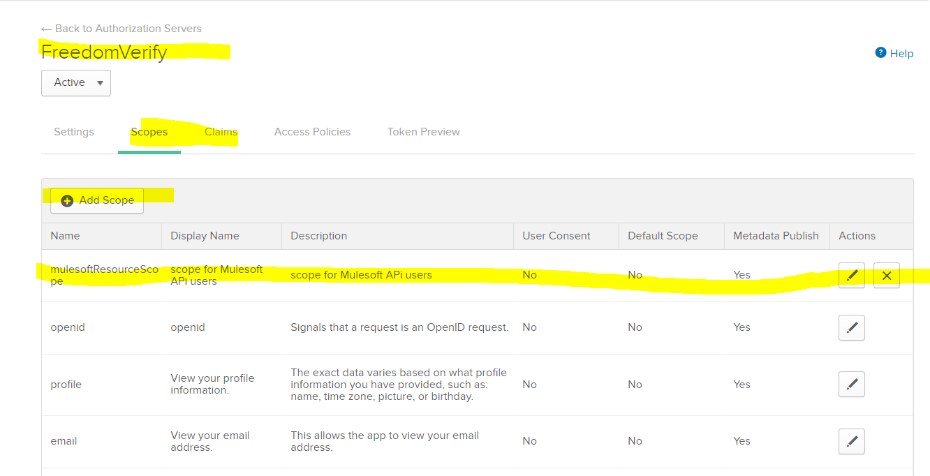
Go to Scope -> Add Scope -> Save.
Step 4:
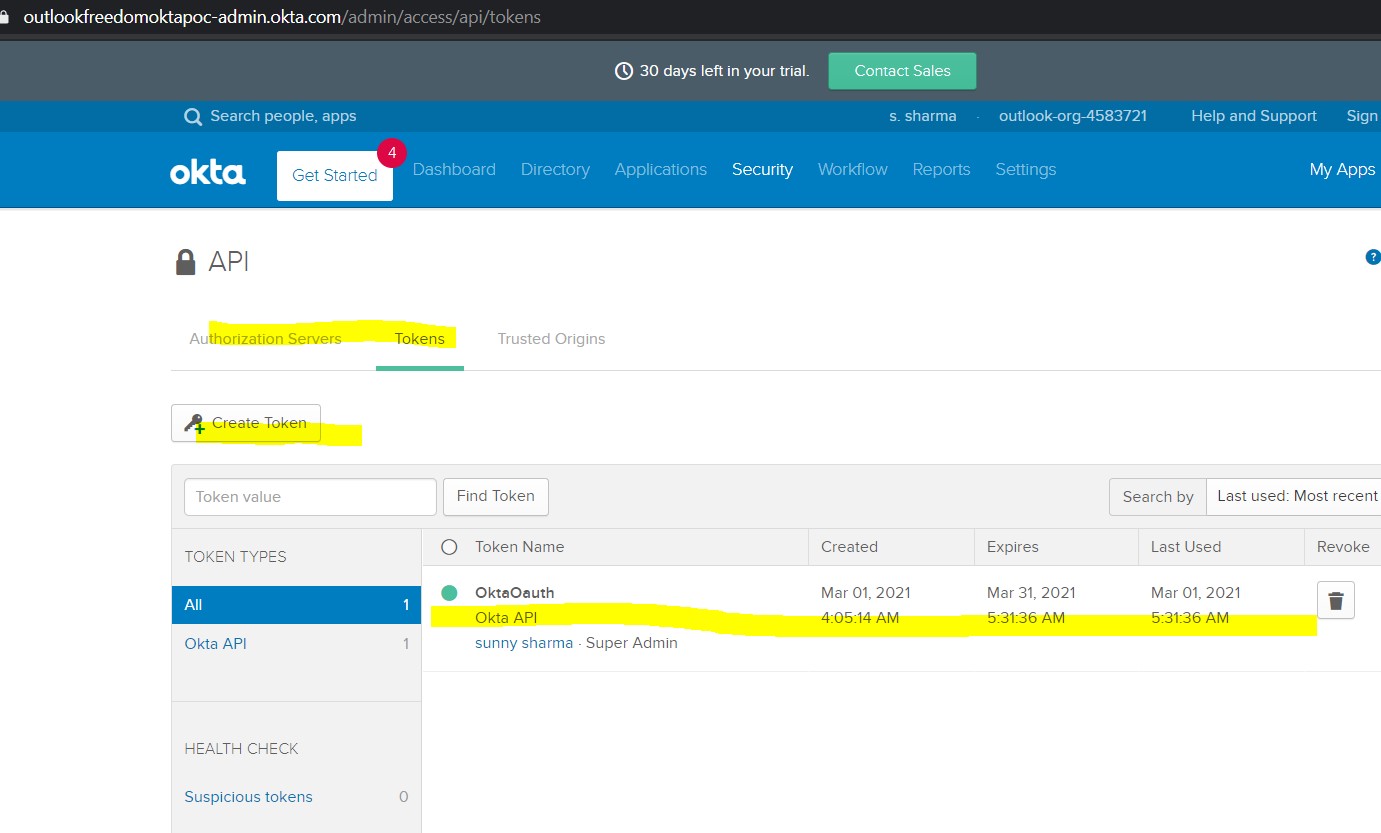
Go to Security -> API -> Tokens -> Create Token. (Keep the token value saved somewhere, as we can’t see its value later.)
Step 5:
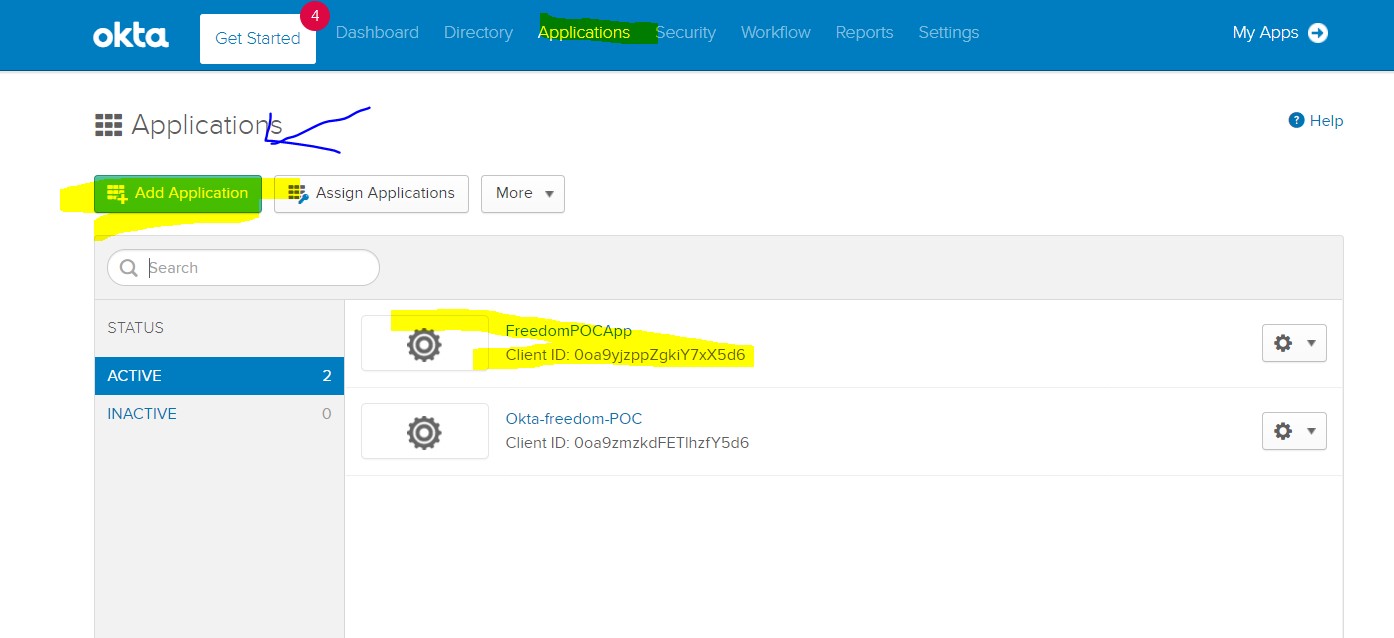
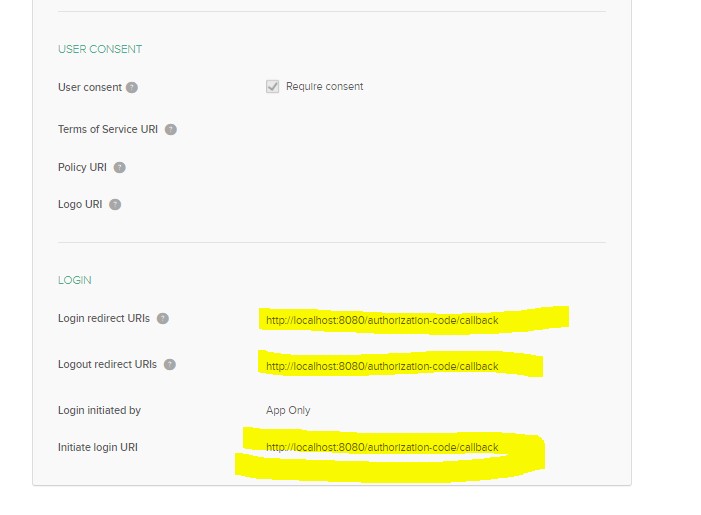
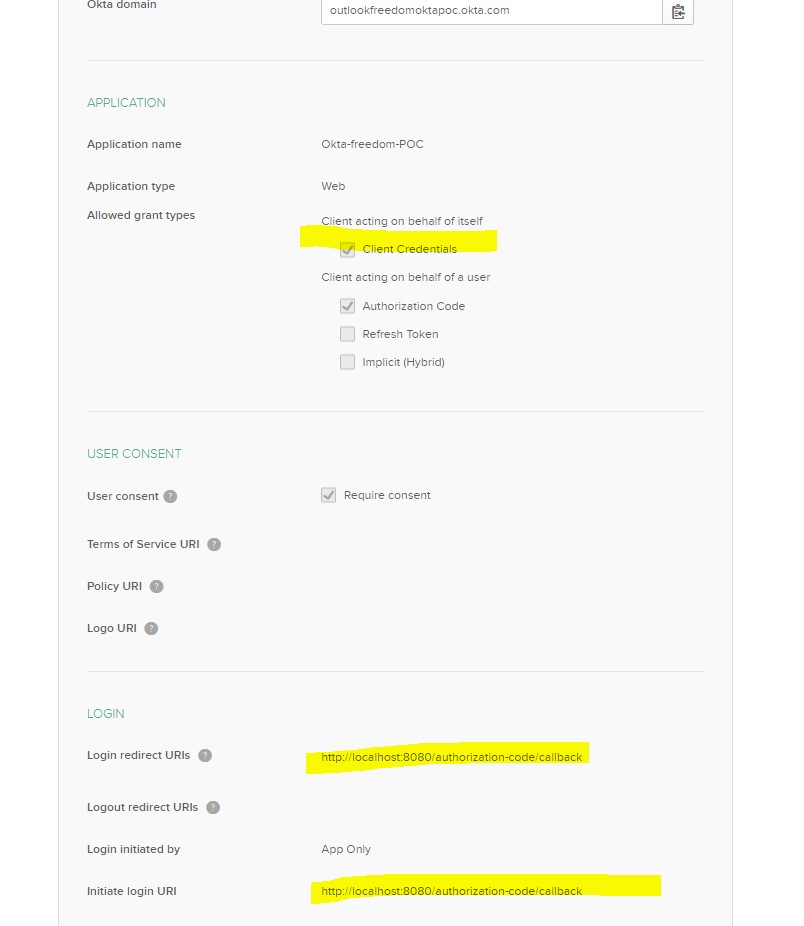
Go to Application -> Add Application -> Do the below configs:
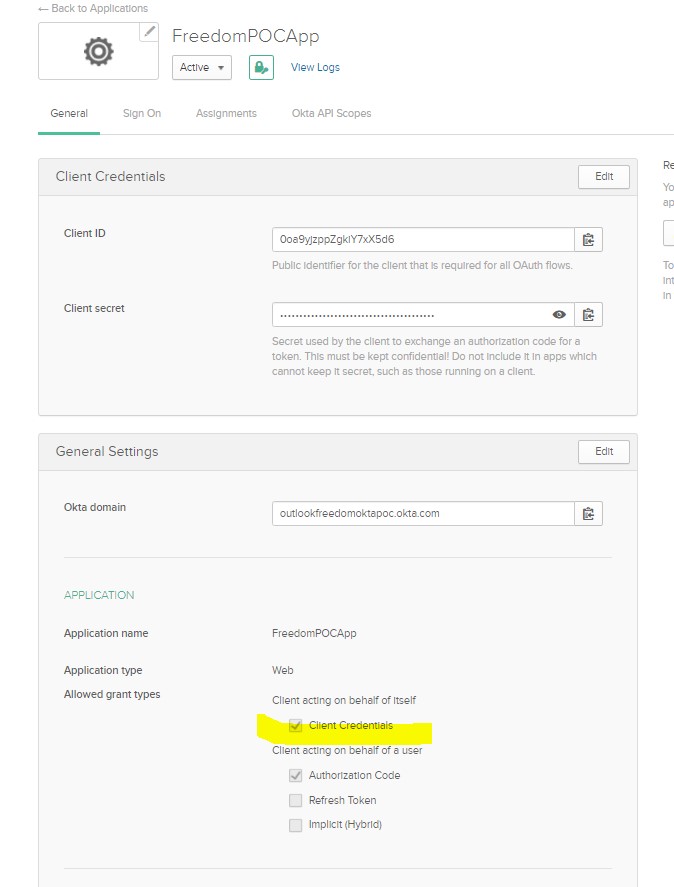
Step 6:
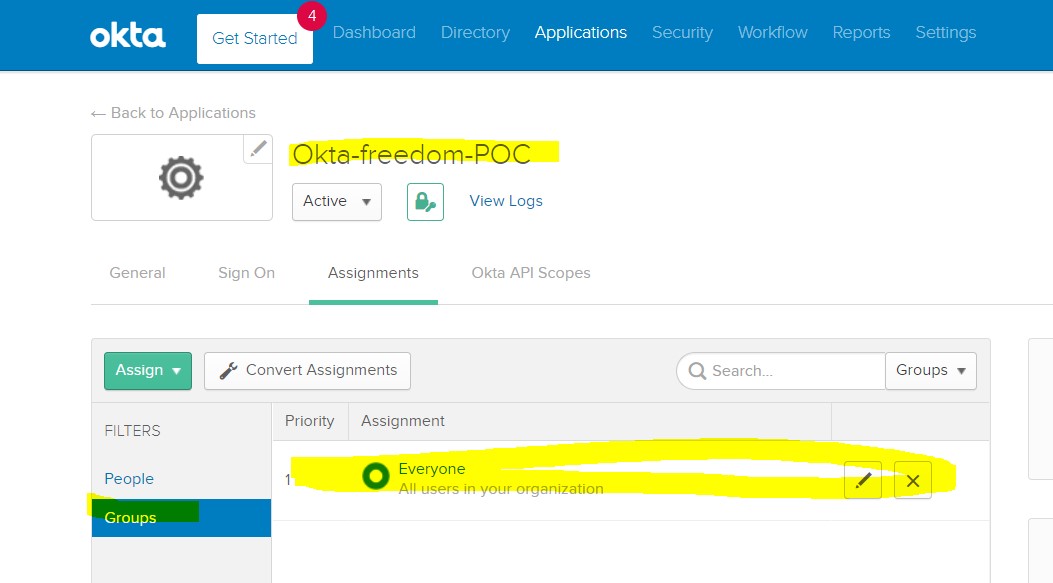
Go to this Application -> Assignments -> Groups -> Everyone. (If you want few people to be added, add those in the “People” tab, or add them as a group in the “Group” tab.)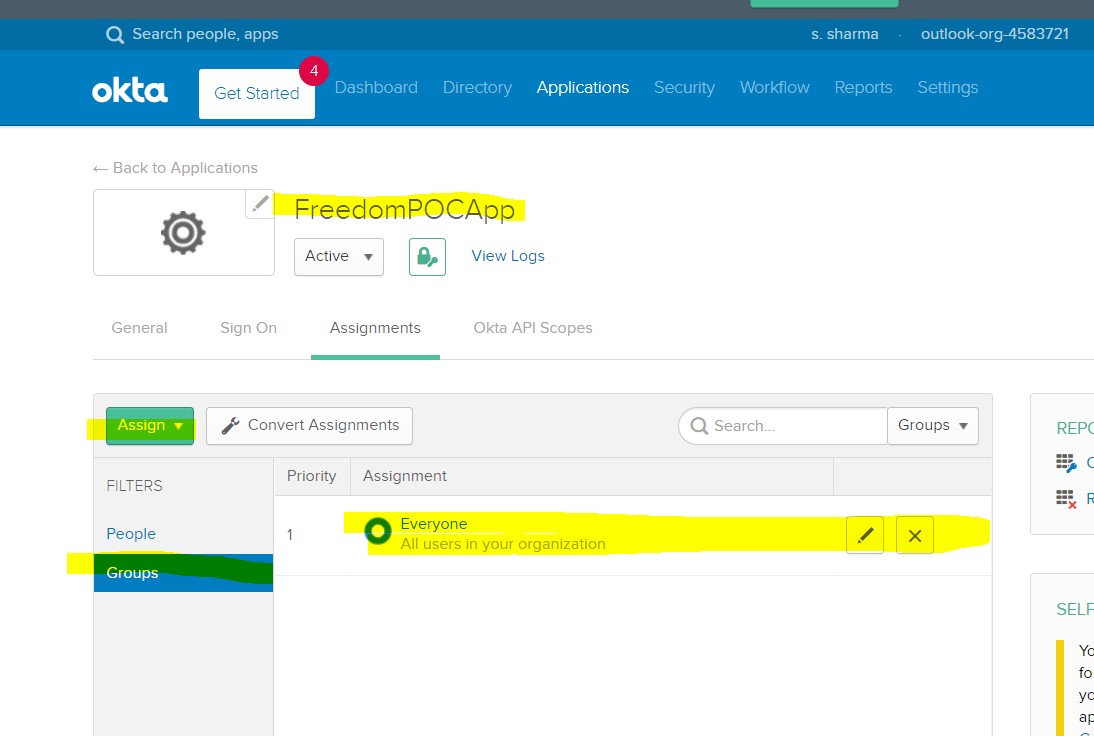
Step 7:
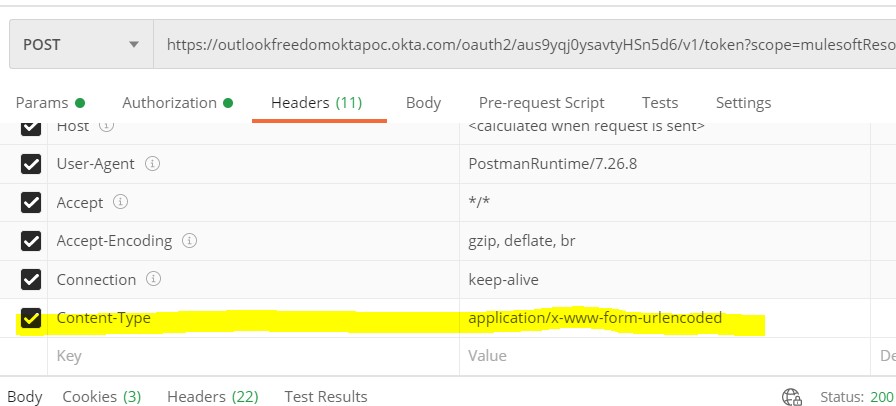
Let’s test our Okta Config through Postman, if we are able to get an access token or not.
Authorization: Basic Auth with Client Id and Secret are generated when we created an App as shown below:
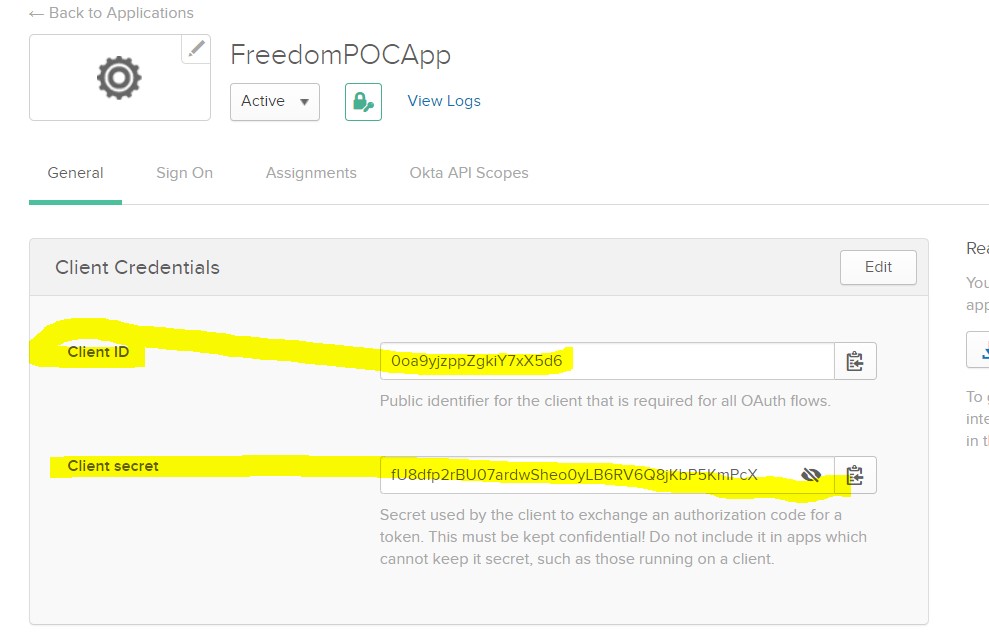
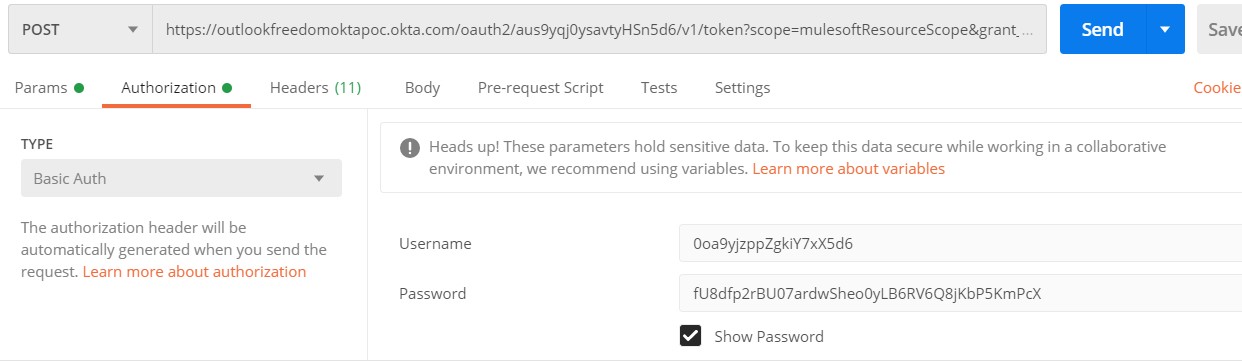
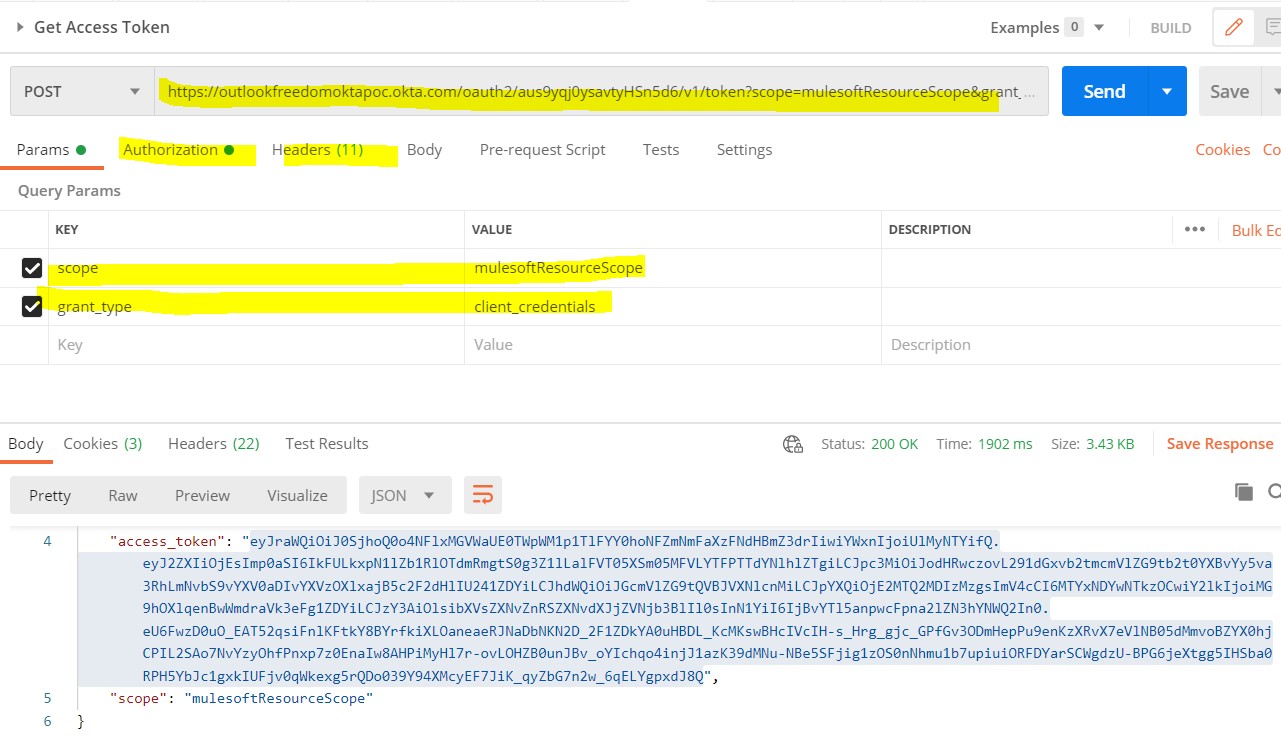
Yes, it is working fine.
Configure Okta as a Client Provider
Let’s move to Anypoint Platform and configure Okta in it as a client provider.
Step 8:
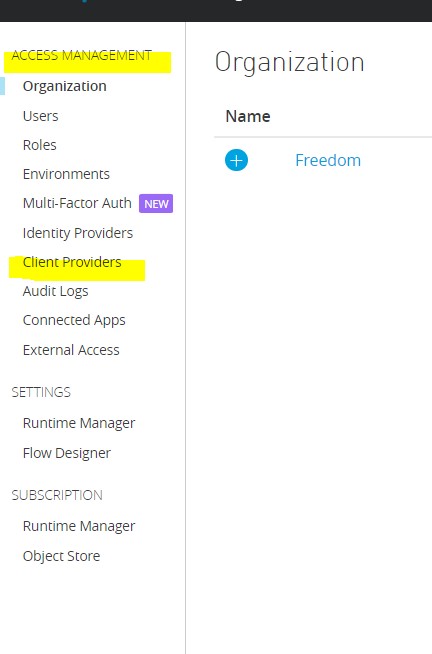
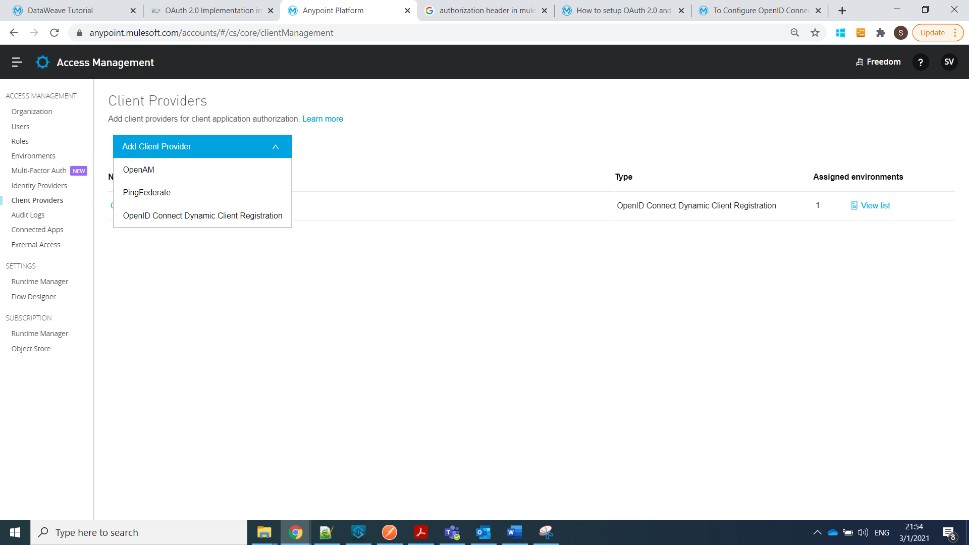
Login to Anypoint platform -> Access Management -> Client Providers -> Add -> Open Id Connect Dynamic Client Registration.
 Step 9:
Fill in all the details as shown below (use the metadata URL that we got in Step 1, Pic-2). Click on that URL, open that JSON in a JSON viewer, and you will be able to see all the required URLs to be configured in the platform.
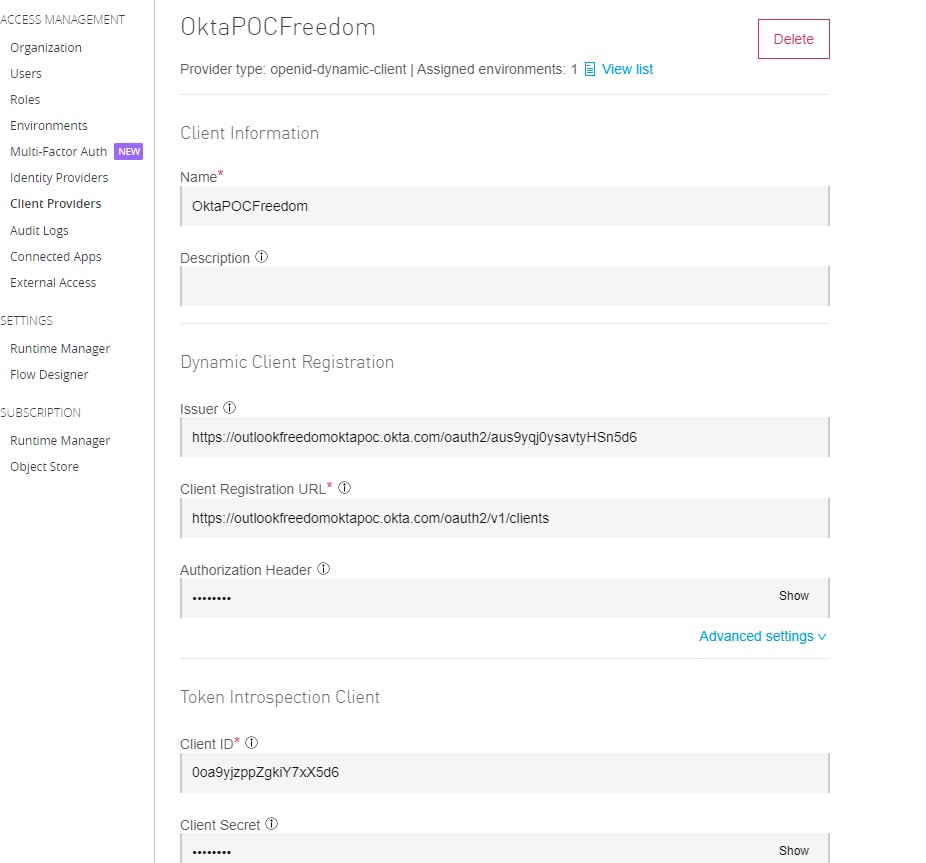
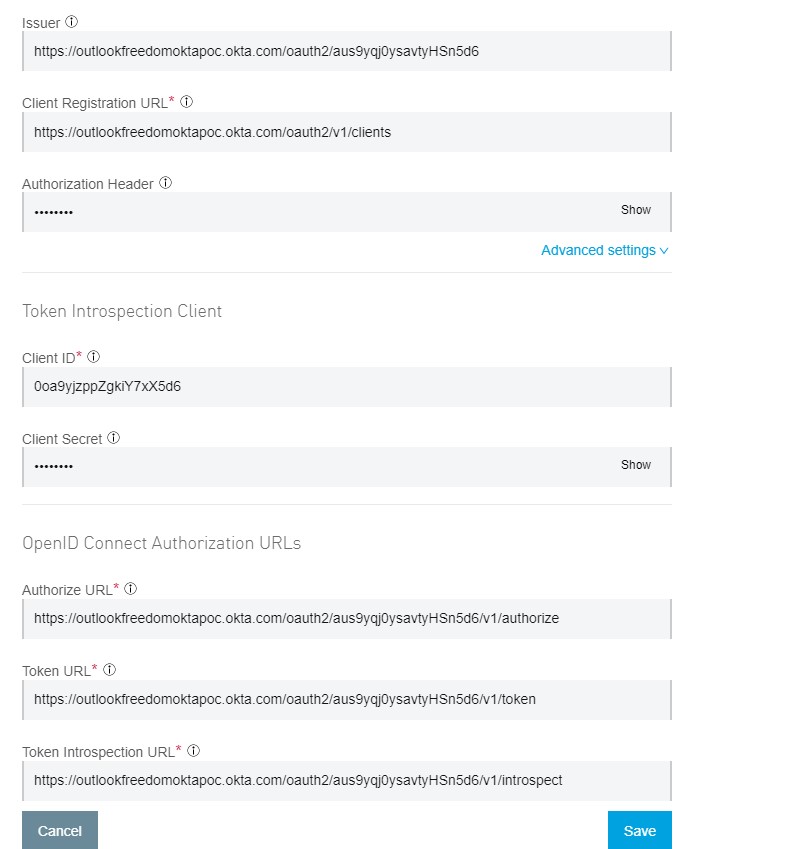
Note: Authorization Header = SSWS(space)<Token value that we got from Step 4>
Step 10:
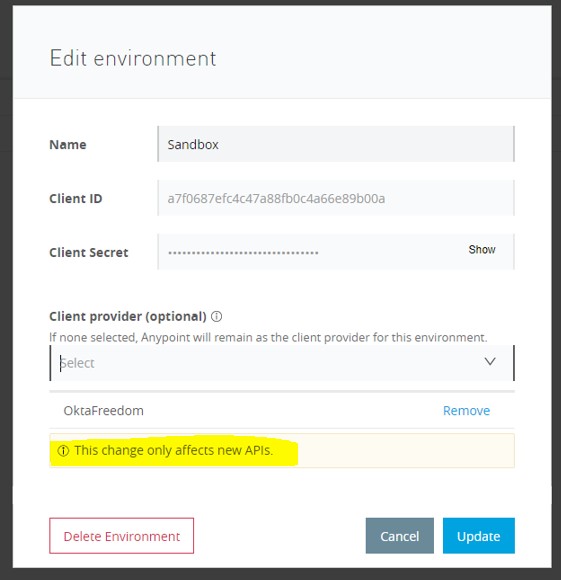
Let’s assign this client provider to a particular env. For that, go to Access Management -> Environments -> Select Environment -> Select Client Provider as shown:
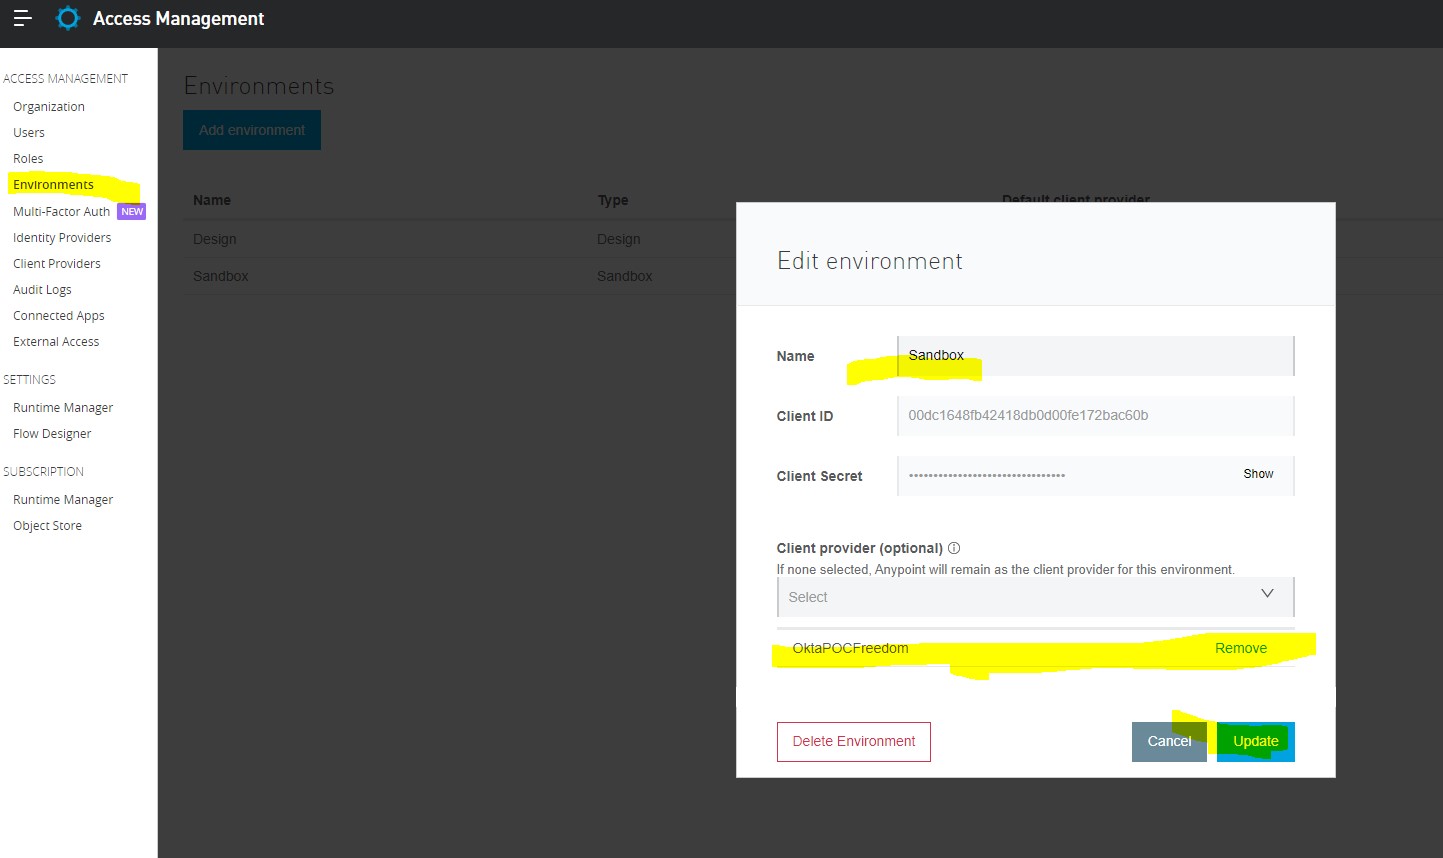
Now your Okta is configured as a client provider. You can Use OKTA to generate Client Applications.
Configure Open ID Connect Access Token Enforcement Policy
Let’s configure Open ID Connect Policy on one of the applications using Okta as a client provider.
Step 11:
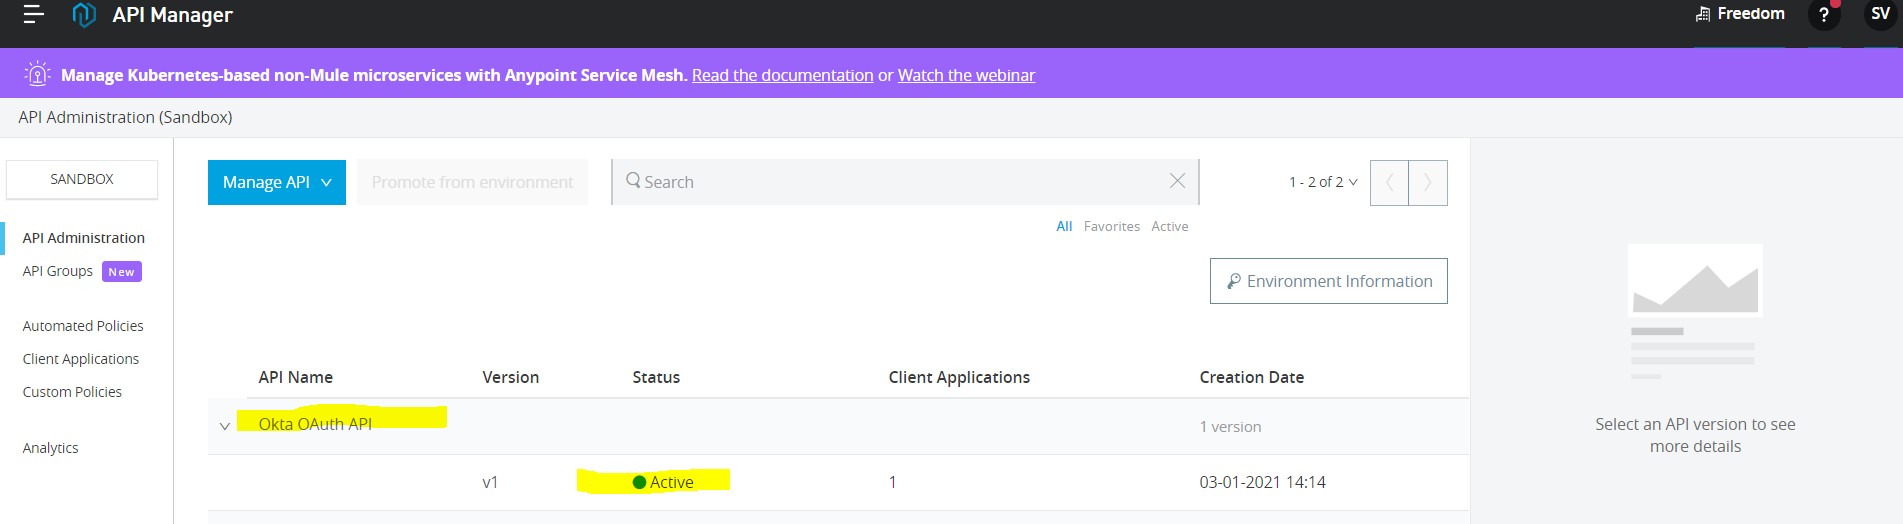
Now Create an App -> Deploy that to CloudHub -> Configure its API Autodiscovery. Its Status in API Manager should be “Active”.
 Step 12:
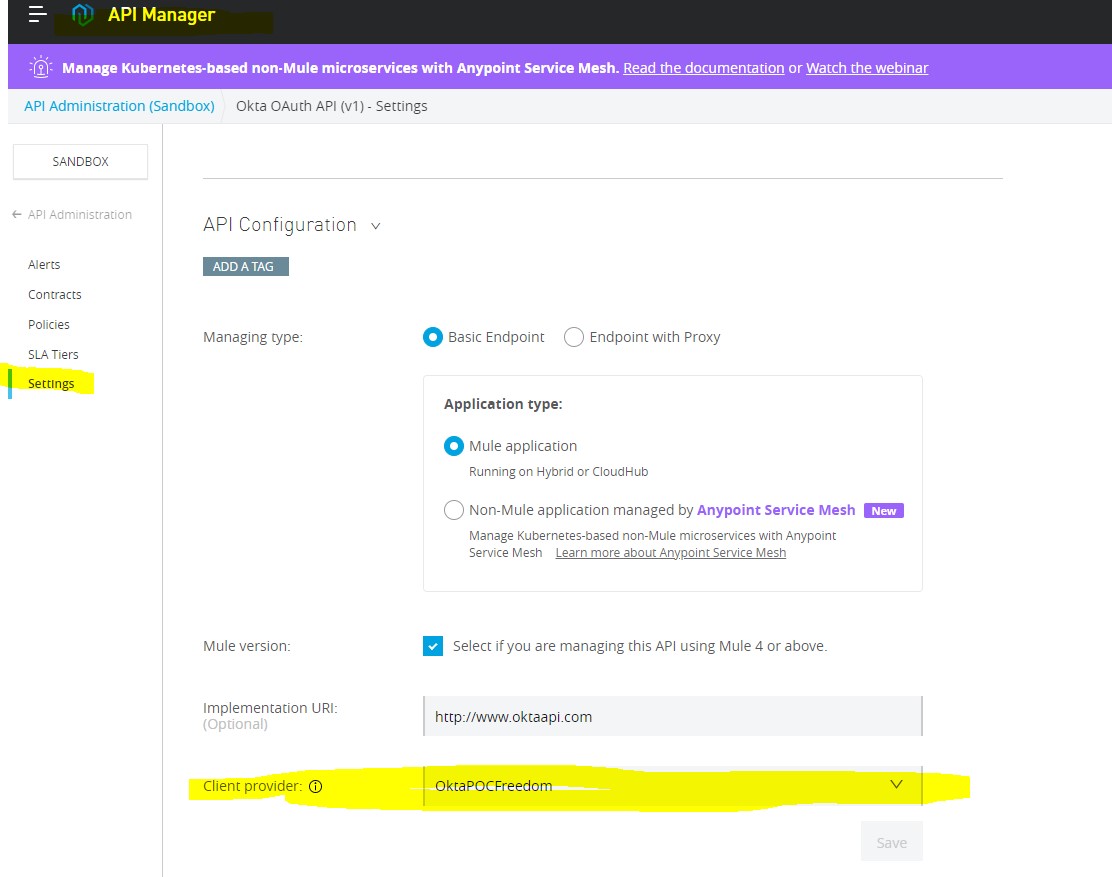
Click on this API version: “v1” -> go to settings -> Chose Client Provider. (It should be there by default, but if you have more than 1 client provider, select any.)
Step 13:
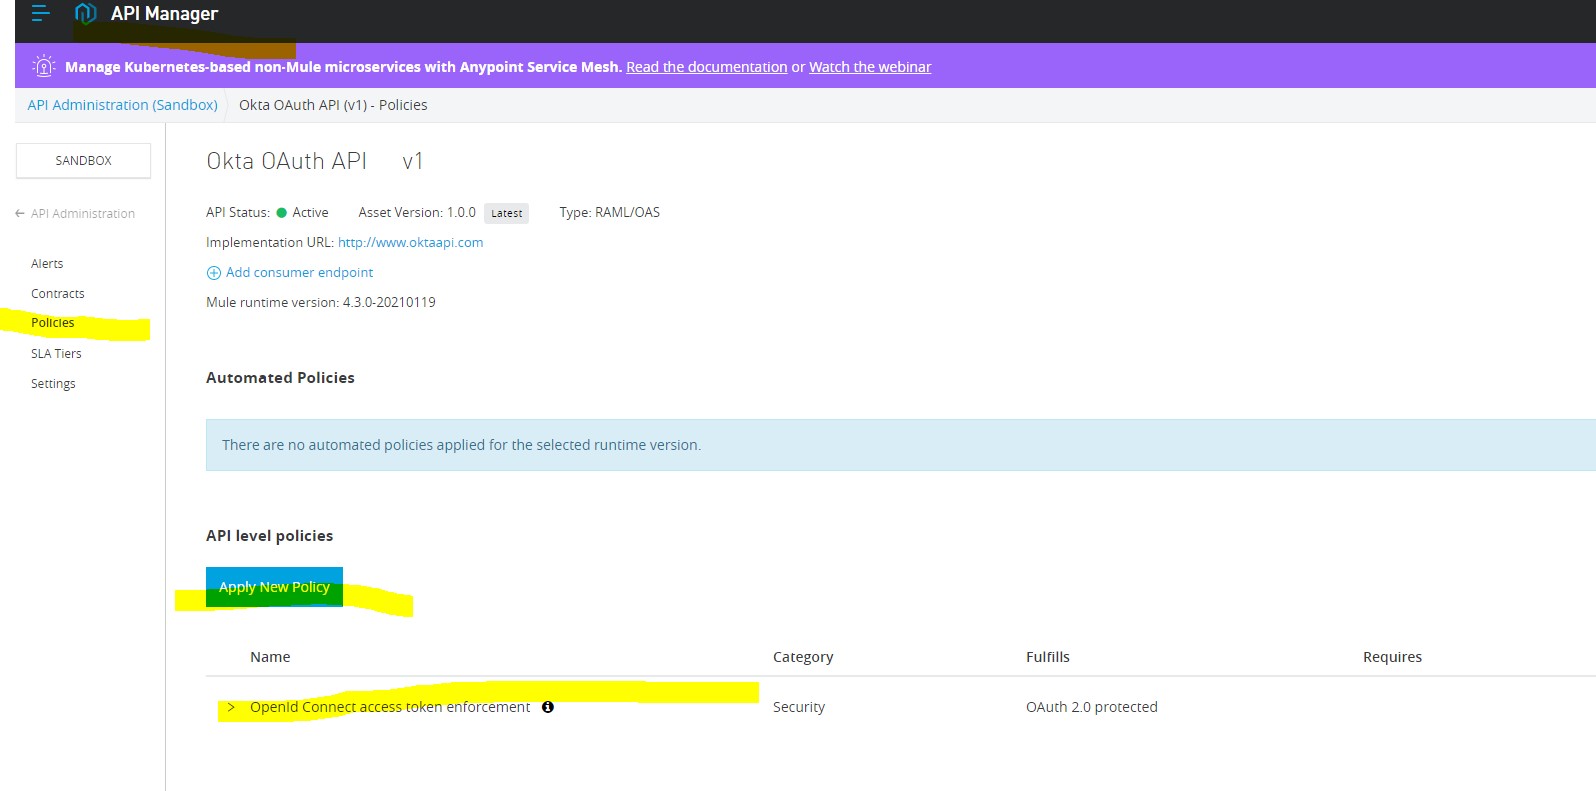
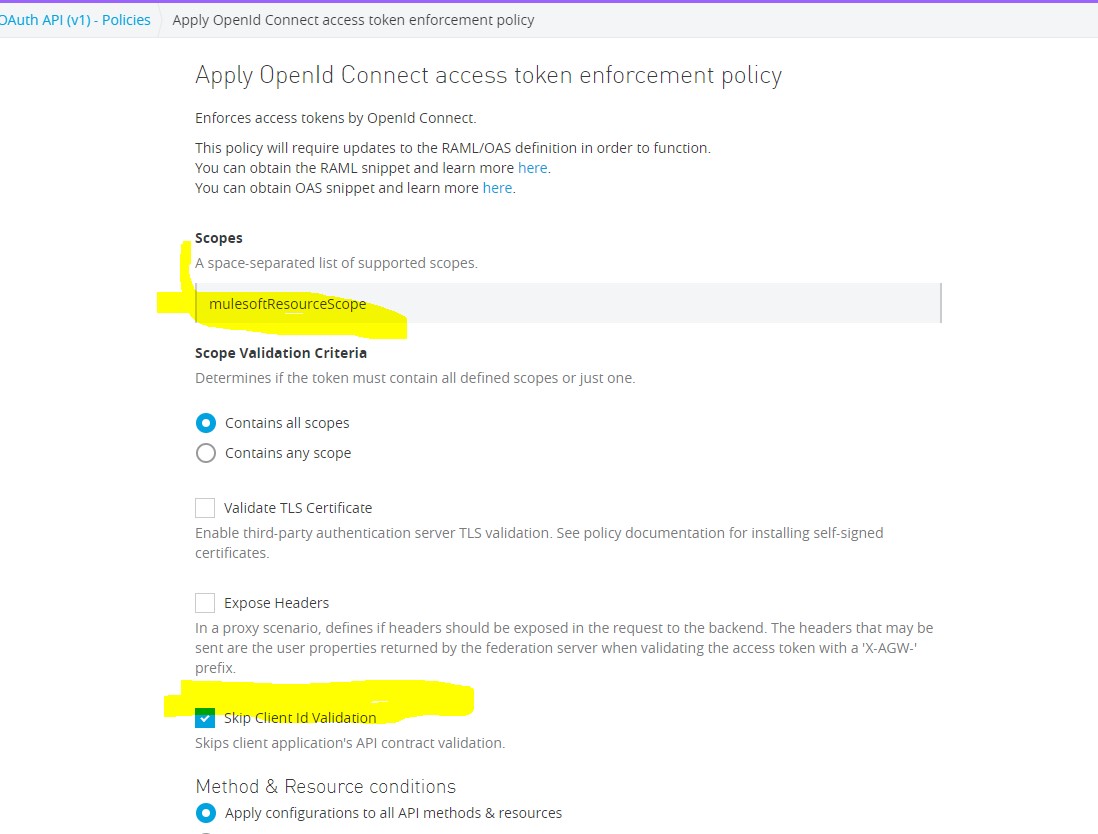
Go to policies -> Open ID Connect Access token Enforcement -> Do configs as shown.
 Step 14:
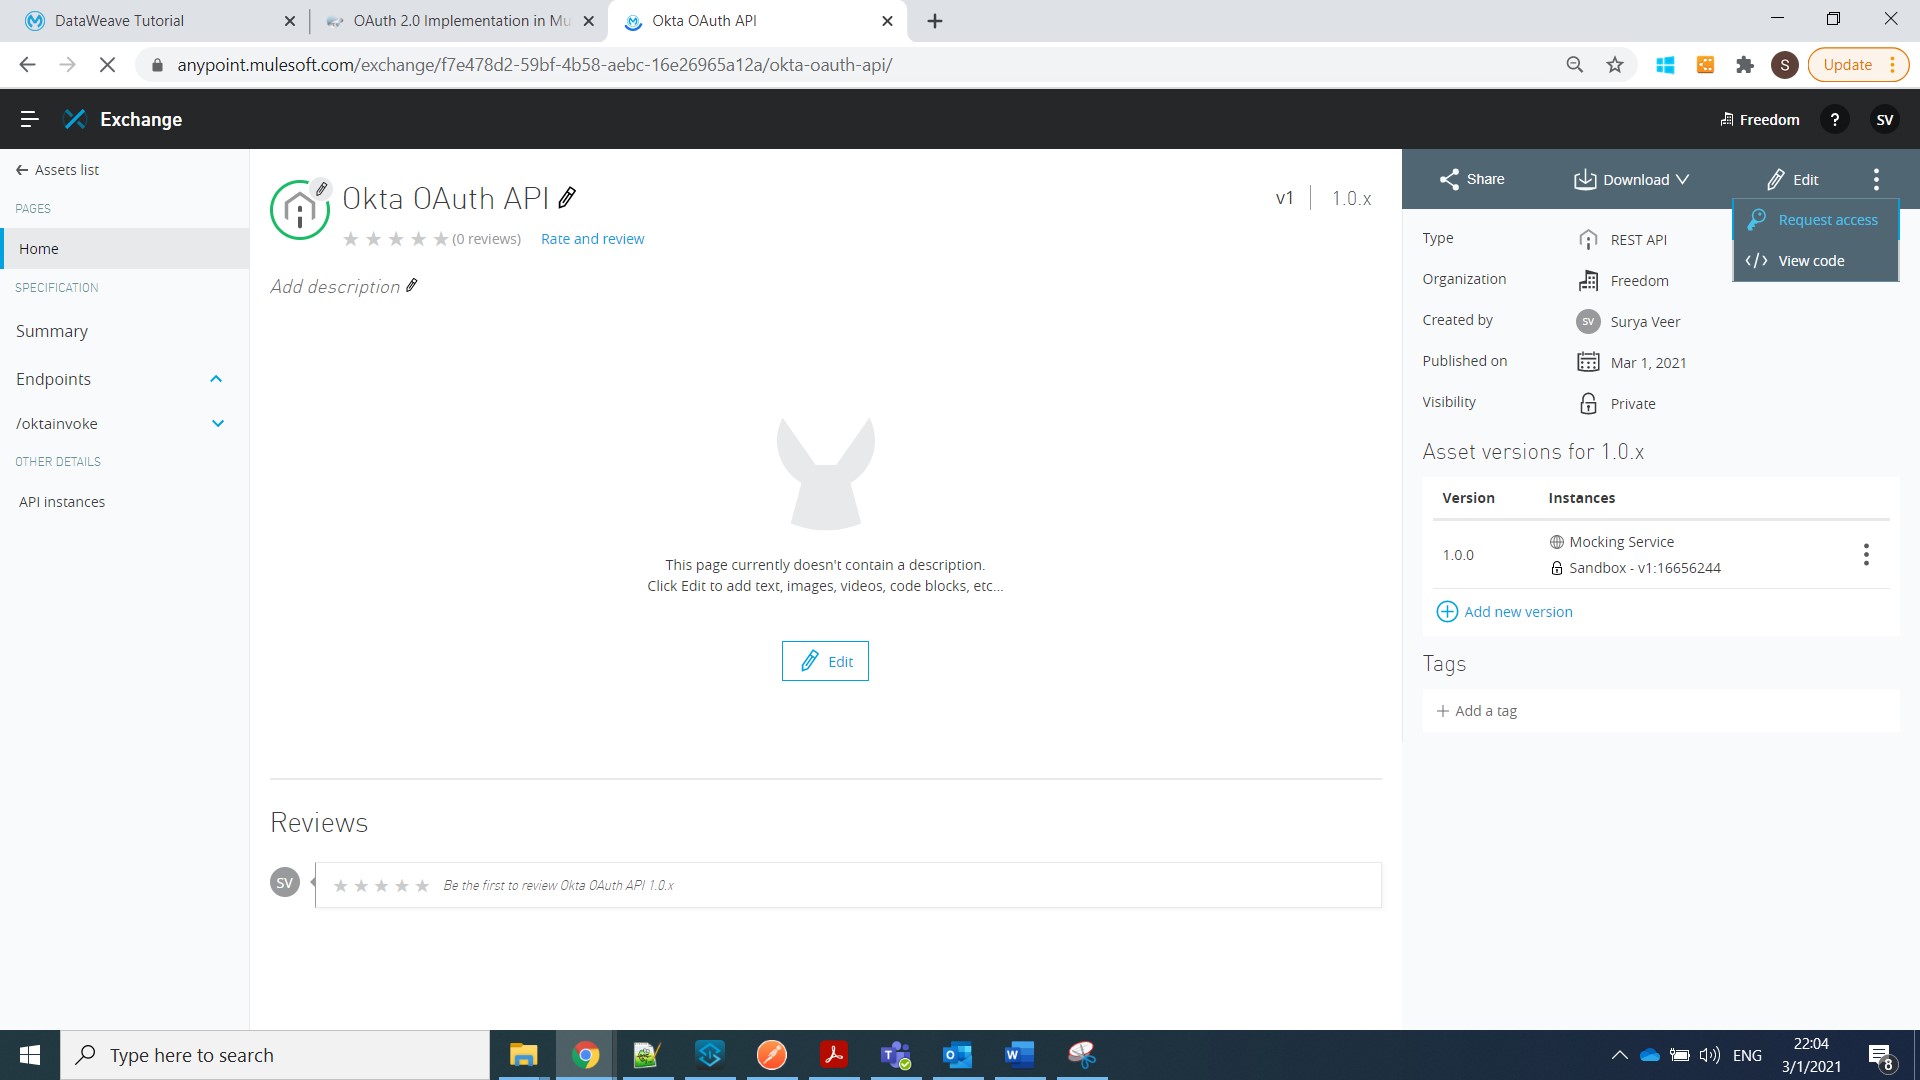
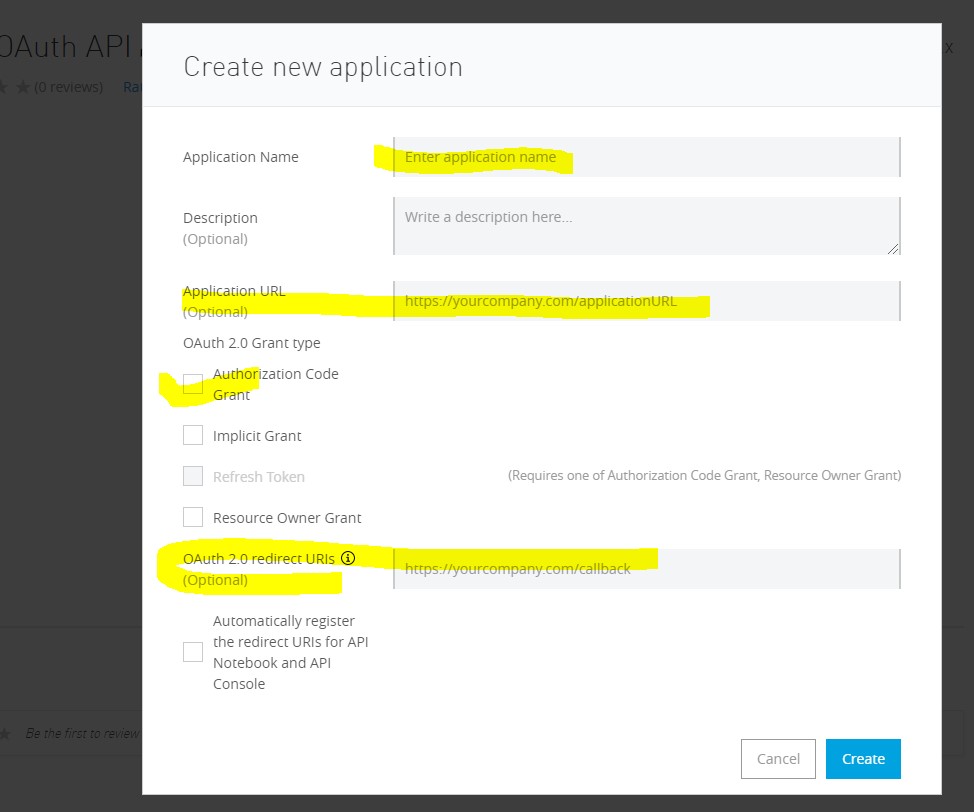
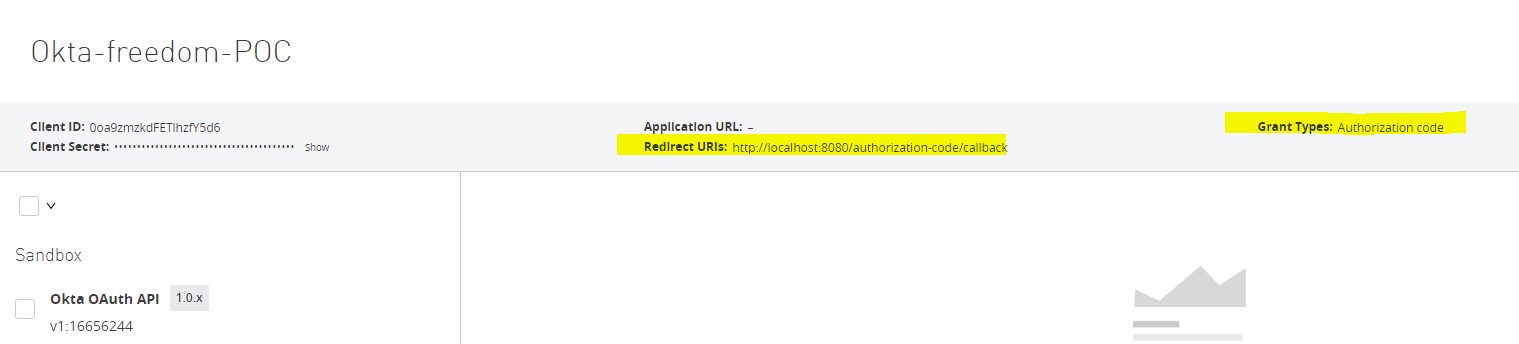
Now we need a Client App to access this API. For this, go to Exchange -> Select your API -> Request Access and Fill the details as shown below:
Step 15:
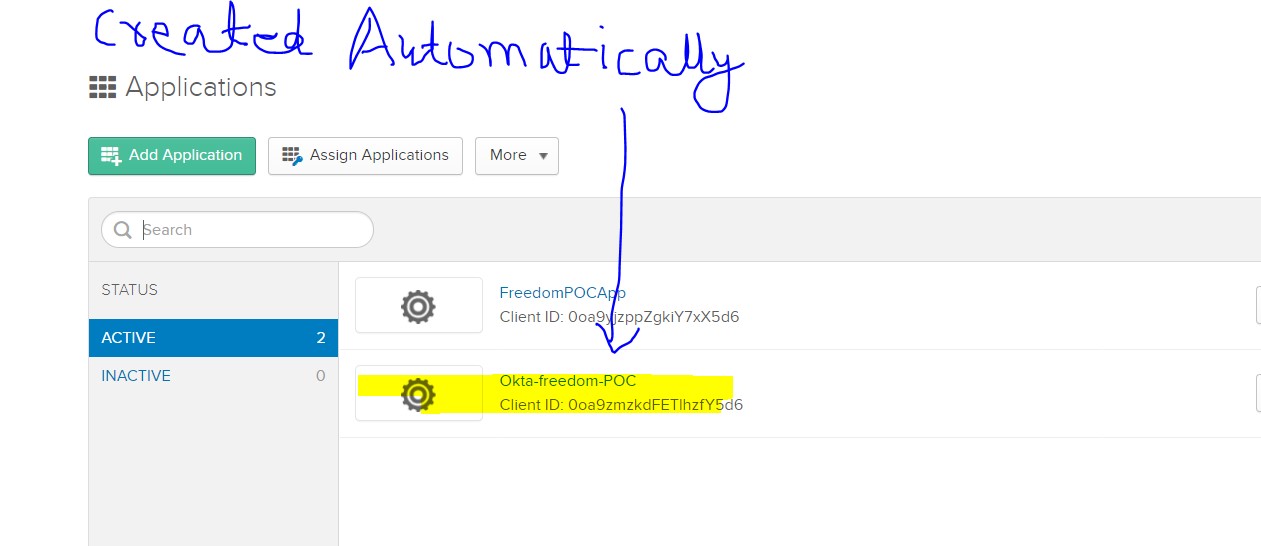
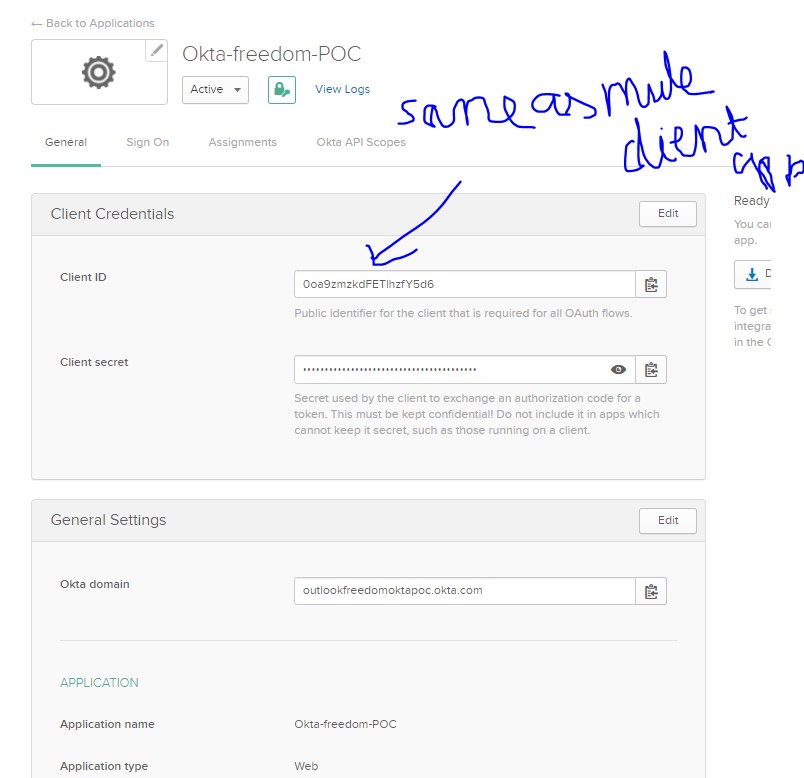
Now note this Client ID and Secret and go to Okta -> Applications.
We will see the same Client app created in Okta Automatically.
Step 16:
All Configurations are done. It's time to test our API.
Go to Postman, and choose a get request which will give us the Access Token (shown in Step 7).
Take this token, put it as Bearer token Authorization, and call out API, as shown below:
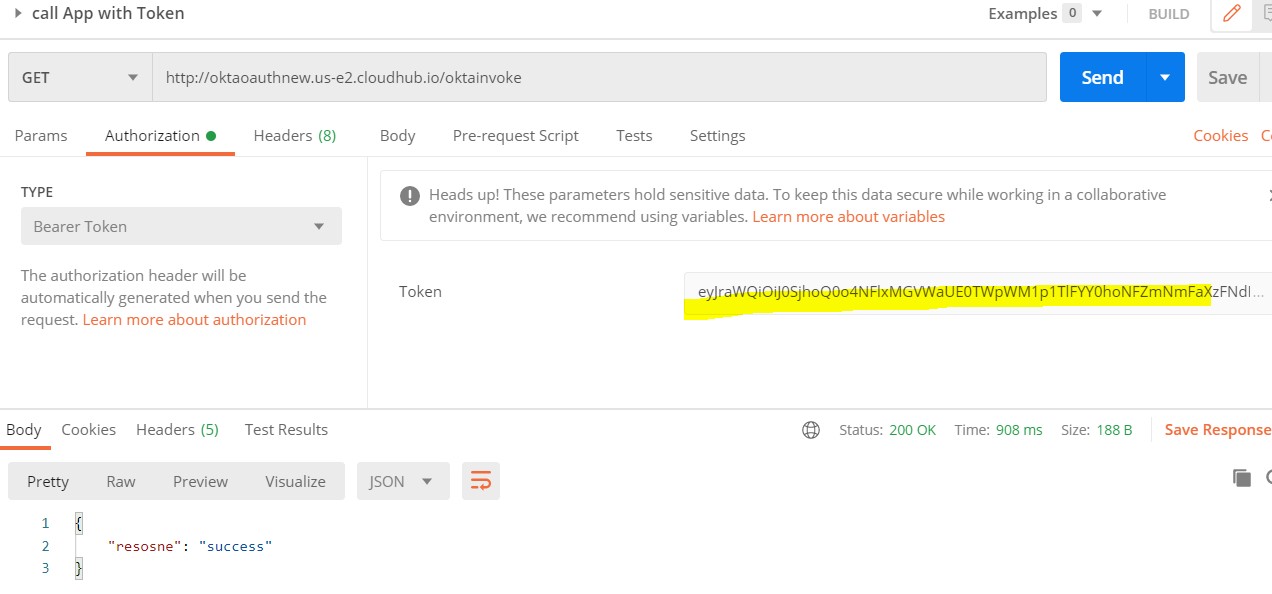
Congratulations. We Configured Okta and open ID Connect Successfully.
Configure Client ID Enforcement Policy Using Okta as Client Provider
Step 17:
Follow steps 11 and 12 (i.e, creating an app, deploying on CloudHub, and applying Autodiscovery to make status as “Active”).
Step 18:
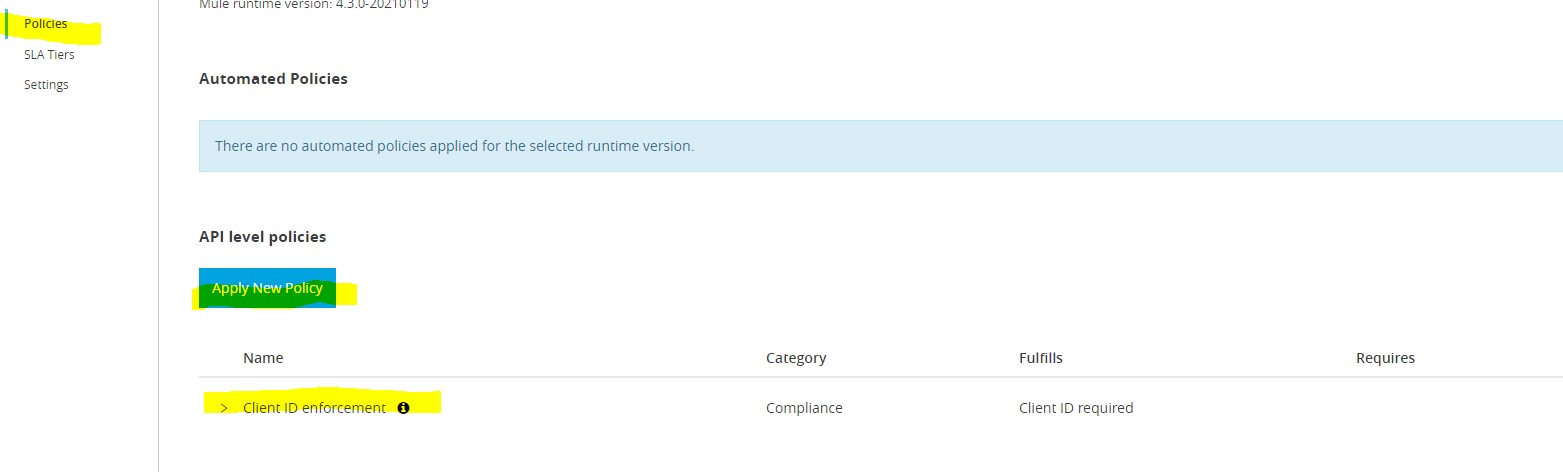
Go to API Manager-> v1-> Policies -> Select Client ID Enforcement ->Configure as shown -> Click Apply.
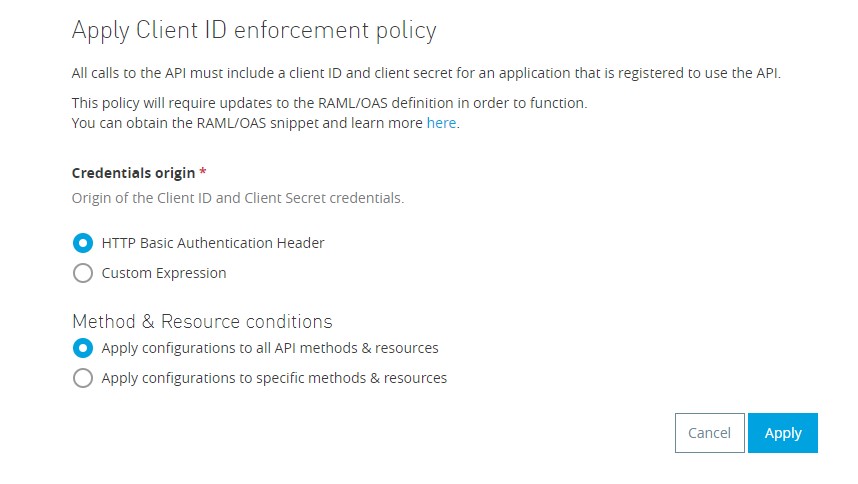
Step 19:
Go to Exchange -> Select your API Asset -> Request Access -> Create a client app.
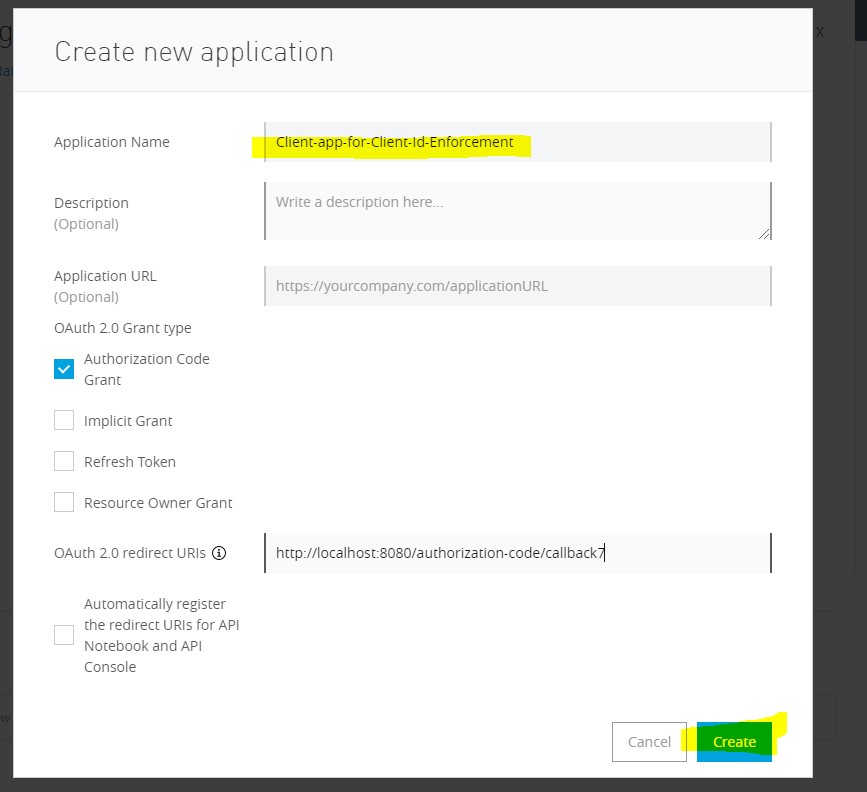
Check Okta Applications and you can see this app in your Okta Account, too.
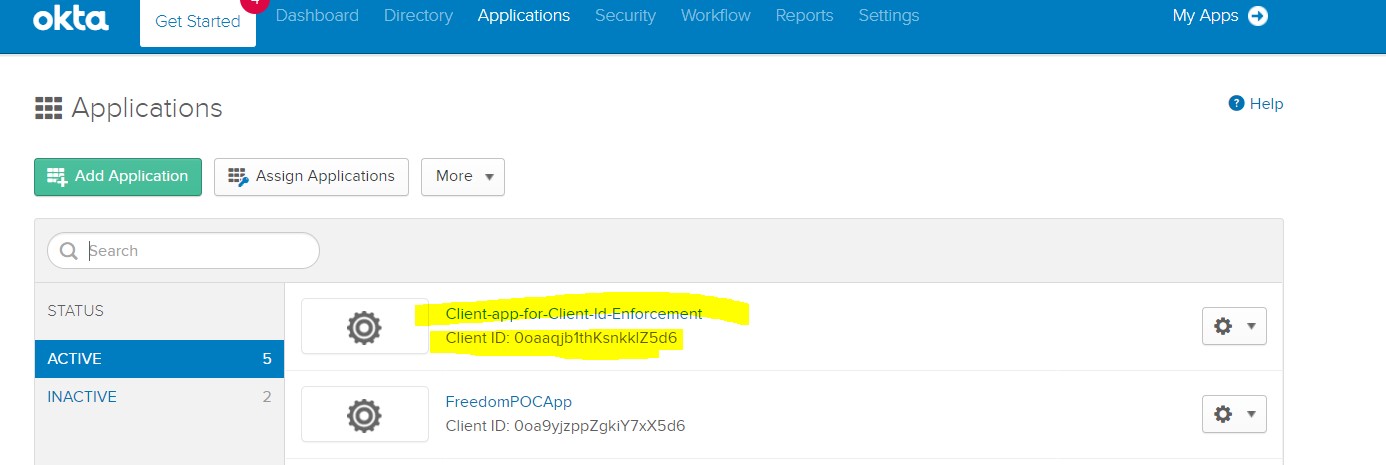 Step 20:
Go to postman-> configure your API URL -> Select Authorization as Basic Auth -> enter username and password of the newly created app-> send and get a success response.
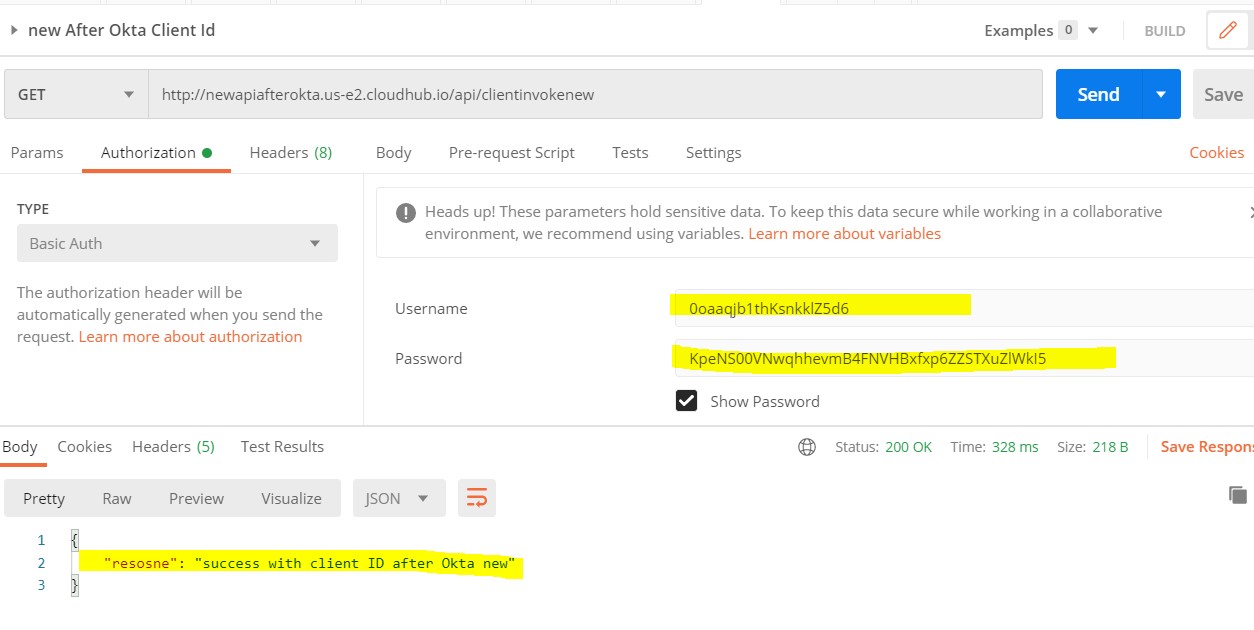
Congratulations, Client ID enforcement is configured and applied successfully.
Implications of Okta Implementation in Mulesoft Anypoint Platform
There will be no impact to the existing application: it will keep on using Anypoint Platform Client Applications.
Once the external client provider is configured, we won’t be able to use Anypoint Platform as a client provider anymore for any future application. We can create a client app using the Anypoint platform, but the client credentials will be provided by an external client provider and that’s why we see client apps created automatically in client provider (Step 14, 17).
That's all for this article. See you soon with another interesting topic.
Opinions expressed by DZone contributors are their own.
Comments