Connect to Google BigQuery Using the MuleSoft Database Connector
This article will walk you through the process of connecting to BigQuery using the MuleSoft Database connector.
Join the DZone community and get the full member experience.
Join For FreeBigQuery is a RESTful web service that enables interactive analysis of massively large datasets working in conjunction with Google Storage. If you’re building new integrations to drive data in and out of BigQuery, the general recommendation is to leverage the native API. But an additional approach is using standard SQL dialect, which BigQuery supports. To aid with this, Google provides ODBC/JDBC drivers that allow users to connect to BigQuery for just this purpose. While it only exposes a subset of the full capabilities of BigQuery, the drivers are an easy way to interact with the data. Coupled with MuleSoft, we make it even easier for users by providing connectors to abstract the complexity of writing custom code. Using the Database connector with the JDBC drivers allows users to select, insert, and update data easily from BigQuery. This article will walk you through the process of connecting to BigQuery using the MuleSoft Database connector.
This article assumes you already have experience with the MuleSoft Anypoint Studio 7.x and the Database Connector. For the purpose of highlighting the usage of the Database connector with BigQuery, I have the following flow setup that you can set up easily by dragging an HTTP Listener, the Select operation for the Database component, and the Transform Message component.
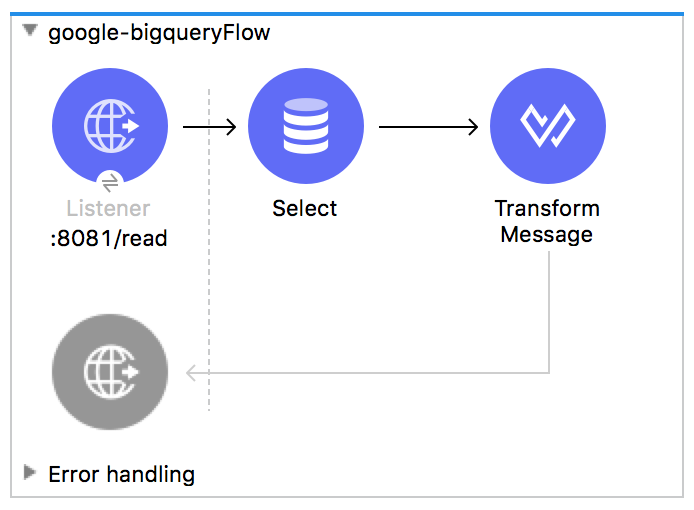
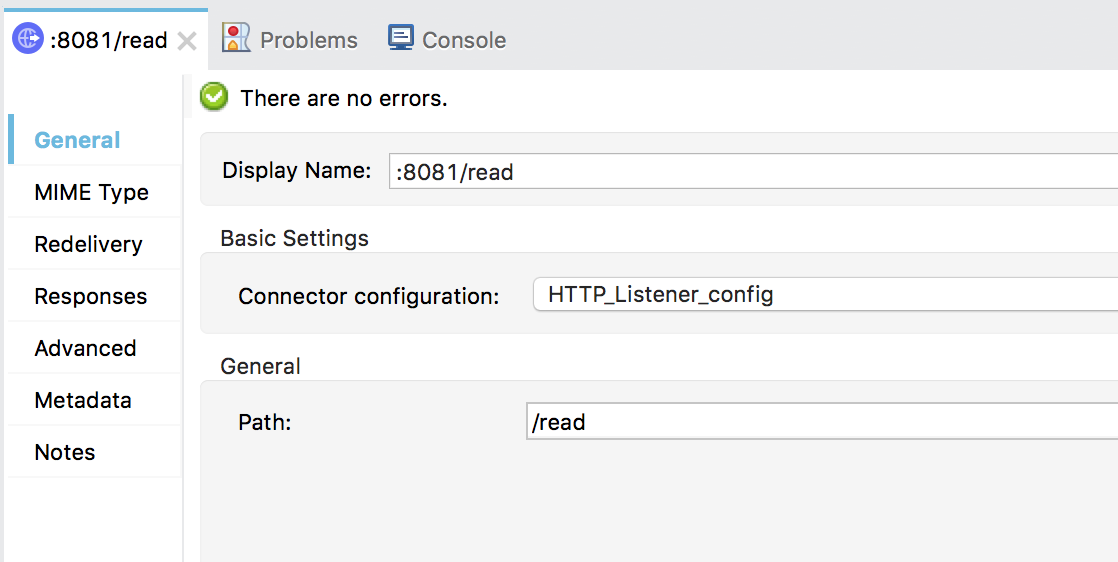
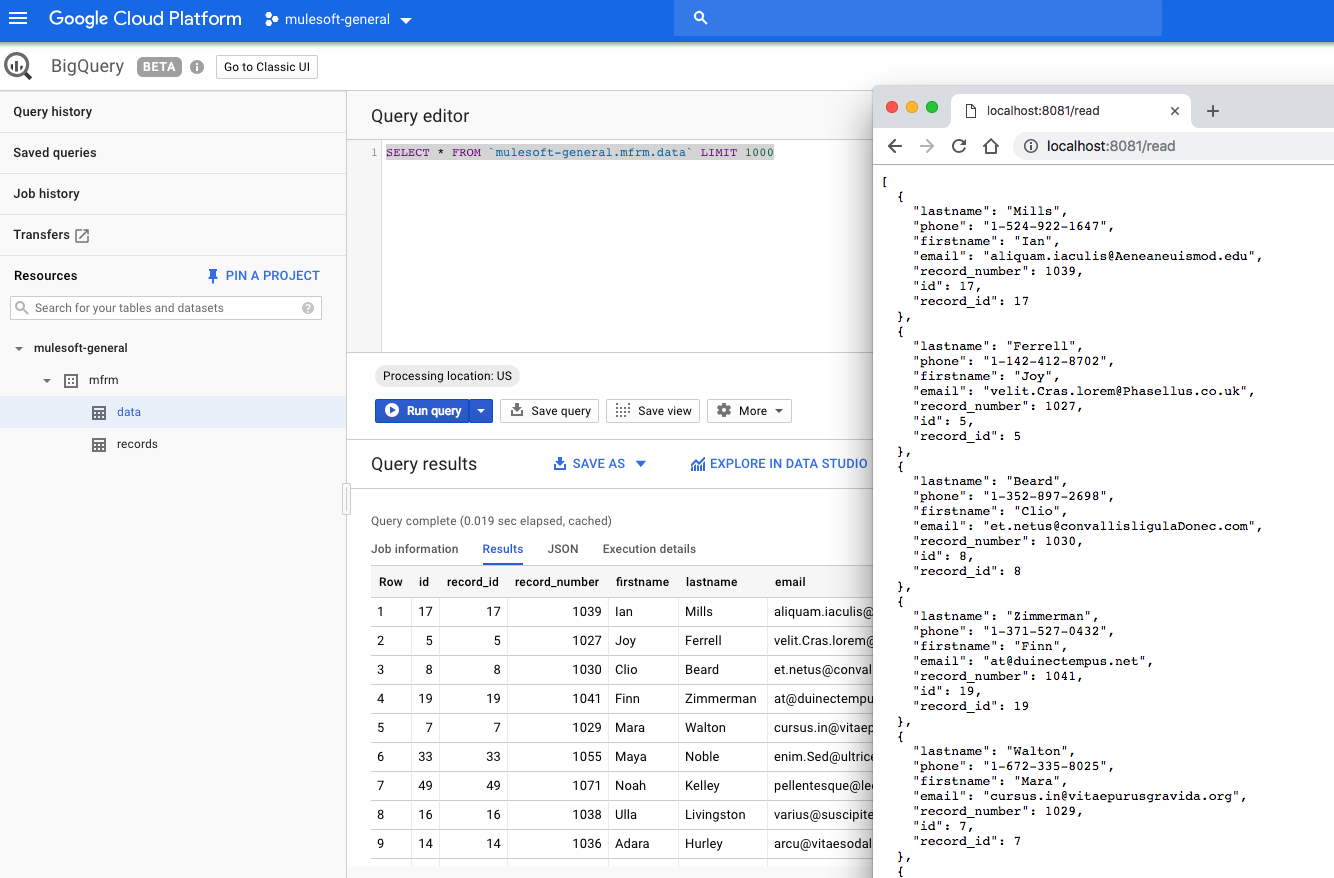
The HTTP Listener is listening on port 8081, so in order to kick off this flow, just use a web browser and navigate to http://localhost:8081/read. Here’s a screenshot of the HTTP Listener configuration screen.
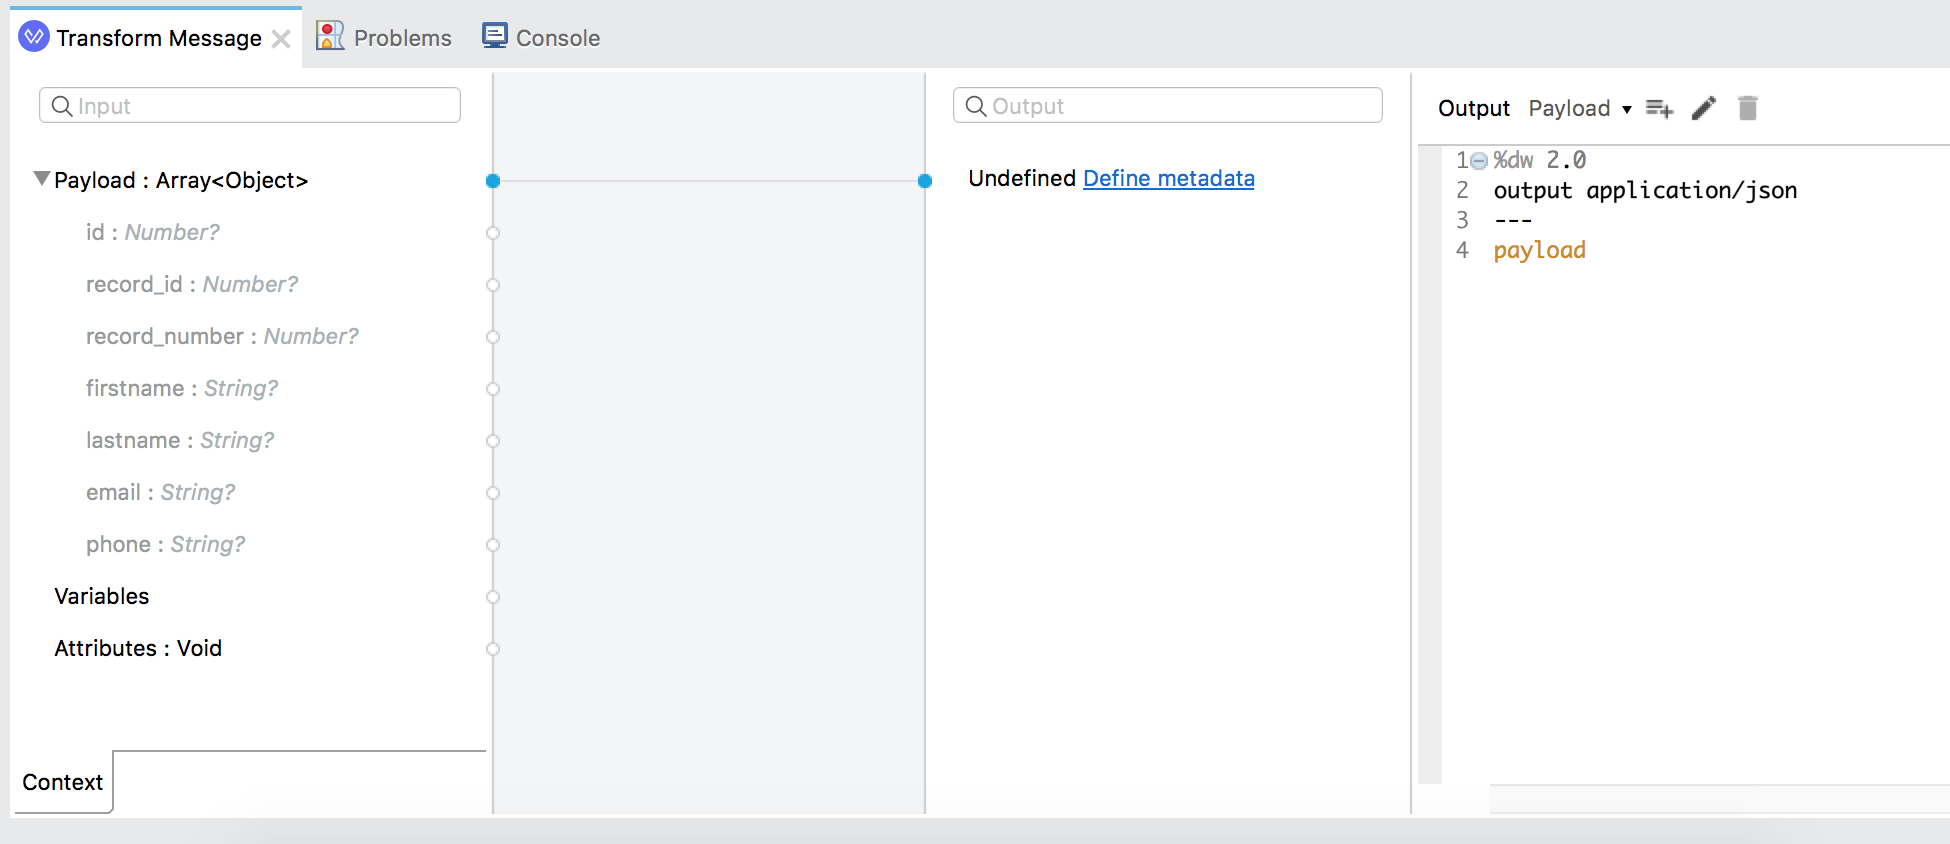
The Transform Message component will take the response from the Database connector and output the data in JSON format back to the web browser.
Download the BigQuery JDBC Drivers
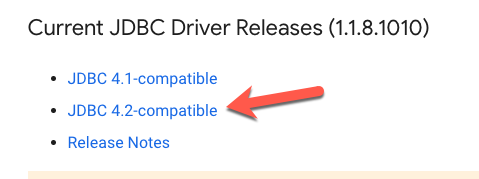
So let’s talk about how to set up the Database connector to work with BigQuery. The first thing you need to do is download the JDBC drivers. You can find them here on the Google documentation website for BigQuery.
Add JDBC Drivers to Mule Project
Once you unzip the downloaded file, you’ll see there are several *.jar files in there. All of these, except for one (GoogleBigQueryJDBC42.jar) can be downloaded from the MVN Repository. In your Mule project pom.xml file, copy and paste the following into the </dependencies> section.
<!-- https://mvnrepository.com/artifact/com.google.api-client/google-api-client -->
<dependency>
<groupId>com.google.api-client</groupId>
<artifactId>google-api-client</artifactId>
<version>1.24.1</version>
</dependency>
<!-- https://mvnrepository.com/artifact/com.google.auth/google-auth-library-credentials -->
<dependency>
<groupId>com.google.auth</groupId>
<artifactId>google-auth-library-credentials</artifactId>
<version>0.10.0</version>
</dependency>
<!-- https://mvnrepository.com/artifact/com.google.auth/google-auth-library-oauth2-http -->
<dependency>
<groupId>com.google.auth</groupId>
<artifactId>google-auth-library-oauth2-http</artifactId>
<version>0.10.0</version>
</dependency>
<!-- https://mvnrepository.com/artifact/com.google.http-client/google-http-client -->
<dependency>
<groupId>com.google.http-client</groupId>
<artifactId>google-http-client</artifactId>
<version>1.24.1</version>
</dependency>
<!-- https://mvnrepository.com/artifact/com.google.http-client/google-http-client-jackson2 -->
<dependency>
<groupId>com.google.http-client</groupId>
<artifactId>google-http-client-jackson2</artifactId>
<version>1.24.1</version>
</dependency>
<!-- https://mvnrepository.com/artifact/com.google.oauth-client/google-oauth-client -->
<dependency>
<groupId>com.google.oauth-client</groupId>
<artifactId>google-oauth-client</artifactId>
<version>1.24.1</version>
</dependency>
<!-- https://mvnrepository.com/artifact/com.fasterxml.jackson.core/jackson-core -->
<dependency>
<groupId>com.fasterxml.jackson.core</groupId>
<artifactId>jackson-core</artifactId>
<version>2.1.3</version>
</dependency>
<!-- https://mvnrepository.com/artifact/com.google.apis/google-api-services-bigquery -->
<dependency>
<groupId>com.google.apis</groupId>
<artifactId>google-api-services-bigquery</artifactId>
<version>v2-rev400-1.24.1</version>
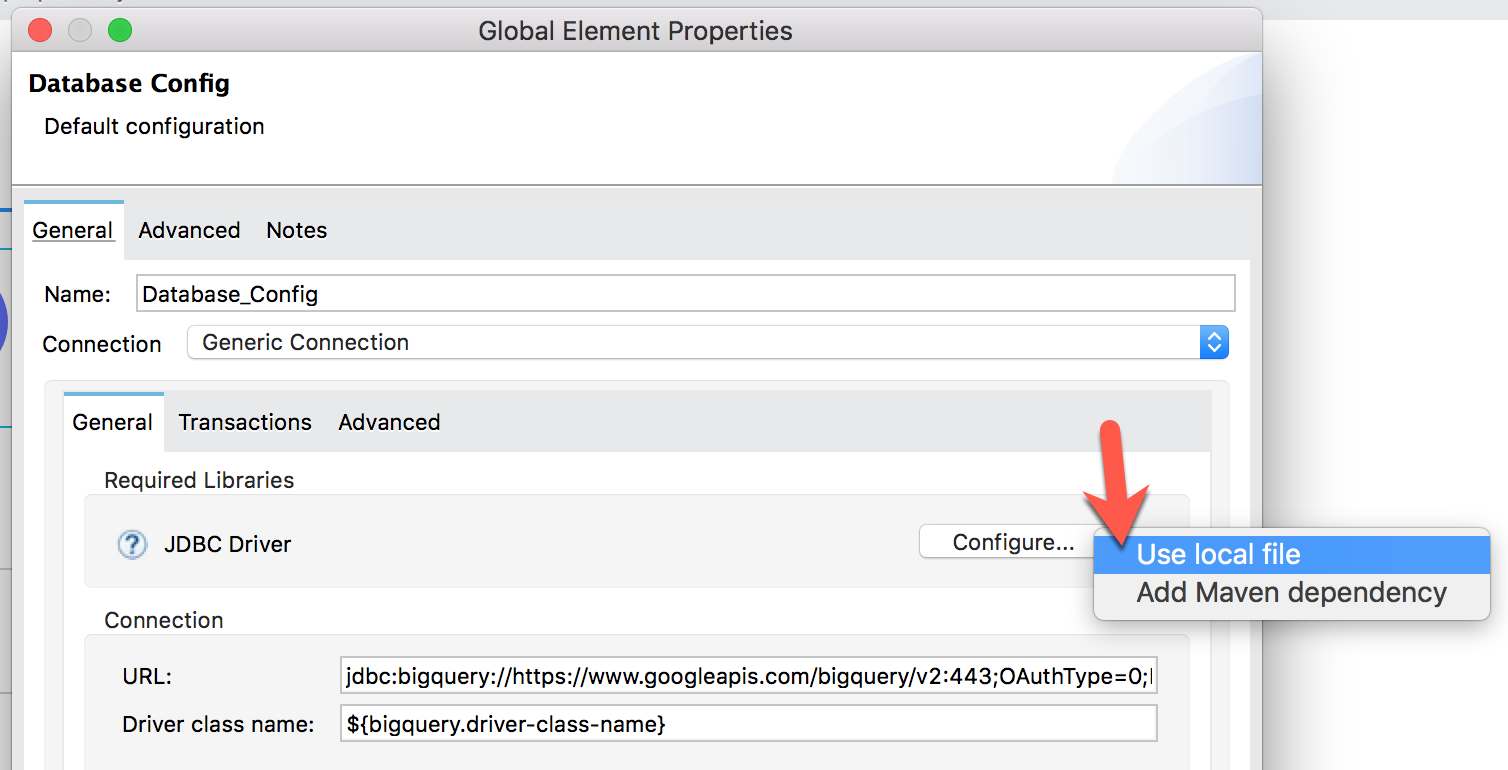
</dependency>For the the GoogleBigQueryJDBC42.jar file, we’ll include that as a local file. In the Database Config window, click on Configure and select Use local file
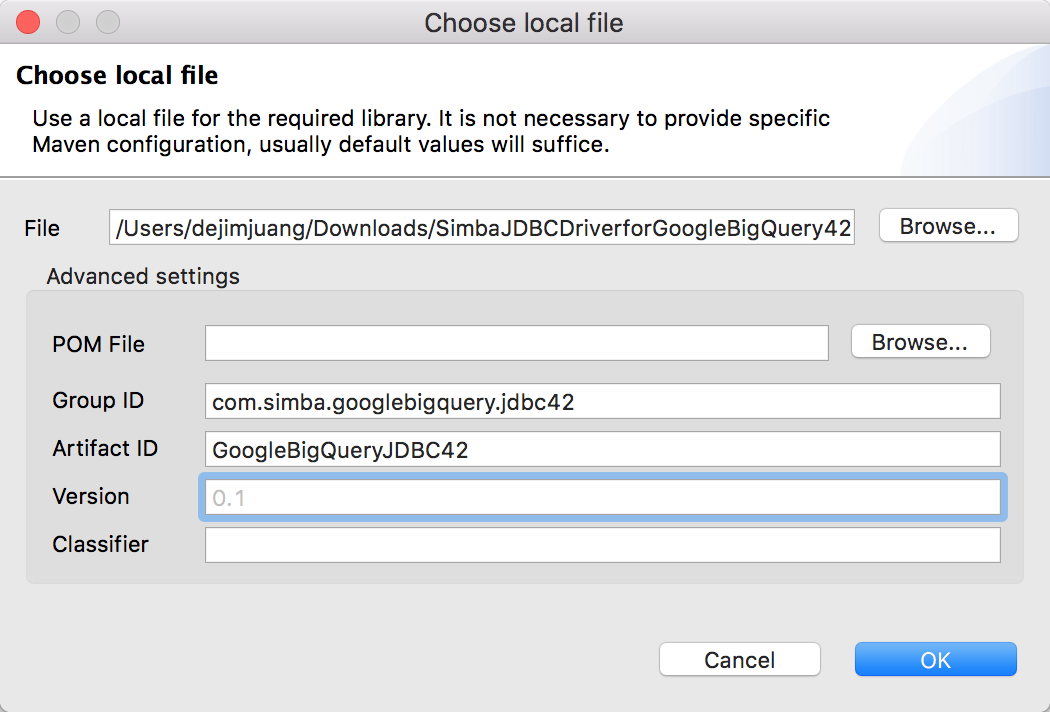
Browse and select the GoogleBigQueryJDBC42.jar file and then fill the Group ID field with the following, com.simba.googlebigquery.jdbc42 and then click on OK.
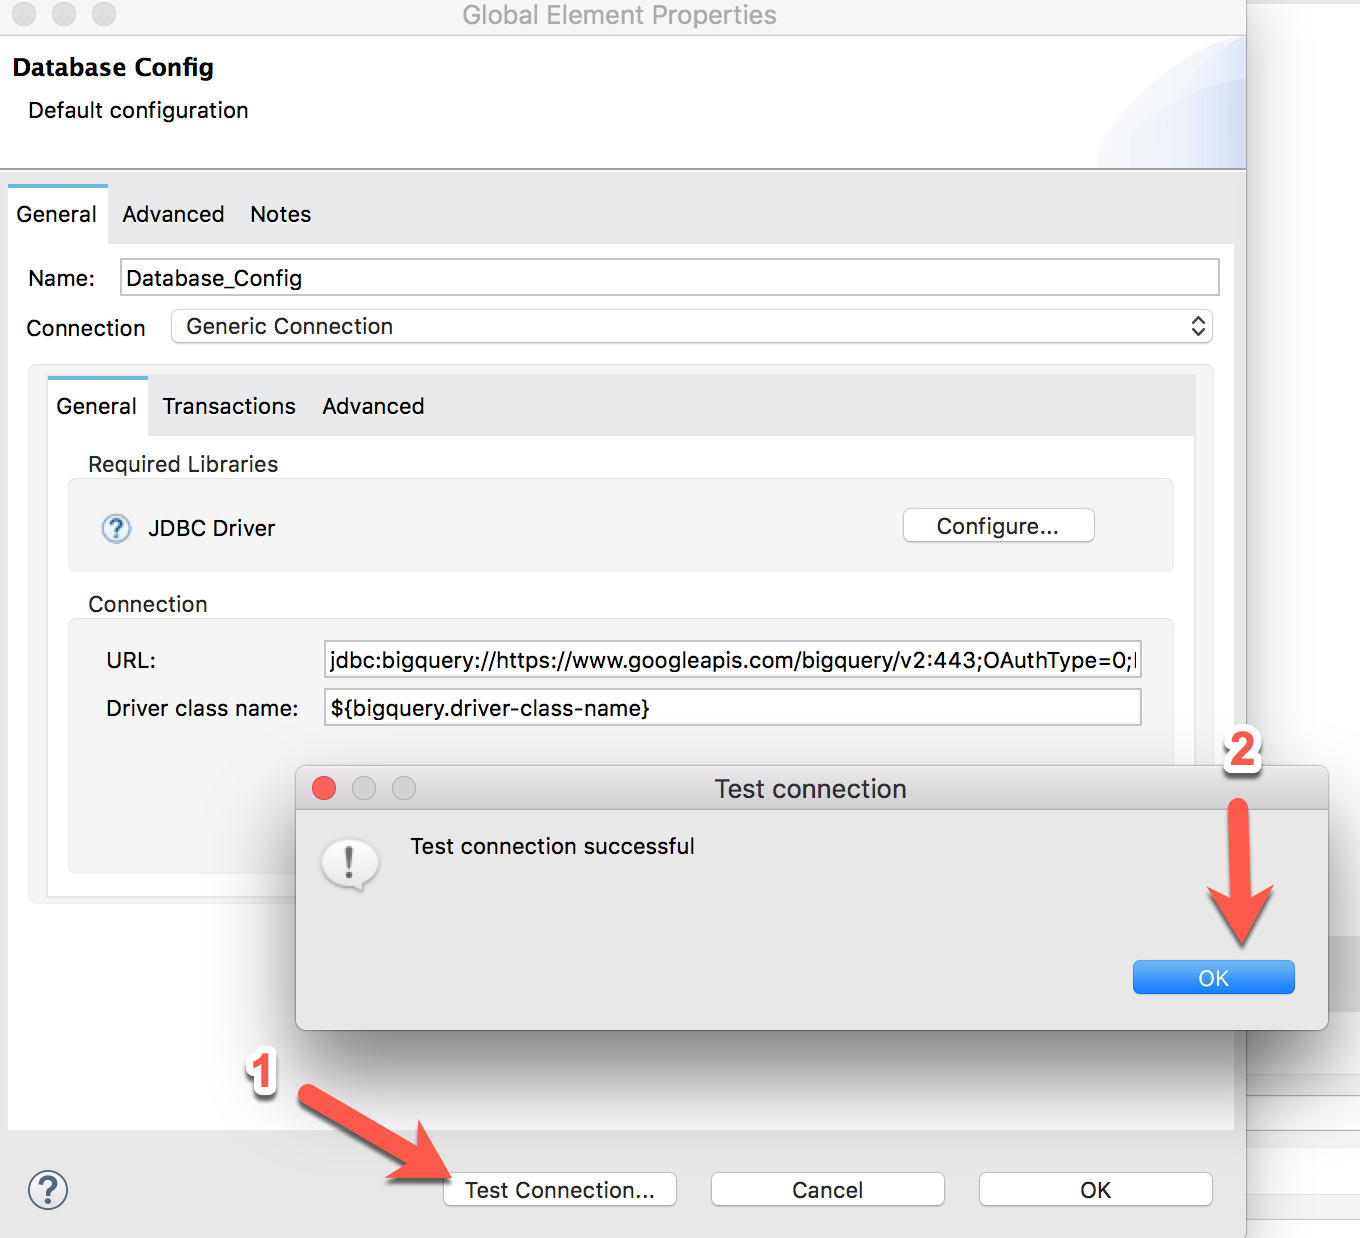
Back in the Database Config window, fill in the URL and Driver class name field with the following:
| URL | jdbc:bigquery://https://www.googleapis.com/bigquery/v2:443;OAuthType=0;ProjectId=${bigquery.project-id};OAuthServiceAcctEmail=${bigquery.service-account};OAuthPvtKeyPath=${bigquery.pvt-key-path}; |
| Driver class name | ${bigquery.driver-class-name} |
We can’t test the connection yet until we add configuration properties to the project, so click on OK for now to close the window. We’ll come back and test this later.
Create a Google Service Account
There are a couple ways to set up authentication with Google in order for the driver to work. For this article, we’ll configure the driver to authenticate the connection with a Google service account. The service account can handle the authentication process so that no user input is required.
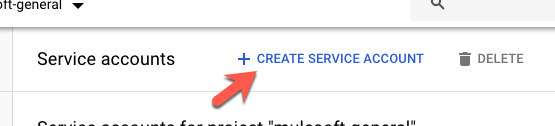
In your Google Cloud account, navigate to Service accounts under IAM & admin.

Click on Create Service Account at the top.
Fill in all the fields to describe the service account:
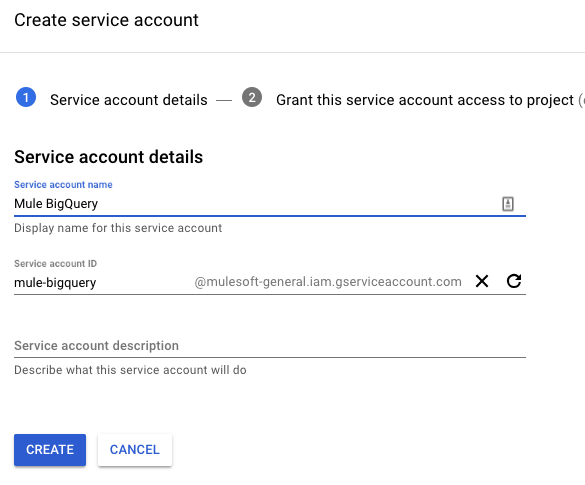
Write down the Service account ID that is auto-generated. We’ll need this later when we set up the configuration file. Next, click on Create and then click on Continue on the next screen for Step 2.
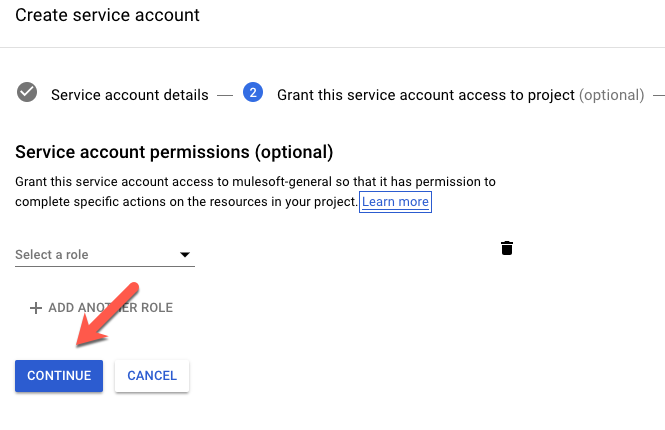
At the bottom of the screen in Step 3, click on Create Key

Select any key type you would like. For this article, I selected *.p12. Click on Create and it will download the file to your machine. Write down the password if you would like, we won’t use it for this article but if you intend to use this key for other projects, you’ll need it. Click on Close and then click on Done.
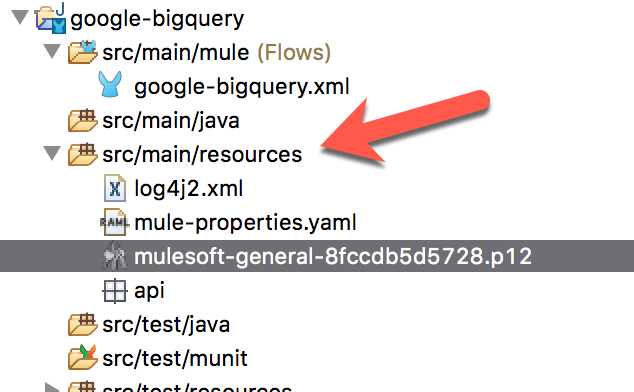
Next, find the *.p12 key file that was downloaded and copy and paste that into the src/main/resources folder of your project back in Anypoint Studio.
Now we have this information, we can set up the configuration properties file for the Mule project.
Setup Configuration Properties
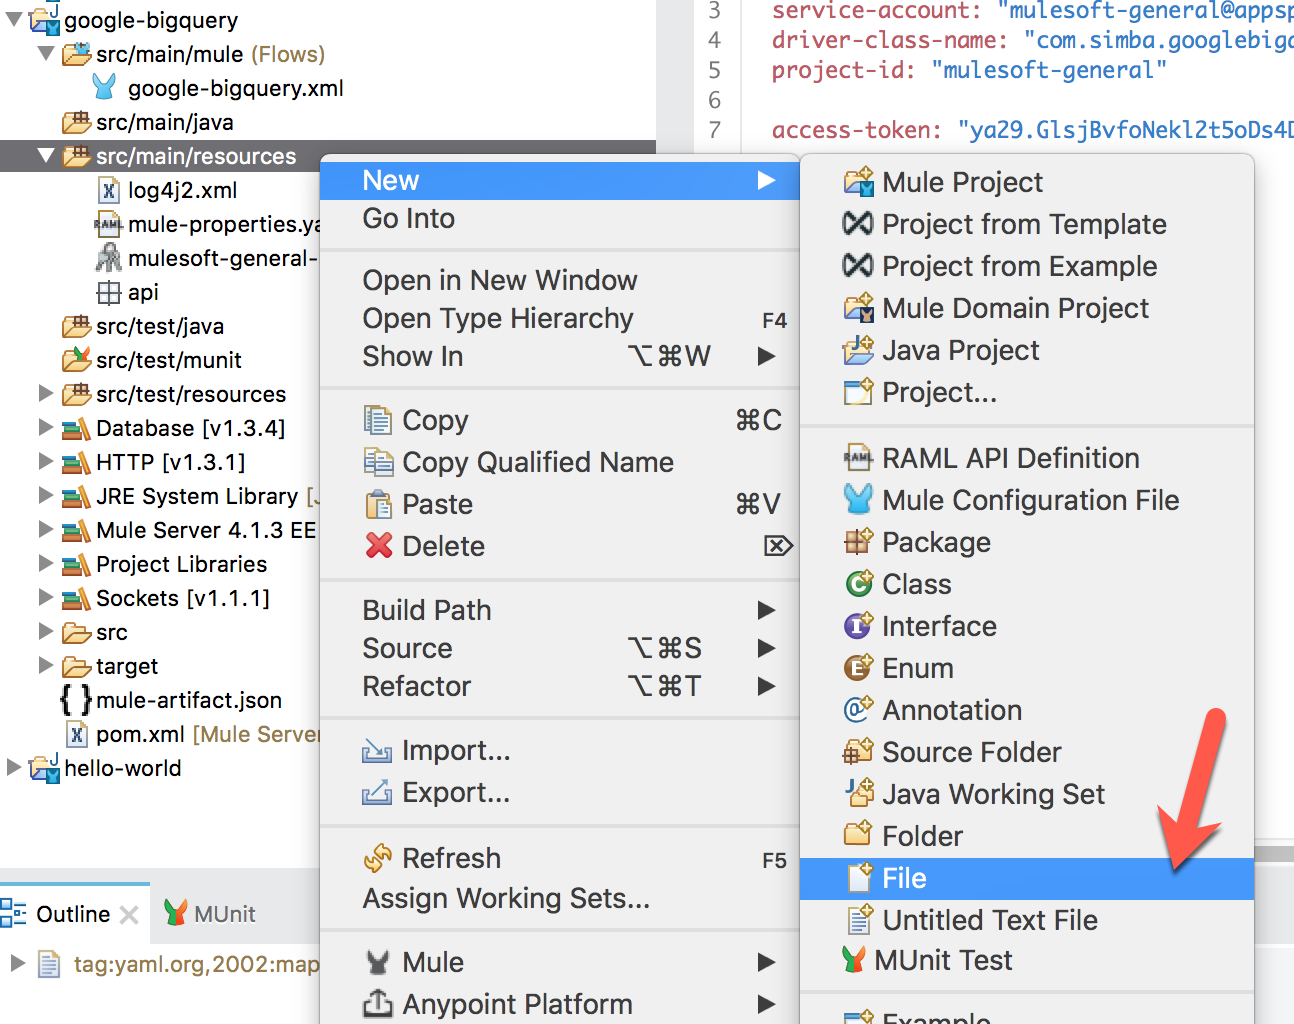
Back in Studio, right click on the src/main/resources folder, and create a new file.
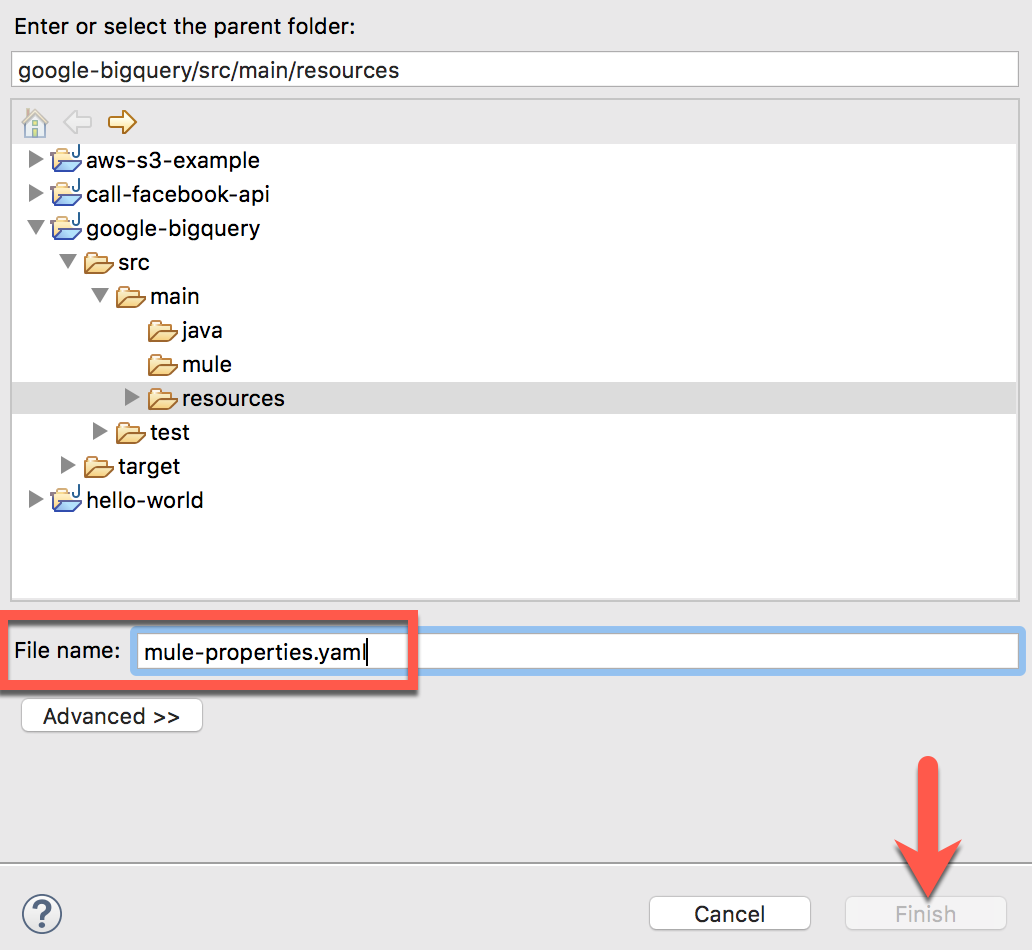
Give the file a name (e.g. mule-properties.yaml) and then click on Finish.
In the newly created file, paste the following YAML into the window:
bigquery:
    pvt-key-path: "/Users/dejimjuang/Workspace/studio-seven-new/google-bigquery/src/main/resources/mulesoft-general-8fccdb5d5728.p12"
    service-account: "[email protected]"
    driver-class-name: "com.simba.googlebigquery.jdbc42.Driver"
    project-id: "mulesoft-general"
Replace the pvt-key-path, service-account, and project-id with values that correspond to your project. The pvt-key-path should point to the key file that you downloaded. The service-account is the ID that was generated when you created a service account. The project-id is the ID of the project in Google Cloud that’s tied to your BigQuery account.
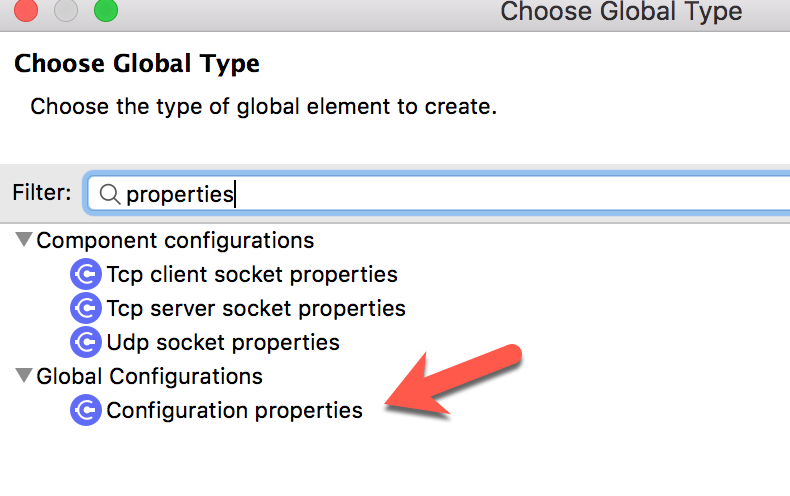
In order for the project to reference these properties, we need to create a Global Element to point to this file. Back on the project, click on Global Elements and then click on Create

Search for properties and then select Configuration properties from the list of components and click on OK
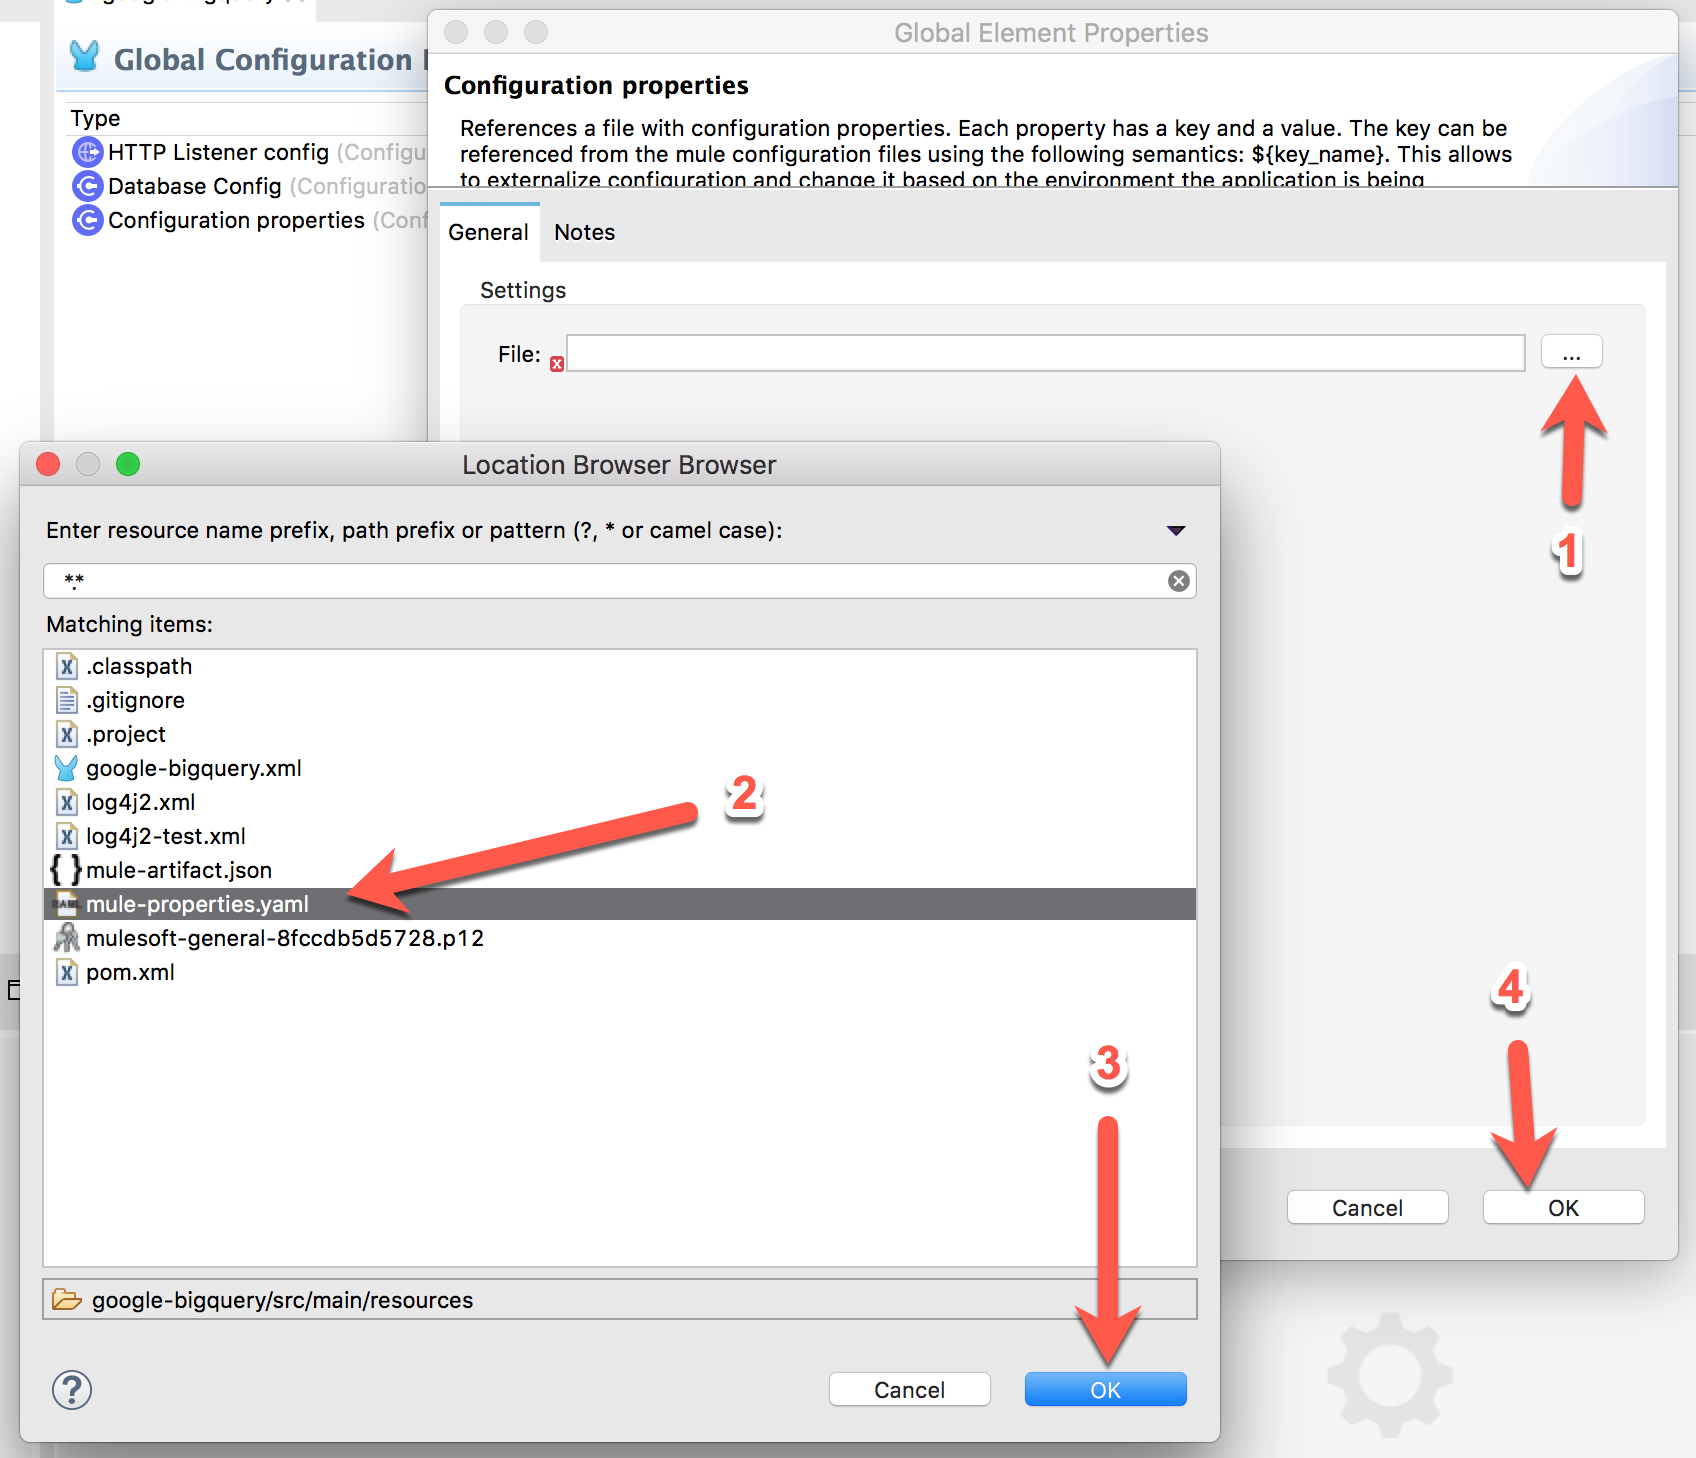
 In the Configuration properties window, click on the Browse button and then select the properties file that you created and then click on OK and then OK to close the windows.
To make sure the credentials are set up correctly, go back to the Database Config and click on Test Connection… it should return a message saying Test connection successful.
The last thing we need to do is enter a query in the SQL Query Text field of the Database connector.
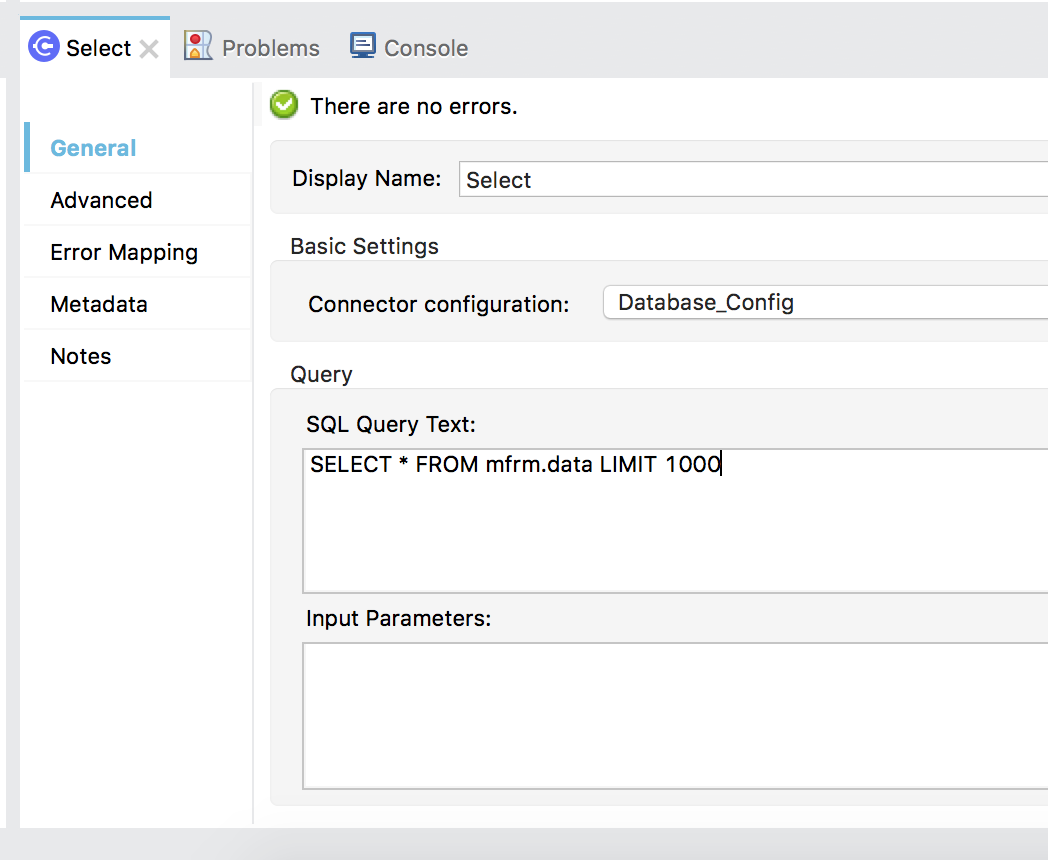
Run and Test Project
Now that is all set up, we can run and test the project. Right-click on the canvas and select Run project. Once the project is deployed and up and running, switch to your web browser and navigate to the URL http://localhost:8081/read
Summary
As you can see, leveraging MuleSoft and the Database connector with the BigQuery JDBC drivers makes your developer's job easier by reducing the amount of code needed to integrate. While it only exposes a subset of the full capabilities of BigQuery, this method allows you to quickly interact and push or pull data into BigQuery from various data sources. Using MuleSoft’s other connectors for various systems, such as Salesforce, SAP, ServiceNow, etc., along with the Database driver, can help you collect and analyze data from various enterprise systems in BigQuery to find meaningful insights.
Opinions expressed by DZone contributors are their own.
Comments