How to Create a CRUD Application in Less Than 15 Minutes
This step-by-step guide explores how to create a front end for your database with Java only, without any JavaScript knowledge needed.
Join the DZone community and get the full member experience.
Join For FreeCRUD applications form the backbone of most software projects today. If you're reading this article, chances are your project encountered some challenges, you’re seeking a faster way to accomplish this task, or you are looking for a Java framework to start with. You're not alone.
With the tech world constantly evolving, especially with tighter budgets, there's a noticeable shift towards frameworks that bring everything under one roof to reduce the need for oversized teams.
One good example of these unified frameworks is Jmix. Let's dive into how it simplifies the developer experience in a practical example of creating a CRUD application.
Also, you can see the video version of this guide on YouTube.
Jmix in Action
What often helps to understand how good your developer experience will be is getting your hands dirty with a practical project. It's like the difference between reading a recipe and actually baking the cake - one's a piece of cake, and the other teaches you how to bake. :)
We’ll build an admin panel to manage employees with CRUD functionalities, a simple user interface and REST API, security features, and a small service.
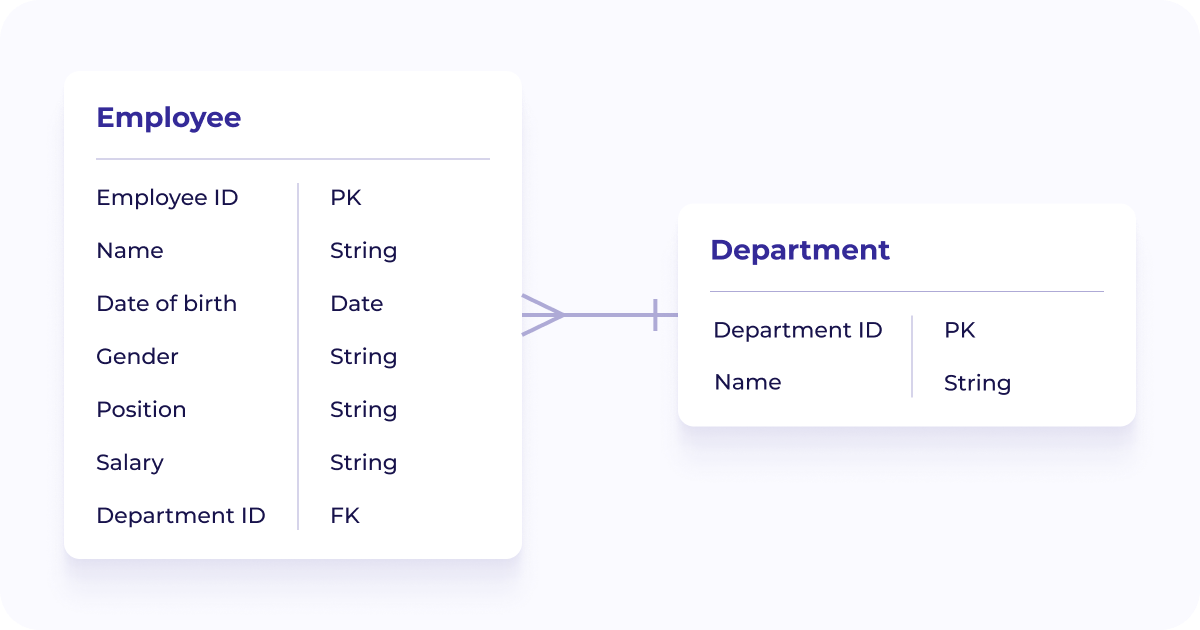
Our data model will center around two main entities: Employees and Departments. The Employee entity will include details like Employee ID, Name, DoB, Gender, Position, Salary, and Department ID, establishing a many-to-one relationship with the Department entity. The Department entity will contain the Department ID, Department Name, and a brief Description.
 Our starting point is a pre-existing database schema with these entities and a fully set-up PostgreSQL environment.
Getting Started
Personally, when I’m new to a framework, I spend more time figuring out the structure and high-level best practices than writing code. With Jmix, you get a pre-arranged project from the get-go, setting up the basics and architectural best practices, so you can get straight to building maintainable features.
While the folders in the project tab might remind you of a Spring Boot setup, the Jmix tab takes it a step further, breaking down the project into logical modules.
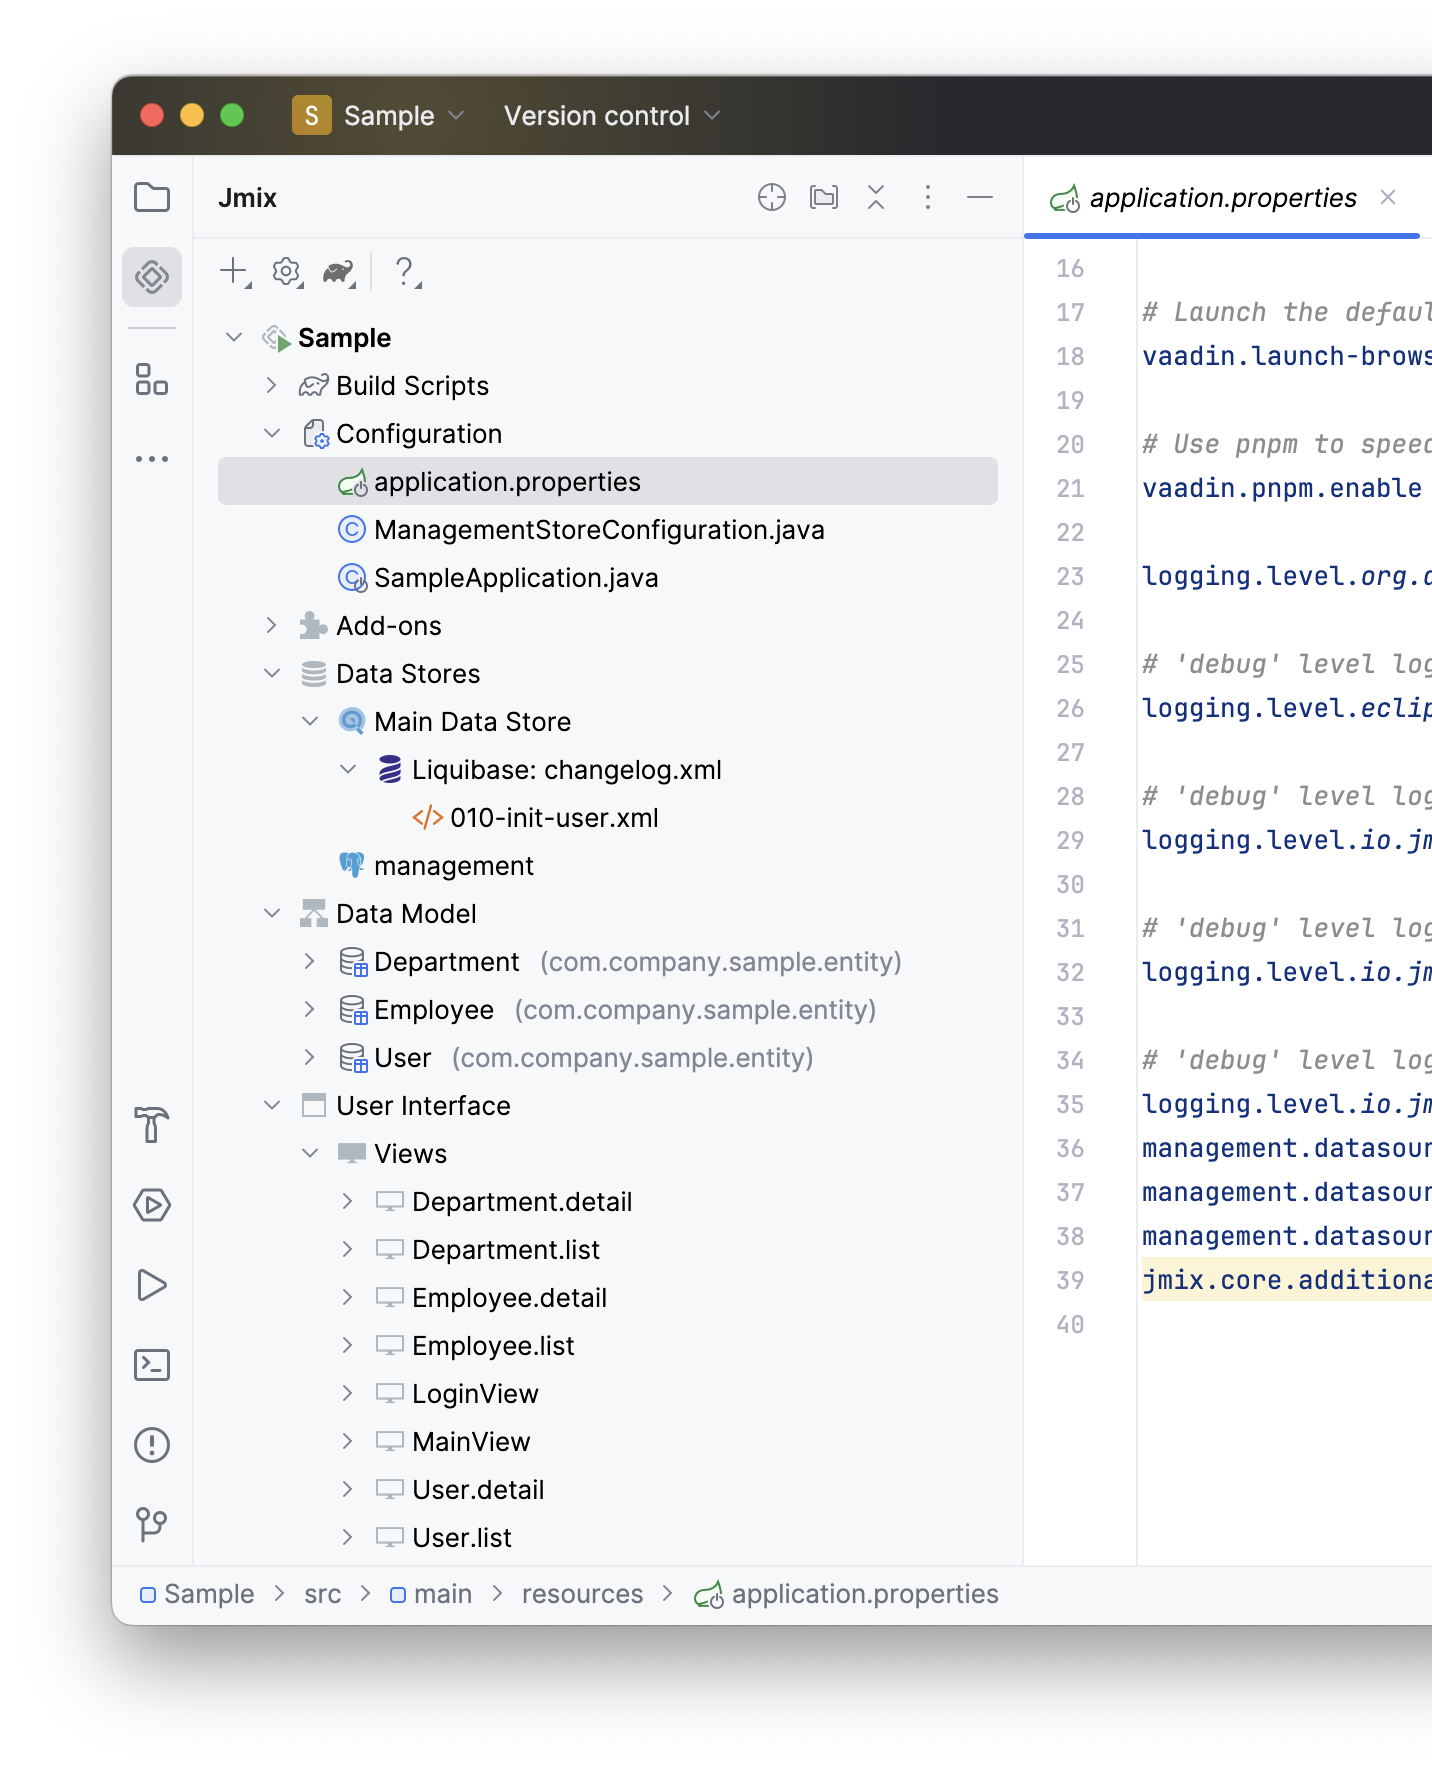 To kick things off, we'll connect our existing database. It's as simple as adding a new data store in Jmix. You type in your database credentials, and Jmix generates all the necessary configurations in the properties file. It even generates a dedicated config class, neatly tucked away in the configuration tab for easy access.
Jmix does all the routine work for you by generating your entire data model* directly from your existing database tables. 
The process doesn't stop there. Within the same wizard, you can also build views (the part of your application that users interact with) for each entity.
Jmix provides two main views:
- List views display multiple records at once, often in a table or a list format. This view is useful for browsing through data and finding specific records quickly.
- Detail views, on the other hand, show a single record in detail. This is where users can view or edit the complete information about a particular item.
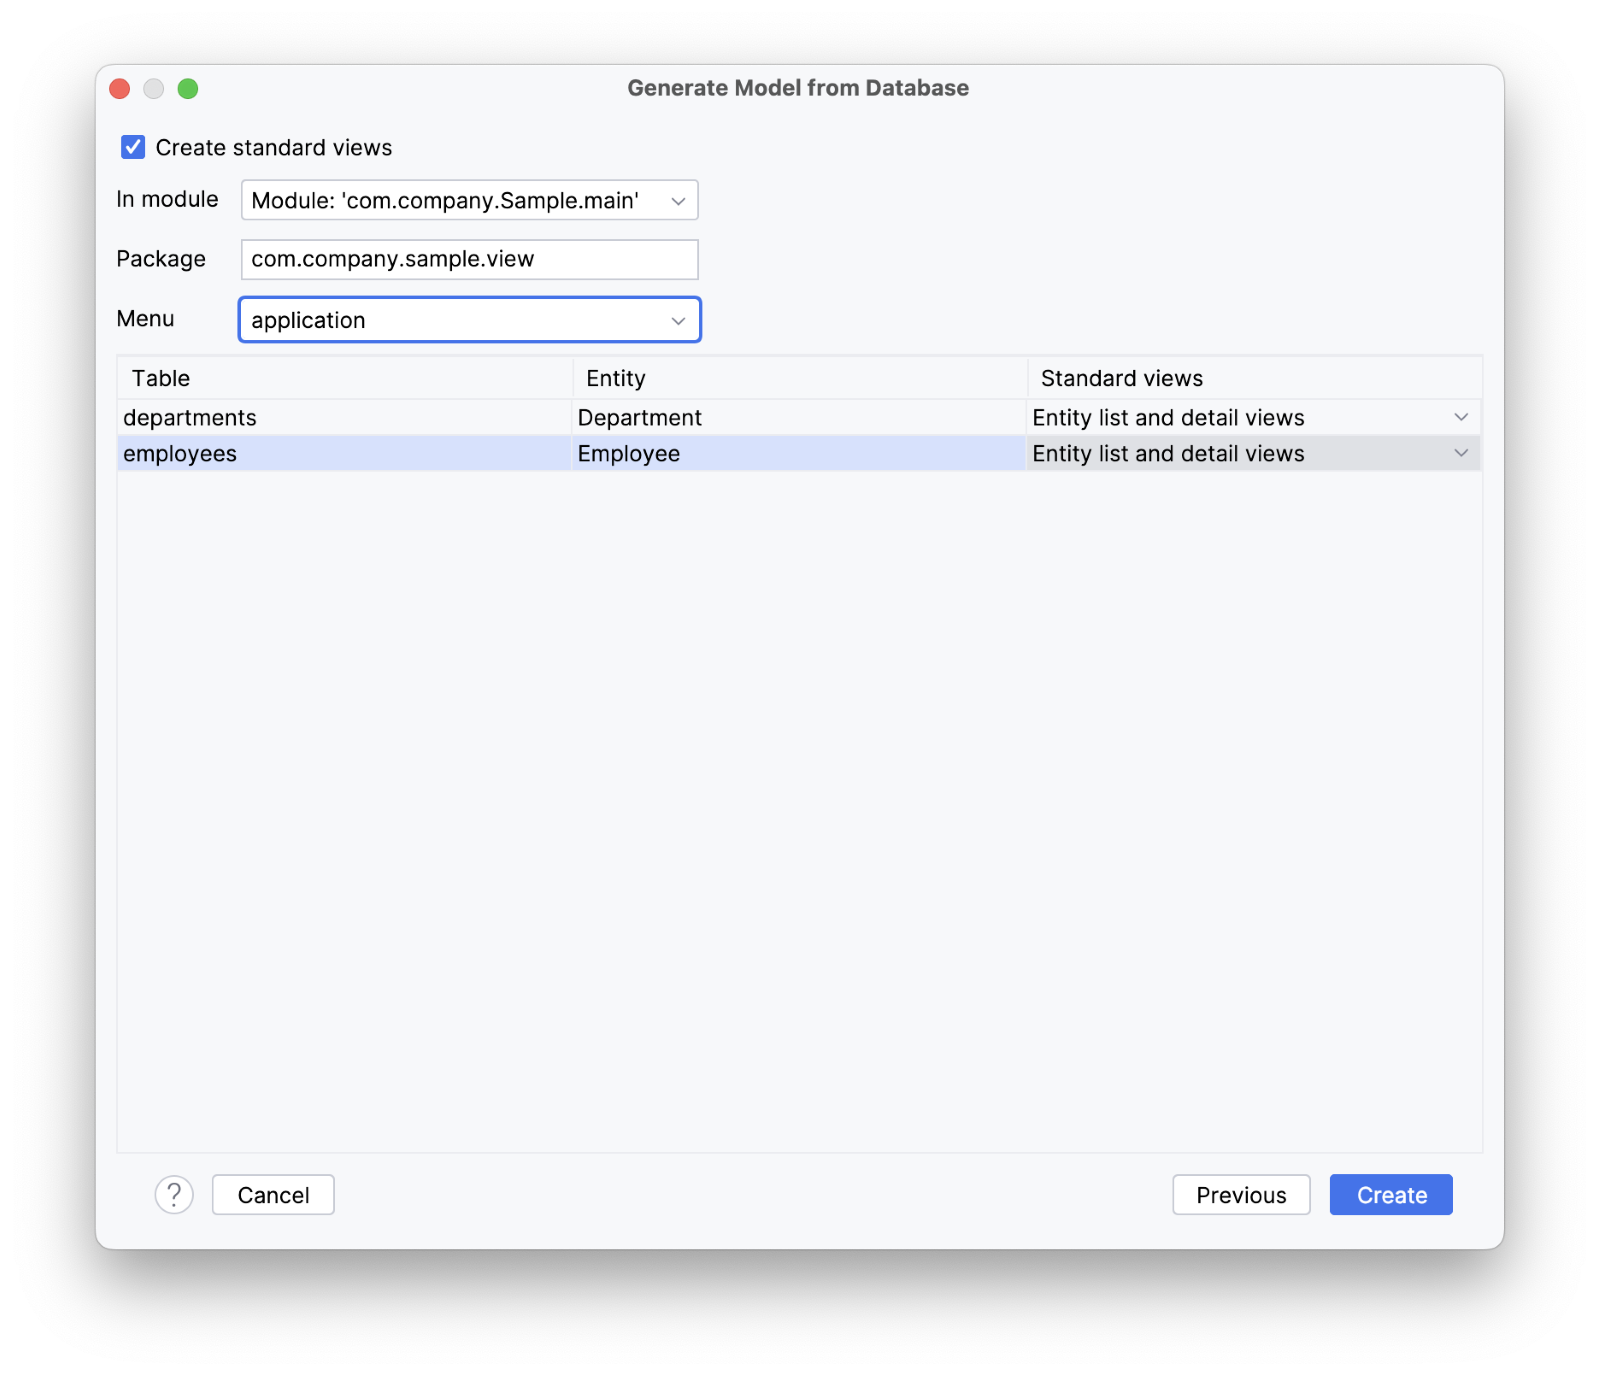 This approach ensures that you're not just setting up the backend but also laying out an interactive front end of your application in one go.
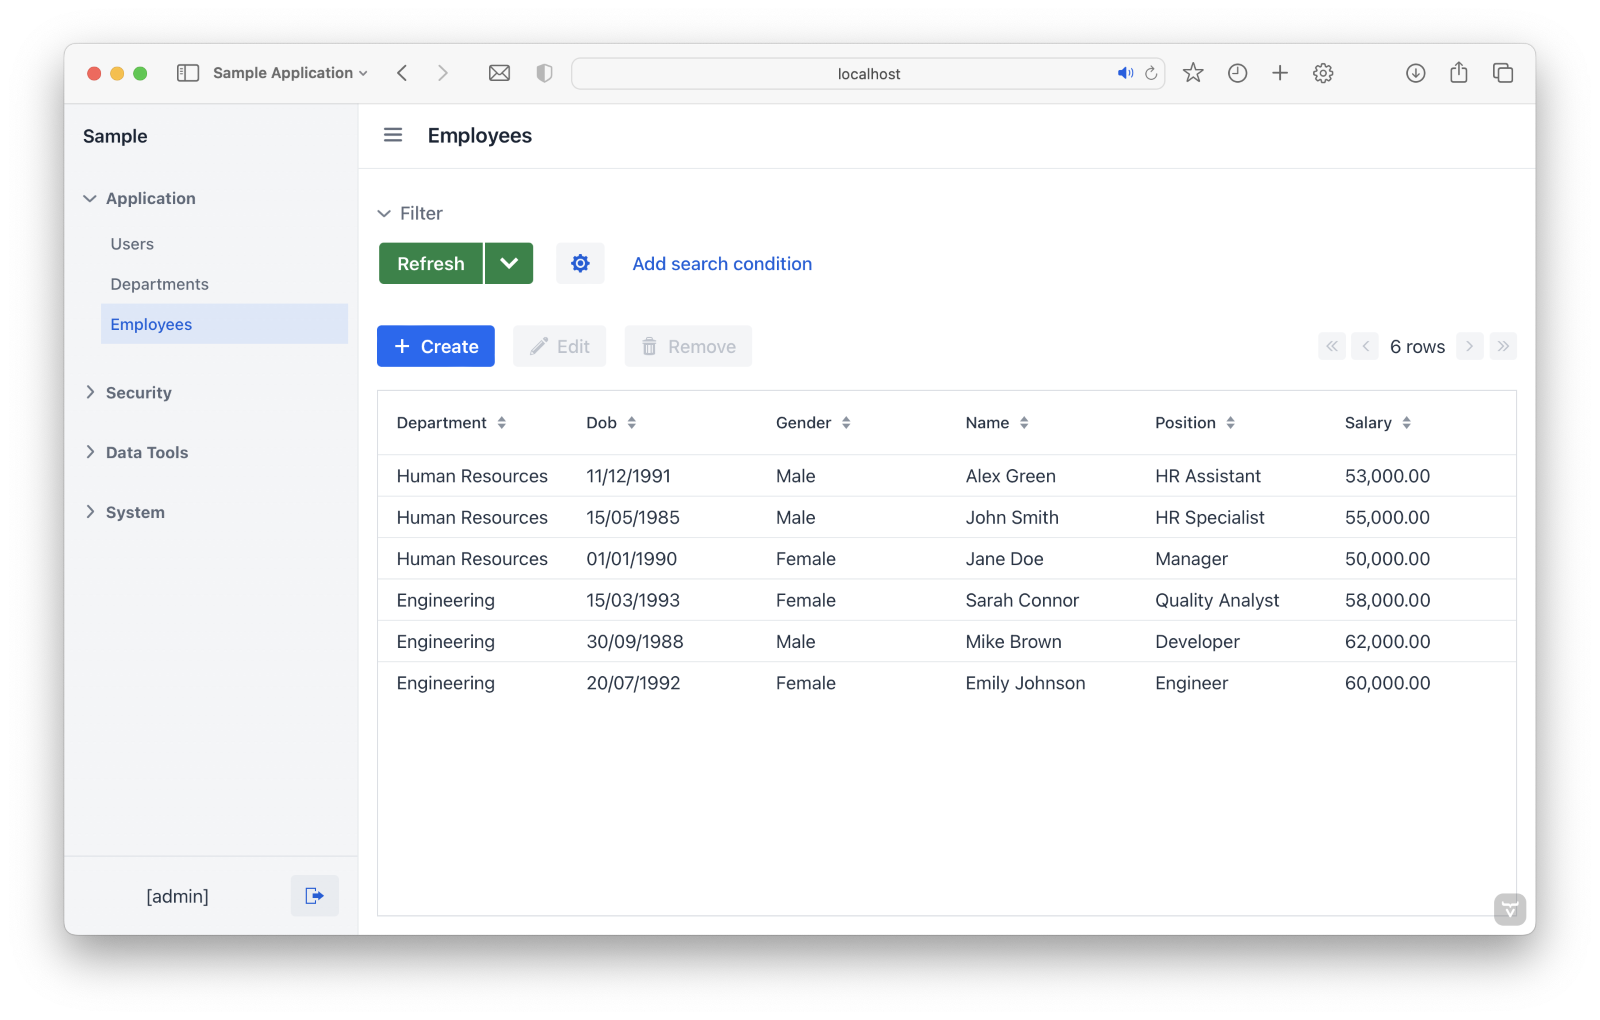
By now, in just a few minutes you have created your entities, their respective controller where your business logic lives, and XML descriptors that define your UI layout.
You’ll be pleasantly surprised when you hit that green button and are greeted by a full-stack application right there on your localhost:8080.
Note: Jmix uses JPA entities, which are Java classes annotated according to JPA standards. These entities are stored in a relational database, either as a primary or additional data store. Read more.
Security
How about security features? Jmix simplifies security management with two types of roles: resource and row-level. Think of resource roles as your keys to different rooms – they let you decide who gets access to which parts of your app, like specific entities or views. Row-level roles, on the other hand, provide fine-grained control, allowing to set permissions for individual entity instances, (add restrictions based on some rules).
In our example, we’ll set up a manager role using a resource role, granting access to the employee view. All you need to do is right-click on the “Security” tab in Jmix Studio, create your manager resource role and you’re good to go. Jmix's declarative approach to defining permissions to your views and entities through your IDE’s UI is about stating what you want, not how to do it.
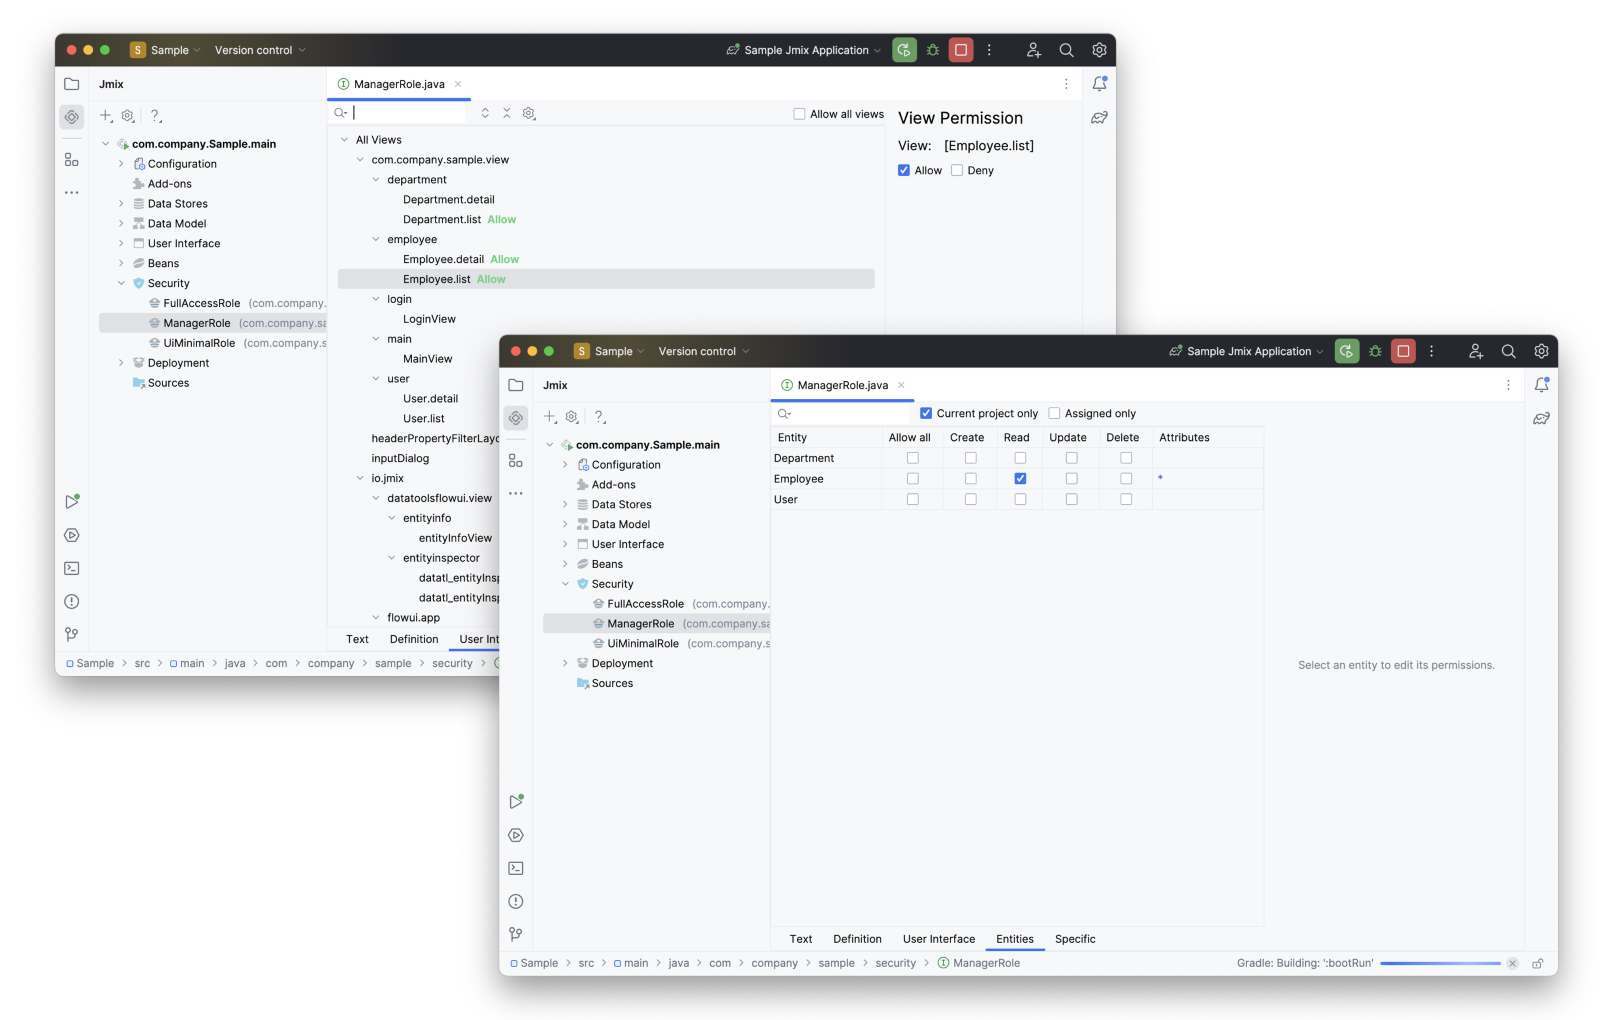 So, with the manager role set, managers can only peek into the views you've green-lit for them. Let's put this into action.
With each new project created, Jmix automatically generates a User entity with a complete list of CRUD functionality. Creating and assigning roles becomes as simple as ordering pizza – you do it with a few clicks in your application, and it's ready in no time.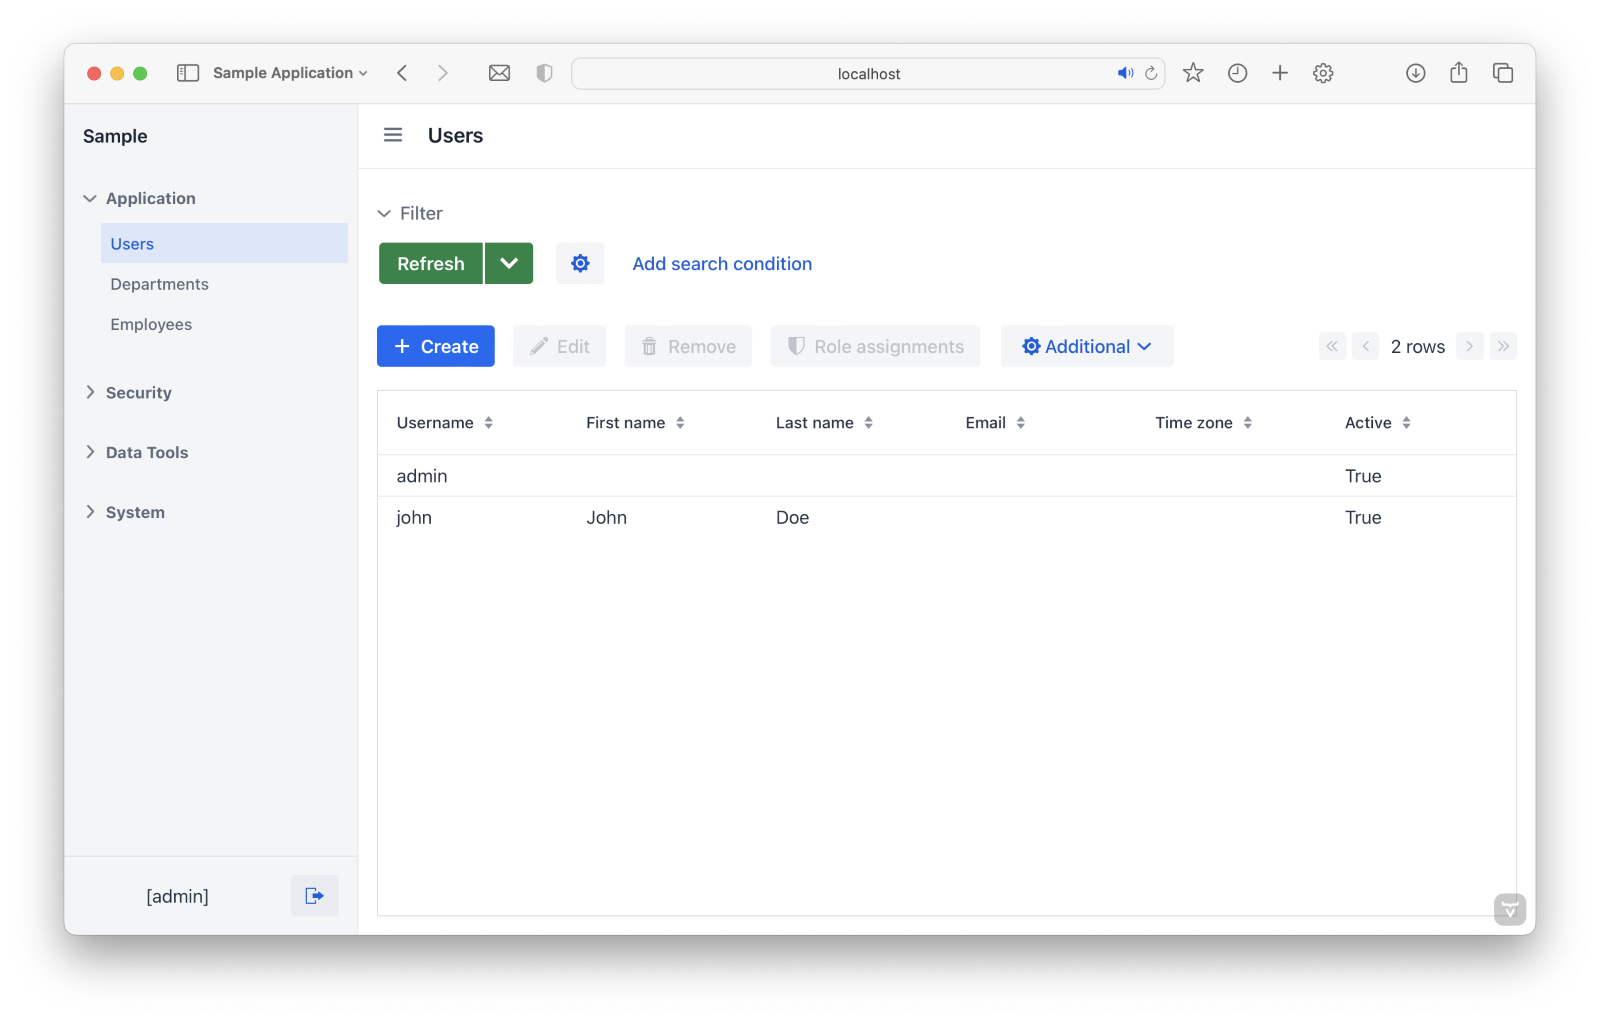
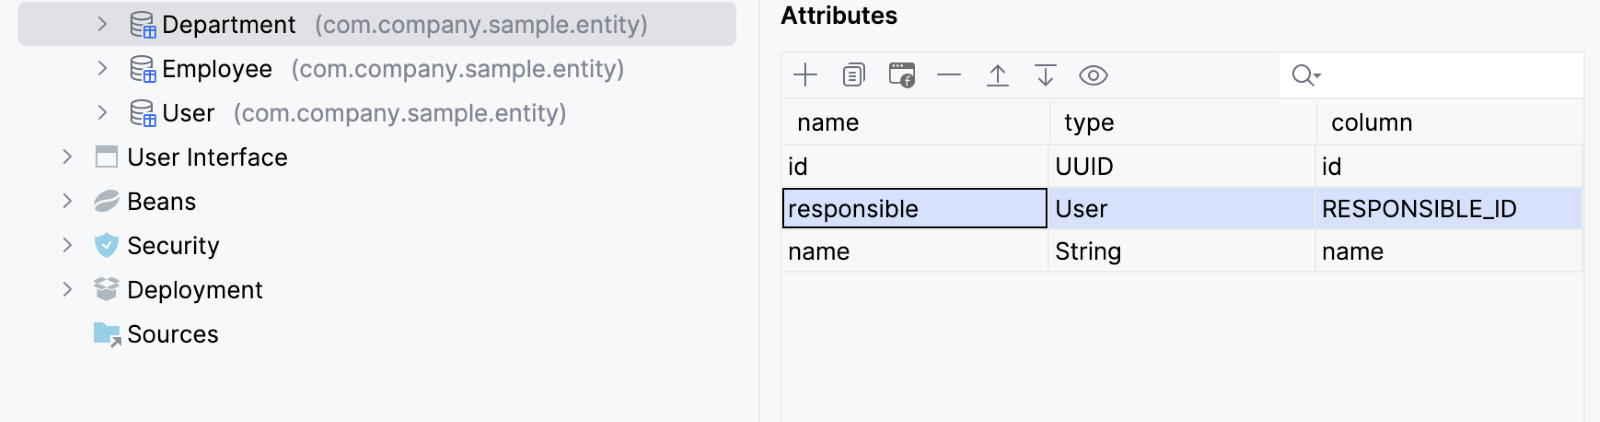
Let’s say we want to ensure that our managers don’t crash the wrong office party and allow them to see only the employees that belong to the corresponding department.
For that, we’ll need to add a “responsible” user attribute to the department, we can do that manually or use Jmix Studio.
I don’t know about you, but whenever I want to change something in my code, I need to propagate changes in each corner of my application’s layers. Jmix keeps track of what needs to be changed in your views and automatically handles database updates using Liquibase without the need to configure anything.
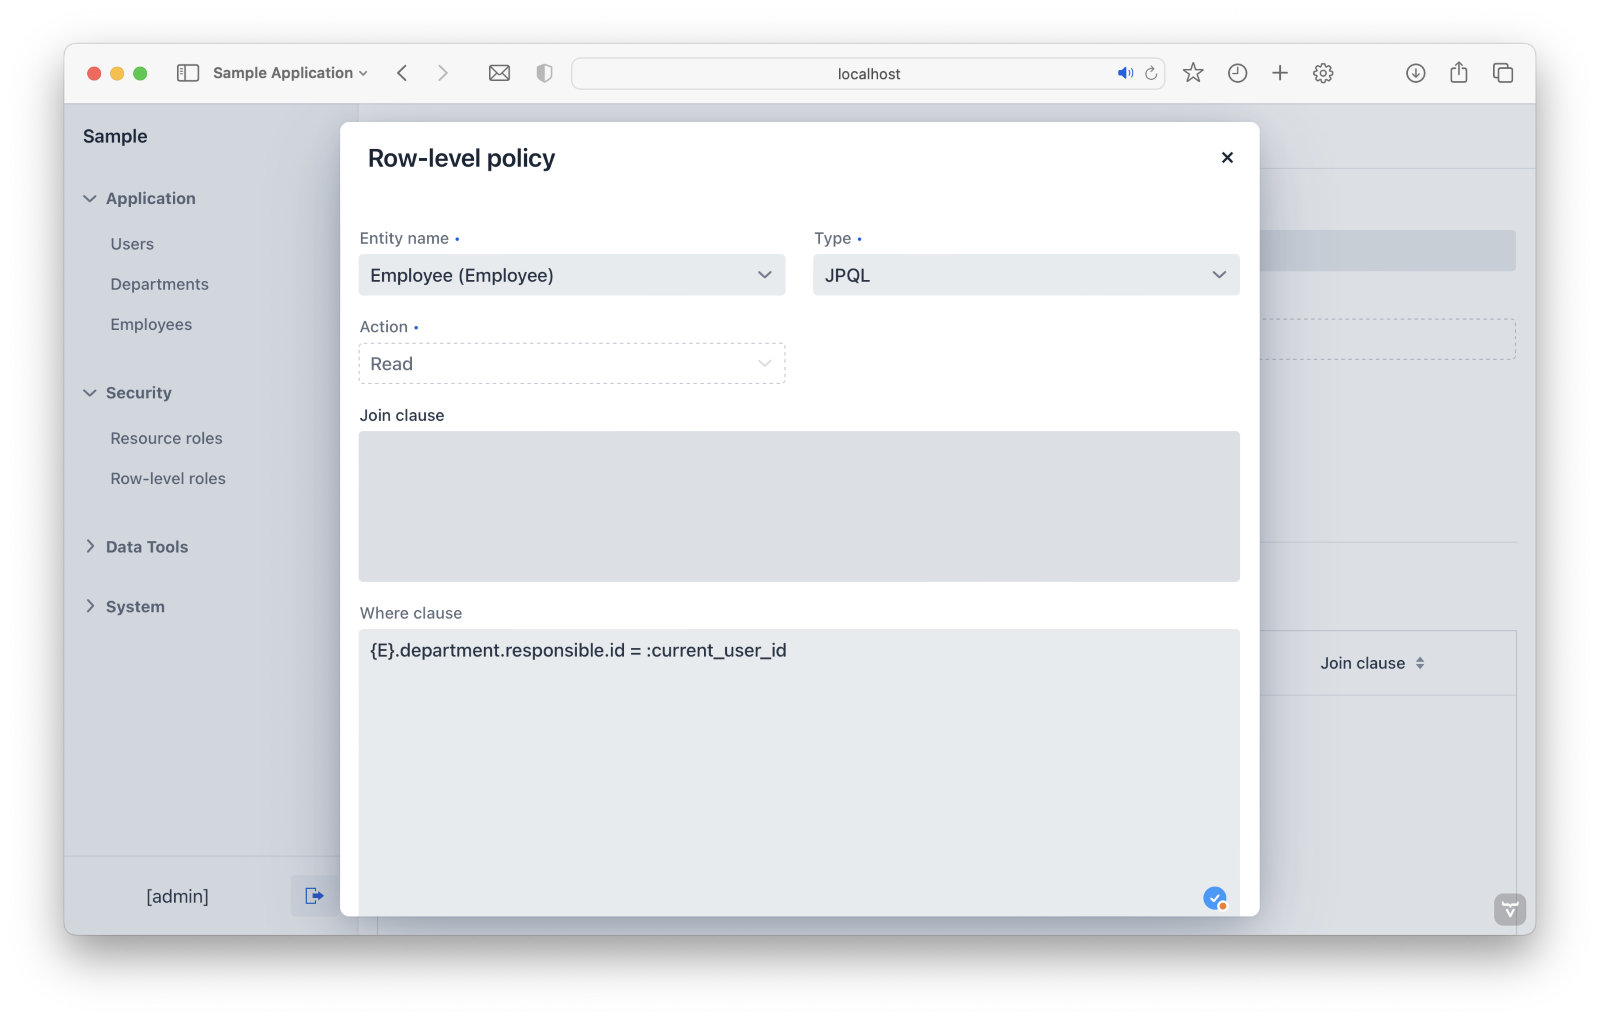
Our application is already well-equipped to create a row-level role in runtime via the admin account. To load the correct data, we’ll choose the entity and type a JPQL script to fetch only the employees whose department’s responsible ID is the same as the current user, or manager in this case.
After assigning the row-level role to John the same way we did with the resource role, we can lean back and watch as John sees exactly what he's meant to do – nothing more, nothing less.
Note: Jmix directly uses Spring Security servlet authentication, so if you are familiar with this framework, you can easily extend or override the standard authentication mechanism provided by Jmix out of the box. Read more.
Service
Let’s see how to implement some functionality to our application. Our manager, John, happens to be on a mission to optimize office seating arrangements based on department sizes. To make his life easier, let’s create a button that counts employees by department in the department list view.
First, we’ll create a Spring service bean*, DepartmentService. Within it, we add the method calculateEmployeeByDepartment.
Jmix Studio provides a way to scaffold useful context-dependent code using the “Code Snippets” button. Here we can choose “Data -> Load list of entities by query” and follow the menu to generate the method below.
public Integer calculateEmployeeByDepartment(Department department) {
    if(department == null)
        return 0;
    final List<Employee> myEntityList = dataManager.load(Employee.class)
            .query("select e from Employee e where e.department = :department1")
            .parameter("department1", department)
            .list();
    return myEntityList.size();
}
Now we have a method that loads and counts employees linked to a specific department.
For my fellow backend devs who break out in a cold sweat at the thought of frontend coding – with Jmix, it's all declarative, even on the front end. Jmix's XML layout makes it easier to visualize your views. To add a button, just simply right-click on the Button panel in Jmix's UI tab, and select 'Button'.
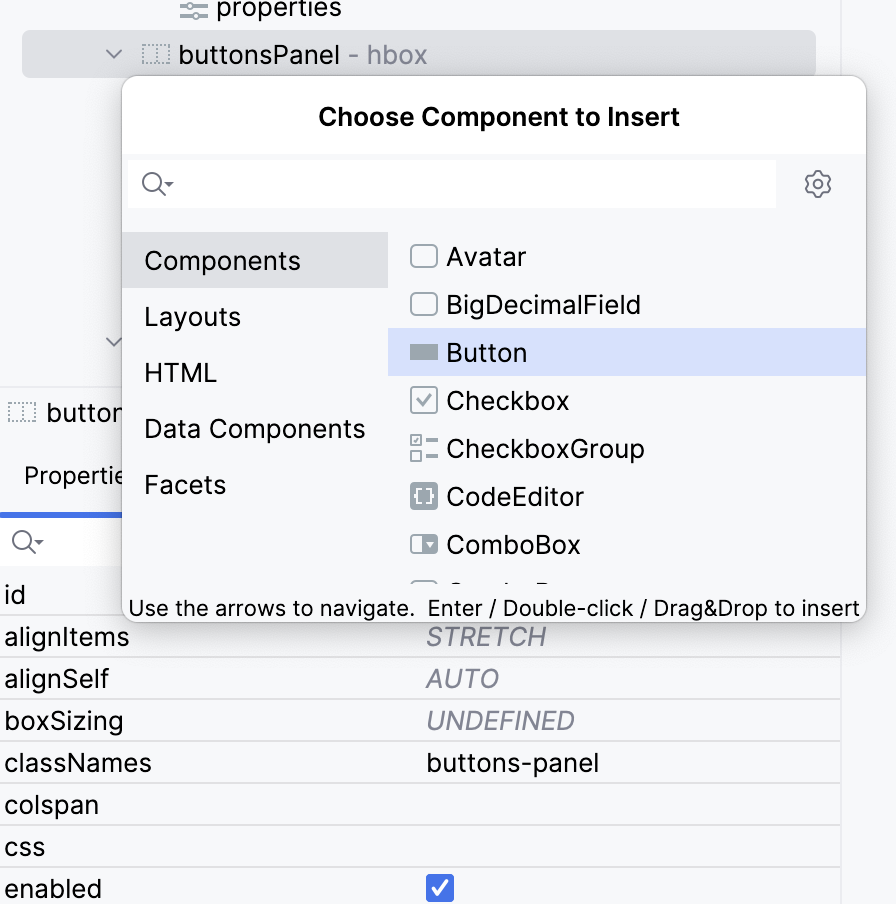
Below the main representation of the buttons, Jmix provides a ton of possible attributes, so you don’t have to remember them all. Name your button, and you're on to setting up how it works.
Jmix has a clear separation between the declarative layout of components defined in XML and programmatic initialization and event-handling logic written in Java. In the 'handler' tab, you'll find a variety of events you can use. And for the detail-oriented folks, yes, you can choose between single or double clicks.
Once you’ve chosen an event, Jmix will neatly create the skeleton of the method in your controller where all the logic happens and now you can inject the needed dependencies and code your business logic.
@Subscribe(id = "countFTEButton", subject = "clickListener")
public void onCountFTEButtonClick(final ClickEvent<JmixButton> event) {
    Integer count = employeeService.calculateEmployeeByDepartment(departmentsDataGrid.getSingleSelectedItem());
    notifications.create(count + " employees found!").show();
}
In this code, Jmix sets up an event listener for our button. When clicked, it triggers the onCountEmployeesButtonClick method. Inside this method, we first call our calculateEmployeeByDepartment service method. It fetches the employee count for the department currently selected in our departmentsDataGrid. Then, we use Jmix's notification bean to display the count to the user.
With this setup, when John or any other user clicks the button, they'll see a notification showing the number of employees in the chosen department.

Note: In Spring, the objects that form the backbone of your application and that are managed by the Spring IoC container are called beans. A bean is an object that is instantiated, assembled, and otherwise managed by a Spring IoC container. Read more.
Addons
Just as Spring's ecosystem has won the hearts of developers with its range of tools, Jmix has its own set of plug-and-play components called add-ons. These add-ons save you time by quickly adding new features to your app with pre-compiled code and resources.
One of the widely used add-ons, for example, is the REST API add-on built on top of the Spring Authorization Server. You get to manage your data and services without the extra work of writing REST controllers. Whether you're integrating with a modern JavaScript framework for a stylish front end or with an external system, this add-on could be your bridge with minimal fuss.
When Not To Use Jmix
It’s all fun and games when you Jmix use it in its spotlight but how about its soft spots? As with any technology, using Jmix has its trade-offs.
Jmix isn’t the best choice for you if:
- You need a highly customized UI: While you can use JS in Jmix to create unique UI elements and complex interfaces (e.g., AWS super admin) or a CMS, it would be more time-consuming than if you were to use a common way to build your front-end with JavaScript frameworks (like React or Vue).
- You’re building a high-load application: Jmix’s front-end uses a stateful approach, meaning the state is maintained on the server side. This can lead to performance issues under heavy load (i.e., hundreds of thousands of requests), as managing numerous active sessions in the server becomes memory-consuming.
- Your application is way too small: If you need an admin panel with one page, Jmix might be overkill with its heavy UI (remember its stateful approach?) and a bunch of unused features in the application. It would be a simpler solution to use a template engine if you wish to write in Java only.
Conclusion
Jmix stands out as a valuable tool to those navigating the world of Spring-Boot-based enterprise application development and comes in handy when your application has an extensive data model, non-trivial business logic, and a functional UI, often with hundreds of screens. Based on its simplicity and the tools its platform provides, it’s one good way to save time on building a Line-of-Business (LOB) web application but not limited to it.
Published at DZone with permission of Amir Shelli. See the original article here.
Opinions expressed by DZone contributors are their own.
Comments