Credential Vault in Mule 3 vs Mule 4
Read this tutorial in order to learn how to create a credential vault in Mule 3 and also in Mule 4. It includes pictures for reference.
Join the DZone community and get the full member experience.
Join For Free Implementing a credential vault using secure property placeholders, encryption-key, and a credential vault is different in Mule 4 when compared to Mule 3.
Let's see how we will implement this in Mule 3:
Prerequisite: Mule Enterprise Security Module should be installed/plugged-in to the Anypoint Studio 6.x.
To implement this, you will need 3 things:
- Creating a credential vault:
Credential Vault is a property file which contains encrypted properties in Key=Value fashion. This can be done as follows:
- Create a property file under the resources folder.
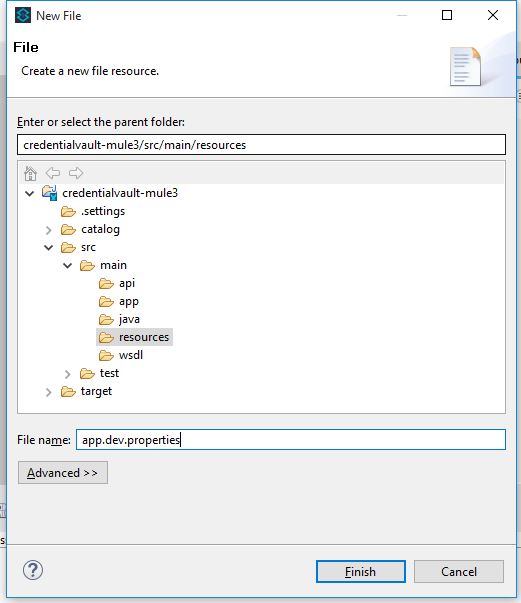
- Open the newly created property file with Mule Properties Editor by right-clicking on the file and select Open With -> Mule Properties Editor.
- Click on the + icon on the toolbar to create or add the property to the file.
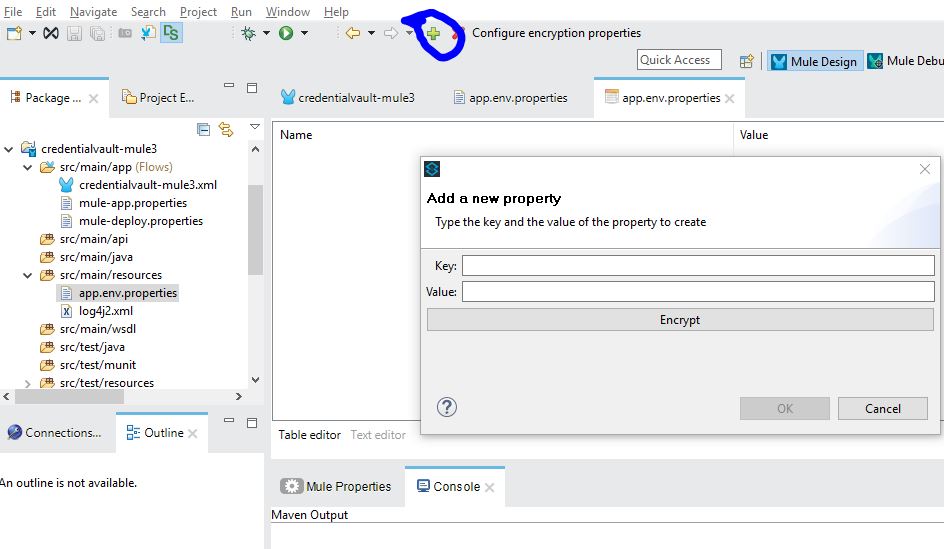
- Add properties in Key and Value fashion and click on the Encrypt button to encrypt this specific property value. You can also click the OK button to create a plain property value.
- Encryption SetUp: Select the appropriate algorithm in the pop-up window. Here, I am choosing the Blowfish as the algorithm and passing the Key (a secret-key used to encrypt these property values) and then clicking on the OK button. (Note: This same key should be made to pass at the run-time so that Mule will use this and decrypt property values during run-time)
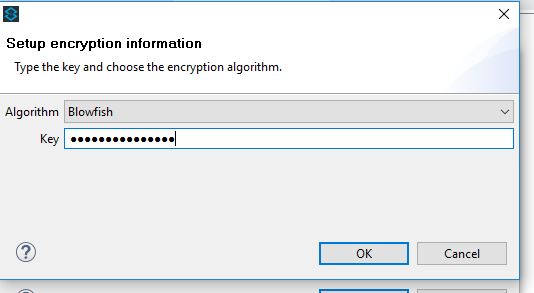
- Now the value of this particular property will be encrypted and stored in this file.
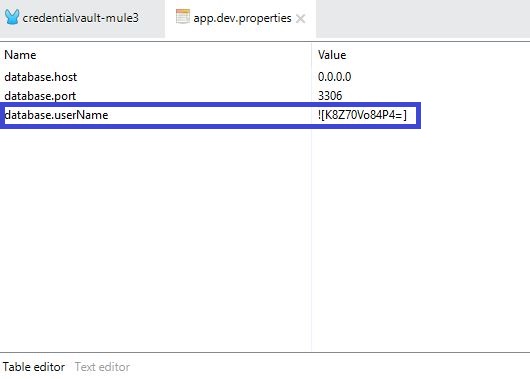
- The above steps should be repeated for creating all sensitive properties that need to be maintained securely.
2. Creating a secure property placeholder:
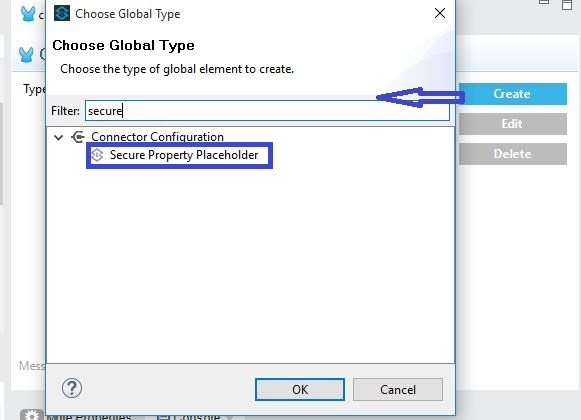
- Create a global secure placeholder from theGlobal Elements tab of the canvas.
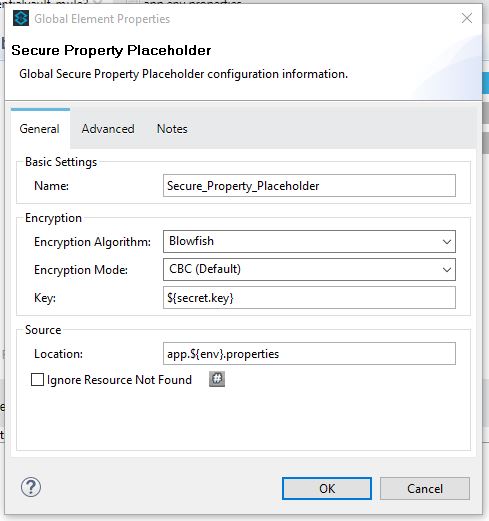
- Give the encryption algorithm a name, mode, and Key used to encrypt/decrypt property values and the location of the credential vault (filename of the secure property file). Then, click on the OK button.
3. Creating the secret key to demand by the Mule:
- Deploy the application as Run Configuration and then pass the secret.key and env values as the VM argument by prefixing -D to the Key=Value pair. Multiple Key=Value pairs are to be separated by whitespace.
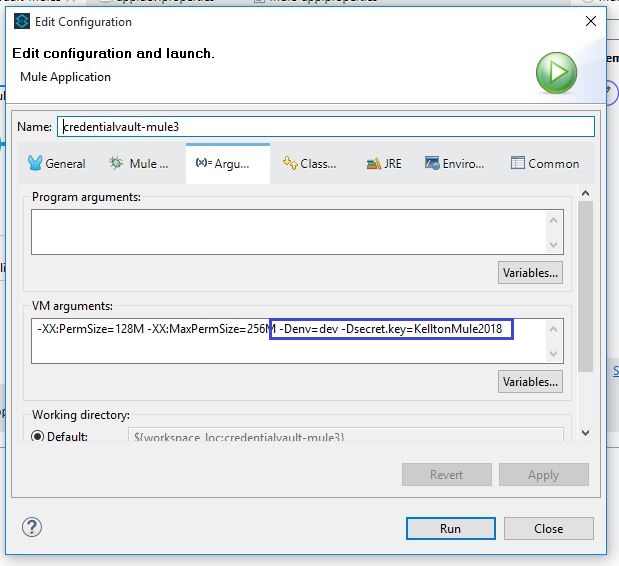
- Click on the Run button to deploy the application.
Now let's see how we will implement this in Mule 4:
Prerequisite: Add secure property configuration extension to the studio by adding the dependency to the project's pom file.
<dependency>
<groupId>com.mulesoft.modules</groupId>
<artifactId>mule-secure-configuration-property-module</artifactId>
<classifier>mule-plugin</classifier>
<version>1.0.0</version>
</dependency>
Here in Mule 4, we also have to do 3 things but in a different way:
- Creating a credential vault:
- Create a property file under the resources folder.
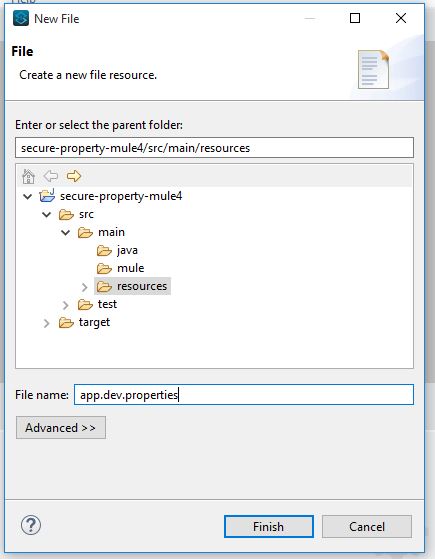
- Add properties to this file in a Key=Value fashion.
- In Mule 4, property values need to be encrypted by using the secure-properties-tool.jar from the command prompt. This jar can be downloaded from the link https://docs.mulesoft.com/mule4-user-guide/v/4.1/_attachments/secure-properties-tool.jar
- To encrypt or decrypt properties using this tool, open the command prompt and navigate to the path of this tool.
- You can encrypt each and every single property value or you can encrypt all property values of a file in a single step. It is done using the commands that follow:
- Encrypt each property value using the command: java -jar secure-properties-tool.jar string <encrypt|decrypt> <algorithm> <mode> <key> <value>
- Encrypt entire property file at once using the command: java -jar secure-properties-tool.jar file <encrypt|decrypt> <algorithm> <mode> <key> <input file> <output file>
- If you want encrypt each sing property as a string:
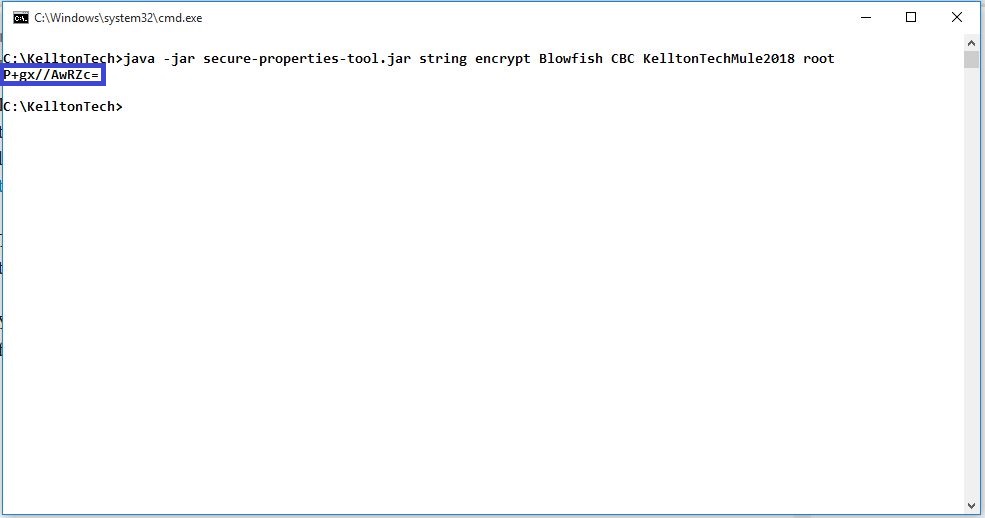
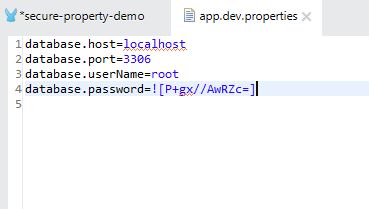
- Copy the encrypted text and paste it into the project's property file. Note: Make sure that the encrypted text in property file is enclosed or represented as ![encryptedPropertyValue]
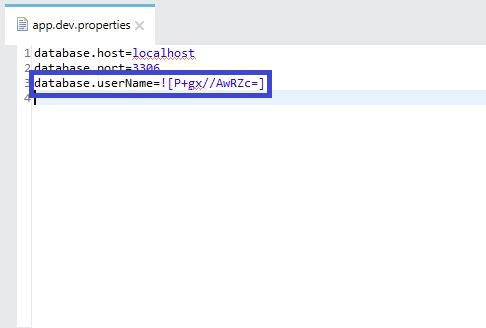
- Repeat this to encrypt each property value
- If you want to encrypt the total property file, then add all properties to the file.
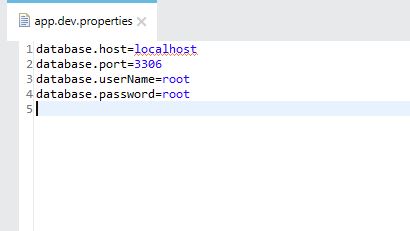
- Then, run the command to generate encrypted property file:

- Generated file content will look like this:
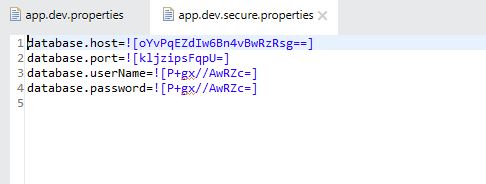
- Use the newly generated file in the project as a credential vault.
Note: We can also use the UI based property encryption process by installing the Mule Enterprise Security Module, which we used with AnypointStudio 6.x with Mule 3.x
2. Creating a secure properties configuration
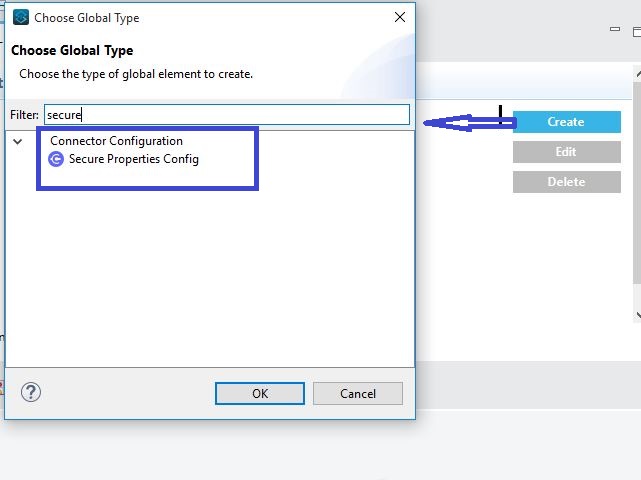
- Create a global secure properties configuration from the Global Elements tab of the canvas
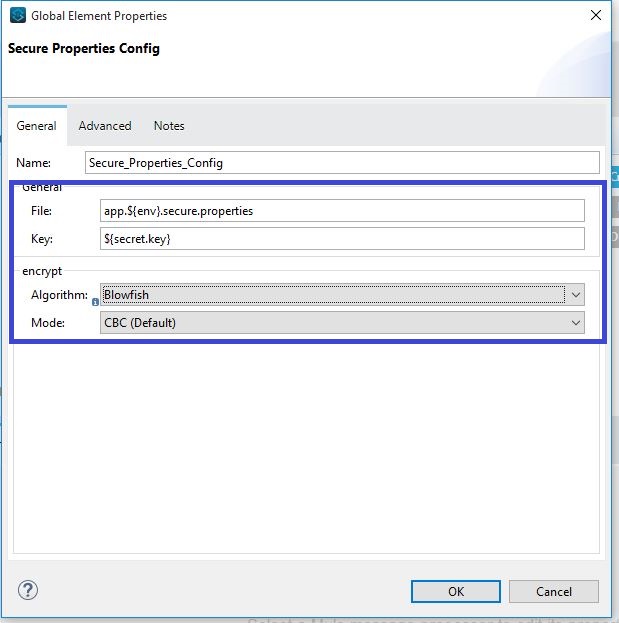
- Give the file name, Key used to encrypt/decrypt property value, encryption algorithm name, and mode. Then click on OK button.
- A reference to an encrypted property from the project can be made by the ant notation and by prefixing the propertyKey with the "secure::", and it will look like ${secure::database.password}.
- Note: To refer or to use any property (i.e., both encrypted and plain properties) from a secure-property-placeholder, we need to use "secure::" preceding to the propertyKey.
3. Creating the secret key to demand by the Mule:
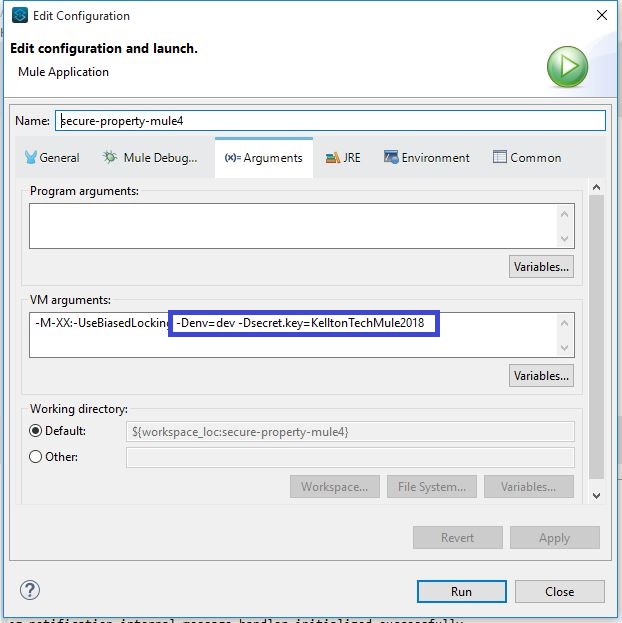
- Deploy the application as Run Configuration and then pass the secret.key and env values as the VM argument by prefixing -D to the Key=Value pair. Multiple Key=Value pairs are to be separated by whitespace.
Thanks.
Opinions expressed by DZone contributors are their own.

Comments