Data Conversion for SQL Server Integration Services (SSIS)
In the series of step by step lessons of SSIS (SQL Server Integration Services), this is part six in which we are going to learn a new control: Data Conversion.
Join the DZone community and get the full member experience.
Join For FreeIn the series of step by step lessons of SSIS (SQL Server Integration Services), this is part six in which we are going to learn a new control: Data Conversion. I am sure that just by the name it's clear that this control will be used when we require data type conversion of input columns. This is exactly the same as CONVERT or CAST in our programming.
However, in this case it would be important to know that SSIS also has data types which are similar to other programming or database’s data types.
Just as DT_NUMERIC is equivalent to numeric data type, DT_I2 is equivalent to smallint, DT_str is equivalent to VARCHAR and so on.
I am sure you will find this control fairly simple, so without wasting any more time, let's start step by step.
For a change, I am using an excel data source.
Suppose we have an excel sheet of sales orders which have columns like sales order, subtotal, tax amount, and freight:
Here, the sales order is varchar, while SubTotal, Tax amount, and Freight are numeric with four decimal places. We want to convert the numeric field into an integer and want the result in a flat file. So let’s start.
Step 1
Drag and drop a Data flow Task control and double click it. Now add an excel data source from SSIS tool bar as shown in the below figure.
Step 2
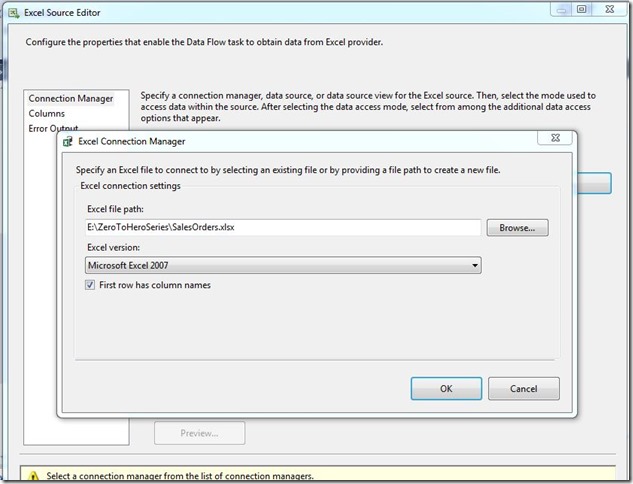
Now, the next step is to configure this excel source. To do this, just right click and use the EDIT option. You will get a screen where you need to provide the file that we want to access.
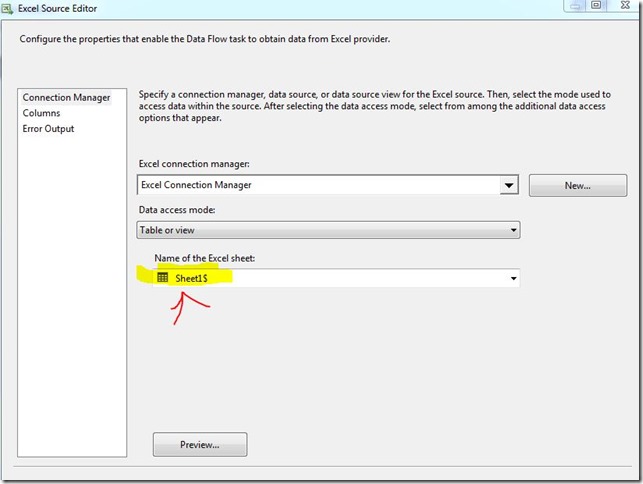
Once the connection with excel is established the next very important step is to configure the sheet as highlighted in the below figure. Remember: You need to configure this sheet because an excel sheet may have the number of sheets available, so you will need to assign only the sheet whose data you want to process.
Step 3
Once the sheet is configured you can choose the columns, as well, which you want to process or want in the destination by clicking the column’s option as shown in the below figure.
Step 4
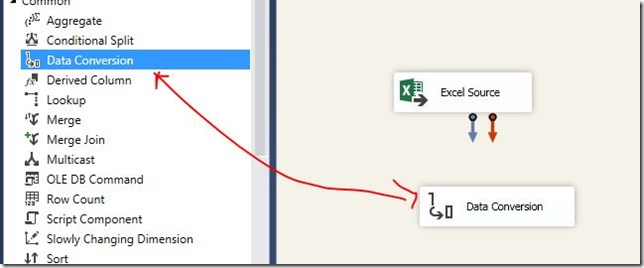
Now drag drop the data conversion control from SSIS toolbar
Step 5
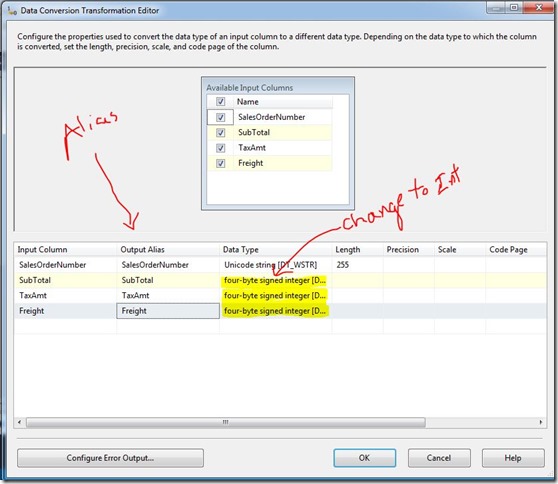
Now, open the context menu and click the edit button to configure data conversion. Now remember: Here we have to change the data from numeric to integer (as discussed earlier). So just change the desired data type which is integer (DT_I4). Also, a point to remember here is that when you do data type conversion you need to careful about Aliasing also. You will see copy of as a prefix on column.
Step 6
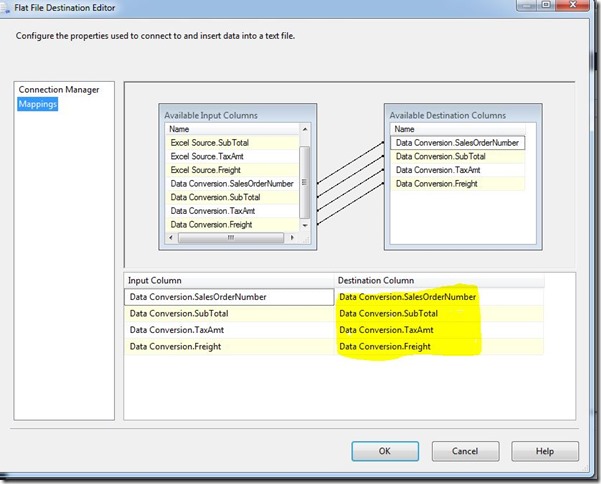
Now, we need this output in flat file, so you can do so by adding a file destination control from SSIS toolbox and configuring it by clicking Edit button as shown in below figure.
Step 7
In the next step we have to configure the file location and columns which we require in the flat file, and delete any unnecessary columns which are not required.
Step 8
Once the above step is done, we are good to go to run this package. So, hold your breath for few seconds (kidding!) and hit F5.
You will get the below screen which shows that all the provided rows are inserted in a file.
Step 9
To cross check whether file has integer columns or not, let's open it.
If you see above screen then you did it successfully. So we achieved our goal in this post and used DATA conversion control successfully.
I hope you feel this post useful.
Thanks for reading this post.
Published at DZone with permission of Rajat Jaiswal, DZone MVB. See the original article here.
Opinions expressed by DZone contributors are their own.







Comments