Deploying GenAI Applications on Kubernetes: A Step-By-Step Guide
This guide provides a comprehensive and detailed approach for deploying GenAI applications on Kubernetes for high availability.
Join the DZone community and get the full member experience.
Join For FreeIn today's fast-paced technological landscape, deploying AI/ML applications efficiently and effectively is paramount. Kubernetes, a powerful open-source platform, has emerged as a leading solution for managing and scaling containerized applications, ensuring they run seamlessly across various environments.
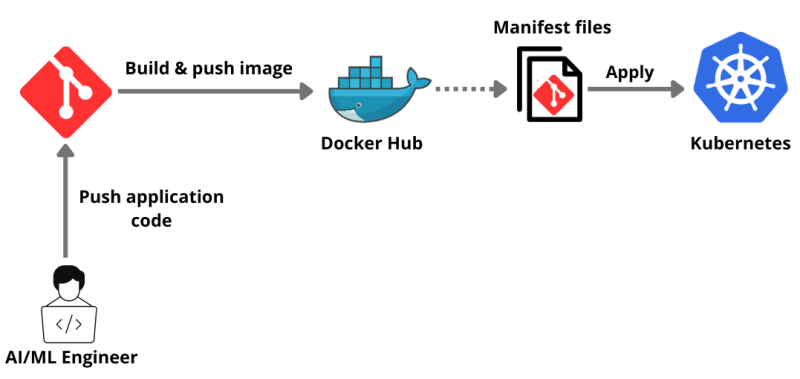
In this comprehensive guide, we will walk you through the step-by-step process of deploying any AI/ML application on Kubernetes. From containerizing your application to setting up your Kubernetes cluster to deploying your AI/ML applications, this guide covers it.
Let's embark on this learning adventure together!
Why Deploy GenAI Applications on Kubernetes?
Deploying AI/ML applications on Kubernetes provides a robust solution for managing complex AI/ML workloads. One of the primary benefits is scalability. Kubernetes can automatically scale the infrastructure, accommodating varying workloads efficiently and ensuring that resources are allocated effectively based on demand. This auto-scaling feature is crucial for handling large computations involved in AI/ML tasks.
Additionally, Kubernetes supports multi-cloud and hybrid-cloud environments, offering flexibility and avoiding vendor lock-in. It provides a consistent and unified environment for development, testing, and deployment, enhancing the collaboration between data scientists and engineers.
Kubernetes also ensures high availability and fault tolerance, automatically replacing or rescheduling containers that fail, ensuring the reliability and robustness of AI/ML applications. Furthermore, it simplifies many operational aspects, including updates and rollbacks, allowing teams to focus more on building AI/ML models rather than managing infrastructure.
Prerequisites
- Docker Desktop installed for containerizing our application.
- Minikube installed. We will use Minikube to create a single-node cluster.
- Download and install Node.js as the sample application is a Node.js application.
- Sign up for a free SingleStore database cloud account to integrate our application with a database.
Tutorial
I hope you have a GitHub account.
First, we will clone the already available openai-quickstart-node repository to our local.
git clone https://github.com/pavanbelagatti/openai-quickstart-node.git
Let's navigate into the project directory.
cd openai-quickstart-node
Install the project requirements and dependencies.
npm install
Create a .env file and add your OpenAI API Key.
touch .env
In your .env file, add the OpenAI Key as an environment variable, as shown below.
OPENAI_API_KEY=<Add Your OpenAI API Key>
Run the application using the below command.
npm run dev
You should see the application on Local 3000.

Let’s Write a Dockerfile for Our Application to Containerize It
touch DockerfileAdd the following Dockerfile instructions in it.
# Use the official Node.js image as a parent image
FROM node:14-alpine as build

# Set the working directory in the Docker container
WORKDIR /app

# Copy the package.json and package-lock.json files into the container at /app
COPY package*.json ./

# Install the dependencies
RUN npm install

# Copy the local files into the container at /app
COPY . .

# Build the application
RUN npm run build

# Start from a smaller image to reduce image size
FROM node:14-alpine as run

# Set the working directory in the Docker container
WORKDIR /app

# Copy over dependencies
COPY --from=build /app/node_modules ./node_modules
COPY --from=build /app/.next ./.next
COPY --from=build /app/public ./public
COPY --from=build /app/package*.json ./

# Expose port 3000 for the app to be accessible externally
EXPOSE 3000

# Command to run the application
CMD ["npm", "start"]
Let's build, tag, and push this to our DockerHub.
docker build -t <image name> .
Note: I am naming my image as generativeai-node-app
Let's launch our container.
The image is built! It’s time to launch the Docker container with assigned ports using the following command:
docker run -p 3002:3002 generativeai-node-app
Let's build it again with our DockerHub credentials.
docker build -t <your dockerhub username>/<image name> .
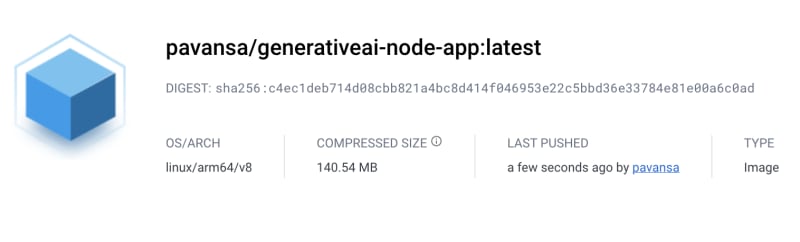
Let's push the image to DockerHub.
docker push <your dockerhub username>/<image name>
You can confirm if the image is pushed by going to your DockerHub.
Deploy and Expose Our Application on Kubernetes
To deploy and expose the application, we need two yaml files.deployment.yaml and service.yaml files.
One file contains the instructions for deployment and the other one for service exposure.
Let's see our deployment.yaml file first.
apiVersion: apps/v1
kind: Deployment
metadata:
  name: genai-app
spec:
  replicas: 2
  selector:
    matchLabels:
      app: genai-app
  template:
    metadata:
      labels:
        app: genai-app
    spec:
      containers:
        - name: genai-app
          image: pavansa/generativeai-node-app:latest
          ports:
            - containerPort: 3000
Below is our service.yaml file.
apiVersion: v1
kind: Service
metadata:
name: genai-app-service
spec:
selector:
app: genai-app
ports:
- protocol: TCP
port: 80
targetPort: 3000
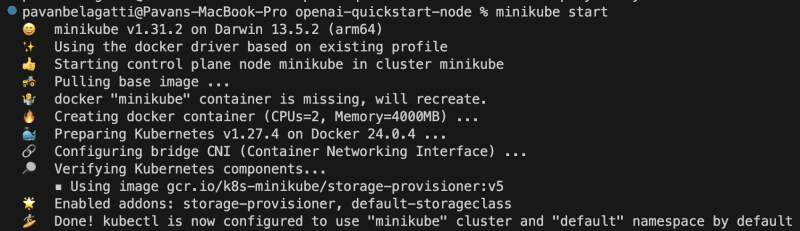
type: LoadBalancerWe are using Minikube to create a single-node Kubernetes cluster, and we will use it to deploy our application.
Start the Minikube using the below command.
minikube start
This is the output you should see.
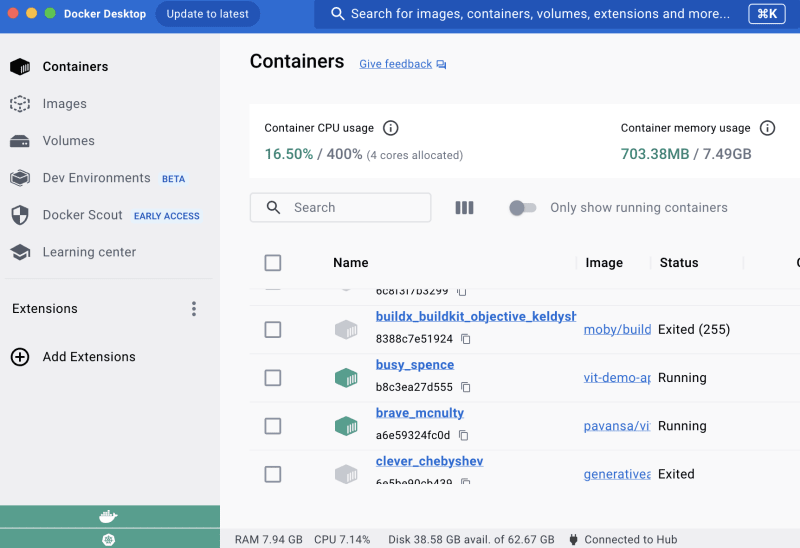
Note: Keep your Docker Desktop running and enable Kubernetes in it. The below image is just for your reference.
Let's apply our deployment file using the below command.
kubectl apply -f deployment.yaml
Similarly, apply our service yaml file.
kubectl apply -f service.yaml
Let's check the status of our Pods first using the below command.
kubectl get pods
You should see the desired output as below.

Let's check the deployment status of our application to see if the desired pods are running as expected.
kubectl get deployment

Let's check the service status of our application.
kubectl get service

Let's see if we can expose our application and access it.
minikube service <add your application service name> --url
You should see the output below and will be able to access your application.

You can see the URL link to go and access our application.
Congratulations! We containerized our application, deployed and exposed it using Kubernetes.
Integrating a Database for Our Application
After successfully deploying and exposing your AI/ML application on Kubernetes, you might need a robust and scalable database to handle your application data. SingleStore is a high-performance, scalable SQL database that is well-suited for AI/ML applications. In this section, we will guide you through the process of integrating SingleStore database into your Kubernetes-deployed application.
You need a free SingleStore cloud account.
- Create a workspace and then create a database and table suitable for your application.
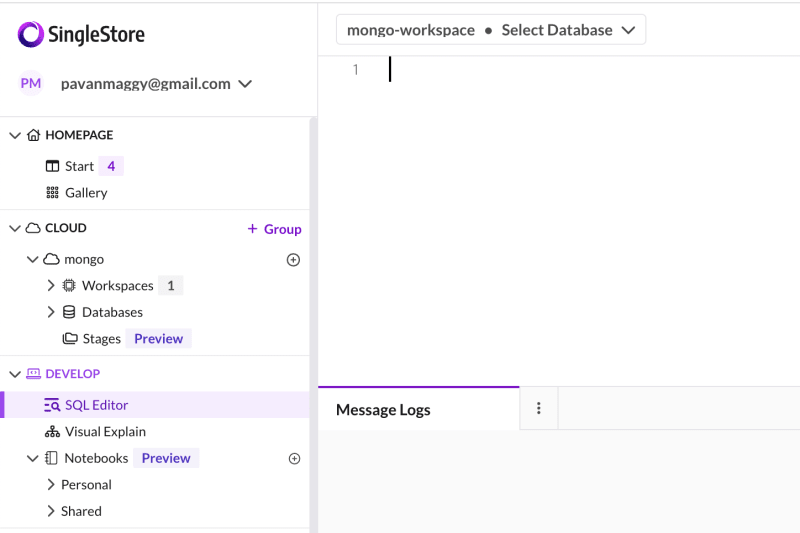
Go to the SQL editor as shown in the below image
Create a New Database Using the Following SQL Statement
-- create a database
CREATE DATABASE <database name>;
Next, switch to the new database using the USE command.
USE <database name>;
Then, create a table in the new database with the desired schema.
-- create a table
CREATE TABLE <table name> (
);
You can paste these SQL commands in the SQL Editor, highlight them, and then click the Run button
You can find the whole process of creating a database, tables, and feeding information in tables in this tutorial.
Update Kubernetes Deployment Configuration
If your SingleStore database is running outside the Kubernetes cluster, update your application’s Kubernetes deployment configuration to allow connections to the SingleStore database.
apiVersion: apps/v1
kind: Deployment
...
spec:
  containers:
    - name: genai-app
      ...
      env:
        - name: DB_HOST
          value: "<Your SingleStore DB Host>"
        - name: DB_PORT
          value: "<Your SingleStore DB Port>"
        ...
Redeploy Your Application
Apply the updated Kubernetes deployment configuration to redeploy your application with SingleStore integration.
kubectl apply -f deployment.yaml
Verify the Integration
After redeployment, verify that your application is successfully connected to the SingleStore database and is performing database operations as expected.
By following these steps, you have successfully integrated the SingleStore database into your Kubernetes-deployed AI/ML application, providing a robust and scalable solution for managing your application data.
Conclusion
Congratulations on successfully navigating through the comprehensive steps to deploy an AI/ML application on Kubernetes! This guide has walked you through each essential phase, from containerizing your application to deploying and exposing it on Kubernetes.
As you continue to explore and enhance your AI/ML deployments, consider integrating a high-performance database like SingleStore to manage your application data seamlessly. SingleStore offers scalability, speed, and efficiency, ensuring your AI/ML applications run optimally with a robust database backend.
Published at DZone with permission of Pavan Belagatti. See the original article here.
Opinions expressed by DZone contributors are their own.
Comments