Develop a Google Cardboard Virtual Reality Application Using Unity SDK
VR is one of the hottest topics in mobile development. Here's a neat tutorial for whipping up a Google Cardboard-compatible VR app with the Unity SDK.
Join the DZone community and get the full member experience.
Join For FreeIntroduction
Google Cardboard is a technology platform to develop virtual reality (VR) applications for mobile phones. A main component of the platform is a low-cost headset with dual lenses to produce "stereoscopic 3D view" of the scene displayed on the phone screen. A Google Cardboard compatible application generates slightly different versions of a (2D) image on a split screen that, when viewed with the headset, creates the illusion of 3D depth.
Google has published specifications for platform compatible headsets and provided two development kits for Cardboard applications.
- Android SDK: Based on Android Java, applicable to only Android devices.
- Unity SDK: Based on Unity Editor and C#, applicable to both Android and iOS devices.
In this tutorial, we will develop a simple Google Cardboard application using Unity SDK and deploy into an Android phone. (Unity Editor can generate an Xcode project to deploy the application into an iOS phone as well. However, in this tutorial our focus will be on Android platform.)
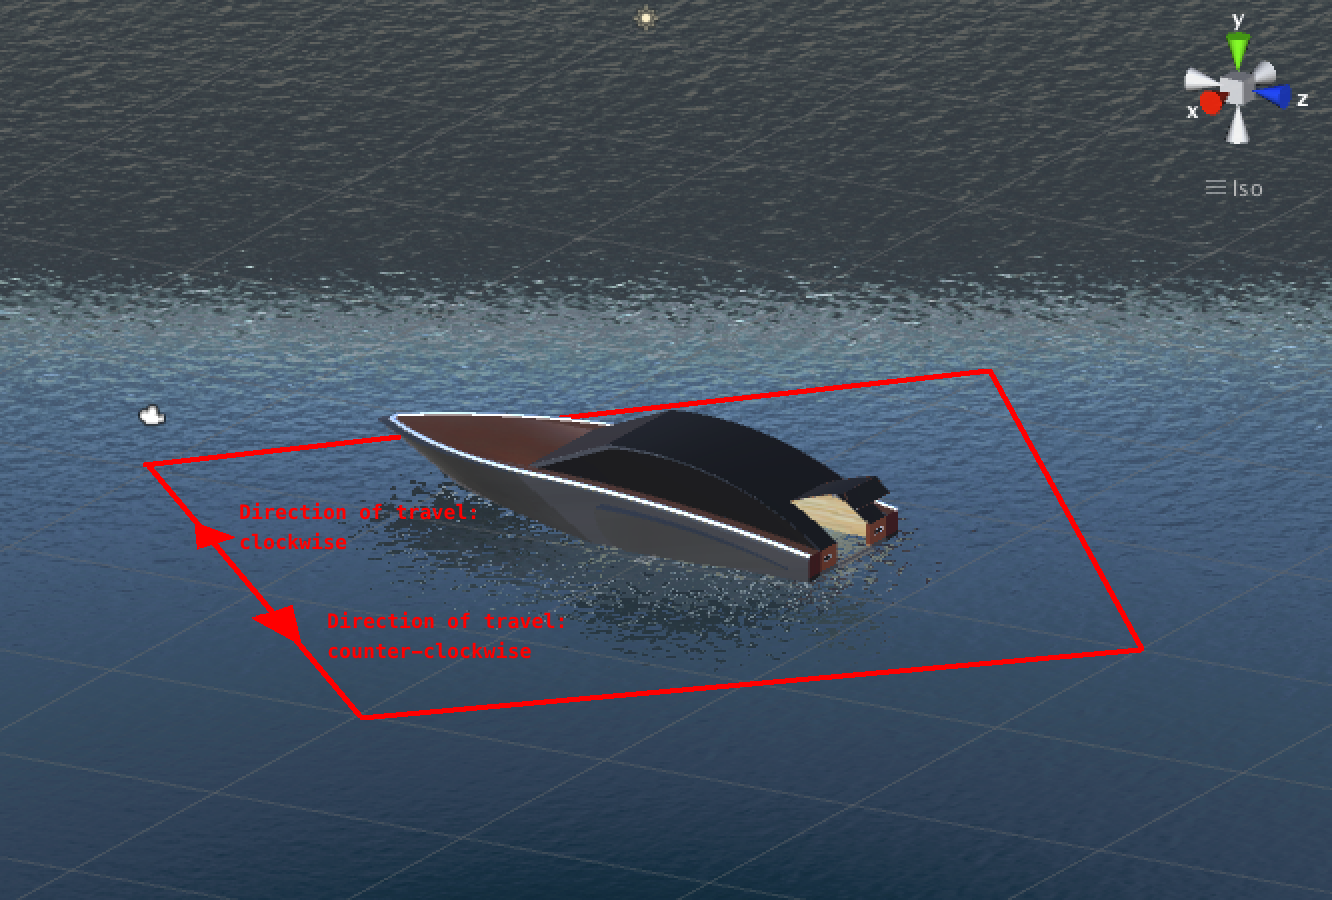
The application will consist of a self-navigating main camera around the 3D model of a yacht on water. Camera follows a path around the yacht (counter-clockwise by default) and keeps pointing towards it. User can move the headset left, right, up and down to change the field of view. A hypothetical ray originating from the camera towards the center of field of vision serves as a pointer. If position of the camera is so that the pointer is on the yacht, user can send an input via the Cardboard trigger to toggle direction of travel of the camera along the path, i.e. from counter-clockwise to clockwise and vice versa.
Finished Product
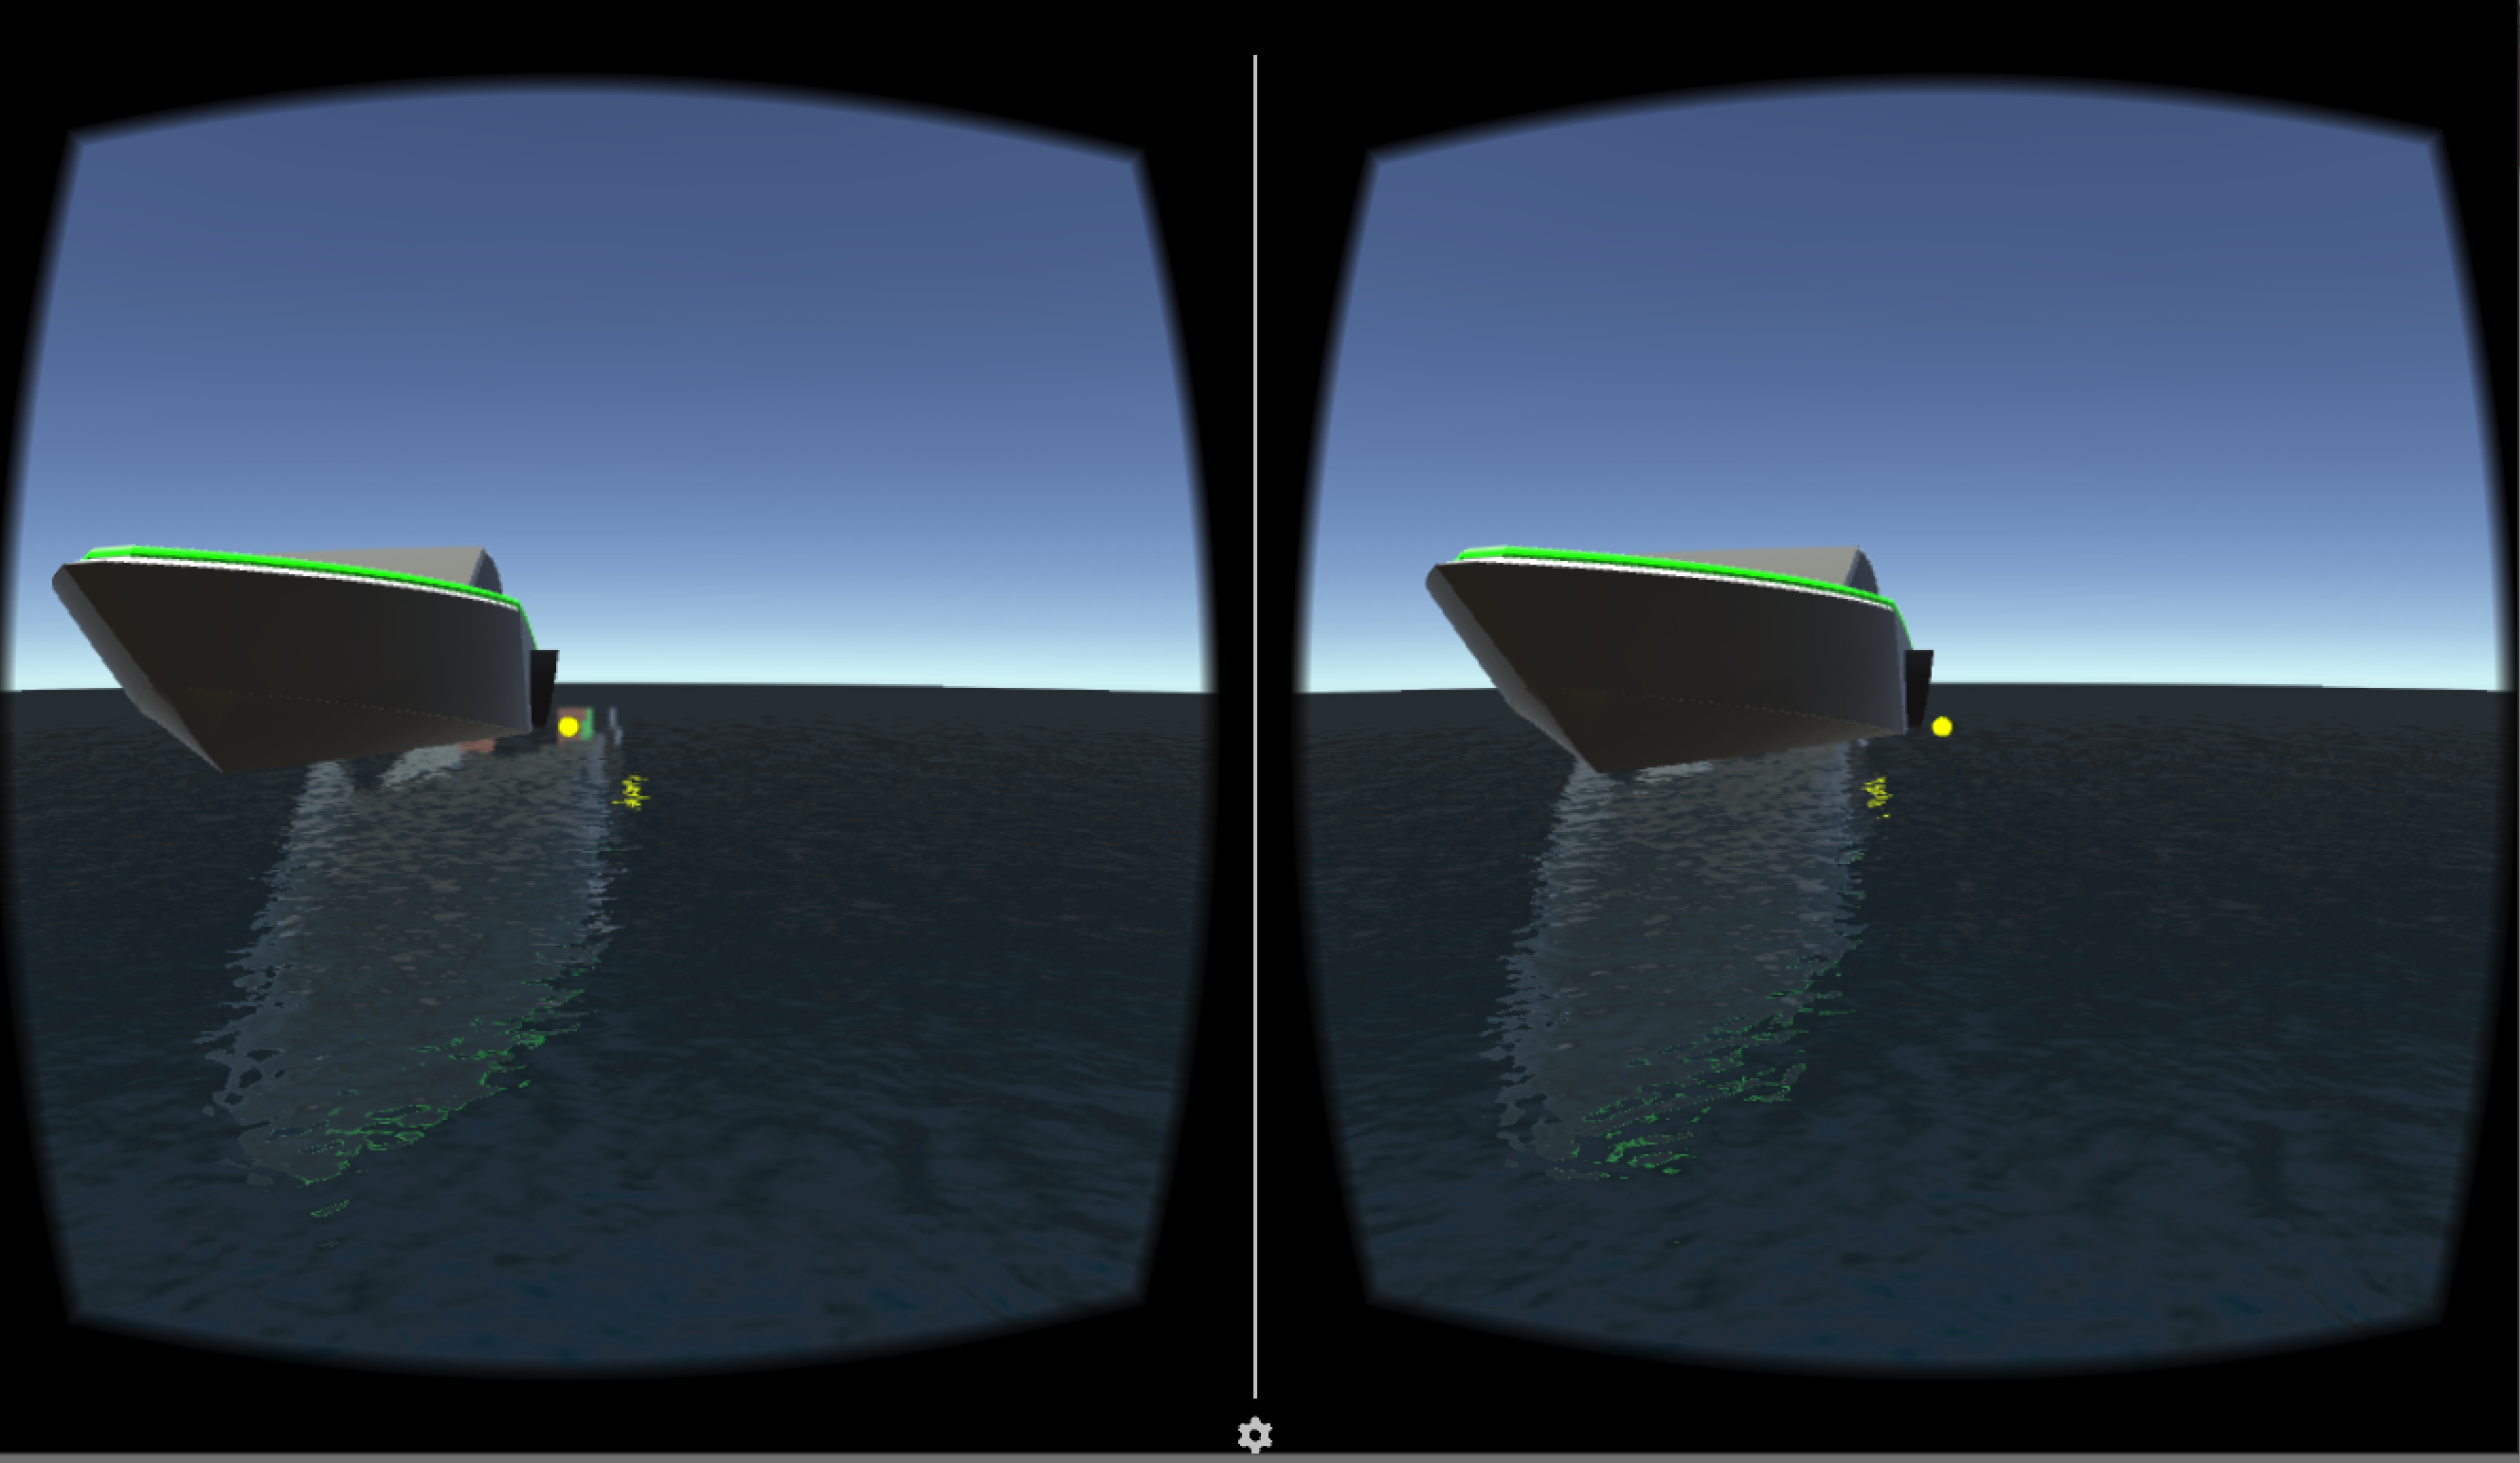
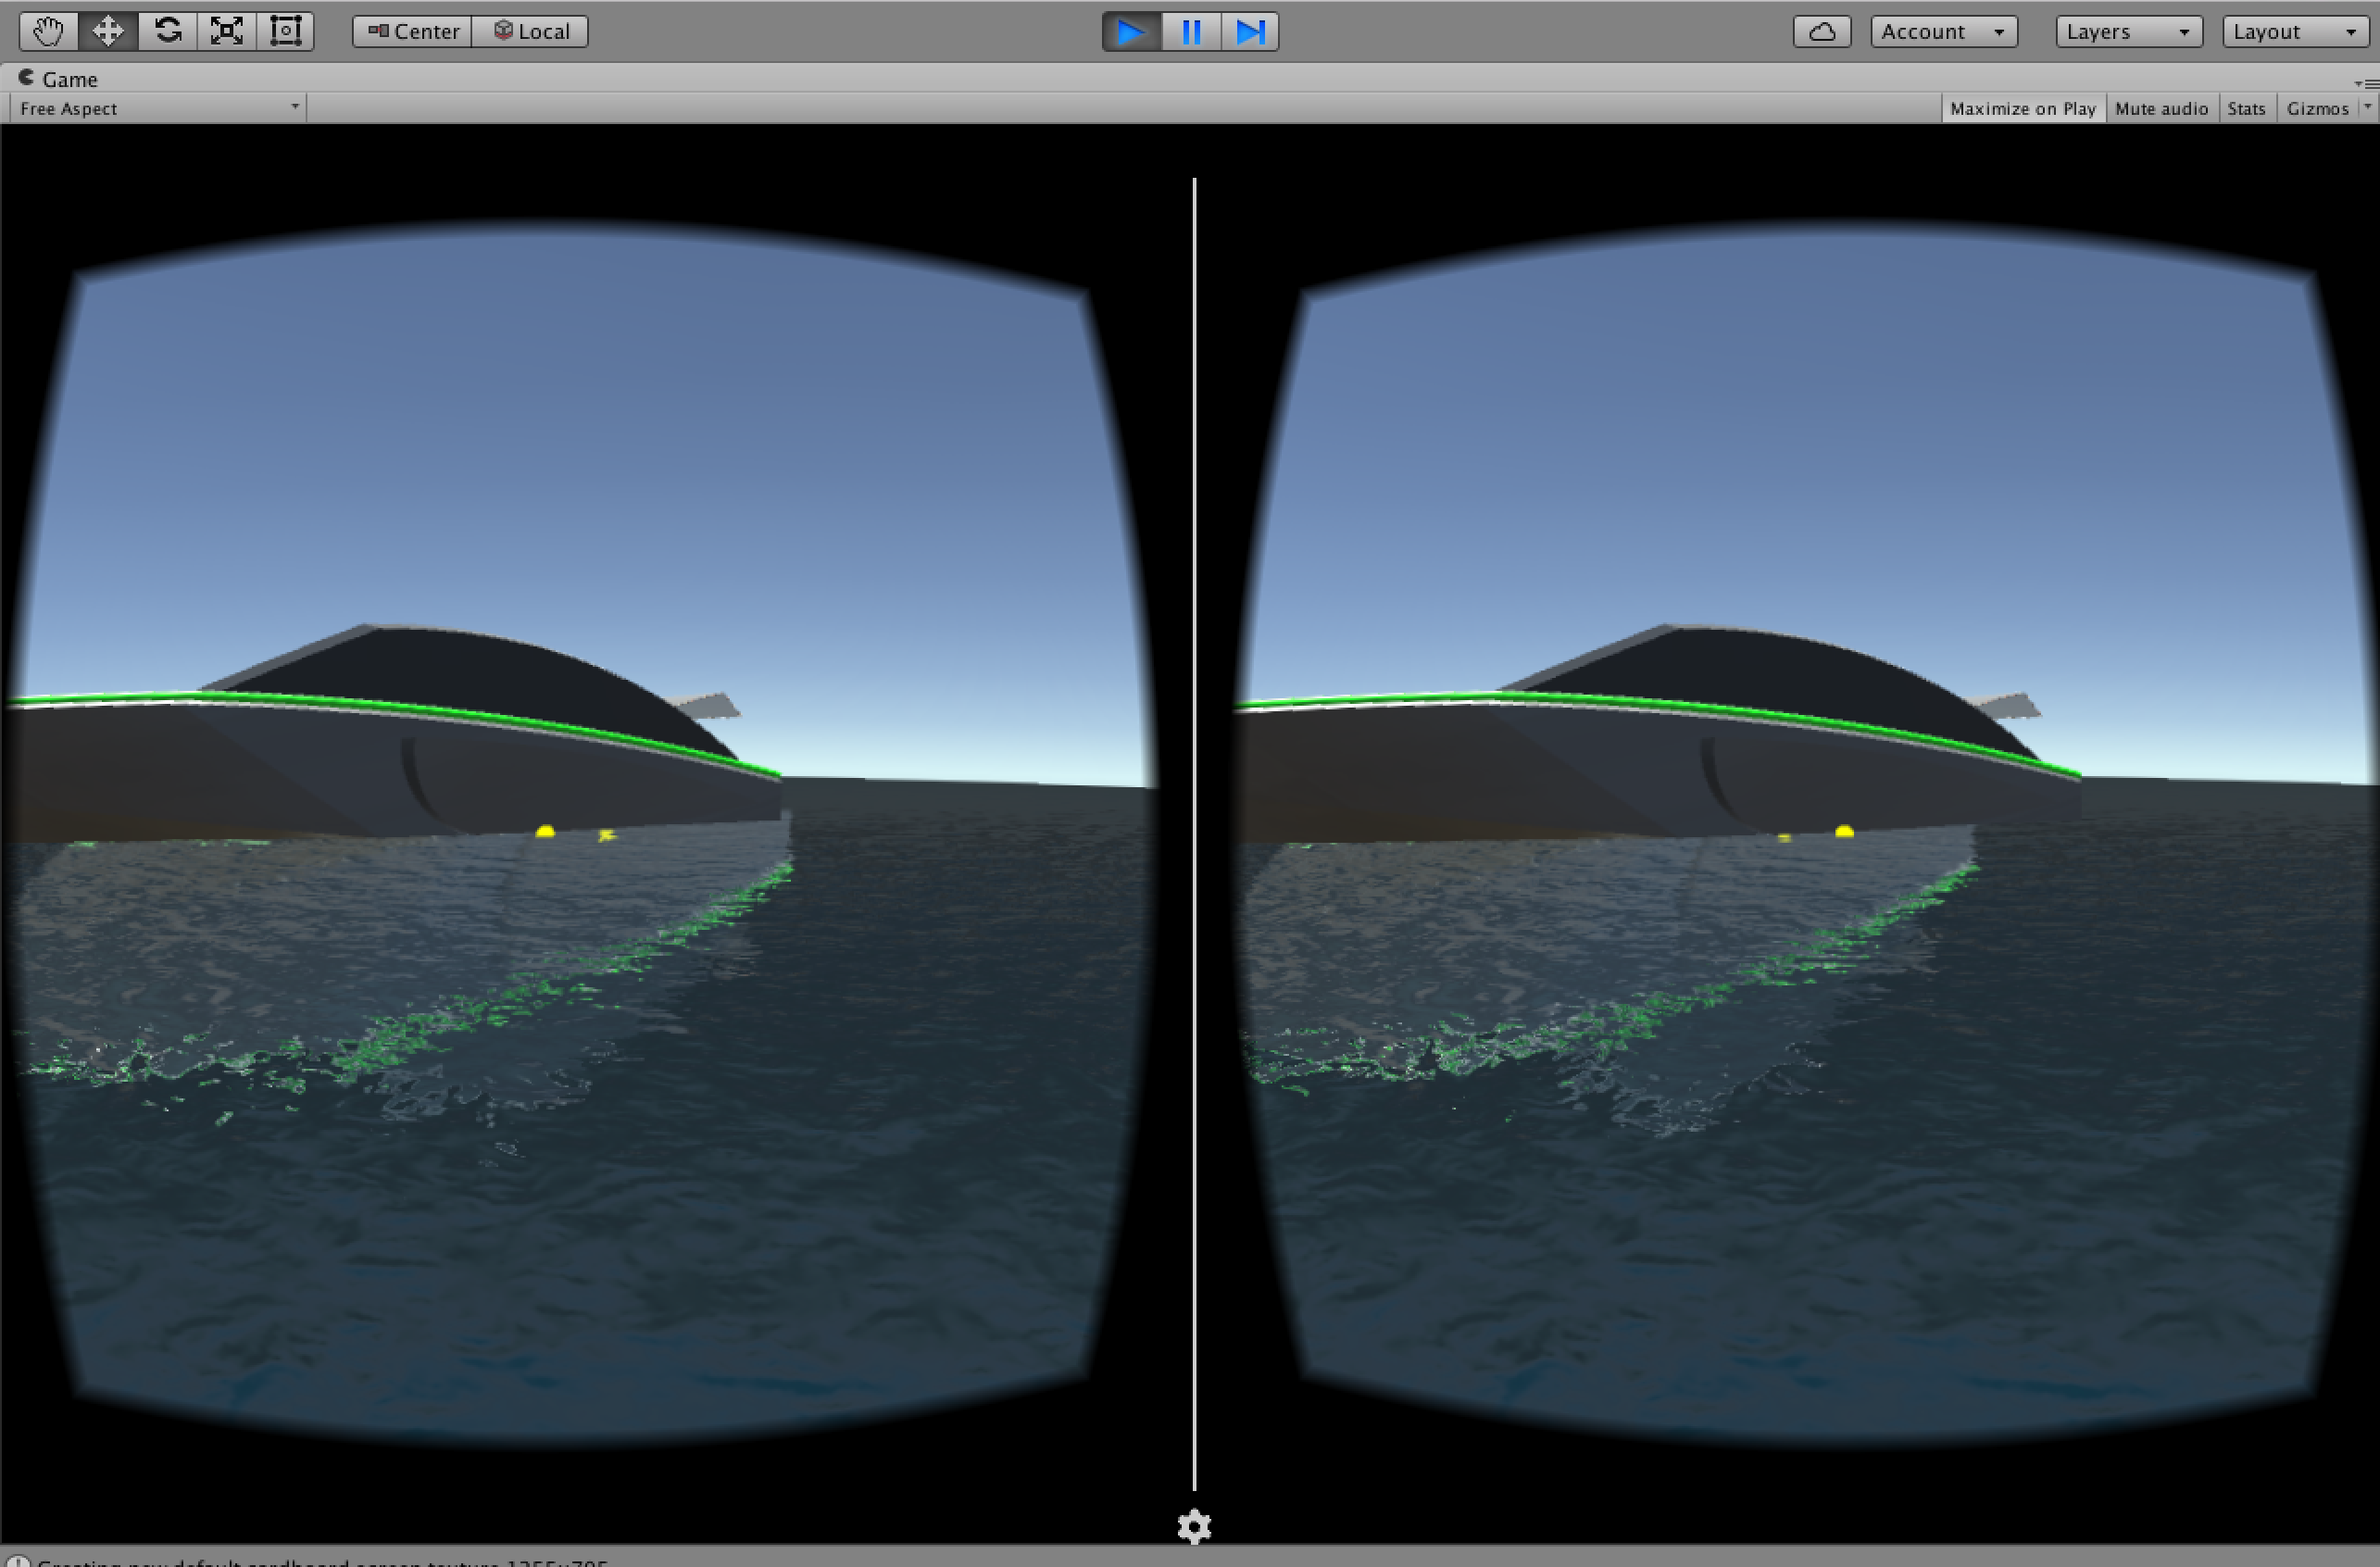
The below figure shows the application screen at startup. The screen is split in the middle so that the left and right sections are viewed by the left and right lenses, respectively, of the cardboard device.
The below figure shows the top view of the path followed by a camera around the yacht. The surface of the water lies on the x and z-axes. The y-axis is perpendicular to the (x,z) plane and points upwards.
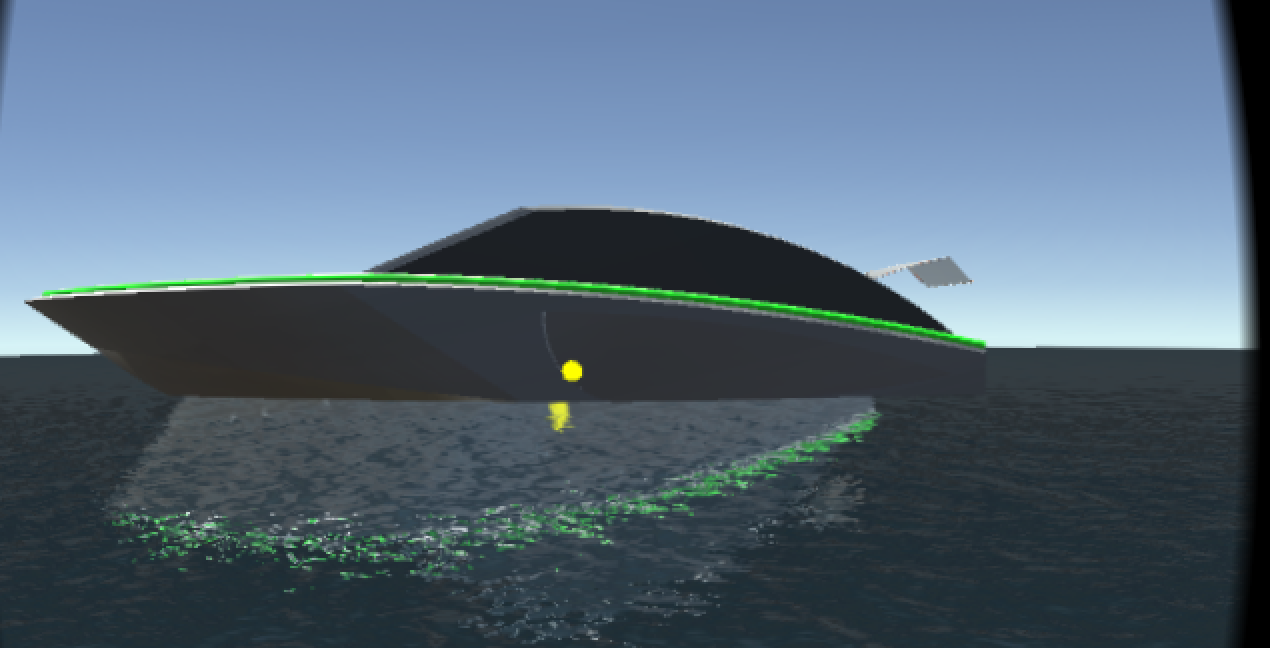
Below figure shows the pointer, indicated by a yellow dot, highlighting the yacht.
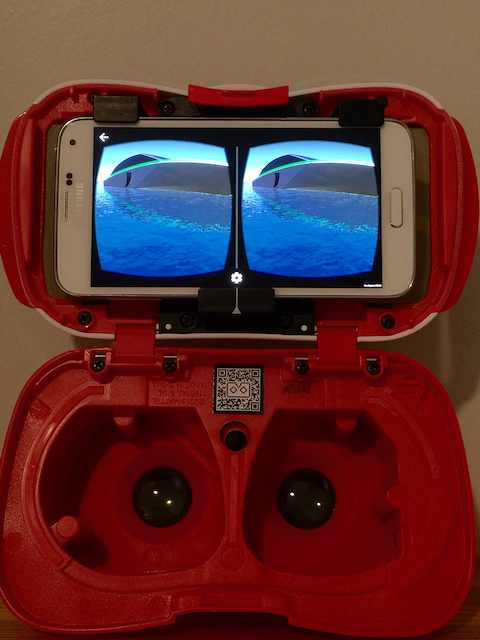
The application running on a Samsung Galaxy S5 phone inside a Google Cardboard headset is shown below.
Credits
The 3D yacht model used in this demo application have been downloaded from 3D Warehouse.
Organization of the Tutorial
The next section discusses the prerequisites to develop the demo application and deploying it into an Android phone. The following section, Main Steps, gives step-by-step instructions for implementation such as setting up the project, creating the scene, importing the Cardboard SDK and the yacht model, creating an event system and various other configuration details. Finally, in Component Review we summarize the role of each individual component in the application. Original source code with comments can be downloaded from https://github.com/kunyelio/Google-Cardboard.
Prerequisites
To develop this application, you will need the following.
- Android SDK and related prerequisites such as Java Development Kit (JDK). See the Android SDK download page for a complete list of requirements.
- Unity Editor v5.3, Personal Edition or above. See system requirements here. Make sure that the components for Android platform are part of the installation.
- The CardboardSDKForUnity.unitypackage, which can be downloaded from https://github.com/googlesamples/cardboard-unity.
- The 3D model yacht+2010.skp, which can be downloaded from 3D Warehouse. While downloading, select 'SketchUp 2015 Model' version. (Depending on how you intend to use the demo application in this tutorial, please make sure you have read the licensing information for 3D Warehouse and the particular 3D model.)
To deploy the application, you will need an Android phone that supports Android Lollipop 5.0 or above. (We have tested the application in a Galaxy S5.) The phone must be enabled for developer options. Regarding how that configuration can be done, see this article. Finally, you will need a Google Cardboard compatible headset. An official list of cardboards is given here. Make sure that the headset is compatible with the phone.
You need familiarity with the Unity Editor and its components such as Hierarchy, Project, Navigation and Inspector windows, as well as MonoDevelop-Unity, which is an Integrated Development Environment for developing scripts. Basic knowledge of C# programming language will also be useful because the scripts considered in this tutorial are based on C#.
Main Steps
Below we give steps to create the Cardboard application and to deploy it in a Cardboard compatible Android phone.
Project Setup and Initial Scene Creation
In this step, we will create the Unity project for our application, configure the light and save the initial scene.
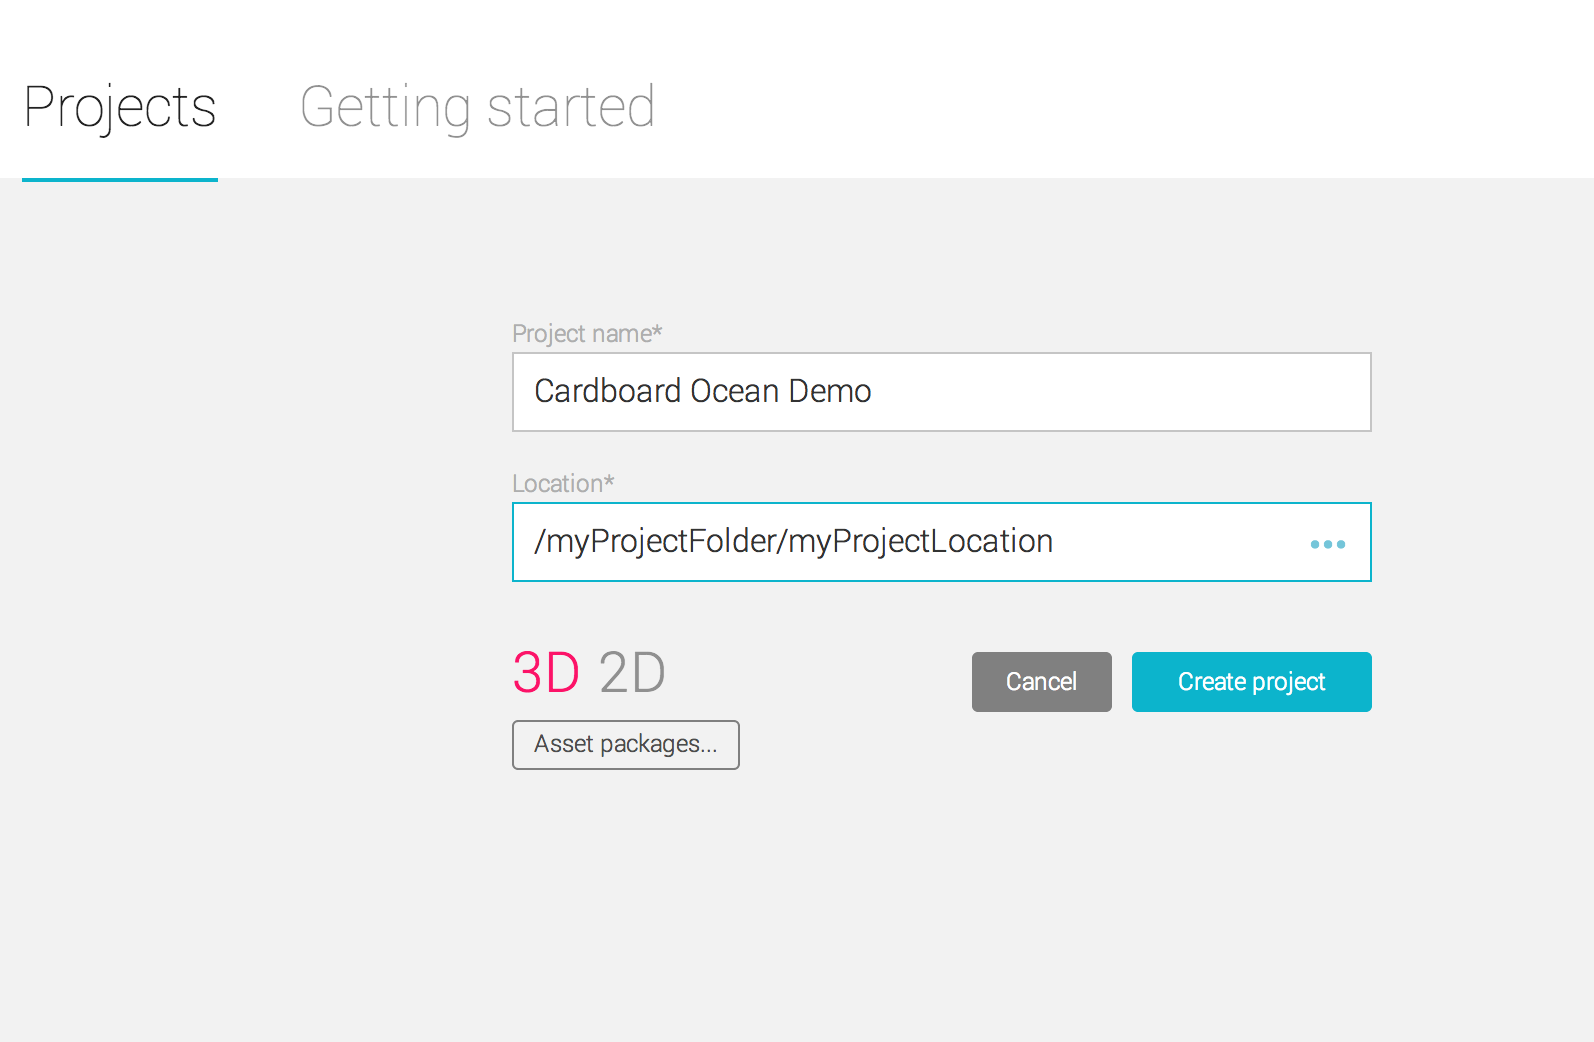
Start up Unity to create a new 3D project. As shown below, supply Cardboard Ocean Demo for the project name. Enter a location in your local filesystem. Make sure 3D is selected (highlighted in red). Press Create project.
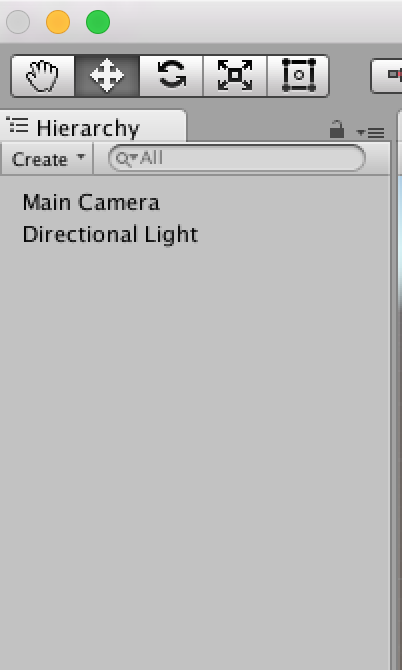
Now you will see that a scene is already created with the main camera and directional light (displayed below).
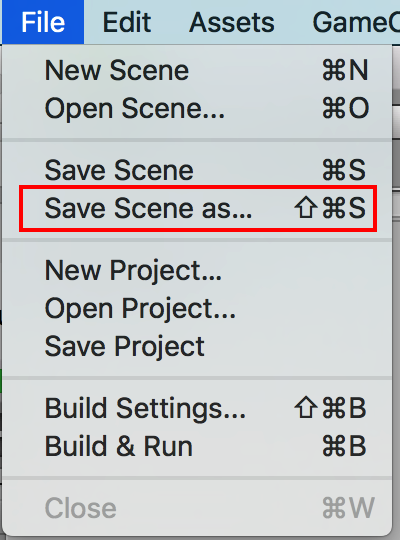
From File menu select Save Scene As as shown below.
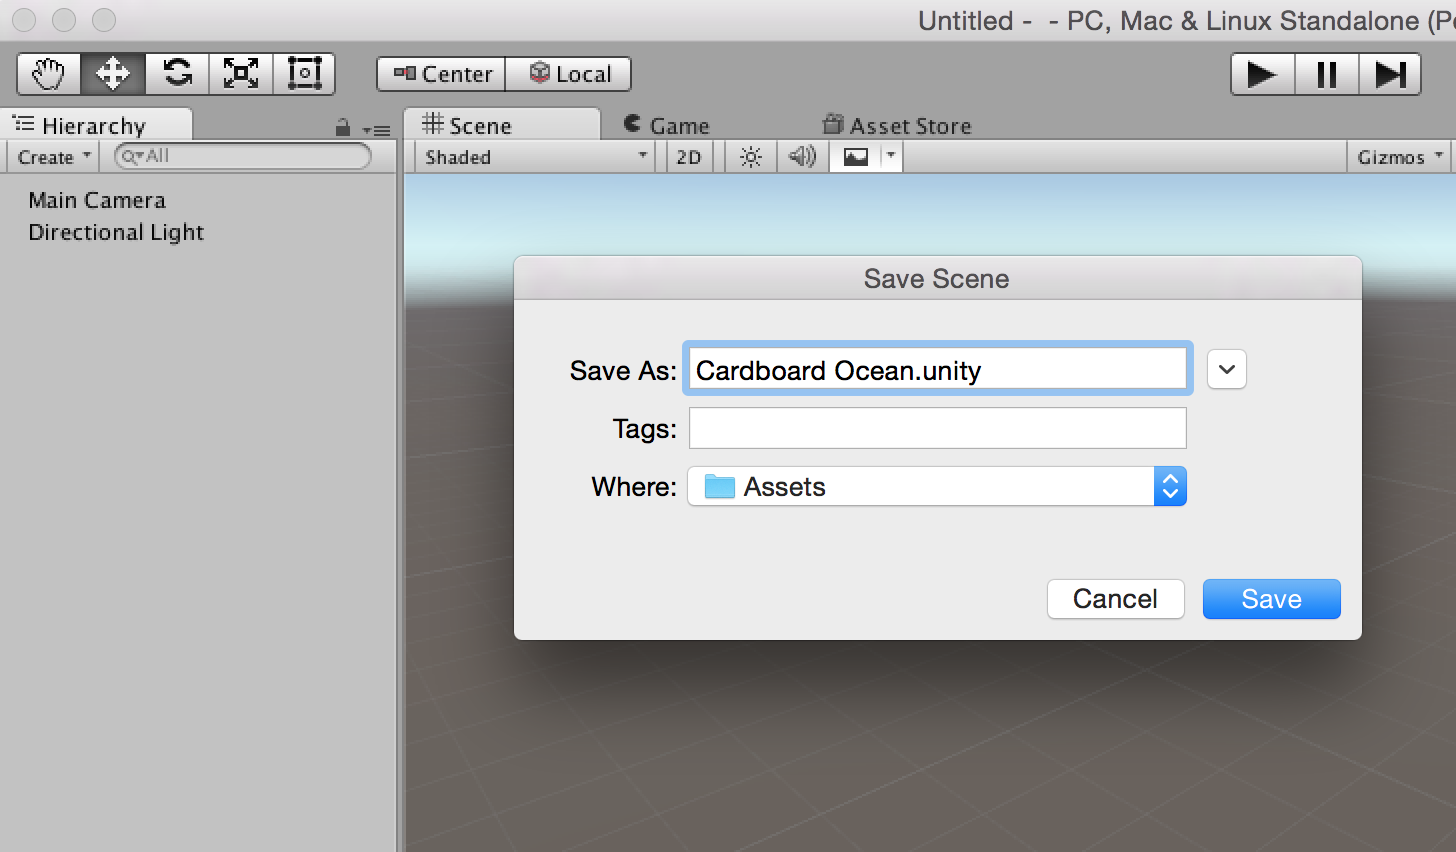
In the Save Scene dialog, supply Cardboard Ocean.unity for Save As. Leave Where option as Assets and leave Tags option empty (shown below). Press Save.
In Hierarchy window select Main Camera and delete it. (For Cardboard application we will need a stereo camera, which will be imported into our application as part of the Unity Cardboard SDK in the next section.)
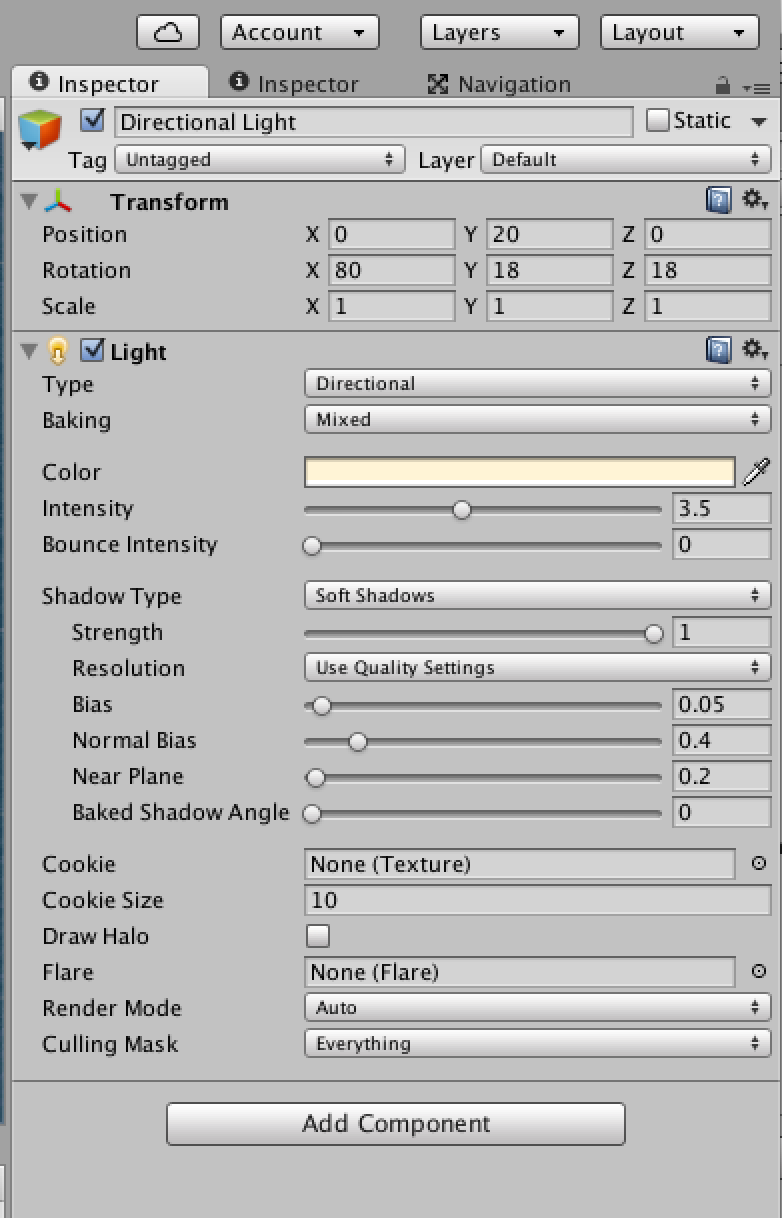
In Hierarchy window select Directional Light. In Inspector window make the following changes.
Transform
- Position: X=0, Y=20, Z=0
- Rotation: X=80, Y=18, Z=18
Light
- Baking: Mixed
- Intensity=3.5
- Bounce Intensity=0
The inspector window should be as follows.
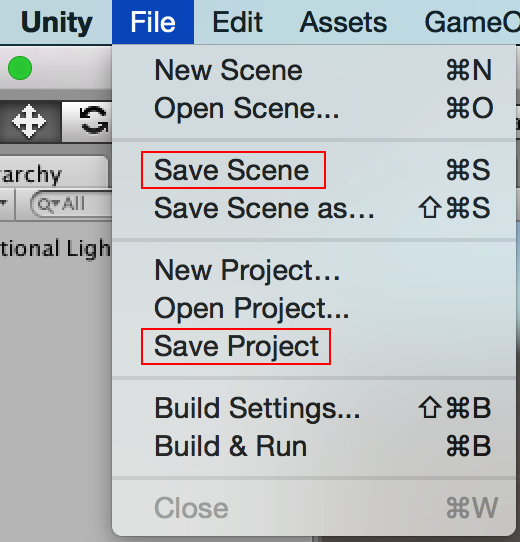
From File menu (see below) select Save Scene first and then Save Project to save both.
Importing Cardboard SDK
In this section, we will import the Unity Cardboard SDK components into our application. (As mentioned in prerequisites, you must have already downloaded CardboardSDKForUnity.unitypackage.)
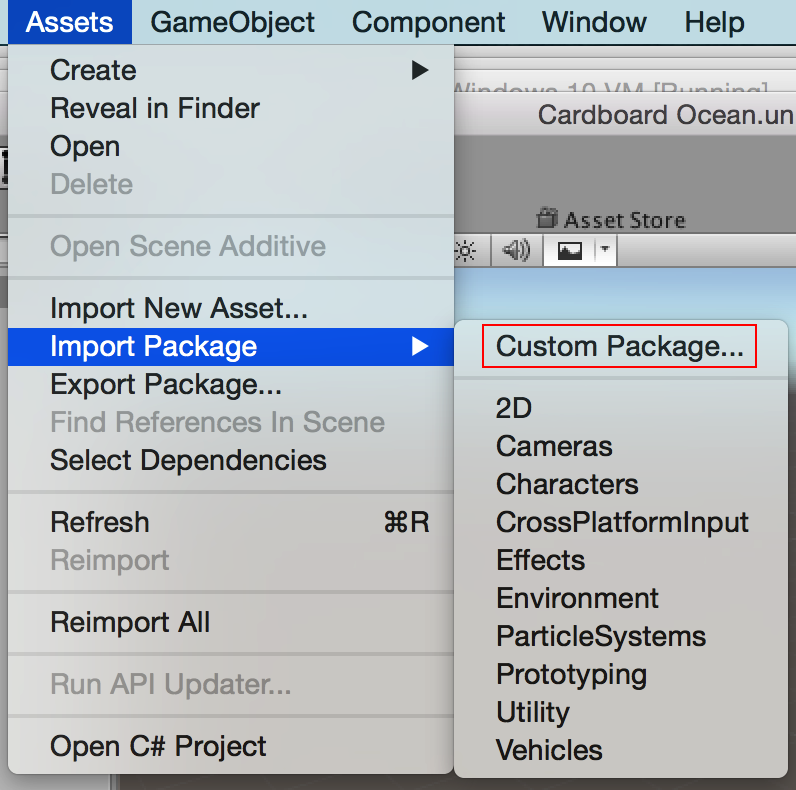
In Assets menu, select Import Package -> Custom Package as shown below.
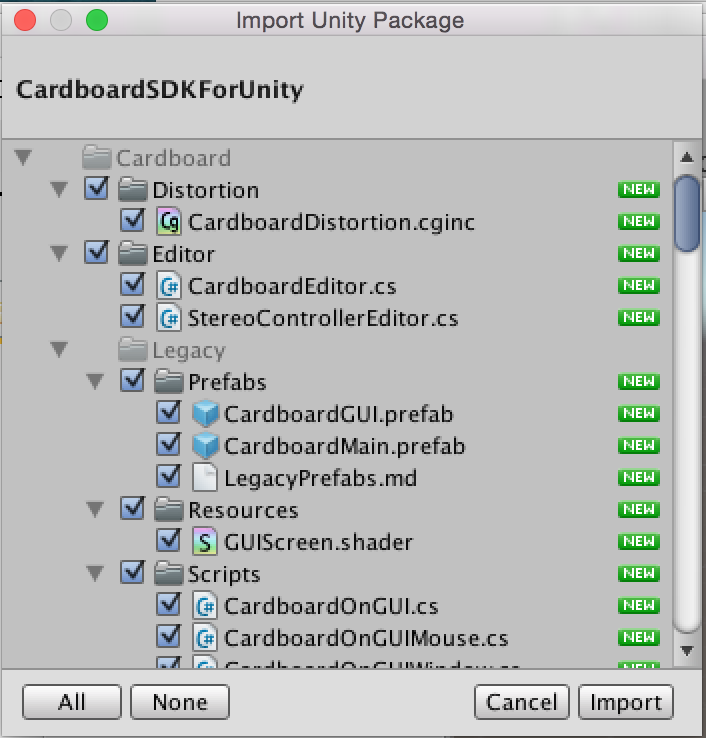
In the file selection dialog, select CardboardSDKForUnity.unitypackage in your local file system and press Open. Observe that a package import dialog is displayed as shown below. By default, everything is selected (leave as it is). Press Import.
From File menu select Save Scene and then Save Project to save both.
In project window select Assets -> Cardboard -> Prefabs -> CardboardMain as shown below. Drag and drop it to Hierarchy window.

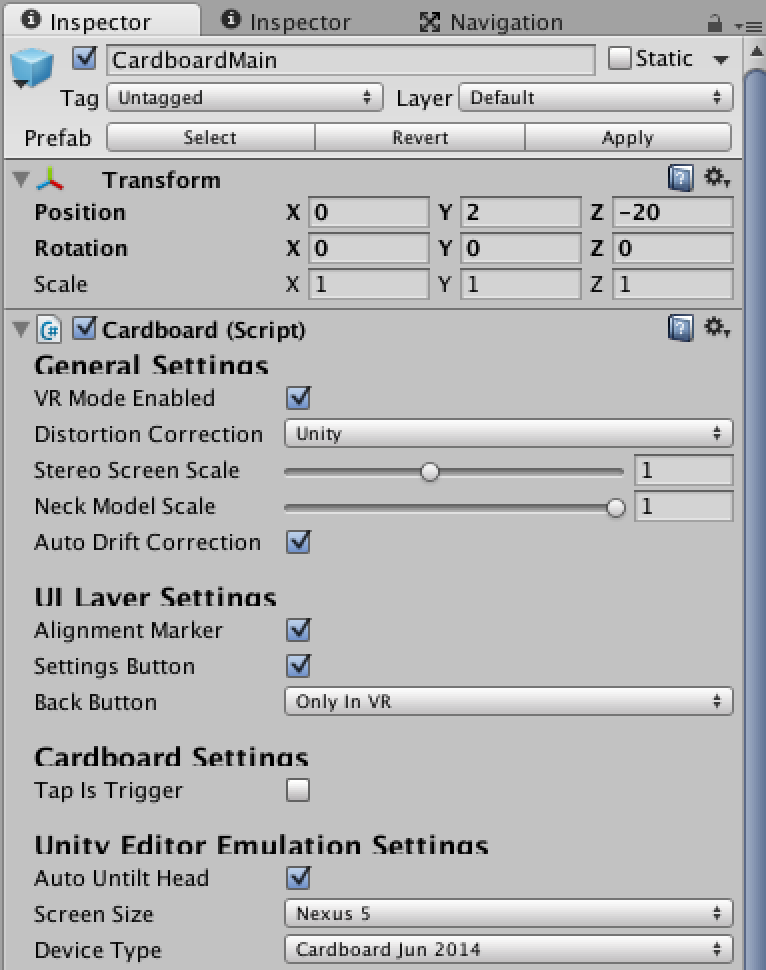
Select CardboardMain in Hierarchy window. Make the following changes in Inspector window.
Transform
- Position: X=0, Y=2, Z=-20
Cardboard Settings
- Tap is Trigger: must be unchecked
The Inspector window should look like below.
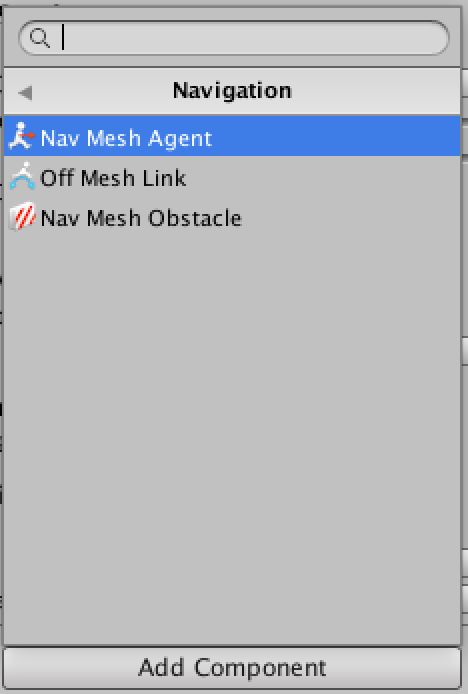
While in Inspector window click on Add Component. Select Navigation -> New Mesh Agent as shown below.
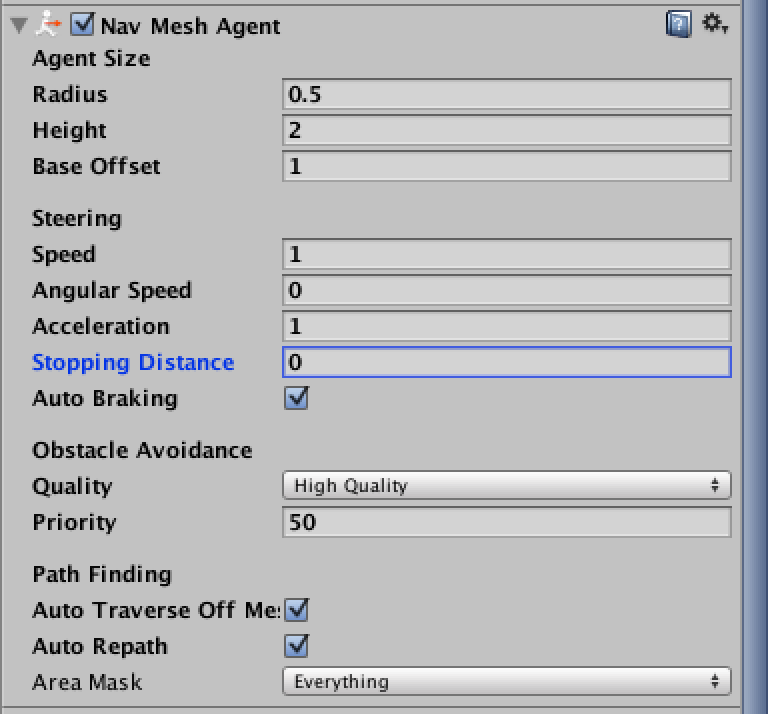
In Inspector window, Nav Mesh Agent, make the following changes on default values.
Agent Size
- Base offset: 1
Steering
- Speed: 1
- Angular speed: 0
- Acceleration: 1
The Nav Mesh Agent section should be as follows.
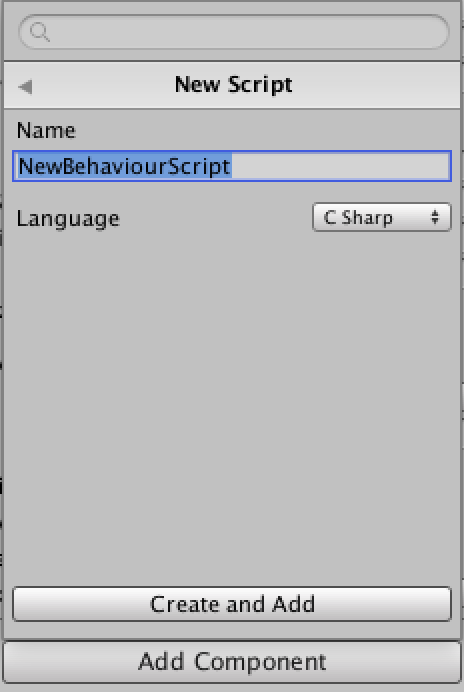
In Inspector window click on Add Component again. Scroll all the way down to select New Script. Leave the name as NewBehaviourScript and language C Sharp. Press Create and Add (see below).
Observe that NewBehaviourScript is added to Inspector window. Double click on NewBehaviourScript in Inspector window. By default, the code will appear in MonoDevelop-Unity as shown below.
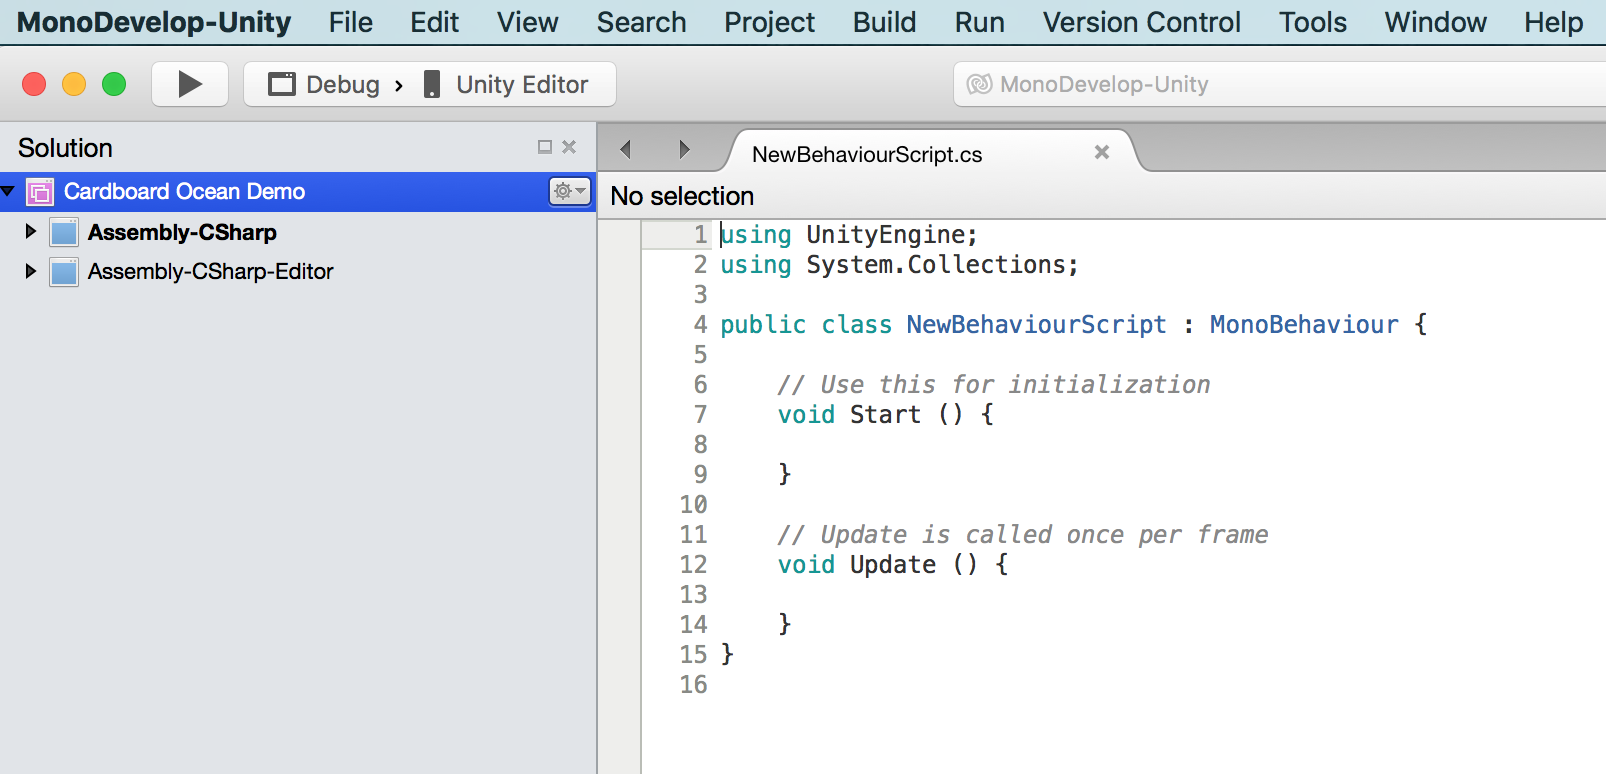
Delete existing code. Replace the content with NewBehaviourScript.cs, which is available in https://github.com/kunyelio/Google-Cardboard. In MonoDevelop-Unity File menu select Save to save NewBehaviourScript.
Go back to Unity application. From File menu select Save Scene and then Save Project to save both.
Importing Water Assets
In this step, we will import the assets that will emulate a body of water.
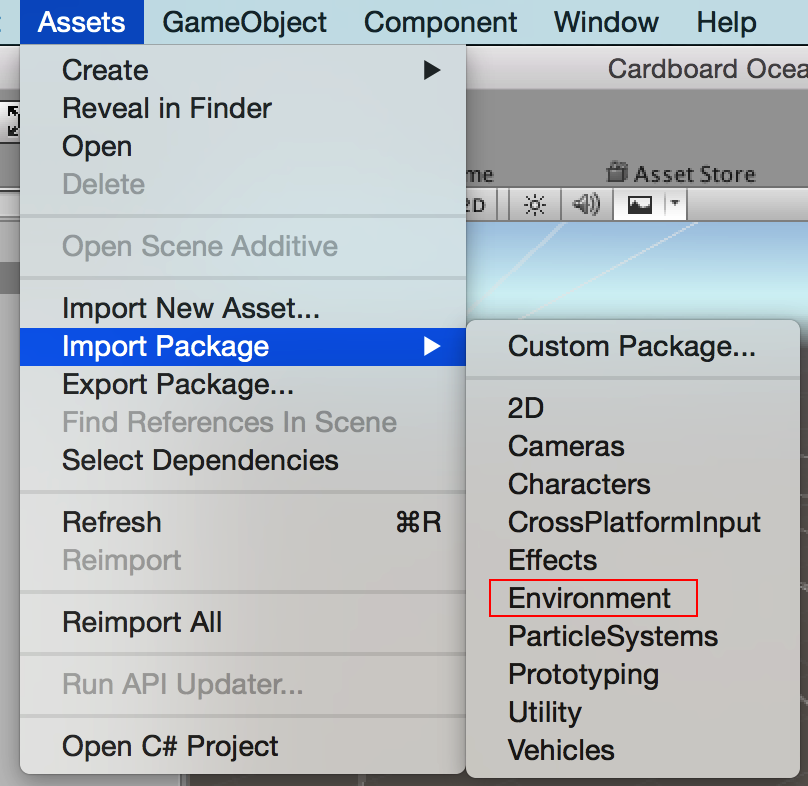
From Assets menu select Import Package -> Environment as shown below.
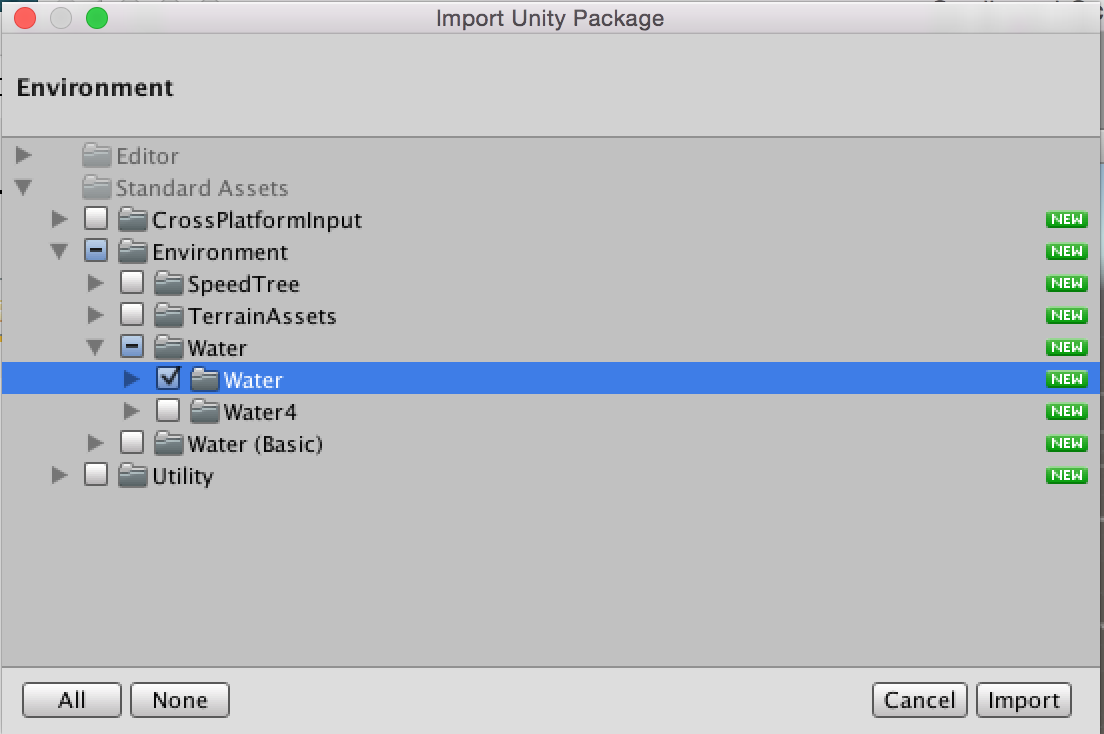
In Import Unity Package dialog first click None to unselect everything. Then, select only the Water folder under Standard Assets -> Environment -> Water as shown below. Press Import to complete the import of package.
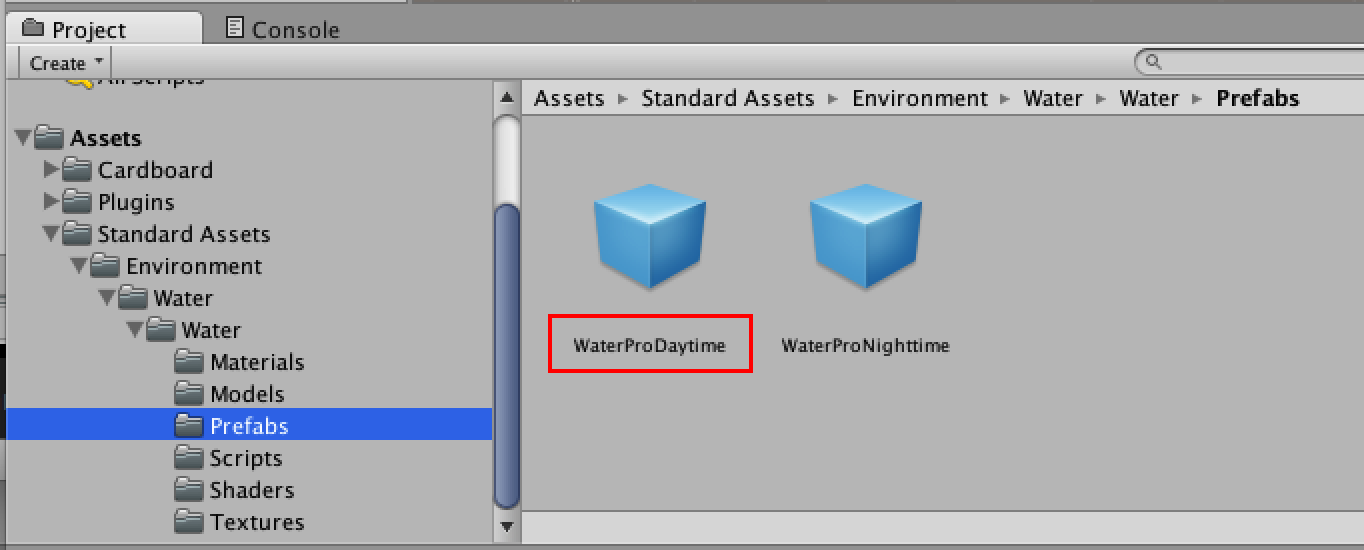
In Project window, select Assets -> Standard Assets -> Environment -> Water -> Water -> Prefabs as shown below. Then, select the WaterProDaytime prefab, drag and drop it to Hierarchy window.
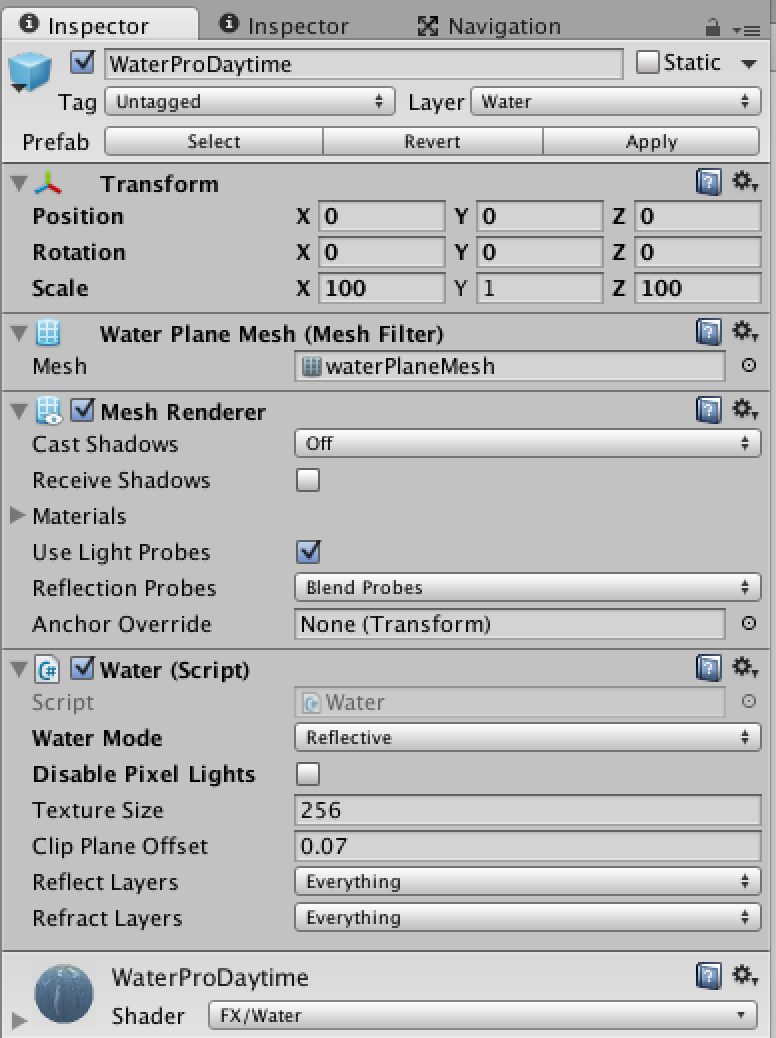
In Hierarchy window, select WaterProDaytime. In Inspector window make the following changes to defaults.
Transform
- Scale X=100, Y=1, Z=100
Water (Script)
- Water Mode: Reflective
- Uncheck Disable Pixel Lights
The inspector window should look like below.
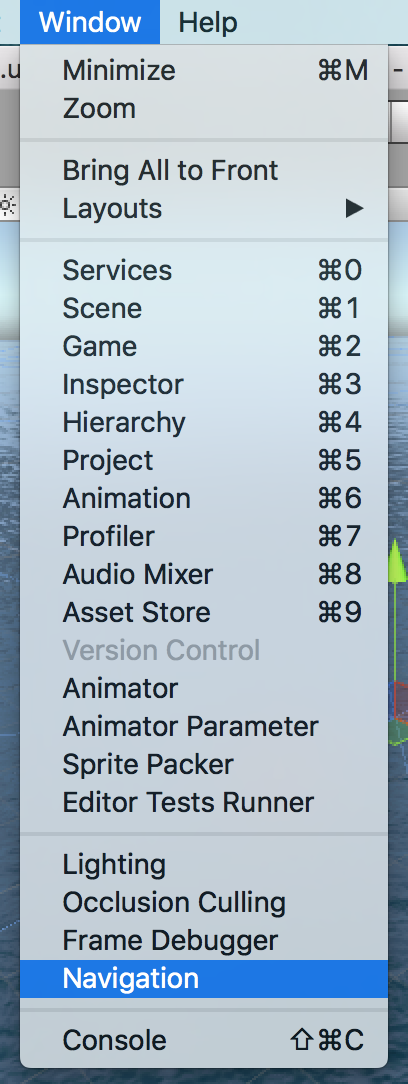
From Window menu select Navigation as shown below.
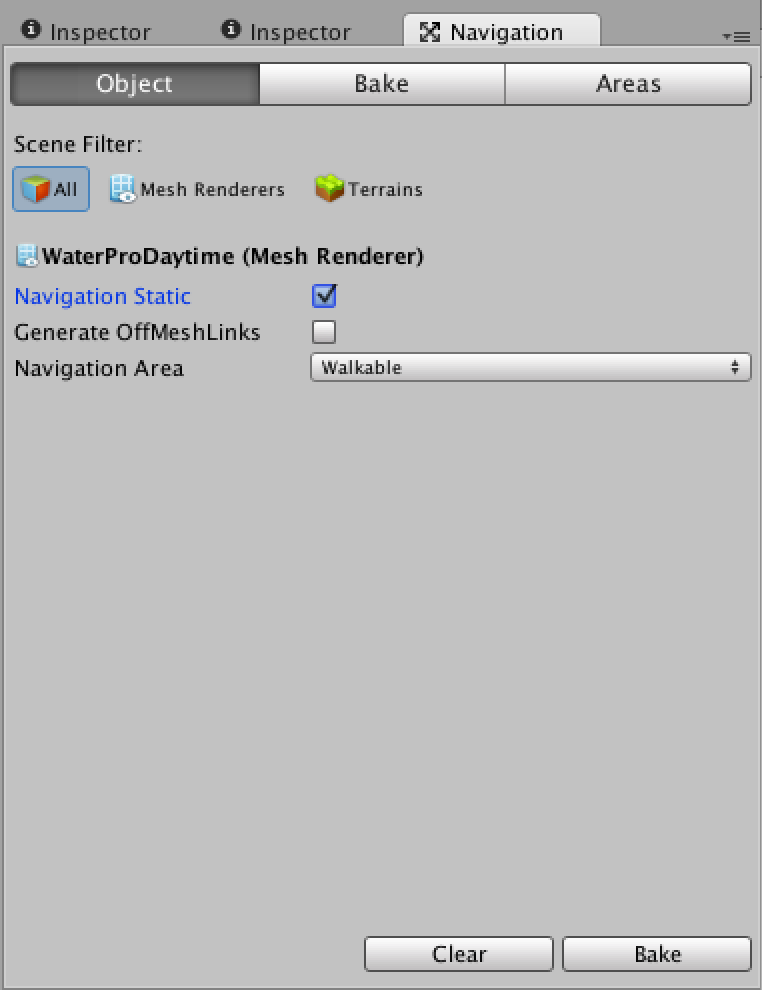
While WaterProDaytime is selected on Hierarchy window, highlight the Navigation tab. Press on All in the Scene filter. Make sure WaterProDaytime is being displayed. Check Navigation Static. Leave Generate OffMeshLinks unchecked and Navigation Area Walkable. (Shown below.) Then, press Bake.
From File menu select Save Scene and then Save Project to save both.
Creating Gaze Pointer
In this section, we will create a so-called 'gaze pointer'. Our camera will emit a ray towards the center of its field of vision at all times. The ray is not visible, however, if it hits an object the gaze pointer will highlight the point where the hit occurs. Later on we will use the pointer to implement pointer enter, pointer exit and pointer click events.
Let us first create a new material. In Project window select Assets folder. From the Assets menu, select Create -> Material as shown below.
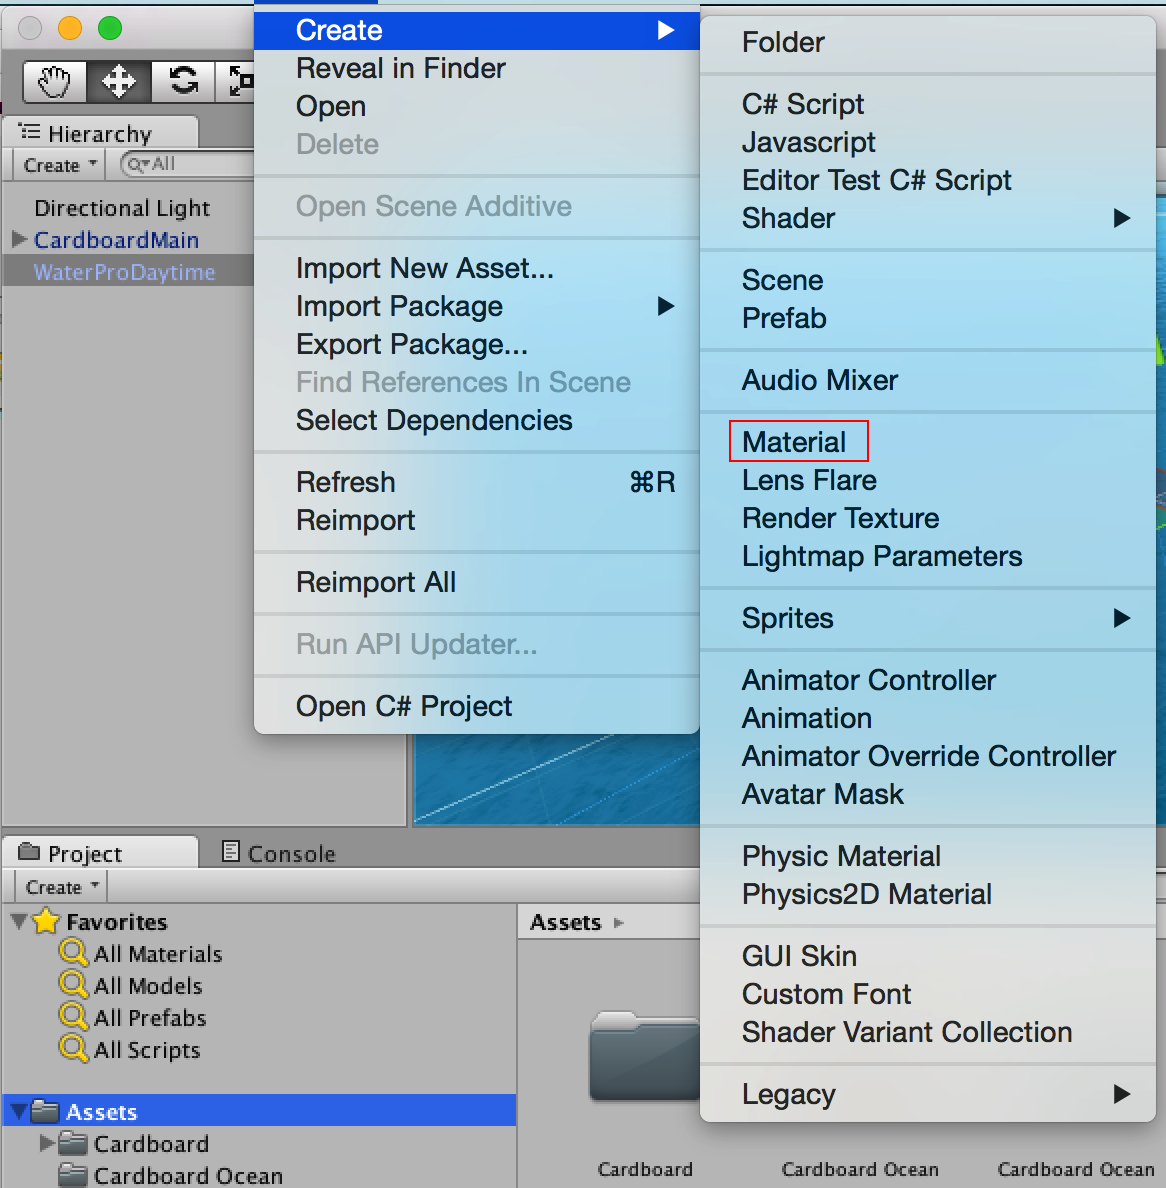
By default, it will be created with name New Material. Highlight the name and change it to GazePointer.
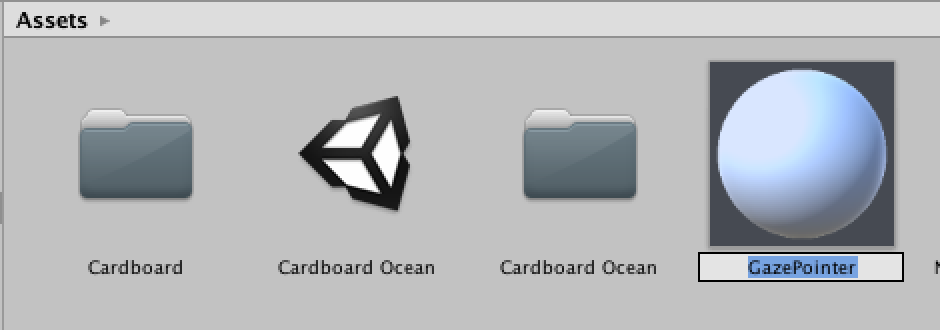
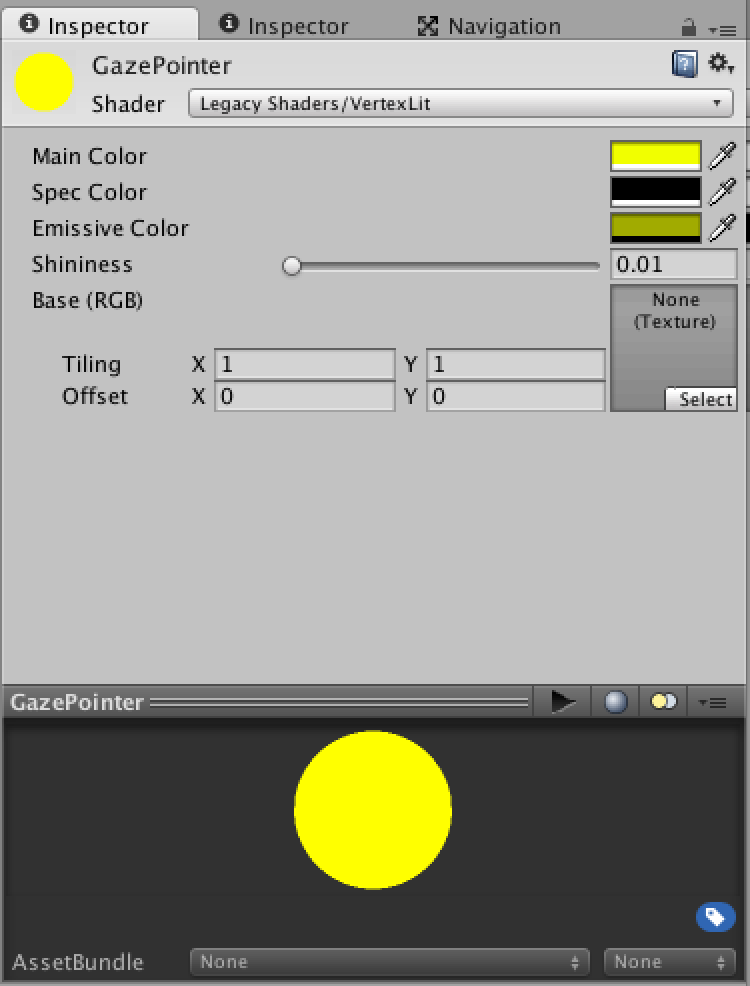
While GazePointer is selected in Assets, highlight the Inspector tab and make the following changes to defaults.
Shader: Select VertexLit under Legacy Shaders. The selected label should read Legacy Shaders/VertexLit. Provide the following RGBA codes:
- Main Color: 241, 255, 0, 255
- Spec Color: 0, 0, 0, 255
- Emissive Color: 161, 171, 0, 0
Let Shininess be 0.01. At this point, the Inspector window should look like below.
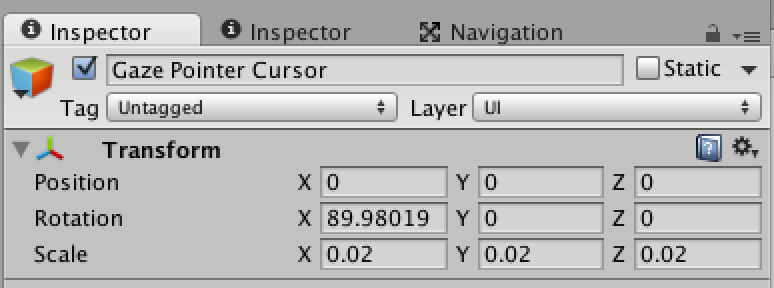
From GameObject menu select Create Empty. This action will create a new Object called GameObject in Hierarchy window. While GameObject is selected in Hierarchy window, make the following changes in Inspector on default values.
Name it Gaze Pointer Cursor.
Layer: UI
Transform
- Rotation: X=90, Y=0, Z=0.
- Scale: X=0.02, Y=0.02, Z=0.02
The inspector window should look like below.
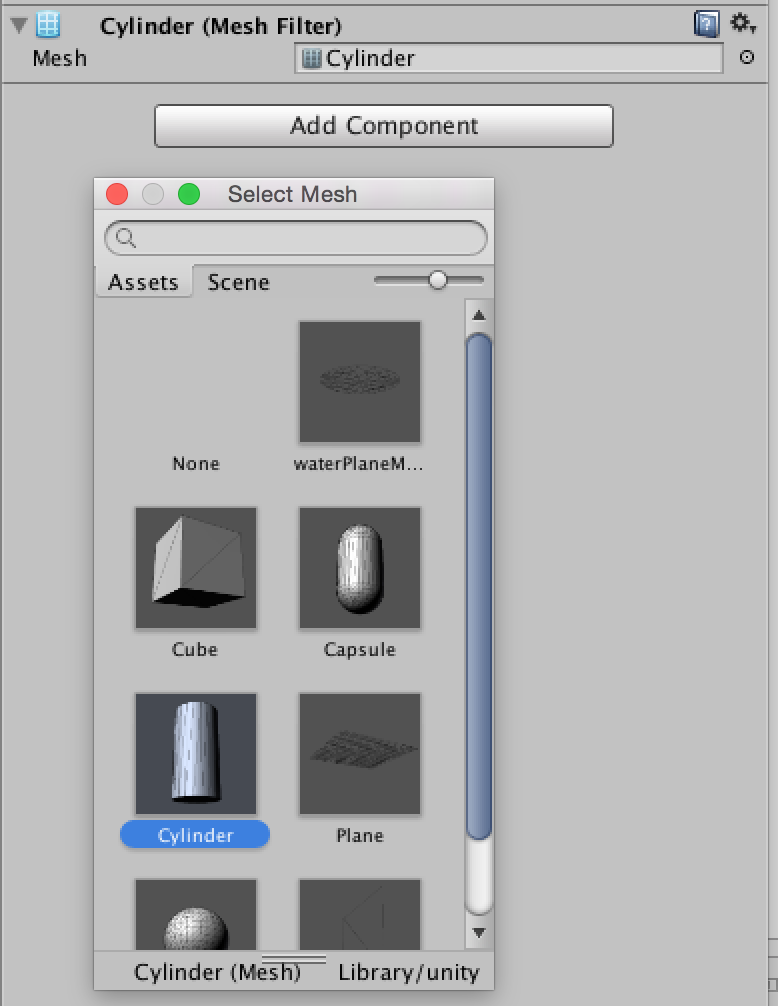
While Gaze Pointer Cursor is selected in Hierarchy window, in Inspector window, press Add Component, select Mesh -> Mesh Filter. Click on the button next to the text field with label Mesh, and then select Cylinder in Assets tab.
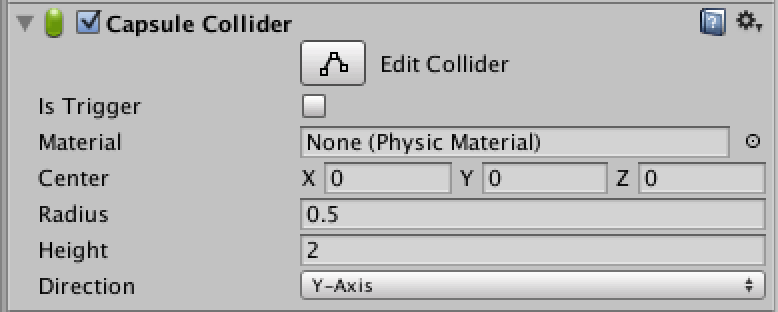
While Gaze Pointer Cursor is selected in Hierarchy window, in Inspector window, again press Add Component, select Physics -> Capsule Collider. Change Height to 2. The Capsule Collider section should look like below.
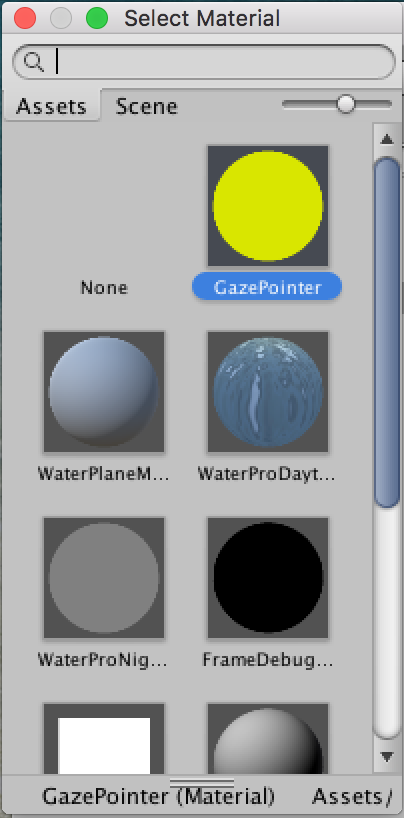
While Gaze Pointer Cursor is selected in Hierarchy window, in Inspector window, again press Add Component, select Mesh -> Mesh Renderer. Expand Materials section in Mesh Renderer. Click on the button next to the text field with label Element 0 and then select GazePointer material from Assets tab as shown below.
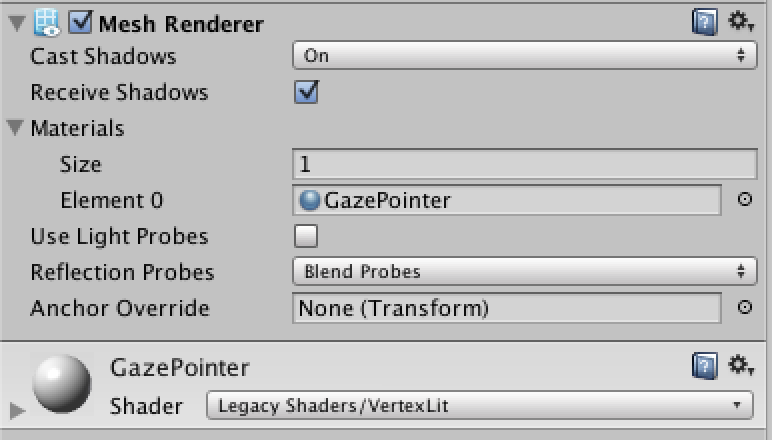
Uncheck Use Light Probes. The Mesh Renderer section should look like below.
From File menu select Save Scene and then Save Project to save both.
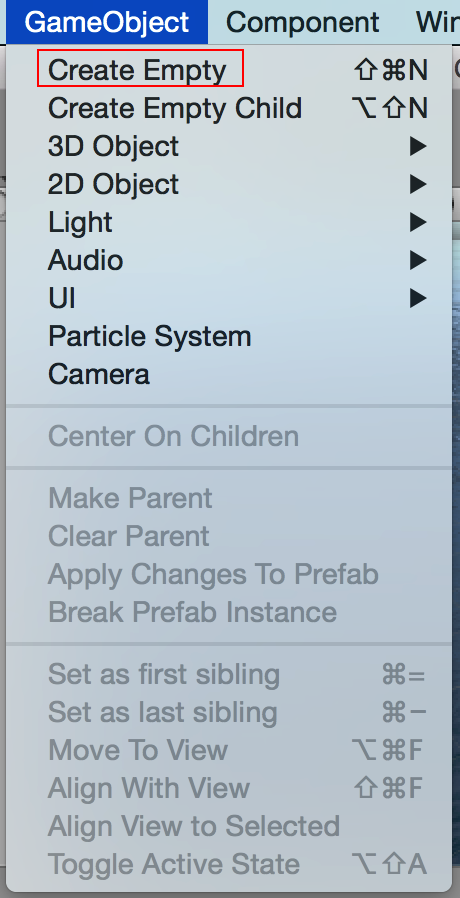
From GameObject menu select Create Empty (see below).
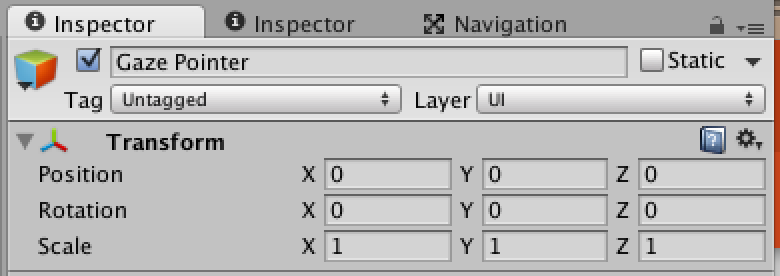
Now, in Hierarchy window, a new object will be created. While it is selected in Hierarchy window, in Inspector window change name to Gaze Pointer and change Layer to UI as shown below.
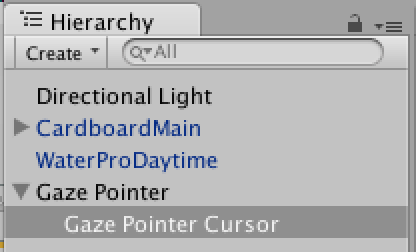
In Hierarchy window, drag and drop Gaze Pointer Cursor to Gaze Pointer. Now, Gaze Pointer Cursor should appear as a child of Gaze Pointer as shown below.
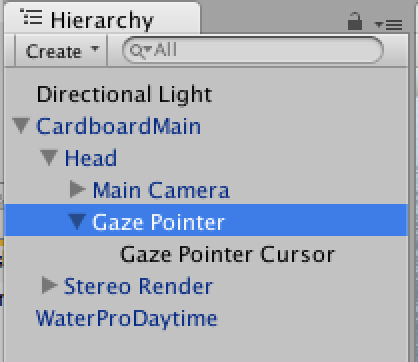
In Hierarchy window expand CardboardMain to locate the Head node. Then, drag and drop Gaze Pointer to Head. Gaze Pointer should appear as a child node of Head as shown below.
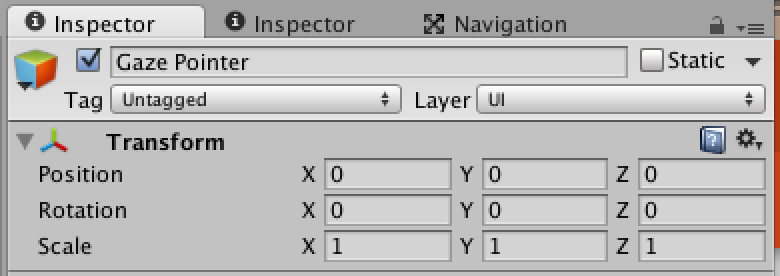
In Hierarchy window select Gaze Pointer. In Inspector window, Transform section change the Position parameters to X=0, Y=0, Z=0.
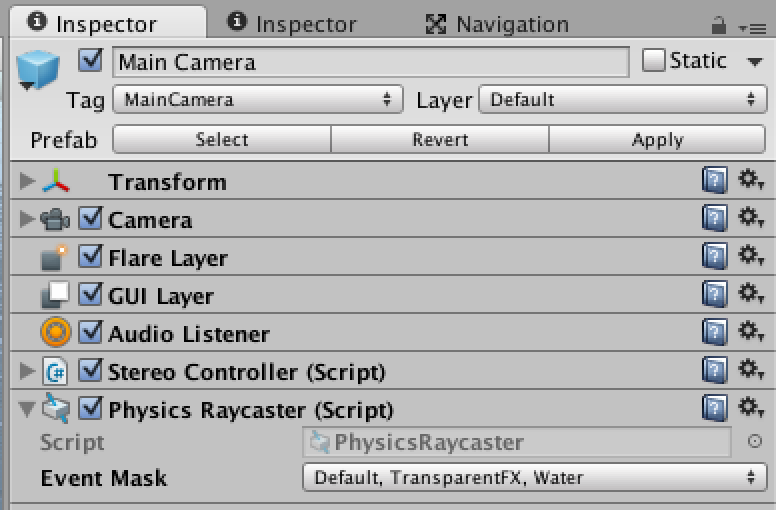
In Hierarchy window, select Main Camera under CardboardMain -> Head. In Inspector window press on Add Component and select Event -> Physics Raycaster. In the newly created 'Physics Raycaster (Script)' section, select Event Mask and make sure only Default, TransparentFX, and Water are selected. It should look like below.
From File menu select Save Scene and then Save Project to save both.
The Yacht Model
In this section, we will import the 3D yacht model and add some event handling behavior to it. (As mentioned in prerequisites, you must have already downloaded yacht+2010.skp.)
Importing The Model
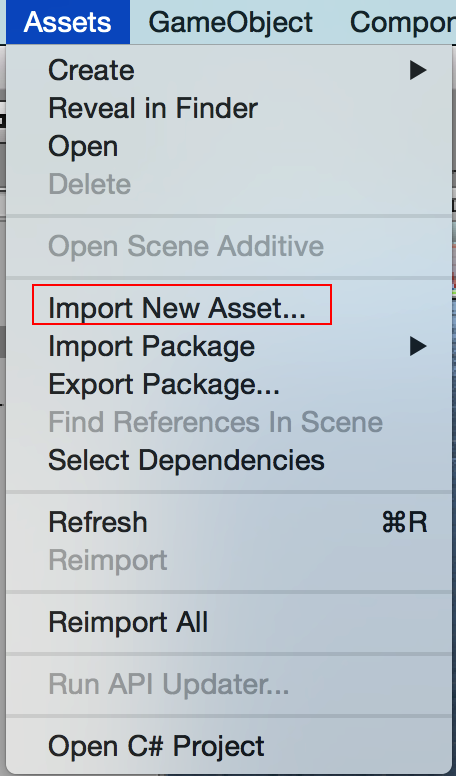
In Project window, select Assets folder. From Assets menu, select Import New Asset as shown below.
In the file selection dialog, select yacht+2010.skp in your local file system and press Open. After the import is completed confirm that it is available under Assets folder in Project window as shown below.
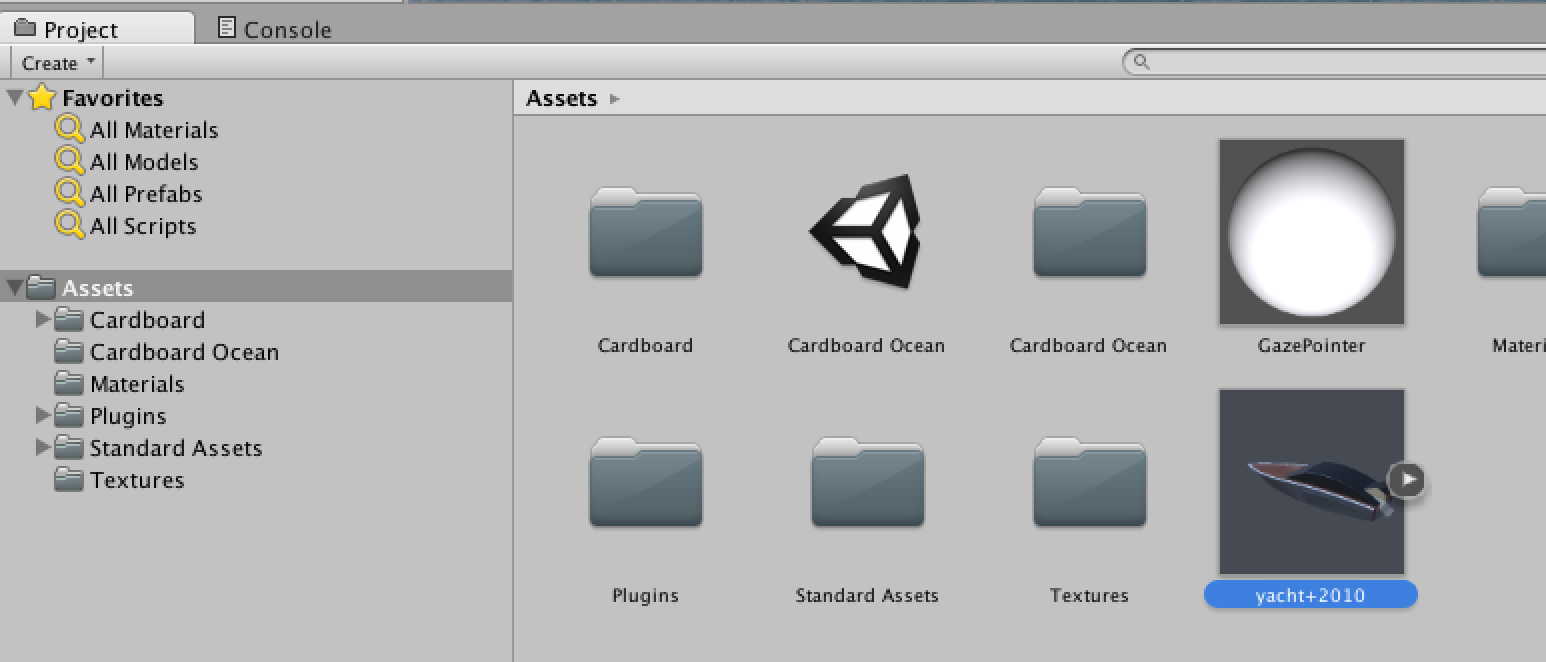
Drag and drop yacht+2010 from right-hand side of Project window, under Assets folder, to Hierarchy window. Highlight yacht+2010 in Project window and rename it to the yacht. (See below.)

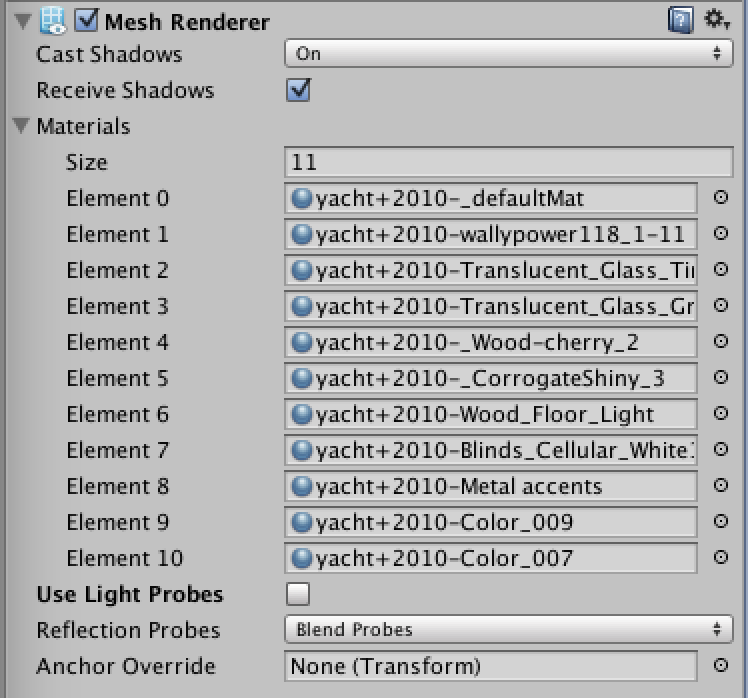
While yacht is selected in Hierarchy window, in Inspector window uncheck Use Light Probes under Mesh Renderer. The Mesh Renderer section should be as follows.
While yacht is selected in Hierarchy window, scroll down in Inspector window and press on Add Component. Select Physics -> Box Collider. Set the following values in Box Collider section:
- Center X=-3.8, Y=1.25, Z=-3.36
- Size X=7.7, Y=4.35, Z=19.19
The Box Collider section should be as follows.
From File menu select Save Scene and then Save Project to save both.

Event Handling Behavior
The yacht will handle three events:
- Pointer enter event: when gaze pointer hits the boat, the color of the gunwale will change to green. The code implementing this behavior will be part of an event handler script (EventHandlerScript) that will be added to the yacht object.
- Pointer exit event: when gaze pointer leaves the boat, color of the gunwale will change back to its original color. The code implementing this behavior will also be part of EventHandlerScript.
- Pointer click event: while gaze pointer is on the boat if a user sends an input via trigger of the cardboard headset then the direction of travel of the camera around the yacht object will toggle from clockwise to counter-clockwise or vice versa. The code implementing this behavior is part of NewBehaviourScript, previously added to CardboardMain object.
While yacht is selected in Hierarchy window, scroll down again in Inspector window and press on Add Component. Scroll all the way down to select New Script. Set name as EventHandlerScript and language C Sharp. Press Create and Add (see below).
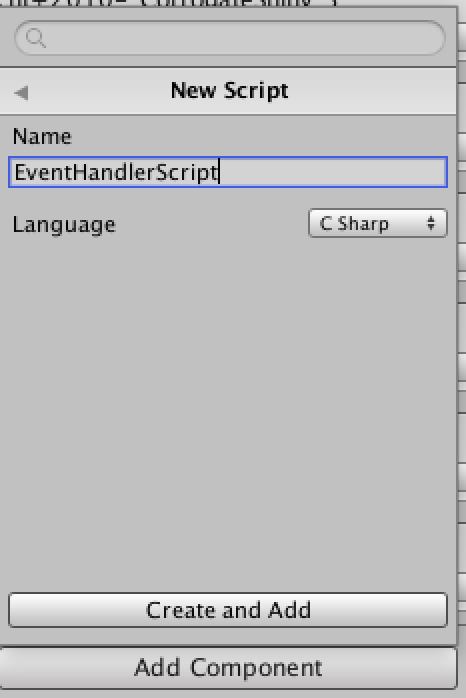
Observe that a new section called Event Handler Script will appear in Inspector window. Double click on EventHandlerScript to open it in MonoDevelop-Unity. Delete everything in EventHandlerScript. Replace the content with EventHandlerScript.cs. Save the file.
Go back to Unity application. While yacht is selected in Hierarchy window, scroll down in Inspector window and press on Add Component. Select Event -> Event Trigger. Observe that a new section named Event Trigger (Script) appears in Inspector window. Click on Add New Event Type and select PointerEnter. A sub-section named Pointer Enter (BaseEventData) will be added in Event Trigger (Script) section. Click on the + sign below Pointer Enter (BaseEventData). Click on the button next to None (Object) field; in pop-up dialog select Scene tab, scroll down and select yacht. In the function list box select EventHandlerScript -> SetGazedAt. Because SetGazedAt accepts a boolean parameter, you will see a checkbox just below the function list box. Check that checkbox. This way, SetGazedAt will be called by setting true as the value of the boolean parameter.
At this point, the Event Trigger (Script) section should look like below.
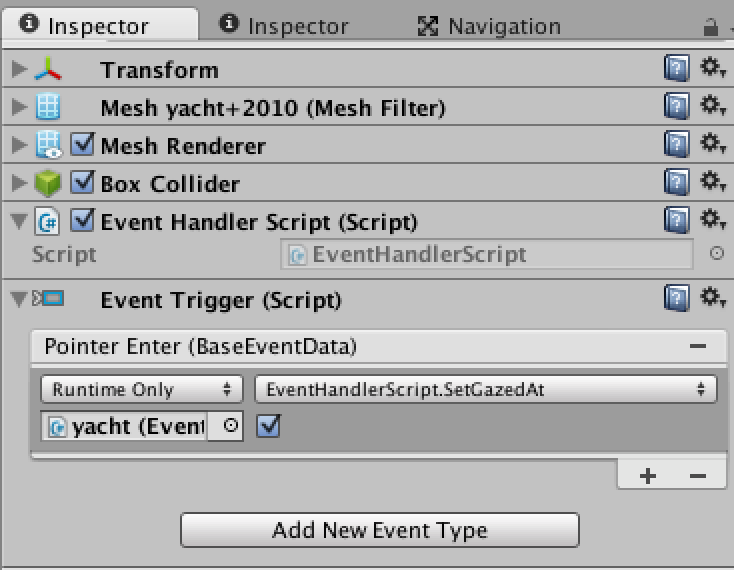
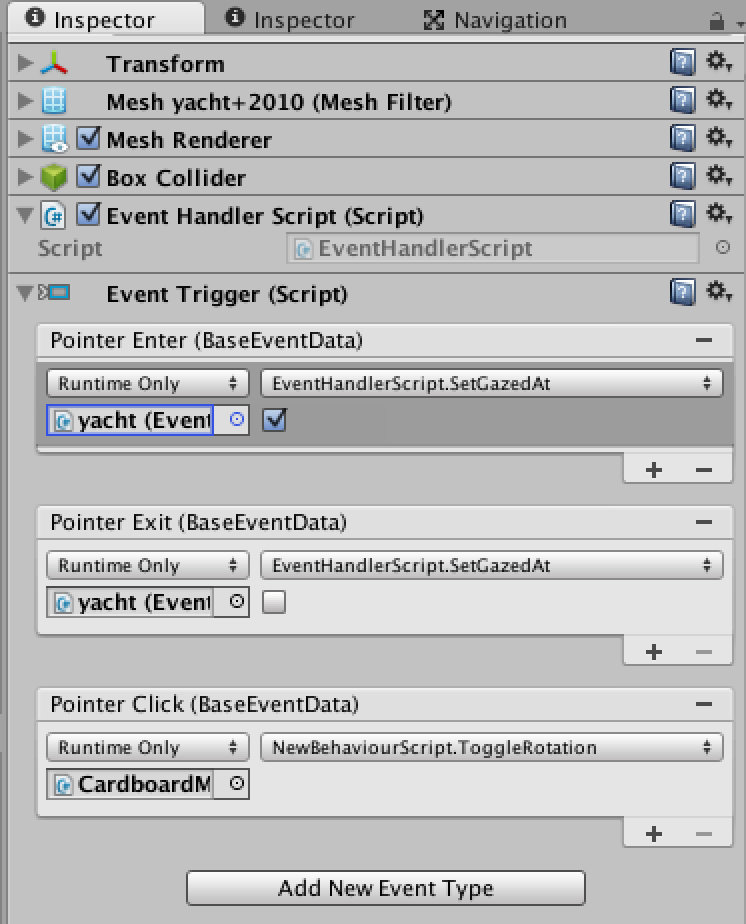
In Event Trigger (Script) section, again click on Add New Event Type and select PointerExit. A sub-section named Pointer Enter (BaseEventData) will be added in Event Trigger (Script) section and, by default, the values from Pointer Enter (BaseEventData) will be copied over. This is indeed what we wanted with one exception. When PointerExit event fires we want the boolean parameter to SetGazedAt to be false. Therefore, uncheck the check box under the function list box.
In Event Trigger (Script) section, again click on Add New Event Type and select PointerClick. A sub-section named Pointer Click (BaseEventData) will be added in Event Trigger (Script) section and, by default, the values from Pointer Exit (BaseEventData) will be copied over. Under Runtime Only, click on the button next to the object name to select a new object. In the Scene tab, select CardboardMain. In the function list, select NewBehaviourScript.ToggleRotation.
At this point, the Event Trigger (Script) section should look like below.
From File menu select Save Scene and then Save Project to save both.
Creating Event System
A basic element of Cardboard Unity SDK event system is a script called GazeInputModule, which enables selecting objects by looking at them (i.e. hitting via a ray) and sending inputs by pulling trigger of the cardboard headset. In this section we will create an event system object to associate GazeInputModule script with our application via the Gaze Pointer object we had created previously.
In Hierarchy window make sure nothing is selected. In GameObject menu, select Create Empty. Observe that a new Game Object will be created in Hierarchy window with name GameObject. Highlight it and change the name to EventSystem. As EventSystem is selected in Hierarchy window, in Inspector window press Add Component. Select Event -> Event System. Observe that a section named Event System (Script) is created in Inspector window. Leave defaults as they are.
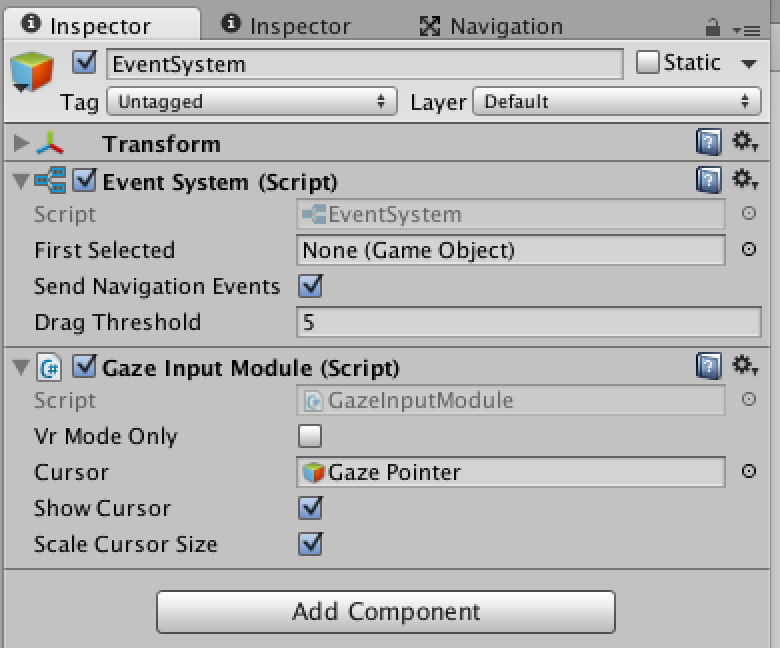
While EventSystem is selected in Hierarchy window, in Inspector window press on Add Component again and select Scripts -> Gaze Input Module. Observe that a section named Gaze Input Module (Script) is created in Inspector window. Click on the button next to Cursor and select Scene -> Gaze Pointer as shown below.
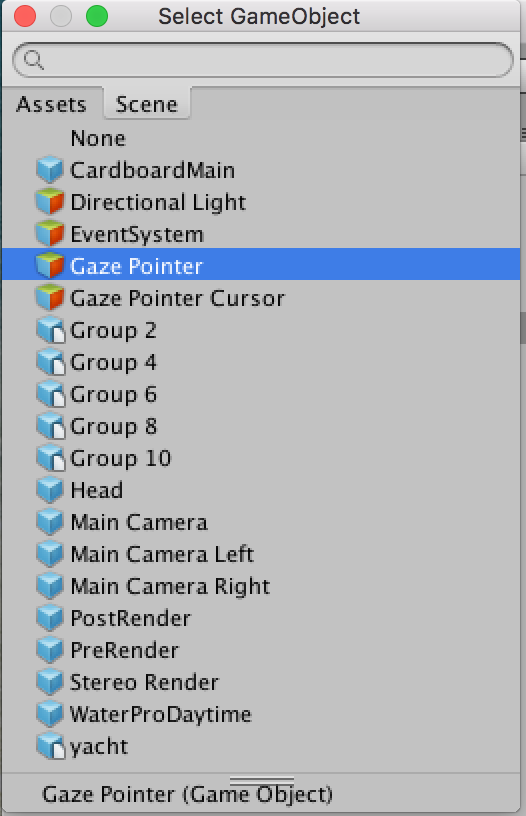
The Gaze Input Module (Script) section should look like this.
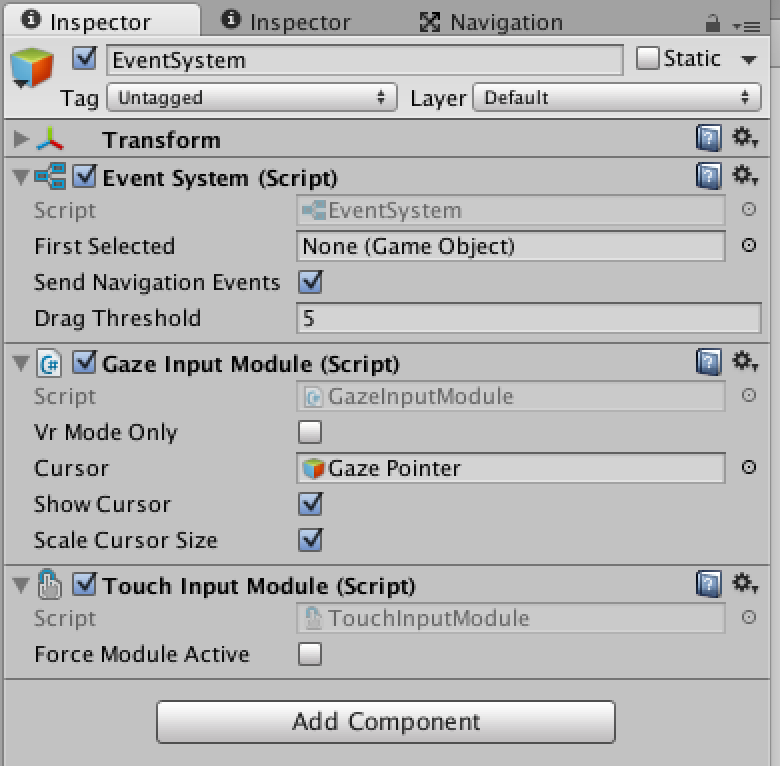
While EventSystem is selected in Hierarchy window, in Inspector window press on Add Component again and select Event -> Touch Input Module. Observe that a section named Touch Input Module (Script) is created in Inspector window. Leave defaults as they are. Make sure that the section Touch Input Module (Script) is below Gaze Input Module (Script). If that is not the case, you can click the down arrow under the wheel to the right of any section and select Move Up or Move Down to move that section accordingly.
From File menu select Save Scene and then Save Project to save both.
Creating Floor Canvas
Another element of the Cardboard Unity SDK event system is a canvas that contains the GraphicsRaycaster script, which is part of UnityEngine.UI. The canvas should have its Render Mode set as World Space. Also, our Main Camera object with stereo cameras should be set as the Event Camera of the canvas. In this section, we will create the canvas and configure it.
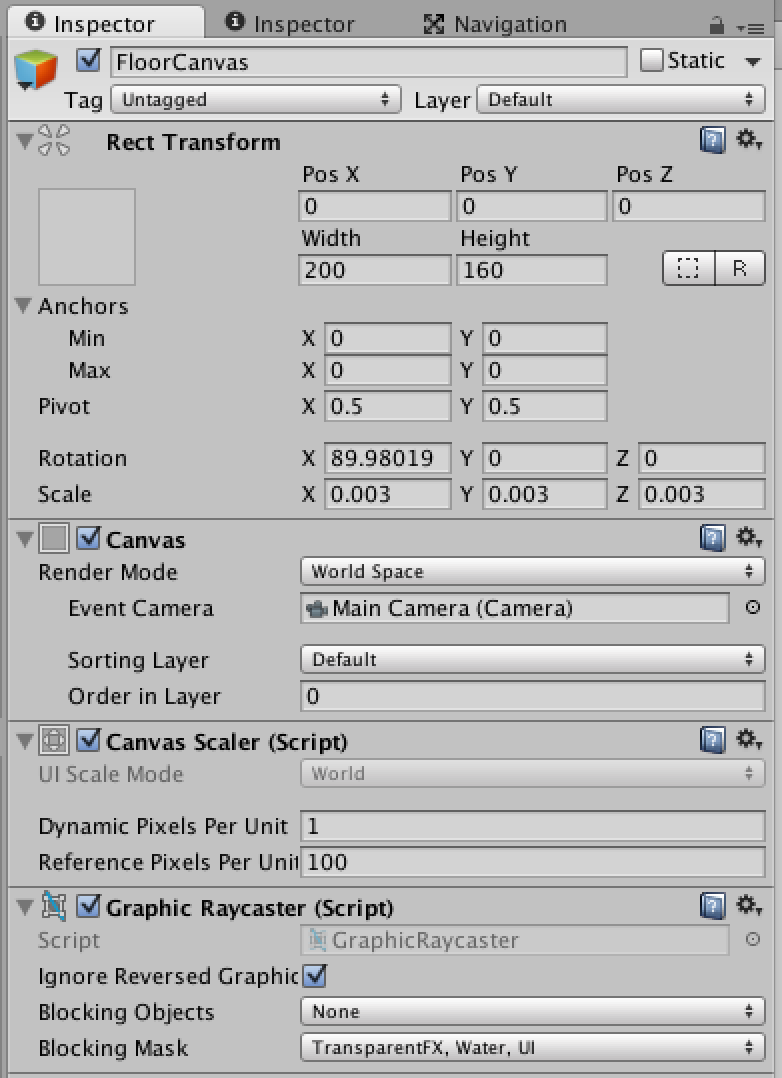
In Hierarchy window make sure nothing is selected. In GameObject menu, select UI -> Canvas. Select the newly created Canvas in Hierarchy window and rename it to FloorCanvas. While FloorCanvas is selected in Hierarchy window, make the following changes in Inspector window.
Layer: Default
Canvas
- Render Mode: World Space
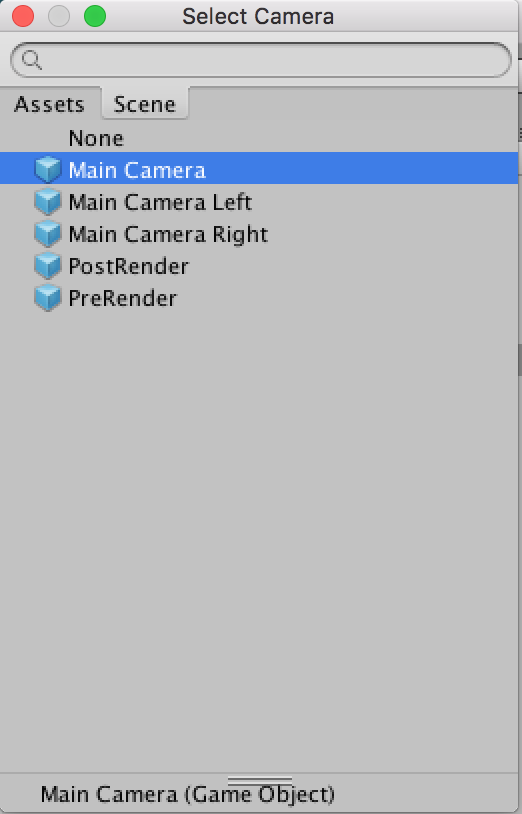
- Press the button next to Event Camera and select Scene -> Main Camera (see below).
Graphic Raycaster
- Blocking Mask: Make sure only Transparent FX, Water, and UI are selected.
Rect Transform
- Pos X=0, Pos Y=0, Pos Z=0
- Width=200, Y=160
- Rotation X=90, Y=0, Z=0
- Scale, X=0.003, Y=0.003, Z=0.003
The Inspector window should look like below.
From File menu select Save Scene and then Save Project to save both.
Testing Application In Unity Editor
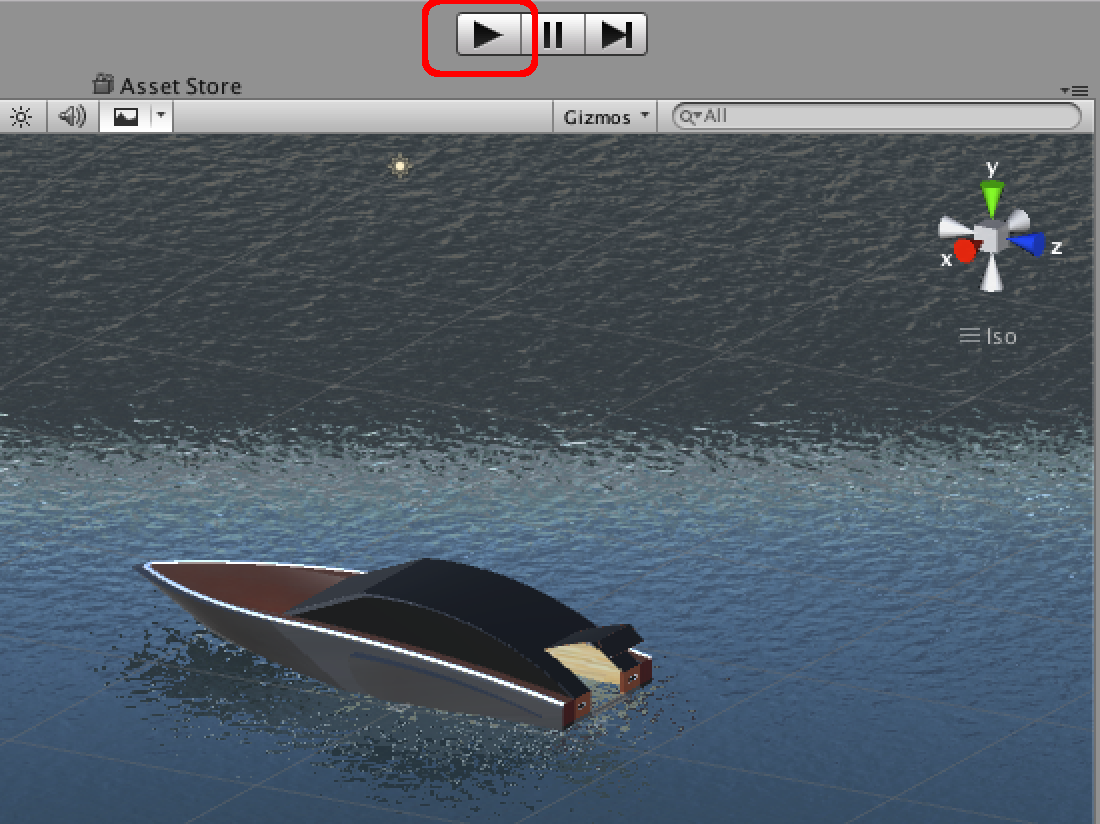
Congratulations! We have completed the development of our application. You can test it in Unity Editor by pressing the play button as shown below.
You should see the camera moving around the yacht, while pointing towards it at all times. While the yellow gaze pointer is on or very close to the yacht, the gunwale color should be displayed green, as shown below. If you click your mouse while pointer is on the yacht, the camera should come to a stop and then start moving again in the opposite direction.
Deploying Application In Android Phone
In this section, we will explain how to build the application for Android platform and deploy it in an Android phone.
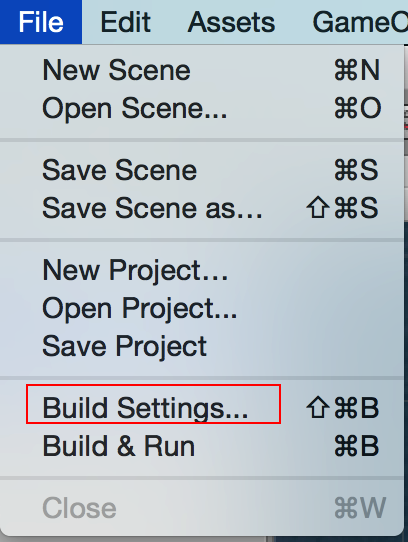
In File menu select Build Settings as shown below.
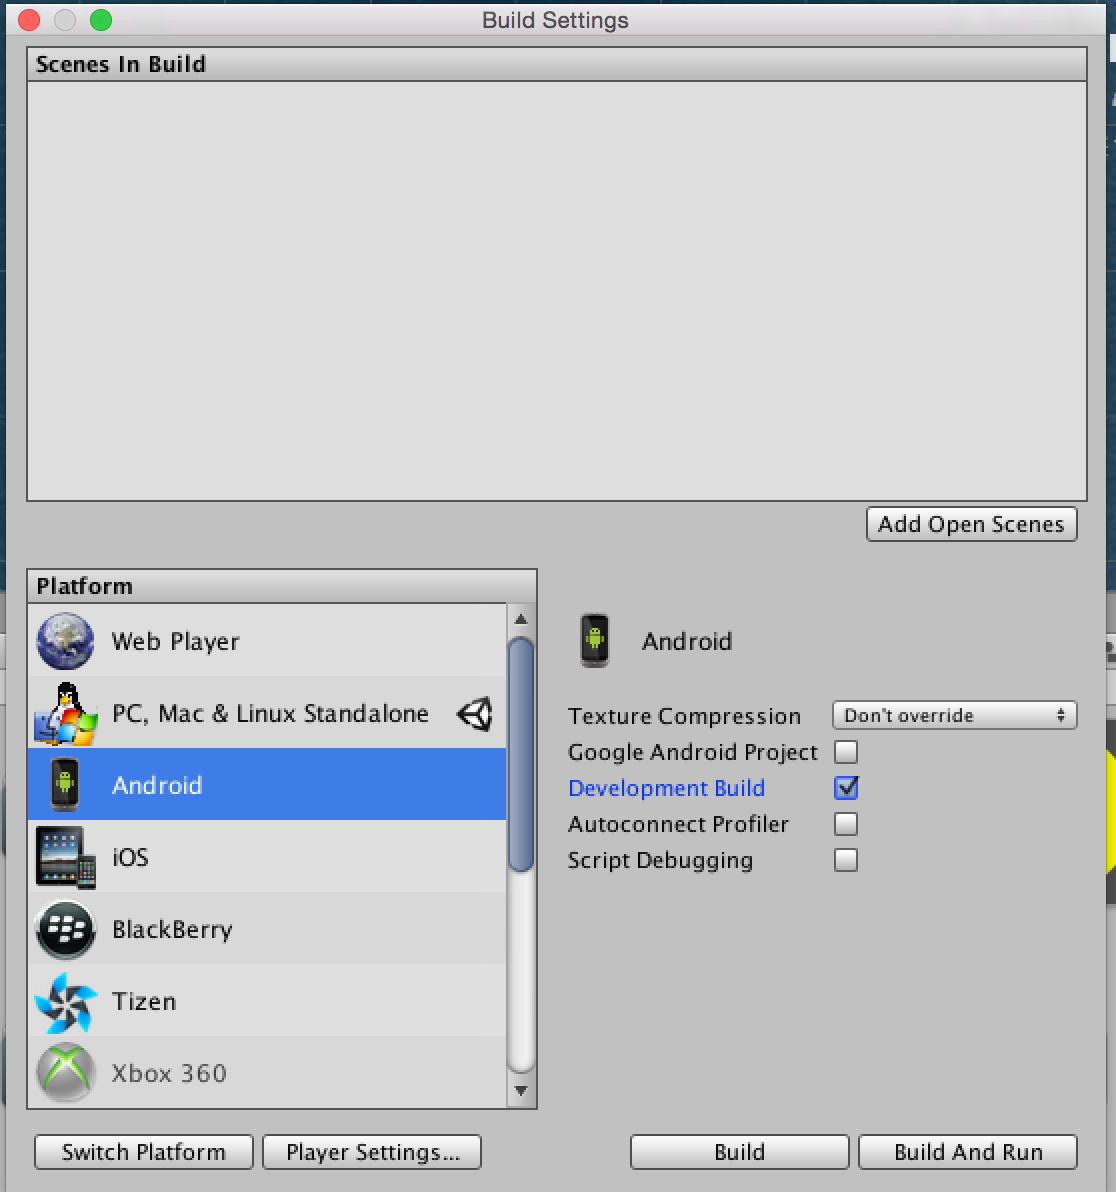
Make sure Android is selected under Platform. On the right-hand side check Development Build as shown below.
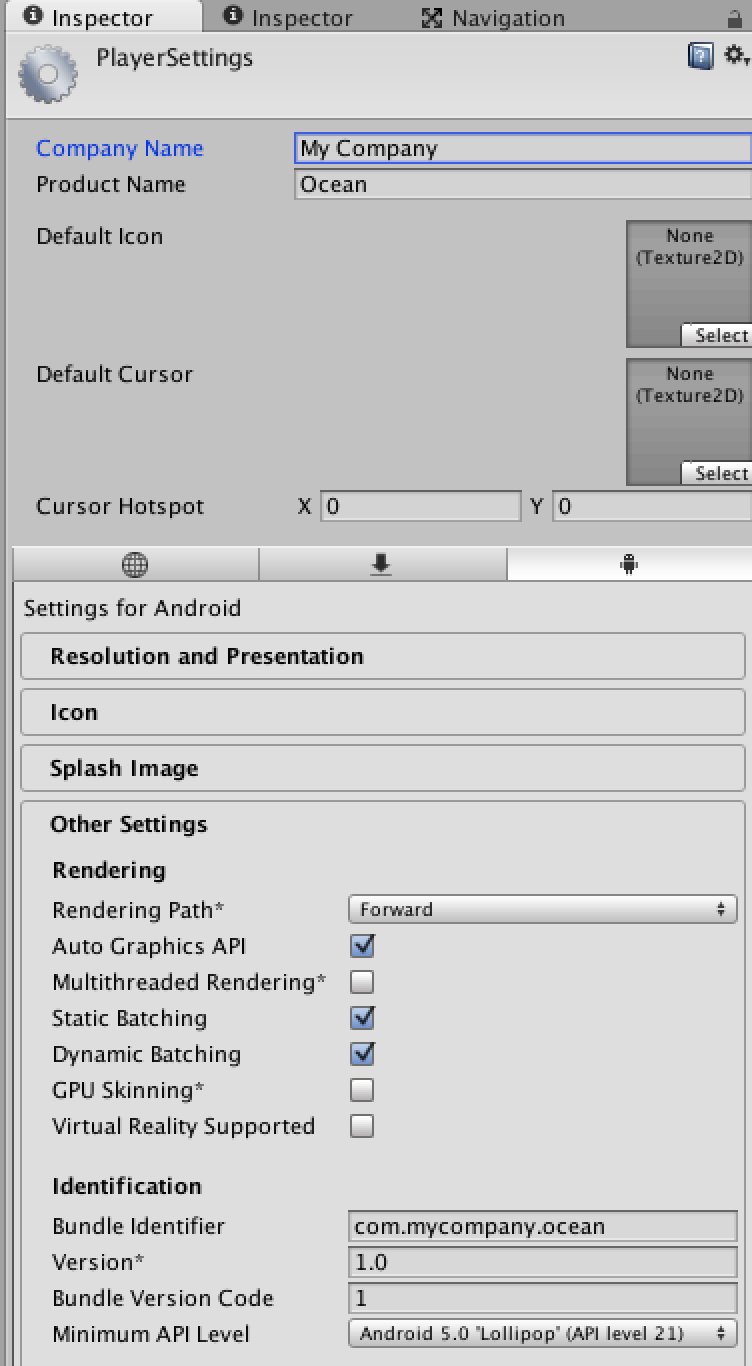
Click on Player Settings. In Inspector, we will make some changes to defaults to get the application deployed in an Android phone for testing purposes.
- Company Name: My Company
- Product Name: Ocean
- Identification
- Bundle Identifier: com.mycompany.ocean
- Version: 1.0
- Minimum API Level: Android 5.0 'Lollipop' (API level 21)
The Inspector window should be as follows.
Make sure the Android phone is connected to the computer and its operating system is Android 5.0 or above. Press Build and Run in Build Settings dialog. In the Build Android dialog, provide an apk package name, e.g. Ocean, and a location to store the apk file locally. An example is shown below.
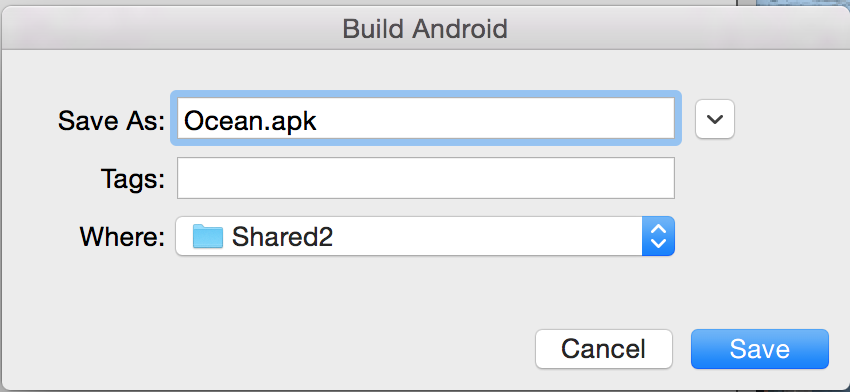
Press Save.
It will take a while for Unity to create the apk file. You will see a Building Player dialog that shows the progress while the file is created. Finally, a dialog will be displayed to indicate that application is being pushed to the phone. This will complete installation of the application on the phone.
Component Review
This section gives a review of the main components in the application.
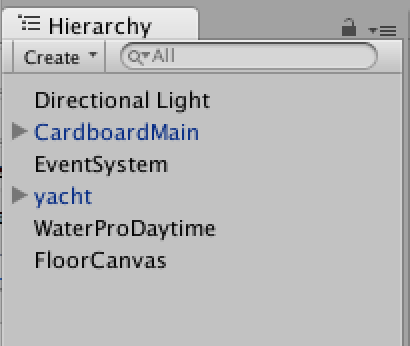
Directional Light is a light source that provides light to the scene. It simulates light coming from the sun.
CardboardMain is the component we have imported from Unity Cardboard SDK. It is a hierarchical object consisting of stereo cameras and related scripts. Note that we added our own gaze pointer to CardboardMain object hierarchy. (Without gaze pointer user could still view the scene with stereo cameras and obtain the same 3D depth perception. However, the pointer enter, exit and click events would not function without the gaze pointer.)
We also added our own script, NewBehaviourScript, to CardboardMain for automatically moving the camera in the scene. Although position (coordinates) of the camera are automatically determined by the script, its rotation, i.e. where the camera is directed, is determined by the user's head movements. The Unity Cardboard SDK tracks the movement of the cardboard headset and points the camera to the direction user is looking at.
EventSystem is only needed for handling the pointer enter, exit and click events. Otherwise, it is not a required component for the application.
the yacht is a visual prop at the center of the scene. We modified this object to handle pointer enter, exit and click events. Firstly, for those events to affect this object, a collider was added. You can use any type of collider, however, we choose a box collider surrounding the original 3D model. Then, we added an event trigger for capturing pointer enter, exit and click events. The pointer enter and exit events are handled by the SetGazedAt method of EventHandlerScript, which is also attached to the yacht object. The pointer click event is handled by the ToggleRotation method of the NewBehaviourScript, attached to MainCamera object.
WaterProDayTime is part of a standard asset package provided by Unity. It contains necessary elements to simulate water, including a built-in script (Water) to define its dynamic behavior. The only change we did for WaterProDayTime was to configure its navigation attributes.via the Navigation window.
FloorCanvas is only needed for handling the pointer enter, exit and click events. We set the render mode of the canvas to World Space and its camera to Main Camera object in the CardboardMain object hierarchy. We also added GraphicRaycaster from UnityEngine.UI package to the canvas. If you are not interested in event handling FloorCanvas is not a required component for the application.
Opinions expressed by DZone contributors are their own.

Comments