Developing a Facebook Chatbot With AWS Lambda and MongoDB Atlas
Learn how to program your own chatbot with the helping hands of AWS Lambda and MongoDB's DBaaS, Atlas.
Join the DZone community and get the full member experience.
Join For FreeWhile microservices have been the hot trend over the past couple of years, serverless architectures have been gaining momentum by providing a new way to build scalable, responsive and cost effective applications. Serverless computing frees developers from the traditional cost and effort of building applications by automatically provisioning servers and storage, maintaining infrastructure, upgrading software, and only charging for consumed resources. More insight into serverless computing can be found in this whitepaper.
Amazon’s serverless computing platform, AWS Lambda, lets you run code without provisioning and running servers. MongoDB Atlas is Hosted MongoDB as a Service. MongoDB Atlas provides all the features of the database without the heavy operational lifting. Developers no longer need to worry about operational tasks such as provisioning, configuration, patching, upgrades, backups, and failure recovery. In addition, MongoDB Atlas offers elastic scalability, either by scaling up on a range of instance sizes or scaling out with automatic sharding, all with no application downtime. Together, AWS Lambda and MongoDB Atlas allow developers to spend more time developing code and less time managing the infrastructure.
To demonstrate the power of serverless computing and managed database as a service, I’ll use this blog post to show you how to develop a Facebook chatbot that responds to weather requests and stores the message information in MongoDB Atlas.

Setting Up MongoDB Atlas
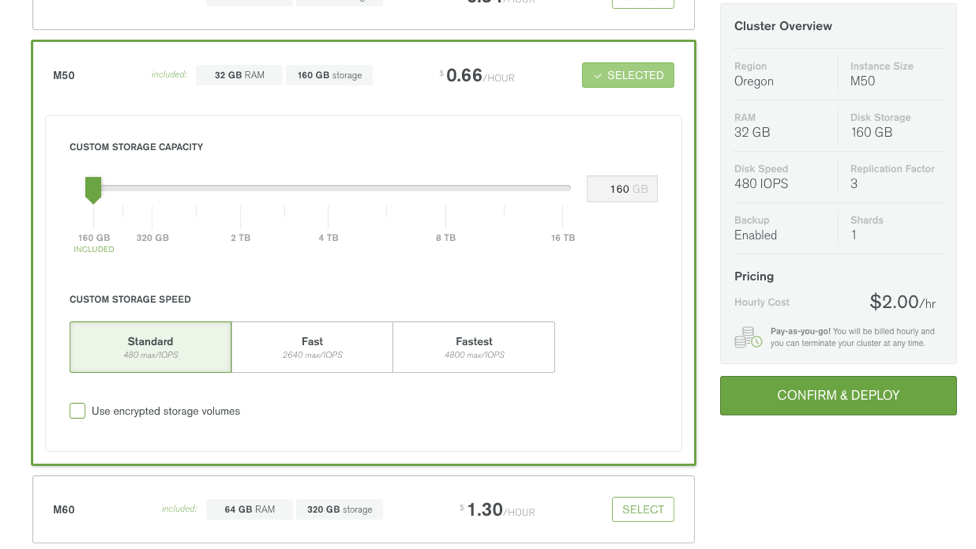
MongoDB Atlas provides multiple size options for instances. Within an instance class, there is also the ability to customize storage capacity and storage speed, as well as to use encrypted storage volumes. The number of virtual CPUs (vCPUs) – where a vCPU is a shared physical core or one hyperthread – increases as the instance class grows larger.
The M10, M20, and M30 instances are excellent for development and testing purposes, but for production it is recommended to use instances higher than M30. The base options for instances are:
M10 – 2 GB RAM, 10 GB Storage, 1 vCPU M20 – 4 GB RAM, 20 GB Storage, 2 vCPUs M30 – 8 GB RAM, 40 GB Storage, 2 vCPUs M40 – 16 GB RAM, 80 GB Storage, 4 vCPUs M50 – 32 GB RAM, 160 GB Storage, 8 vCPUs M60 – 64 GB RAM, 320 GB Storage, 16 vCPUs M100 – 160 GB RAM, 1000 GB Storage, 40 vCPUs
Register with MongoDB Atlas and use the simple GUI to select the instance size, region, and features you need.
Connecting MongoDB Atlas to AWS Lambda
MongoDB Atlas now enables VPC (Virtual Private Cloud) peering, which allows you to easily create a private networking connection between your application servers and backend database. Traffic is routed between the VPCs using private IP addresses. Instances in either VPC can communicate with each other as if they are within the same network. Note, VPC peering requires that both VPCs be in the same region. Below is an architecture diagram of how to connect MongoDB Atlas to AWS Lambda and route traffic to the Internet.
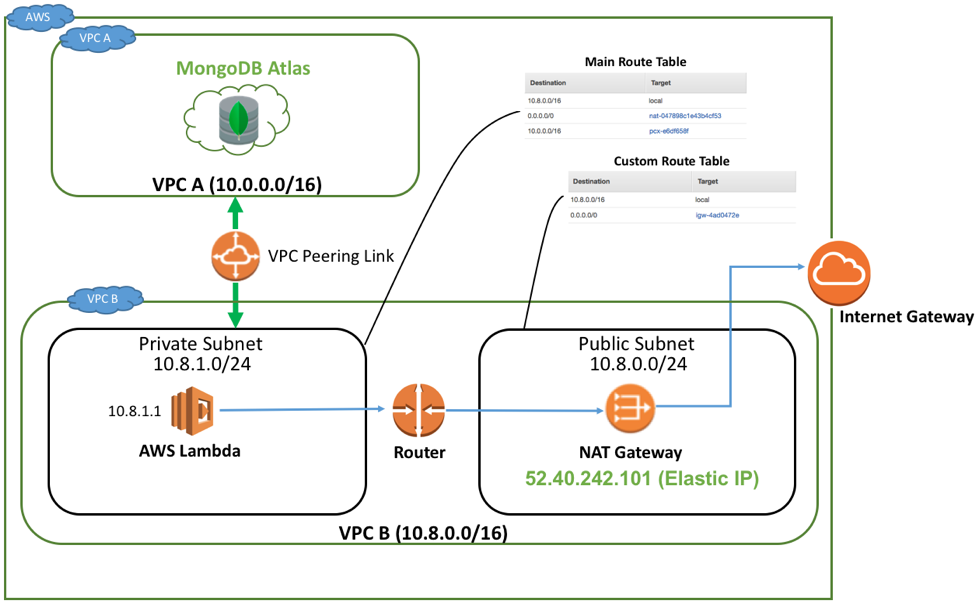 Figure 1: AWS Peering Architecture Architecture
For our example, a Network Address Translation (NAT) Gateway and Internet Gateway (IGW) is needed as the Lambda function will require internet access to query data from the Yahoo weather API. The Yahoo weather API will be used to query real-time weather data from the chatbot. The Lambda function we will create resides in the private subnet of our VPC. Because the subnet is private, the IP addresses assigned to the Lambda function cannot be used in public. To solve this issue, a NAT Gateway can be used to translate private IP addresses to public, and vice versa. An IGW is also needed to provide access to the internet.
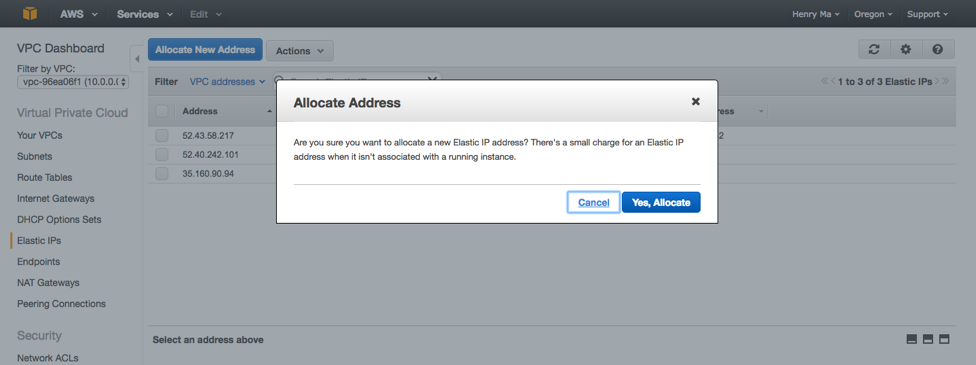
The first step is to set up an Elastic IP address, which will be the static IP address of your Lambda functions to the outside world. Go to Services->VPC->Elastic IPs, and allocate a new Elastic IP address.
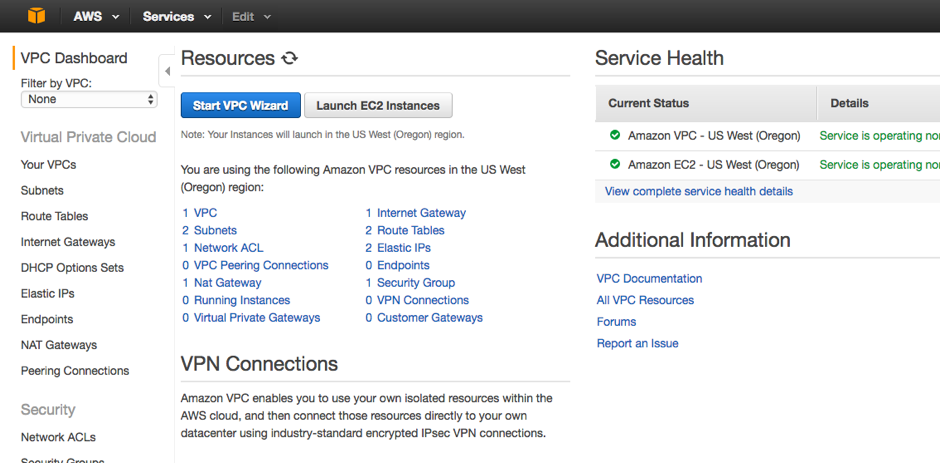
Next, we will create a new VPC, which you will attach to your Lambda function.
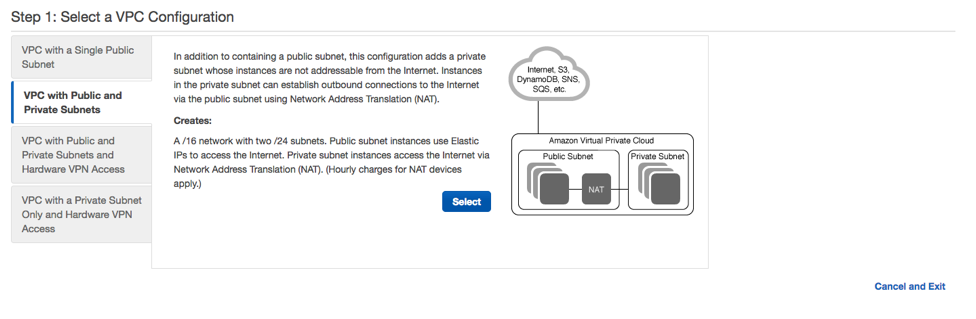
Go to Services->VPC->Start VPC Wizard.
After clicking VPC wizard, select VPC with Public and Private Subnets.
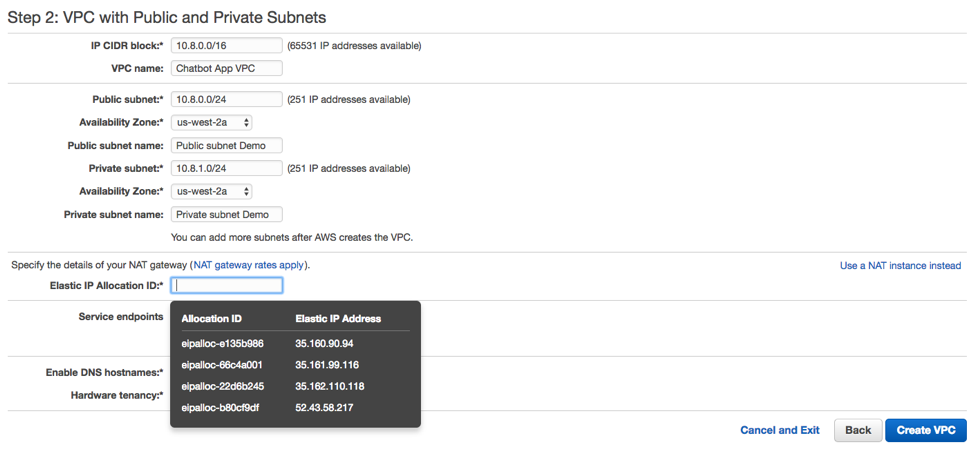
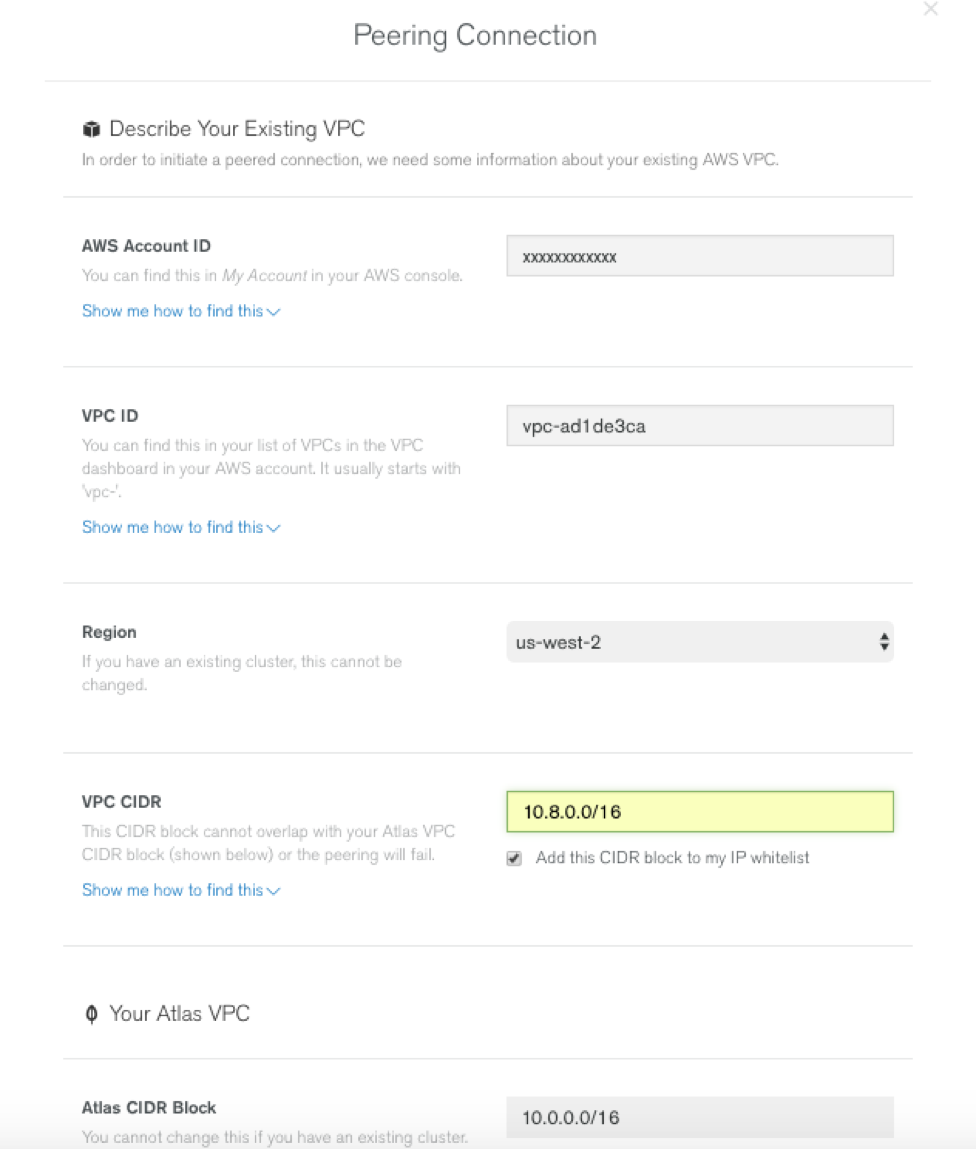
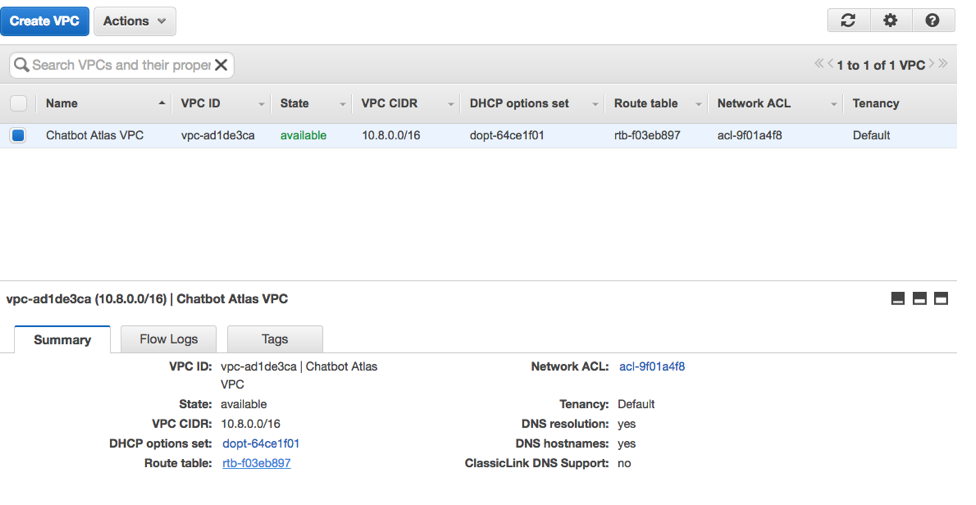
Let’s configure our VPC. Give the VPC a name (e.g., “Chatbot App VPC”), select an IP CIDR block, choose an Availability Zone, and select the Elastic IP you created in the previous step. Note, the IP CIDR that you select for your VPC, must not overlap with the Atlas IP CIDR. Click Create VPC to set up your VPC. The AWS VPC wizard will automatically set up the NAT and IGW.
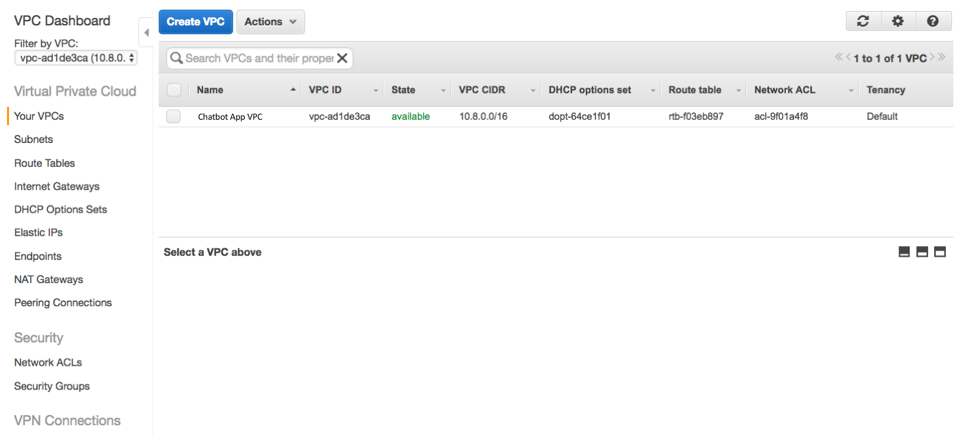
You should see the VPC you created in the VPC dashboard.
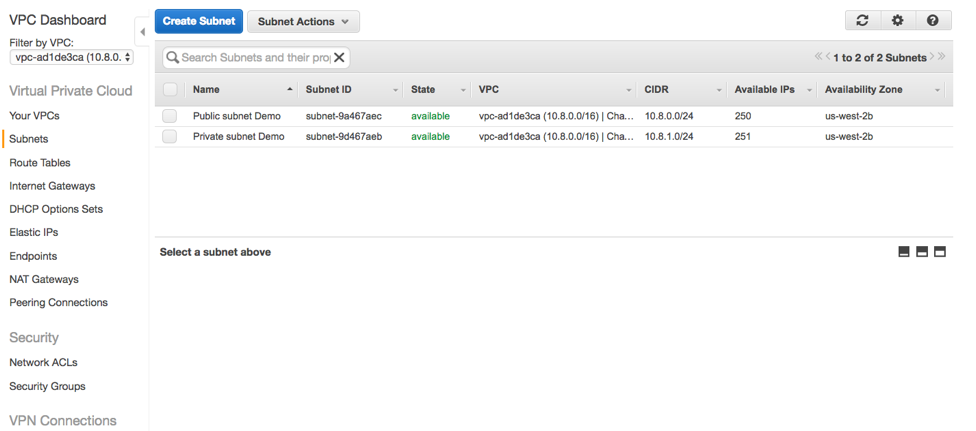
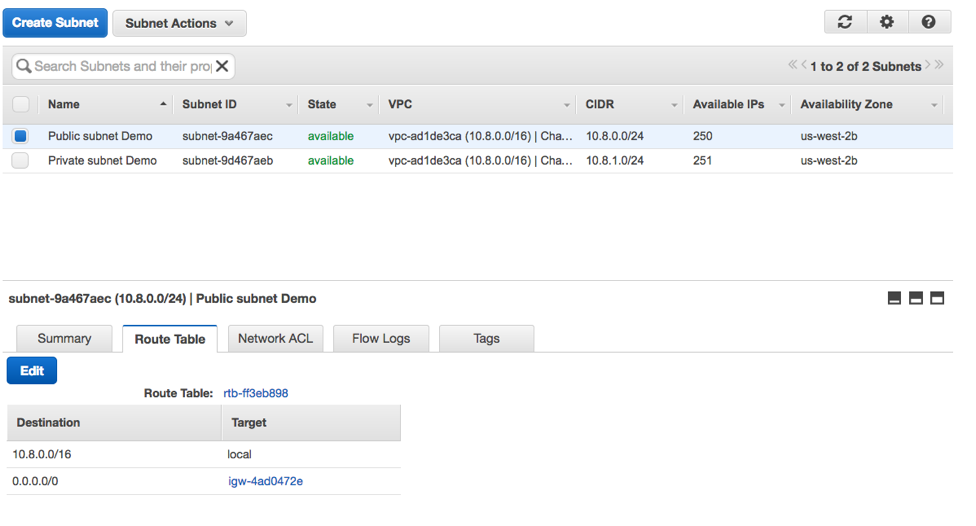
Go to the Subnets tab to see if your private and public subnets have been set up correctly.
Click on the Private Subnet and go to the Route Table tab in the lower window. You should see the NAT gateway set to 0.0.0.0/0, which means that messages sent to IPs outside of the private subnet will be routed to the NAT gateway.

Let’s next check the public subnet to see if it’s configured correctly. Select Public subnet and the Route Table tab in the lower window. You should see 0.0.0.0/0 connected to your IGW. The IGW will enable outside internet traffic to be routed to your Lambda functions.
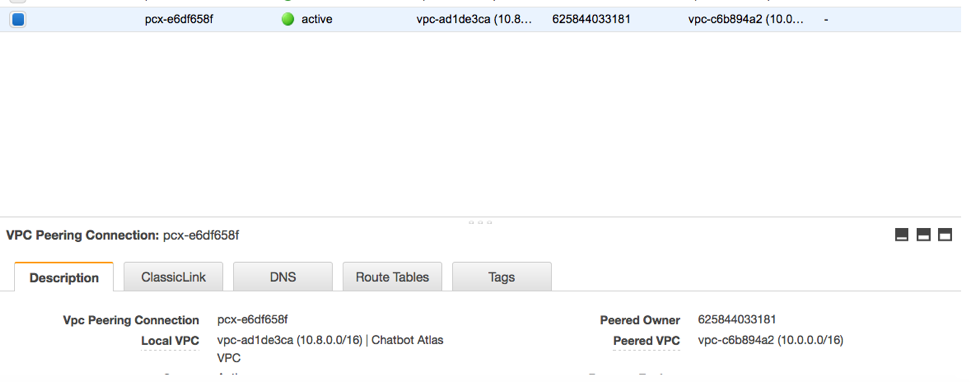
Now, the final step is initiating a VPC peering connection between MongoDB Atlas and your Lambda VPC. Log in to MongoDB Atlas, and go to Clusters->Security->Peering->New Peering Connection.
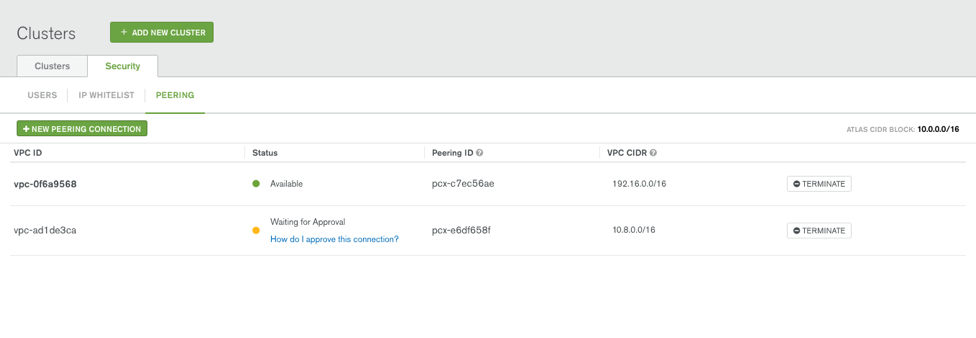
After successfully initiating the peering connection, you will see the Status of the peering connection as Waiting for Approval.
Go back to AWS and select Services->VPC->Peering Connections. Select the VPC peering connection. You should see the connection request pending. Go to Actions and select Accept Request.
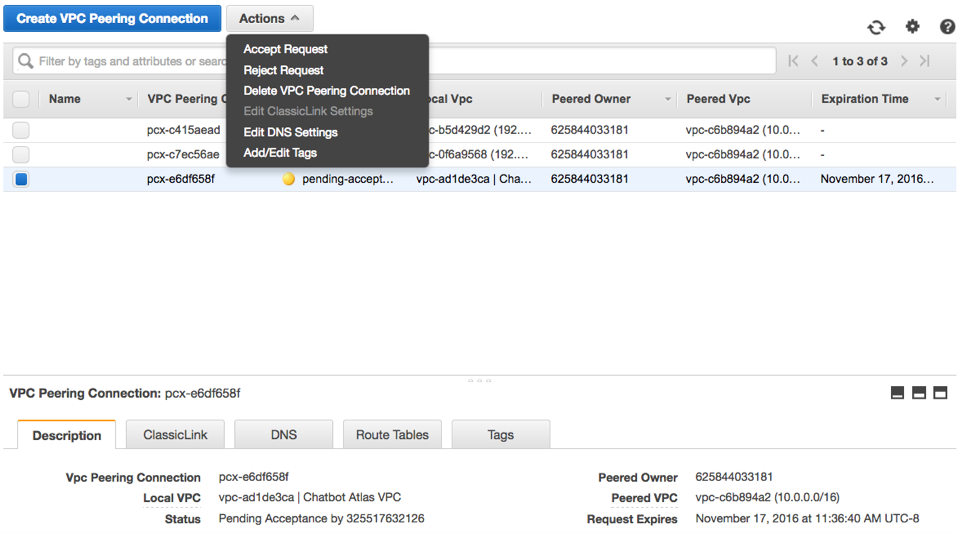
Once the request is accepted, you should see the connection status as active.
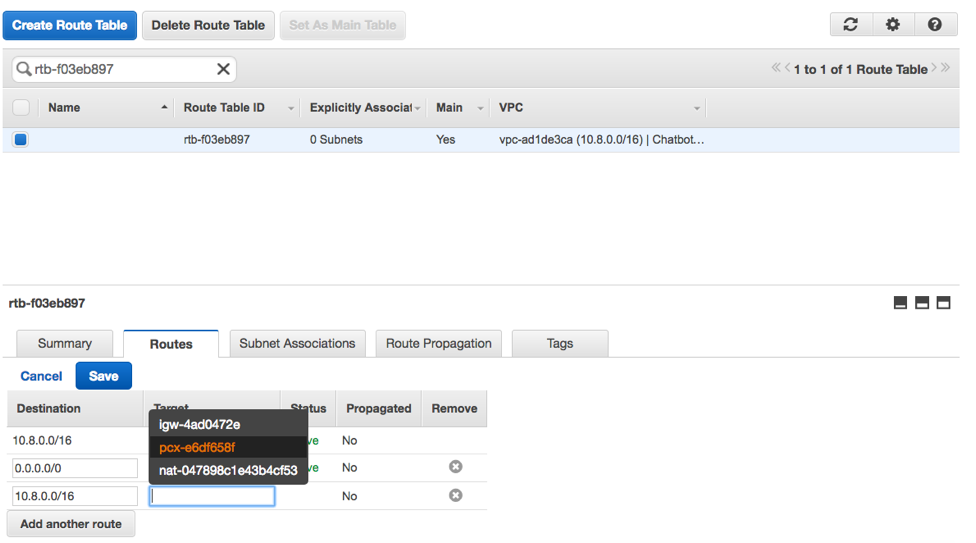
We will now verify that the routing is setup correctly. Go to the route table of the VPC you just setup. In this example, it is rtb-f03eb897. You will need to modify the Main Route Table (see Figure 1) to add the VPC Peering connection. This will allow traffic to be routed to MongoDB Atlas.
Go to the Routes* tab and select Edit->Add another route. You should see the peering connection you just created. Select it and click Save**.
Now that the VPC peering connection is established between the MongoDB Atlas and AWS Lambda VPCs, let’s set up our AWS Lambda function.
Set Up the AWS Lambda Function
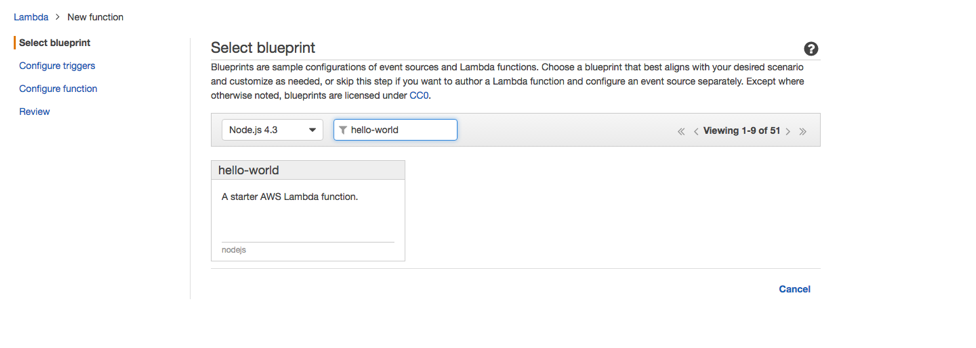
Now that our MongoDB Atlas cluster is connected to AWS Lambda, let’s develop our Lambda function. Go to Services->Lambda->Create Lambda Function. Select your runtime environment (here it’s Node.js 4.3), and select the hello-world starter function.
Select API Gateway in the box next to the Lambda symbol and click Next.
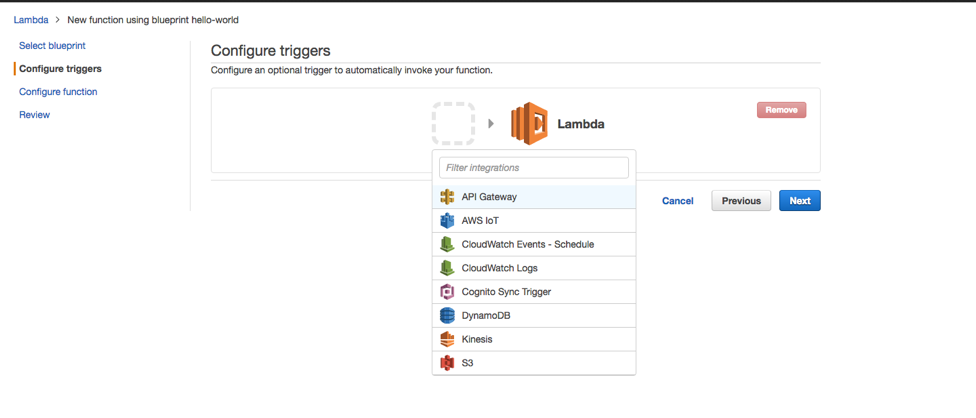
Create your API name, select dev for deployment stage, and click Next.

In the next step, make these changes to the following fields:
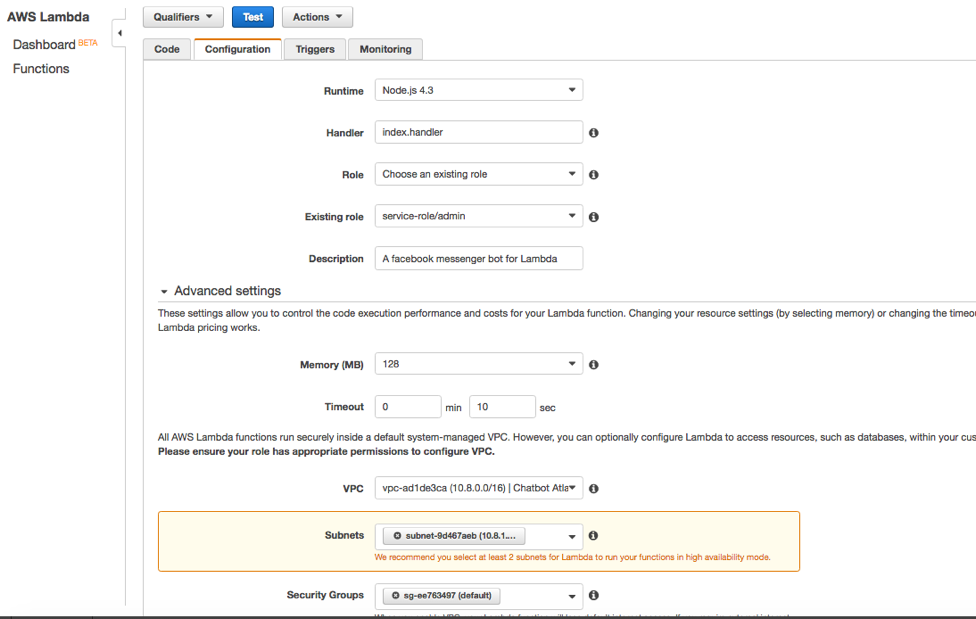
Name: Provide a name for your function — for example, lambda-messenger-chatbot Handler: Leave as is (index.handler) Role: Create a basic execution role and use that Timeout: Change to 10 seconds. This is not necessary but will give the Lambda function more time to spin up its container on initialization (if needed) VPC: Select the VPC you created in the previous step Subnet: Select the private subnet for the VPC (don’t worry about adding other subnets for now) Security Groups: the default security group is fine for now Review and create your new Lambda function.
Set Up AWS API Gateway
We will next need to set up the API gateway for our Lambda function. The API gateway will let you create, manage, and host a RESTful API to expose your Lambda functions to Facebook messenger. The API gateway acts as an abstraction layer to map application requests to the format your integration endpoint is expecting to receive. For our example, the endpoint will be our Lambda function.
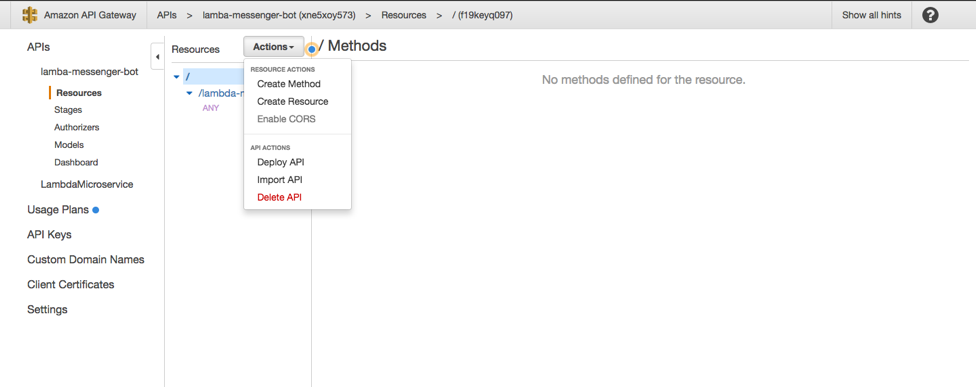
Go to Services->API Gateway->[your Lambda function]->Resources->ANY.
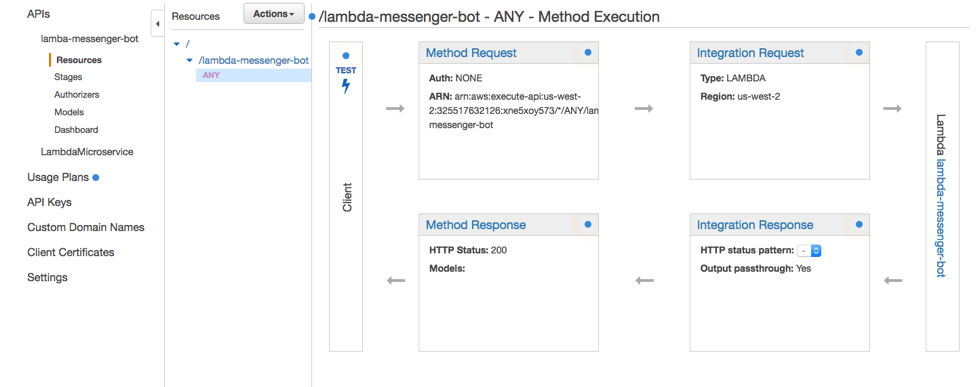
Click on Integration Request. This will configure the API Gateway to properly integrate Facebook with your backend application (AWS Lambda). We will set the integration endpoint to lambda-messenger-bot, which is the name of our Lambda function.
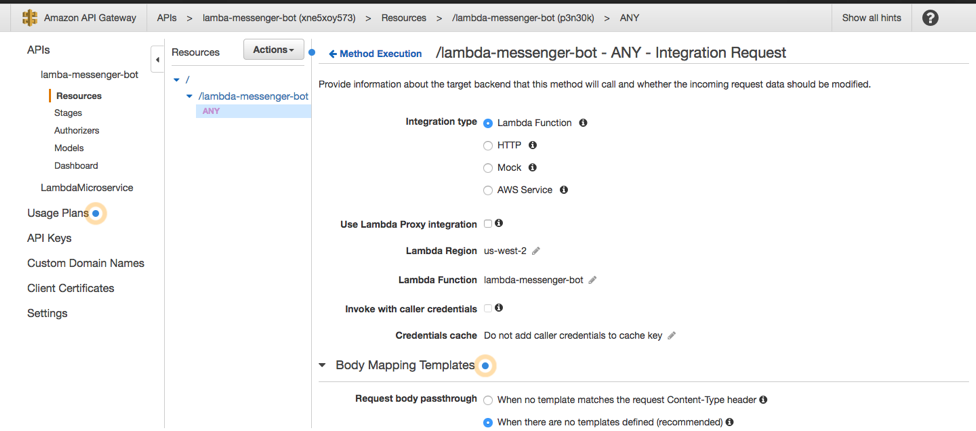
Uncheck Use Lambda Proxy Integration and go to the Body Mapping Template section.
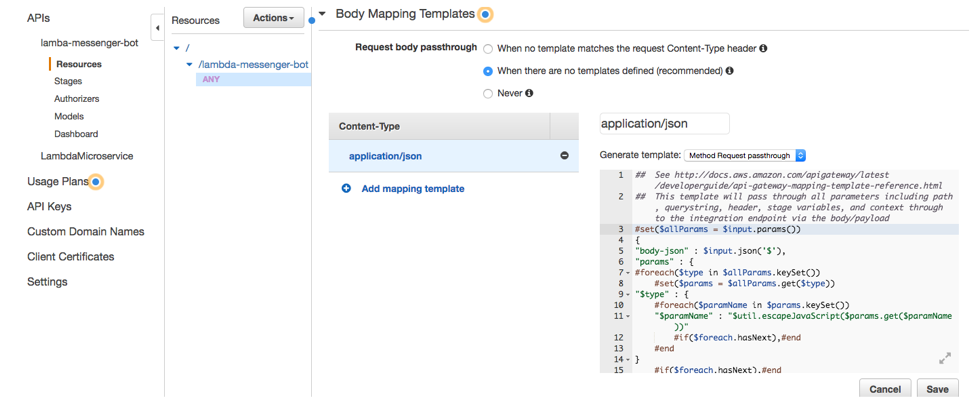
Add a new template called application/JSON. In the Generate template section select Method/Request passthrough and add the code below.
The mapping template will structure the Facebook response in the desired format specified by the application/JSON template. The Lambda function will then extract information from the response and return the required output to the chatbot user. For more information on AWS mapping templates, see the documentation.
Go back to the Actions button for your API gateway and select Deploy API to make your API gateway accessible by the internet. Your API gateway is ready to go.
Set Up Facebook Messenger
Facebook now makes it possible to use Facebook Messenger as the user interface for your chatbot. For our chatbot example, we will use Messenger as the UI. To create a Facebook page and Facebook app, go to the Facebook App Getting Started Guide to set up your Facebook components.
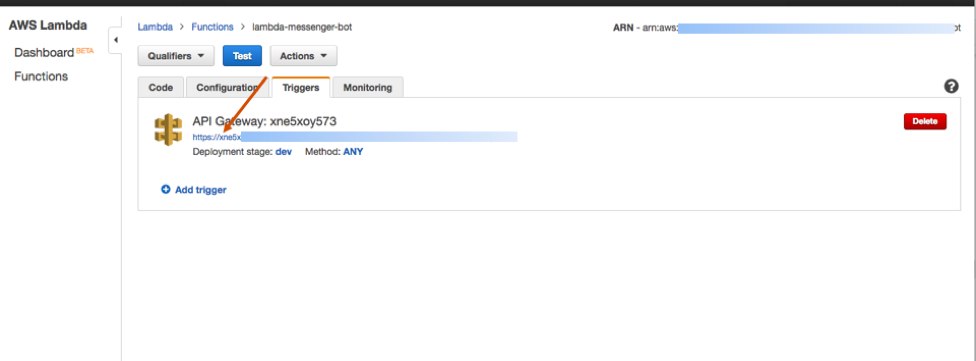
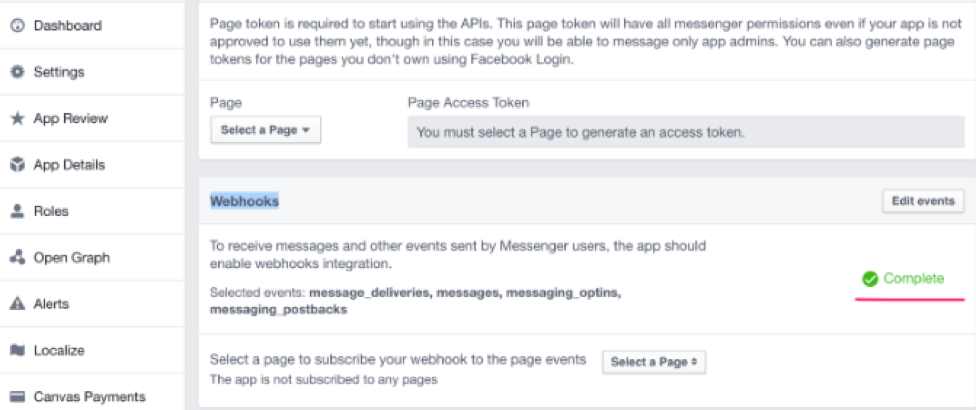
To connect your Facebook App to AWS Lambda you will need to go back to your API gateway. Go to your Lambda function and find the API endpoint URL (obscured in the picture below).
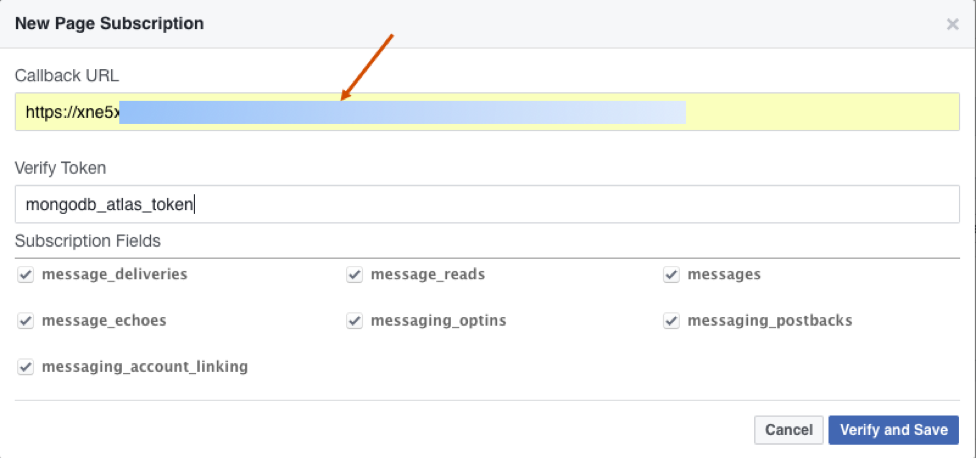
Go back to your Facebook App page and click on Setup Webhooks. Enter your API endpoint URL in the Callback URL textbox. Specify a token name that you will use in your Lambda verification code (e.g. “mongodb_atlas_token”). As the Facebook docs explain, your code should look for the Verify Token and respond with the challenge sent in the verification request. Last, select all subscription fields.
Next, we will enter the verification code that we will use in our Lambda function. Go to your Lambda function and enter in this code.
You should see a green check mark when finished.
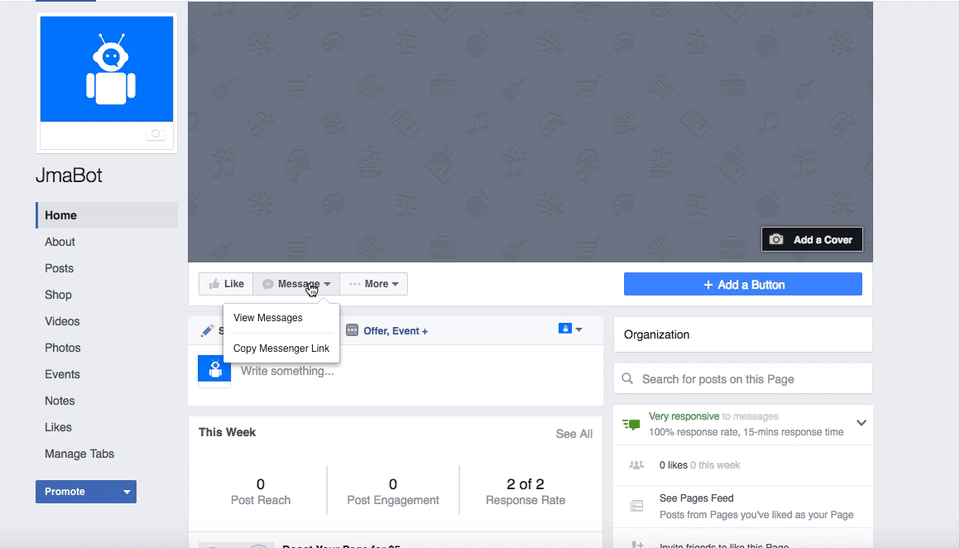
Follow the Facebook docs to subscribe your Facebook page to your app, as well as getting the Page Access Token.
Connect Facebook Messenger UI to AWS Lambda Function
We will now connect the Facebook Messenger UI to AWS Lambda and begin sending weather queries through the chatbot. Below is the index.js code for our Lambda function. The index.js file will be packaged into a compressed archive file and loaded to our AWS Lambda function.
There are some modifications in the index.js file that you will need to add. You should set the following fields yourself (i.e. PAGE_TOKEN, URI). PAGE_TOKEN can be found by generating the token from your Facebook App page.
The uri can be found by looking in your MongoDB Atlas user interface. Go to your MongoDB user interface, click the Clusters tab -> Connect.
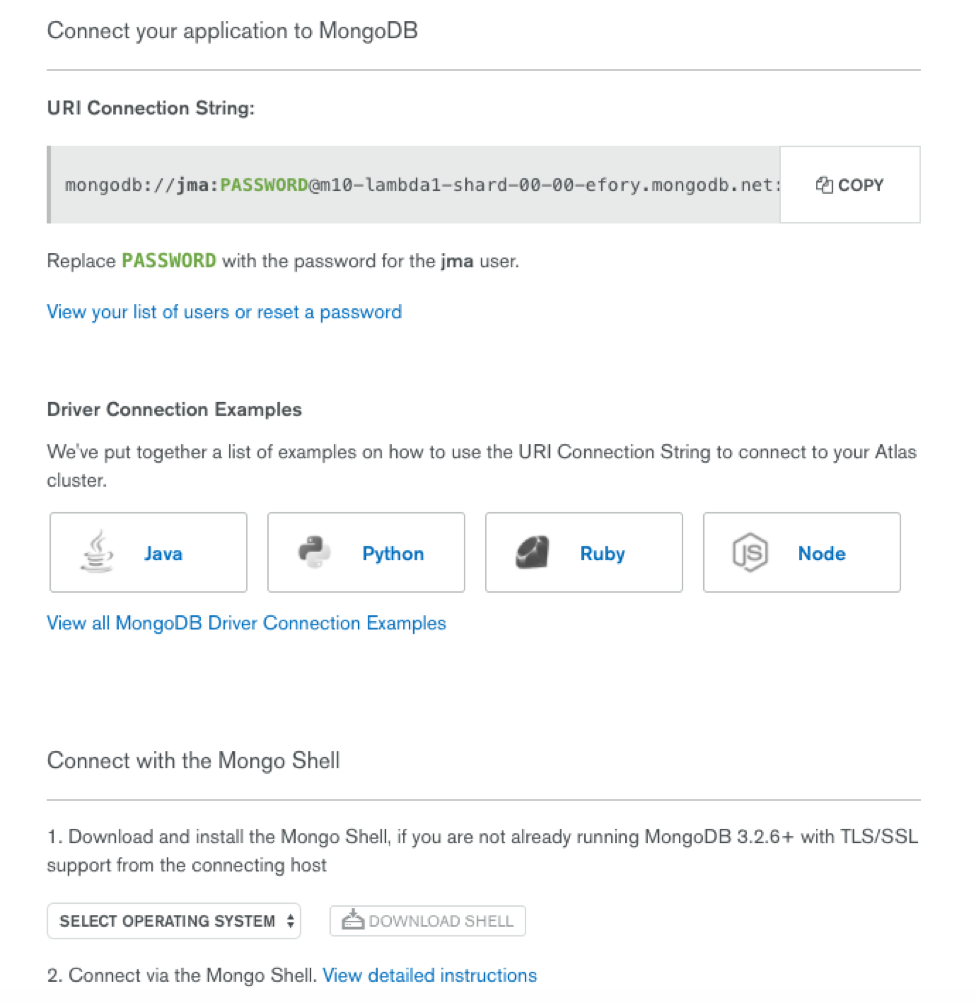
Copy the URI connection string and add it as the value for the URI variable in your Lambda code. Remember to change PASSWORD in the connection string to your actual password. The default database specified in the URI connection string is admin:
mongodb://jma:[email protected]:27017,example-00-01-efory.mongodb.net:27017,example-00-02-efory.mongodb.net:27017/admin?ssl=true&replicaSet=example-0&authSource=admin
Instead of admin, you could change the database to chatbot instead.
mongodb://jma:[email protected]:27017,example-00-01-efory.mongodb.net:27017,example-00-02-efory.mongodb.net:27017/chatbot?ssl=true&replicaSet=example-0&authSource=admin
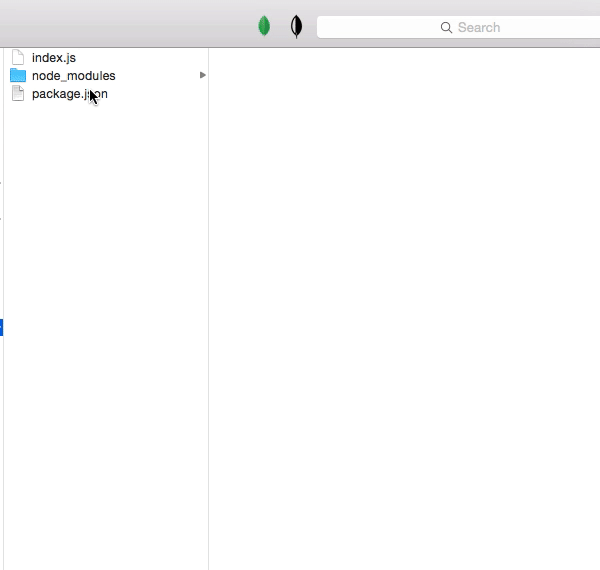
AWS Lambda requires users to package up all scripts and modules into a zip file and upload to AWS Lambda. In our example, we have a few module dependencies that we will need to add to our zip package.
Create a directory and save the index.js file. In the working directory enter the following commands:
npm init
npm install mongodb https request assert --save
This will install the required node.JS modules for our Lambda function. After you have installed the required module dependencies, zip up your files into an archive.
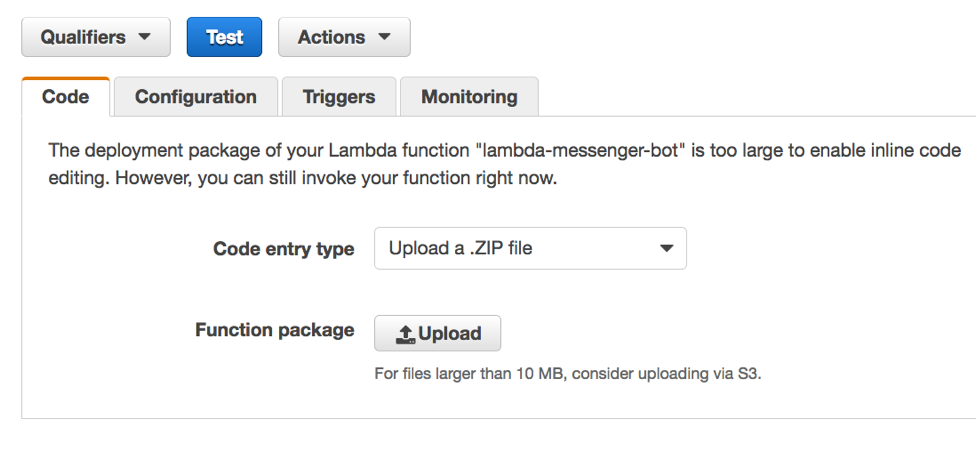
Go to AWS Lambda and upload your Archive.zip file.
Save your Lambda function and go to your Facebook Messenger chat window to test if your function works.
Store Message History in MongoDB Atlas
AWS Lambda functions are stateless; thus, if you require data persistence with your application you will need to store that data in a database. For our chatbot, we will save message information (text, senderID, recipientID) to MongoDB Atlas.
Before writing data to the database, we will first need to connect to MongoDB Atlas. Note, this code is already included in the index.js file.
MongoClient.connect(uri, function(err, db) {
                assert.equal(null, err);
                sendToAtlas(db,  message);
                });
sendToAtlas will write chatbot message information to your MongoDB cluster.
function sendToAtlas (db, message) {
   db.collection('records').insertOne( {
      "facebook" : {
         "message" : message,
      },
    }, function(err, result) {
    assert.equal(err, null);
    db.close();
  });
};
The output will contain the message text, timestamp, senderID, and recipientID all of which will be written to your MongoDB Atlas cluster.
{
  "_id": ObjectId("58124a83c976d50001f5faaa"),
  "facebook": {
    "message": {
      "sender": {
        "id": "1158763944211613"
      },
      "recipient": {
        "id": "129293977535005"
      },
      "timestamp": 1477593723519,
      "message": {
        "mid": "mid.1477593723519:81a0d4ea34",
        "seq": 420,
        "text": "San Francisco"
      }
    }
  }
}
Using MongoDB Atlas With Other AWS Services
In this blog, we demonstrated how to build a Facebook chatbot, using MongoDB Atlas and AWS Lambda. MongoDB Atlas can also be used as the persistent data store with many other AWS services, such as Elastic Beanstalk and Kinesis. To learn more about developing an application with AWS Elastic Beanstalk and MongoDB Atlas, read Develop & Deploy a Node.js App to AWS Elastic Beanstalk & MongoDB Atlas. For information on developing an application with AWS Kinesis and MongoDB Atlas, read Processing Data Streams with Amazon Kinesis and MongoDB Atlas. To learn how to use your favorite language or framework with MongoDB Atlas, read Using MongoDB Atlas From Your Favorite Language or Framework.
Published at DZone with permission of Jason Ma. See the original article here.
Opinions expressed by DZone contributors are their own.
Comments